
1.6 TDI CR engine (EA189) · Mixture preparation – injection · Lambda probe
Lambda probe
6.1 Assembly overview - Lambda probe
⇒ 6.1.3 Assembly overview - lambda probe, Polo
6.1.3 Assembly overview - lambda probe, Polo
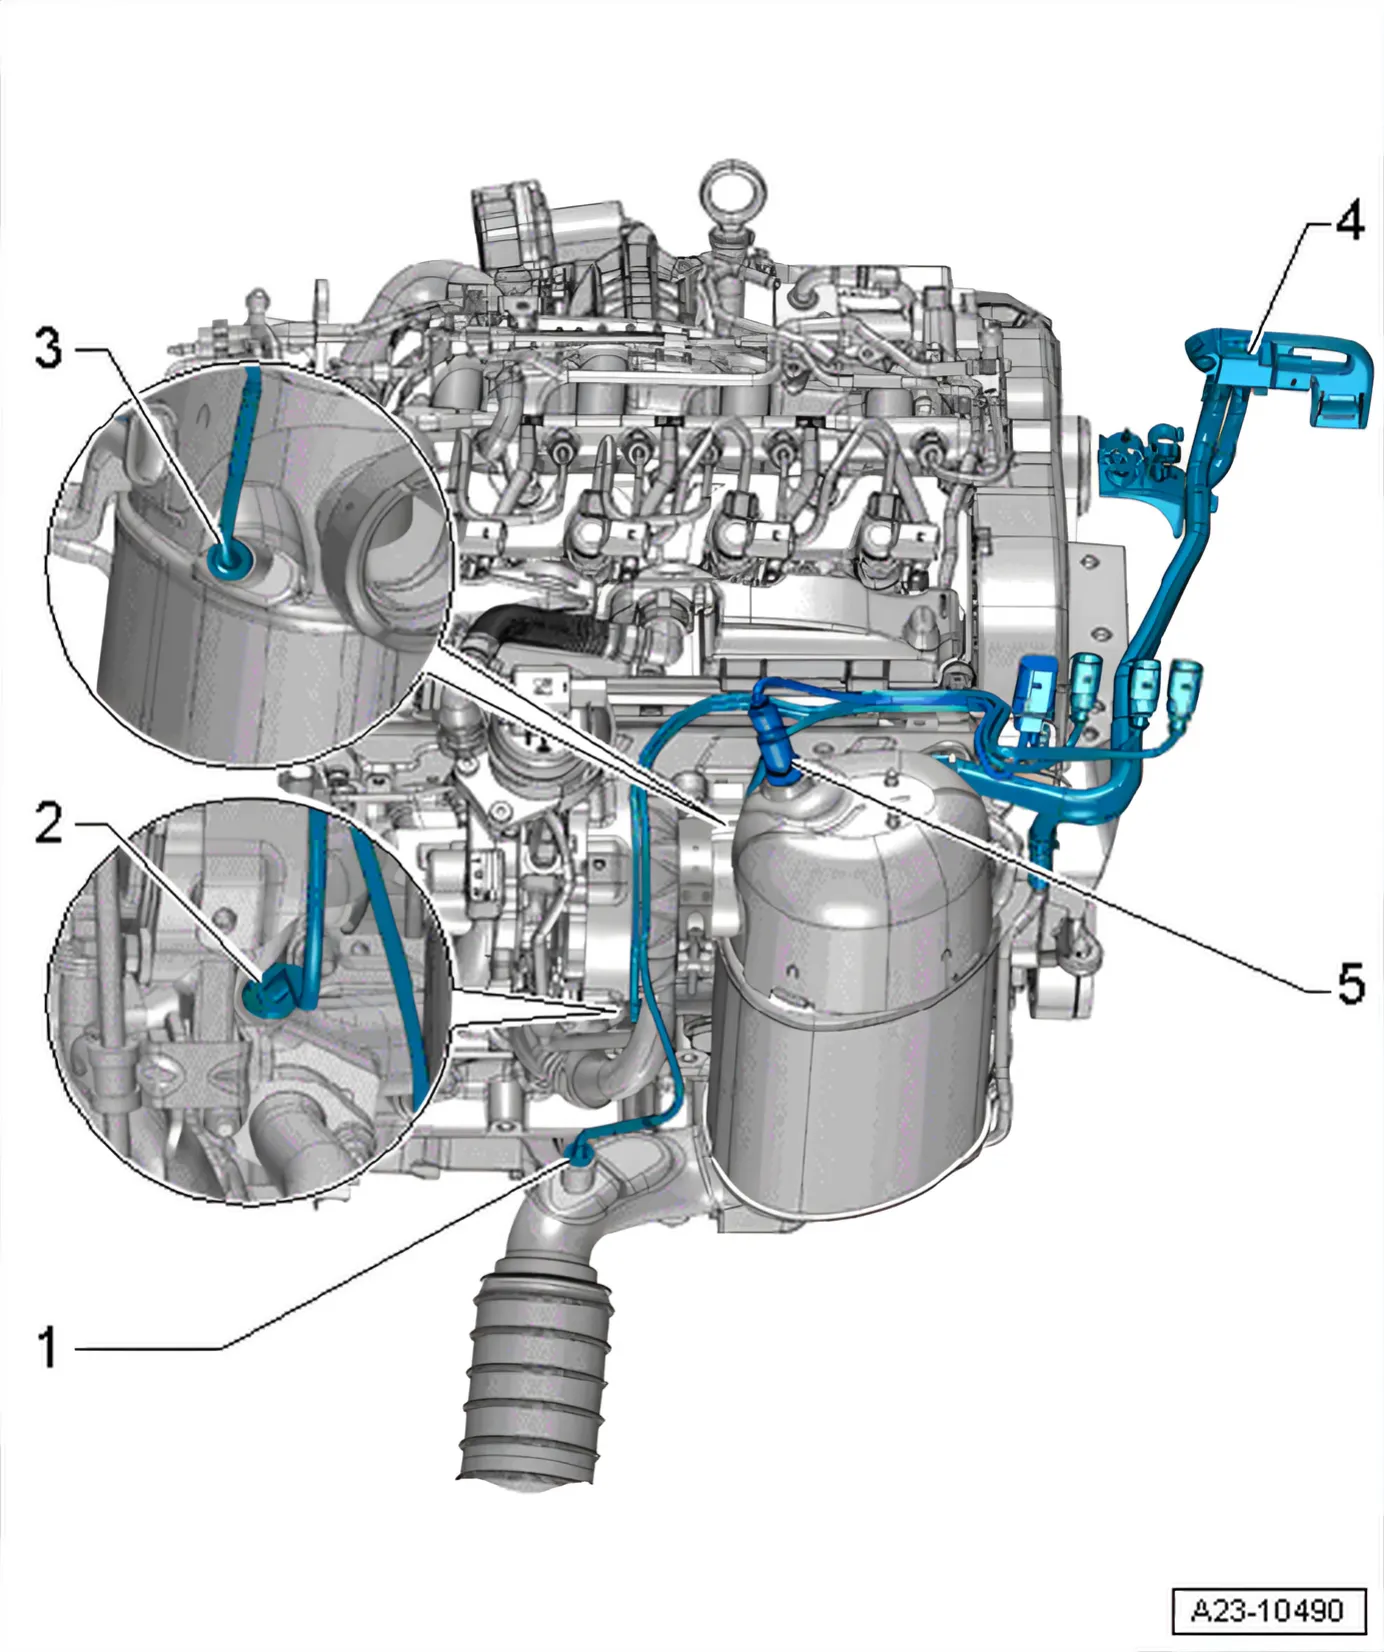
- 1 Exhaust gas temperature sender 4 - G648-
- Removing and installing
- 2 Exhaust gas temperature sender 1 - G235-
- Removing and installing
- 3 Exhaust gas temperature sender 3 - G495-
- Removing and installing
- 4 Pressure differential sender - G505-
- Removing and installing ⇒ 5.6 Removing and installing pressure differential sender - G505-
- 45 Nm
- 5 Lambda probe - G39- with Lambda probe heater - Z19-
- Removing and installing
- New Lambda probes are coated with an assembly paste
- In the case of a used lambda probe, grease only the thread with high-temperature paste ⇒ Electronic Parts
Catalogue (ETKA).
- Assembly paste or hightemperature paste must not get into the slots in the Lambda probe
- 55 Nm
6.2 Removing and installing Lambda probe
⇒ 6.2.2 Removing and installing lambda probe 1 before catalytic converter GX10, Polo
6.2.2 Removing and installing lambda probe 1 before catalytic converter - GX10-, Polo
Special tools and workshop equipment required
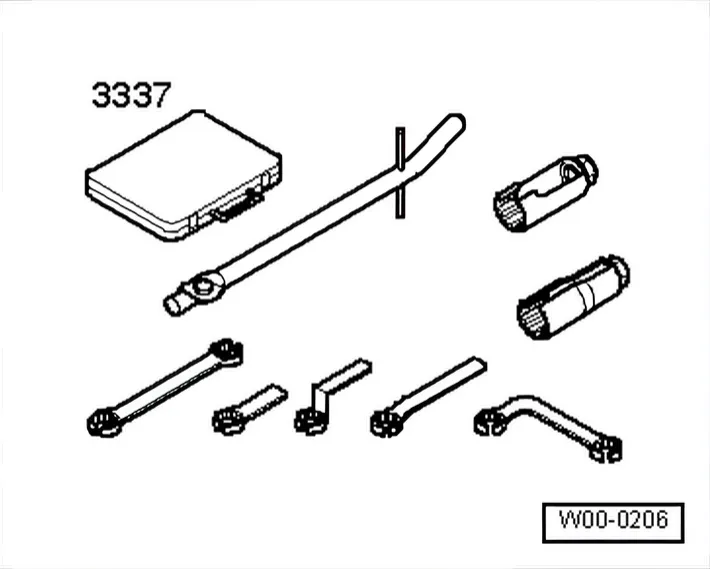
- Lambda probe open ring spanner set - 3337-
Removing
- Pull off engine cover panel ⇒ 3 Engine cover panel.
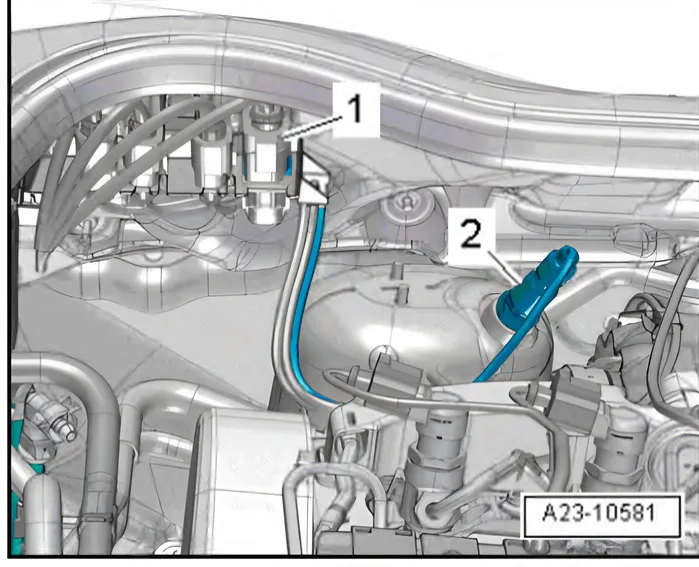
- Detach electrical connector -4- of Lambda probe - G39-.
- Unscrew Lambda probe - G39- -2- using tool from Lambda probe open ring spanner set - 3337-.
Installing
Install in reverse order of removal, observing the following.
Tightening torques on this page
2 torques
6.1.3 Assembly overview - lambda probe, PoloTo the drawing ↑
| Item | Part | Torque | Notes |
|---|---|---|---|
| 4 | Pressure differential sender - G505- | 45 Nm | |
| 5 | Lambda probe - G39- with Lambda probe heater - Z19- | 55 Nm | Removing and installing · New Lambda probes are coated with an assembly paste · Assembly paste or hightemperature paste must not get into the slots in the Lambda probe · Catalogue (ETKA). |