
Roof spoiler 6R0071646GRU
Fitting the roof edge spoiler on the tailgate of the Volkswagen Polo from 2009: trial fit, painting, bonding and curing times.
Roof spoiler
- Part number:
- 6R0 071 646 GRU
- Vehicle:
- Polo 2009– (6R)
Please read fitting instructions thoroughly before commencing installation.
We recommend that fitting is carried out by a specialist workshop.
Recommendation: The body part is precision manufactured and pre-primed. However, trial fitting should still be carried out in accordance with these fitting instructions before painting. It is recommended that fitting is carried out by two people.
Note: The adhesive surfaces must not be painted, but must be kept clear of paint and paint spray.
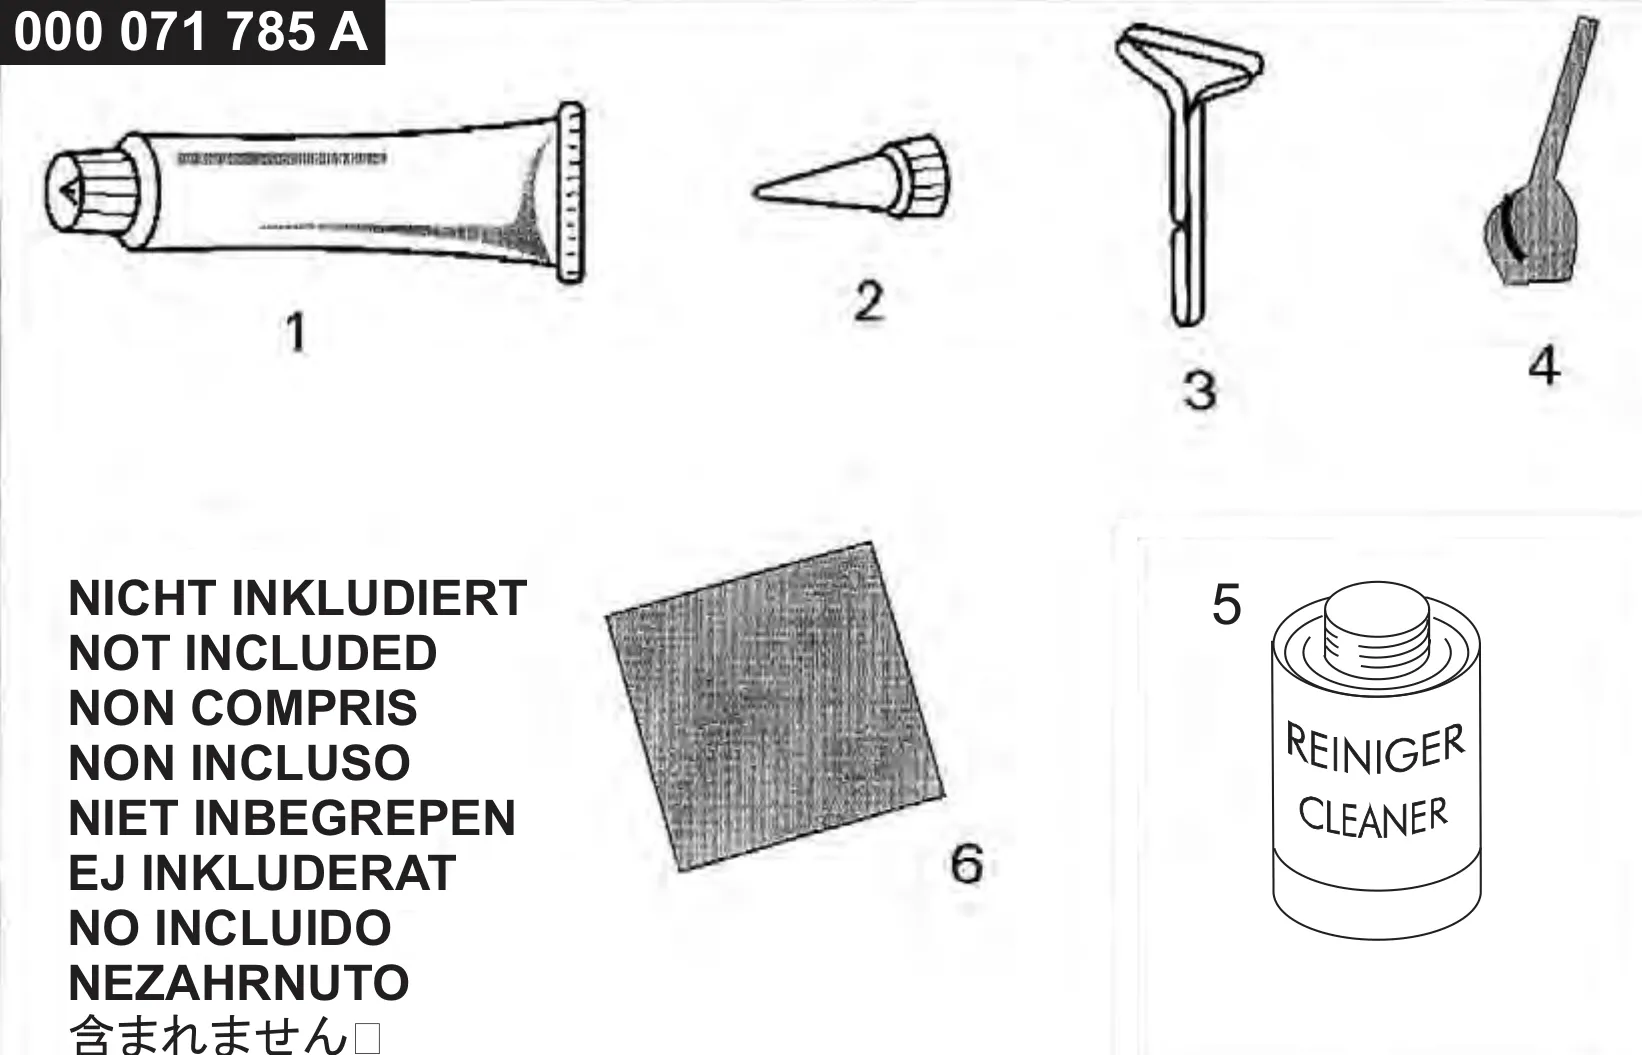
Note: The adhesive set is not included. This must be ordered separately. According to TÜV and ABE regulations, no other type of adhesive is permitted. The adhesive set consists of a cleaner, bonding agent and P1 adhesive, and is available under part no. 000 071 785 A.
Scope of delivery
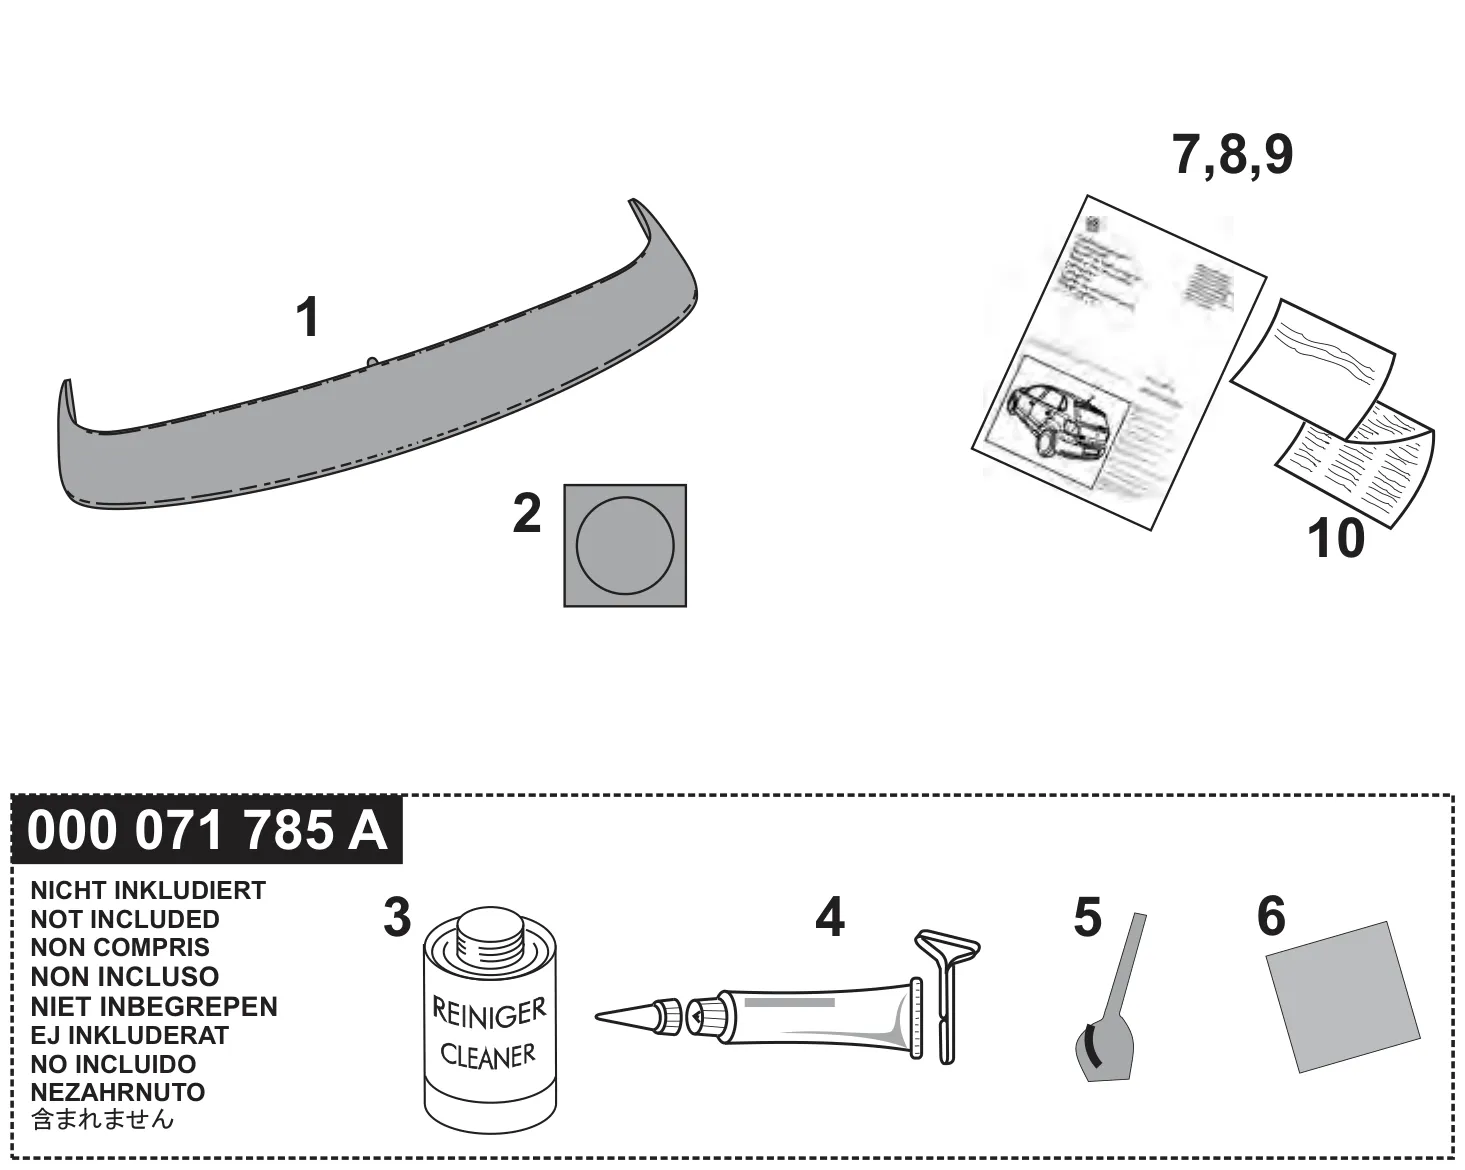
Painting
Pretreat and paint the part as stipulated in the Volkswagen maintenance and repair manual “Painting primered parts”. Please ensure that the part is stored in a manner to prevent warping throughout the entire painting and drying phase!
Trial fitting
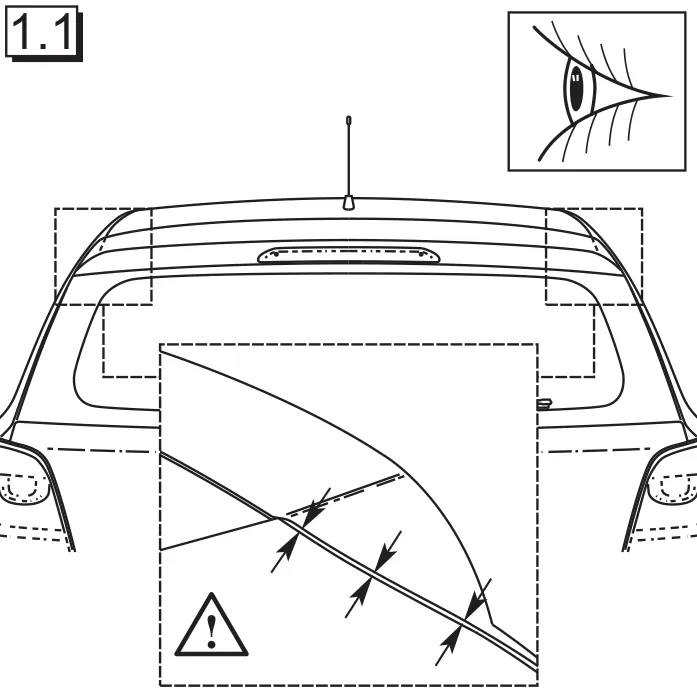
1.1 Note: Make sure the joint design (gap) is correct! Readjust the tailgate if necessary (see garage manual).
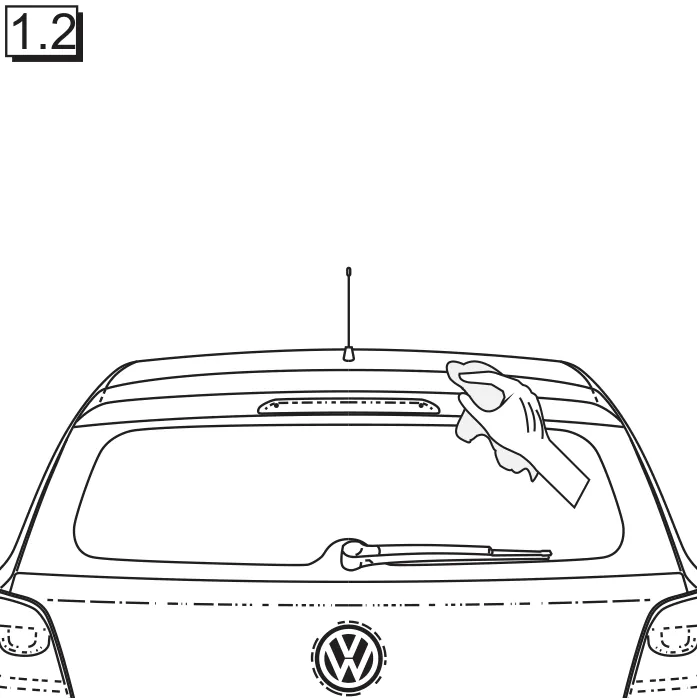
1.2 Thoroughly clean tailgate in application area of roof spoiler (1).
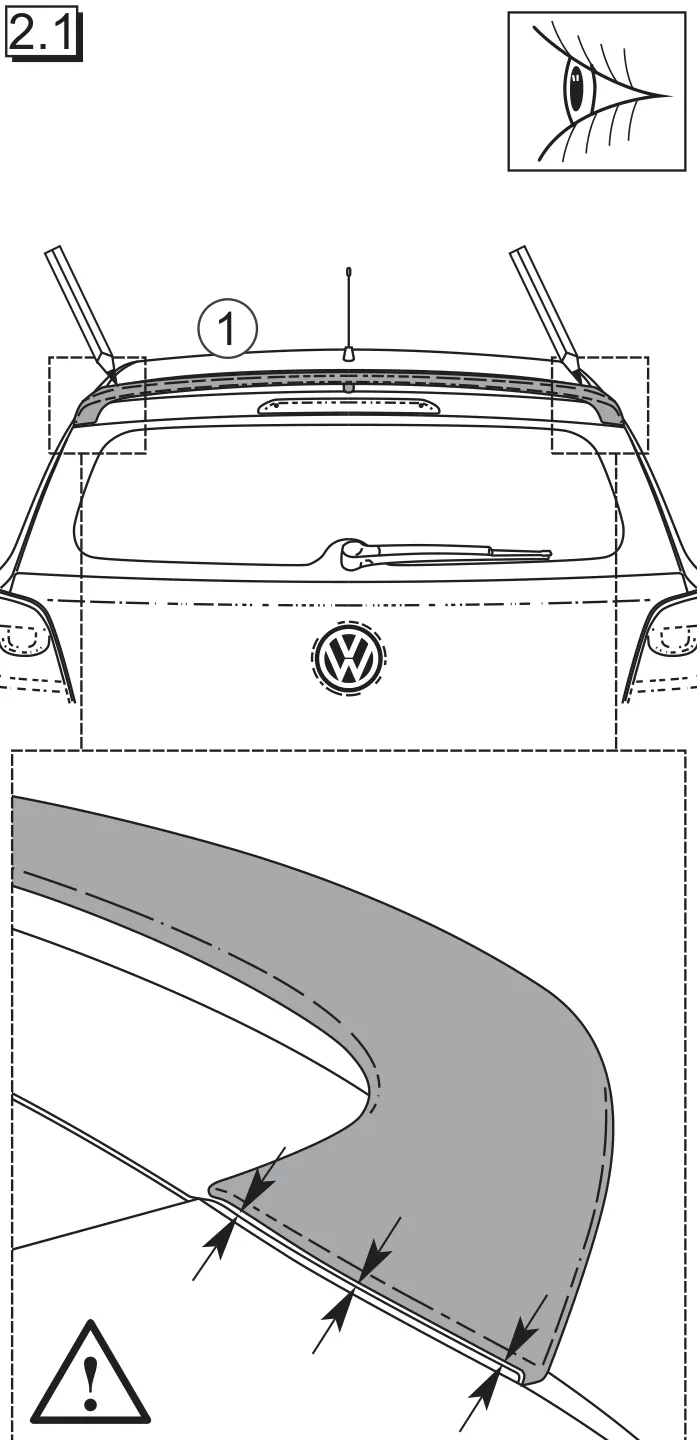
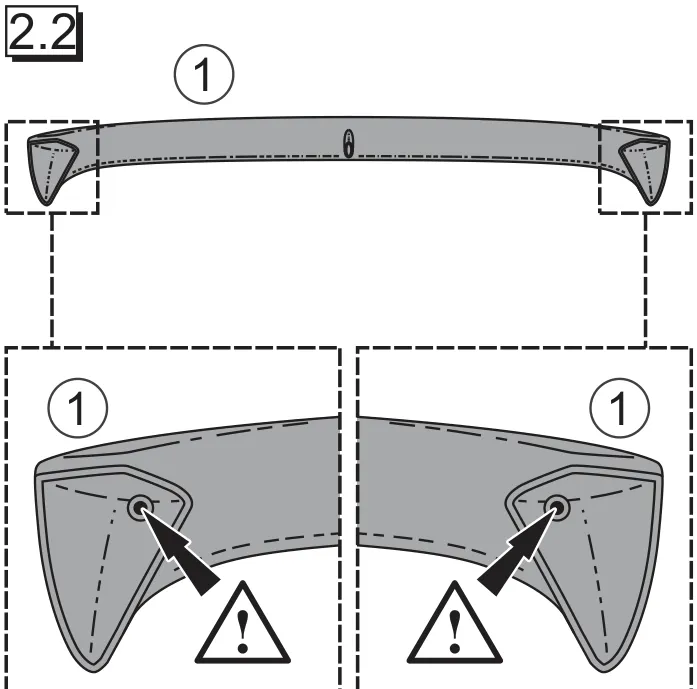
2.1 Bring unpainted roof spoiler (1) into position, check fit and mark contact points with suitable means. Re-check exact position of markings by re-applying roof spoiler (1). Then remove roof spoiler (1) again and paint according to painting instructions (8).
2.2 NOTE: The foamed nuts are used exclusively to support the spoiler when painting.
Fitting
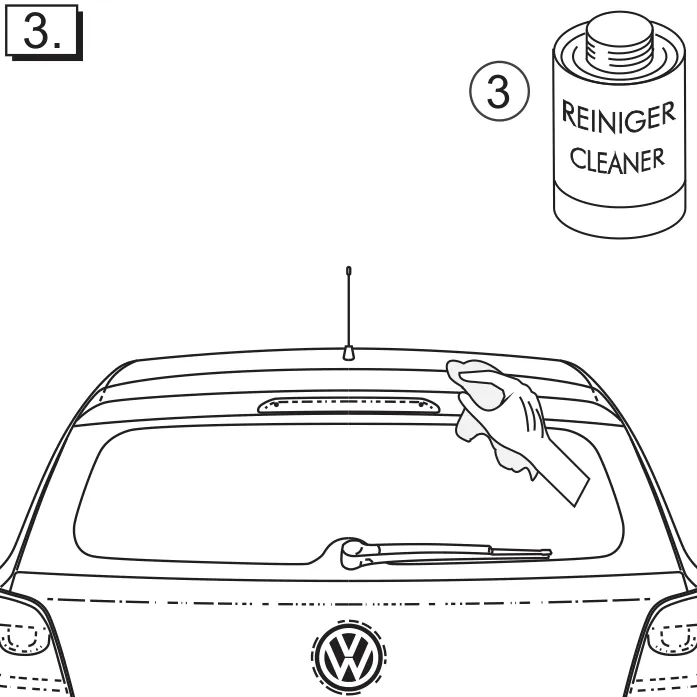
3. Thoroughly clean tailgate in application area of roof spoiler (1) once more with cleaner (3).
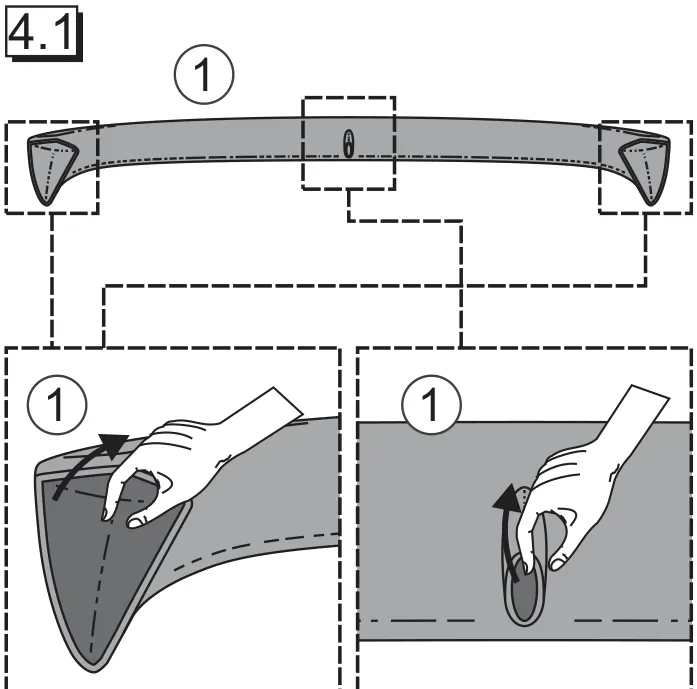

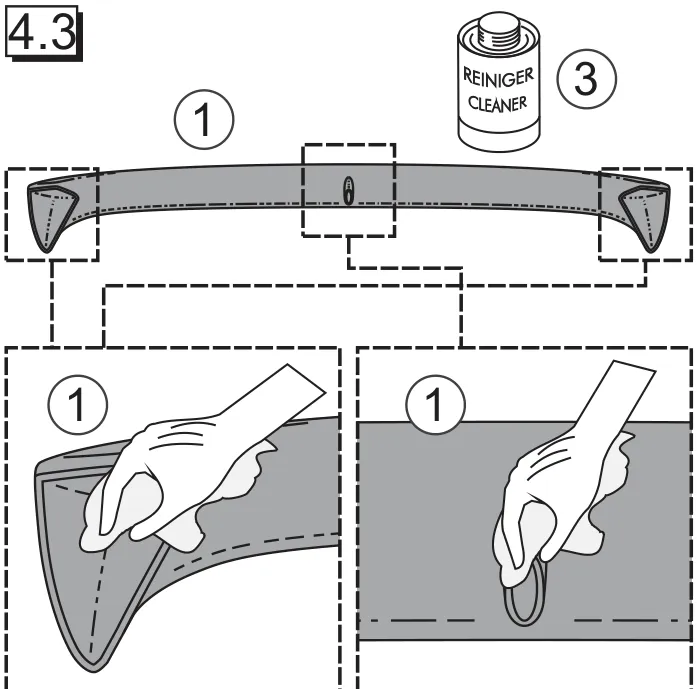
4.1 Remove covering tape.
4.2 Roughen roof spoiler (1) in adhesion area with abrasive paper (6) and thoroughly remove any paint residue.
4.3 Then thoroughly clean adhesion area with cleaner (3).
Attention: Please follow adhesive instructions (7) exactly.
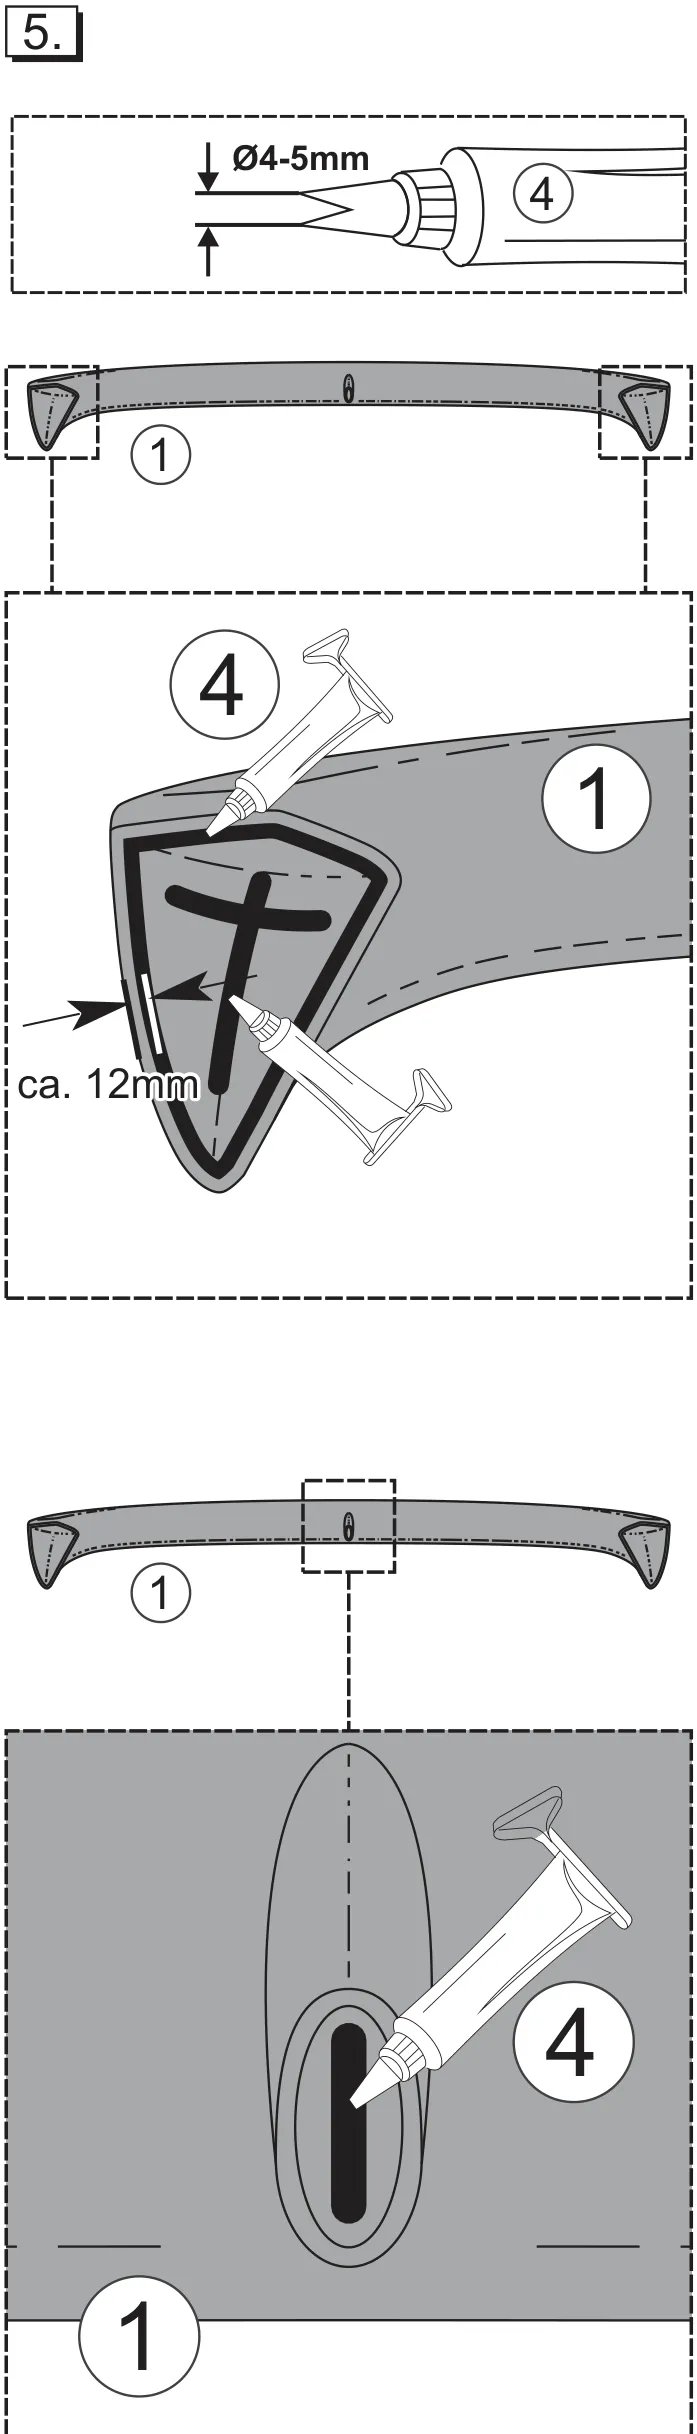
5. Apply an even bead of adhesive (4) (approx. 5 mm in diameter) as illustrated in the diagram.
Attention: Please follow adhesive instructions (7) exactly.
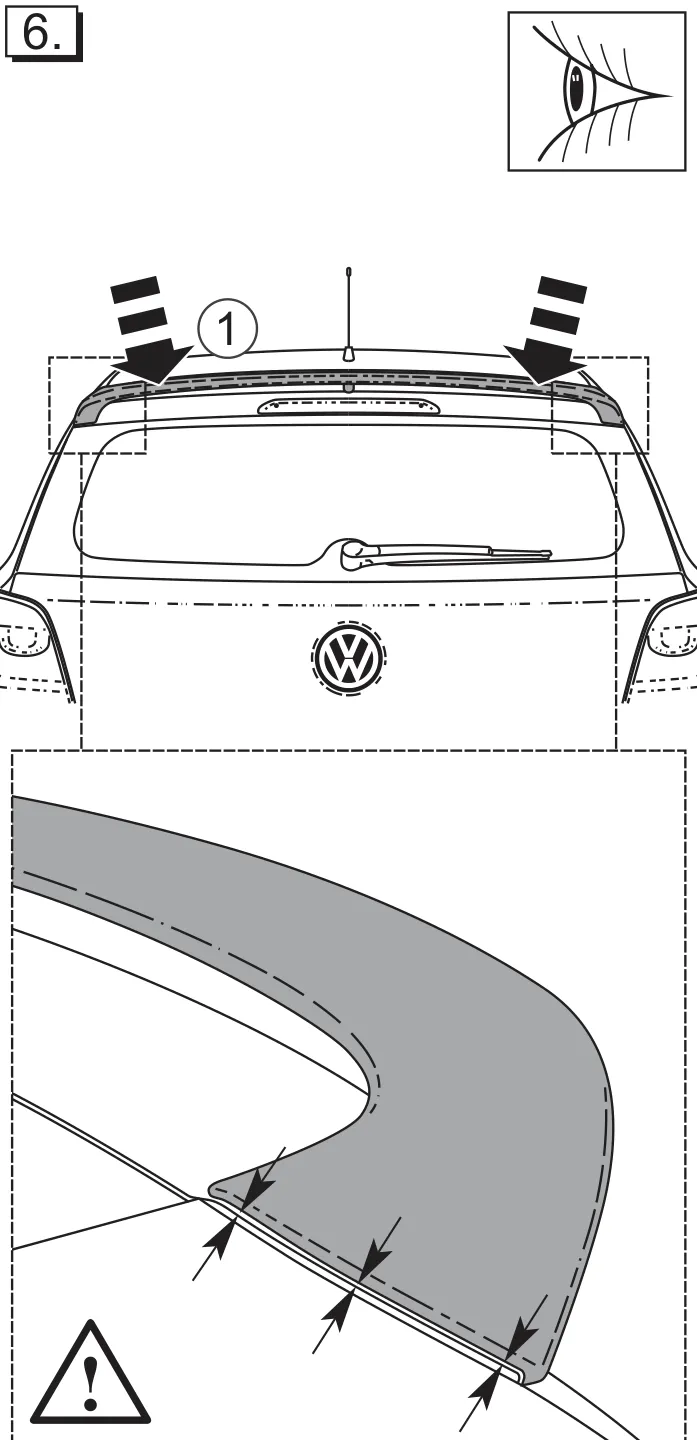
6. Position roof spoiler (1) on tailgate according to markings, align and press into place.
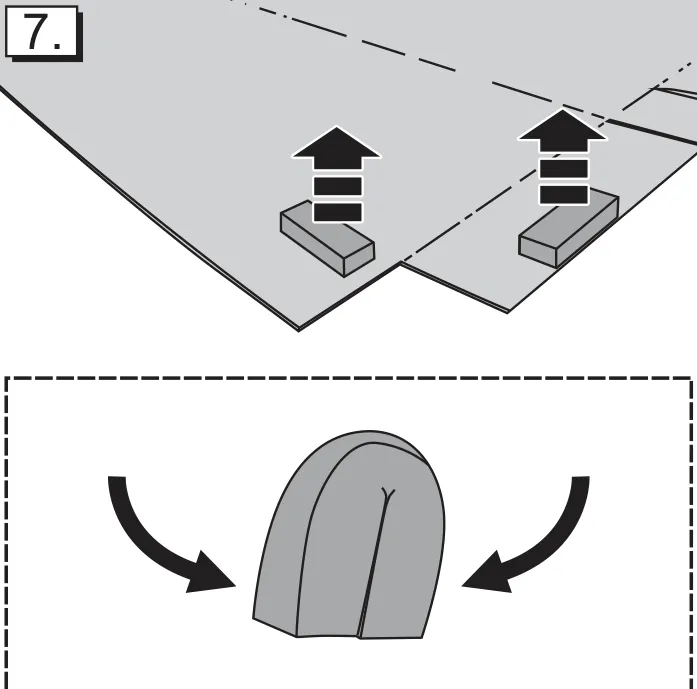
- Remove 2 foam pads from the packaging material and fold the pads together as illustrated in the diagram.
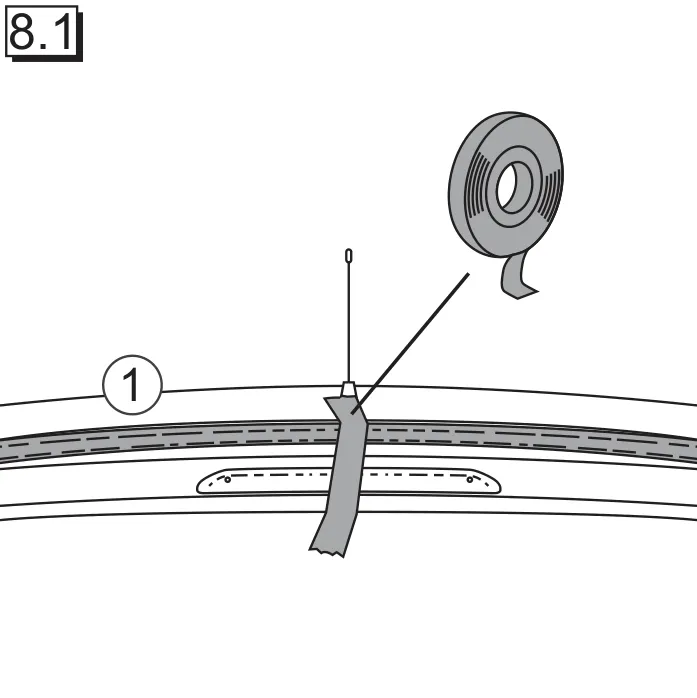
8.1 Secure the roof spoiler (1) at its centre by applying adhesive tape.
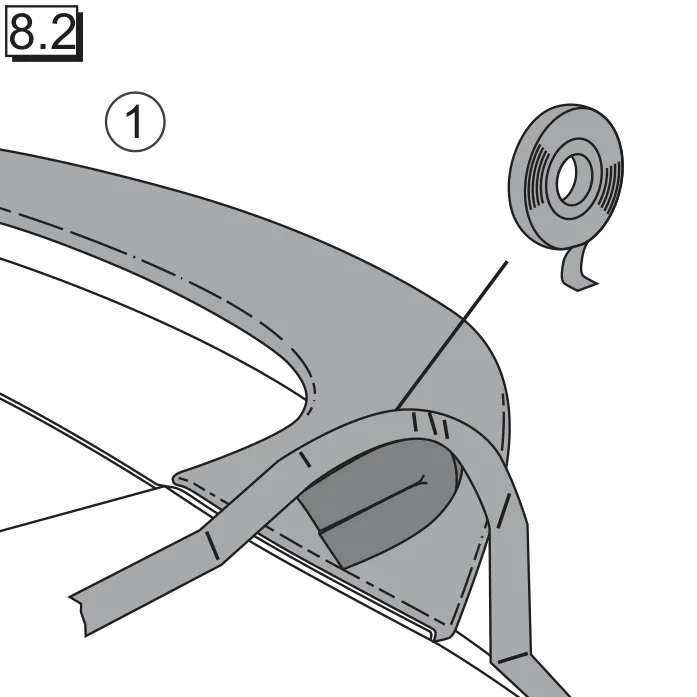
8.2 Press and fix the roof spoiler (1) in place using the adhesive tape and foam pad as illustrated in the diagram.
Attention: Please follow adhesive instructions (7) exactly.
Note: Remove any escaping adhesive remains immediately using the spatula (5) and cleaner (3)!
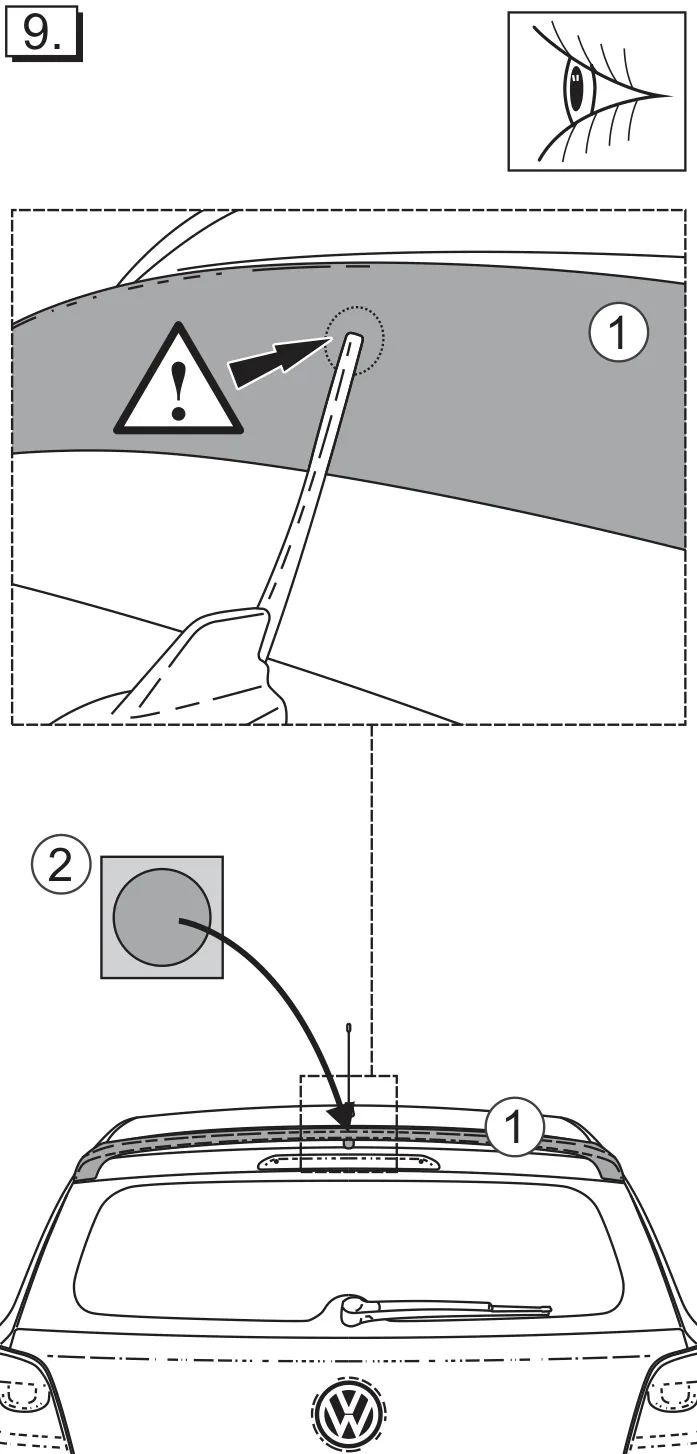
- Caution: Carefully open the tailgate to find the correct position for the paint protection film (2) in way of the roof antenna. After having identified the correct position, affix the paint protection film (2) onto the roof edge spoiler (1).
Curing times
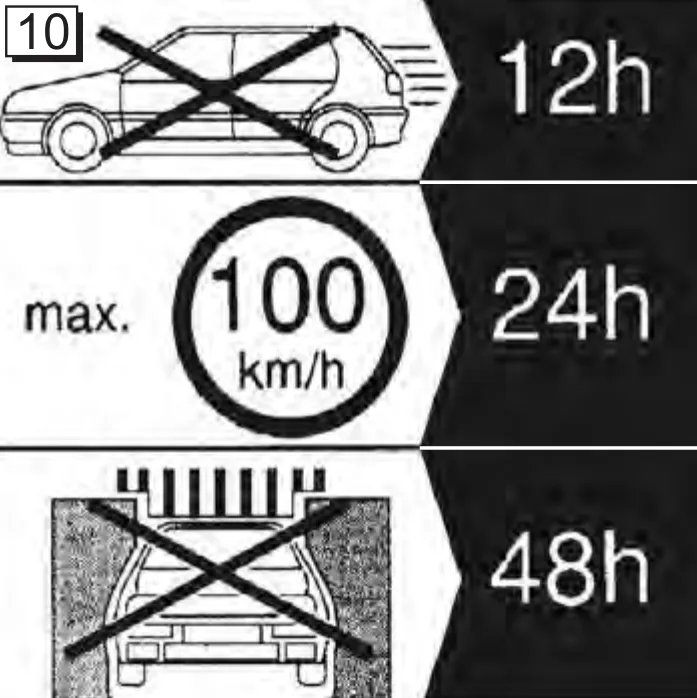
10. Attention:
- Do not remove adhesive tape until after approx. 12 hours.
- No mechanical load may be applied to body part for 24 hours.
- Do not wash for 48 hours.