
Uebler P21/P31 towbar bike carrier
Fitting and operating instructions for the Uebler P21 (2 bikes) and P31 (3 bikes) towbar bike carrier: parts, technical data, safety, fitting to the towbar, fitting the bikes, folding and tilting.
Uebler P21/P31 towbar bike carrier
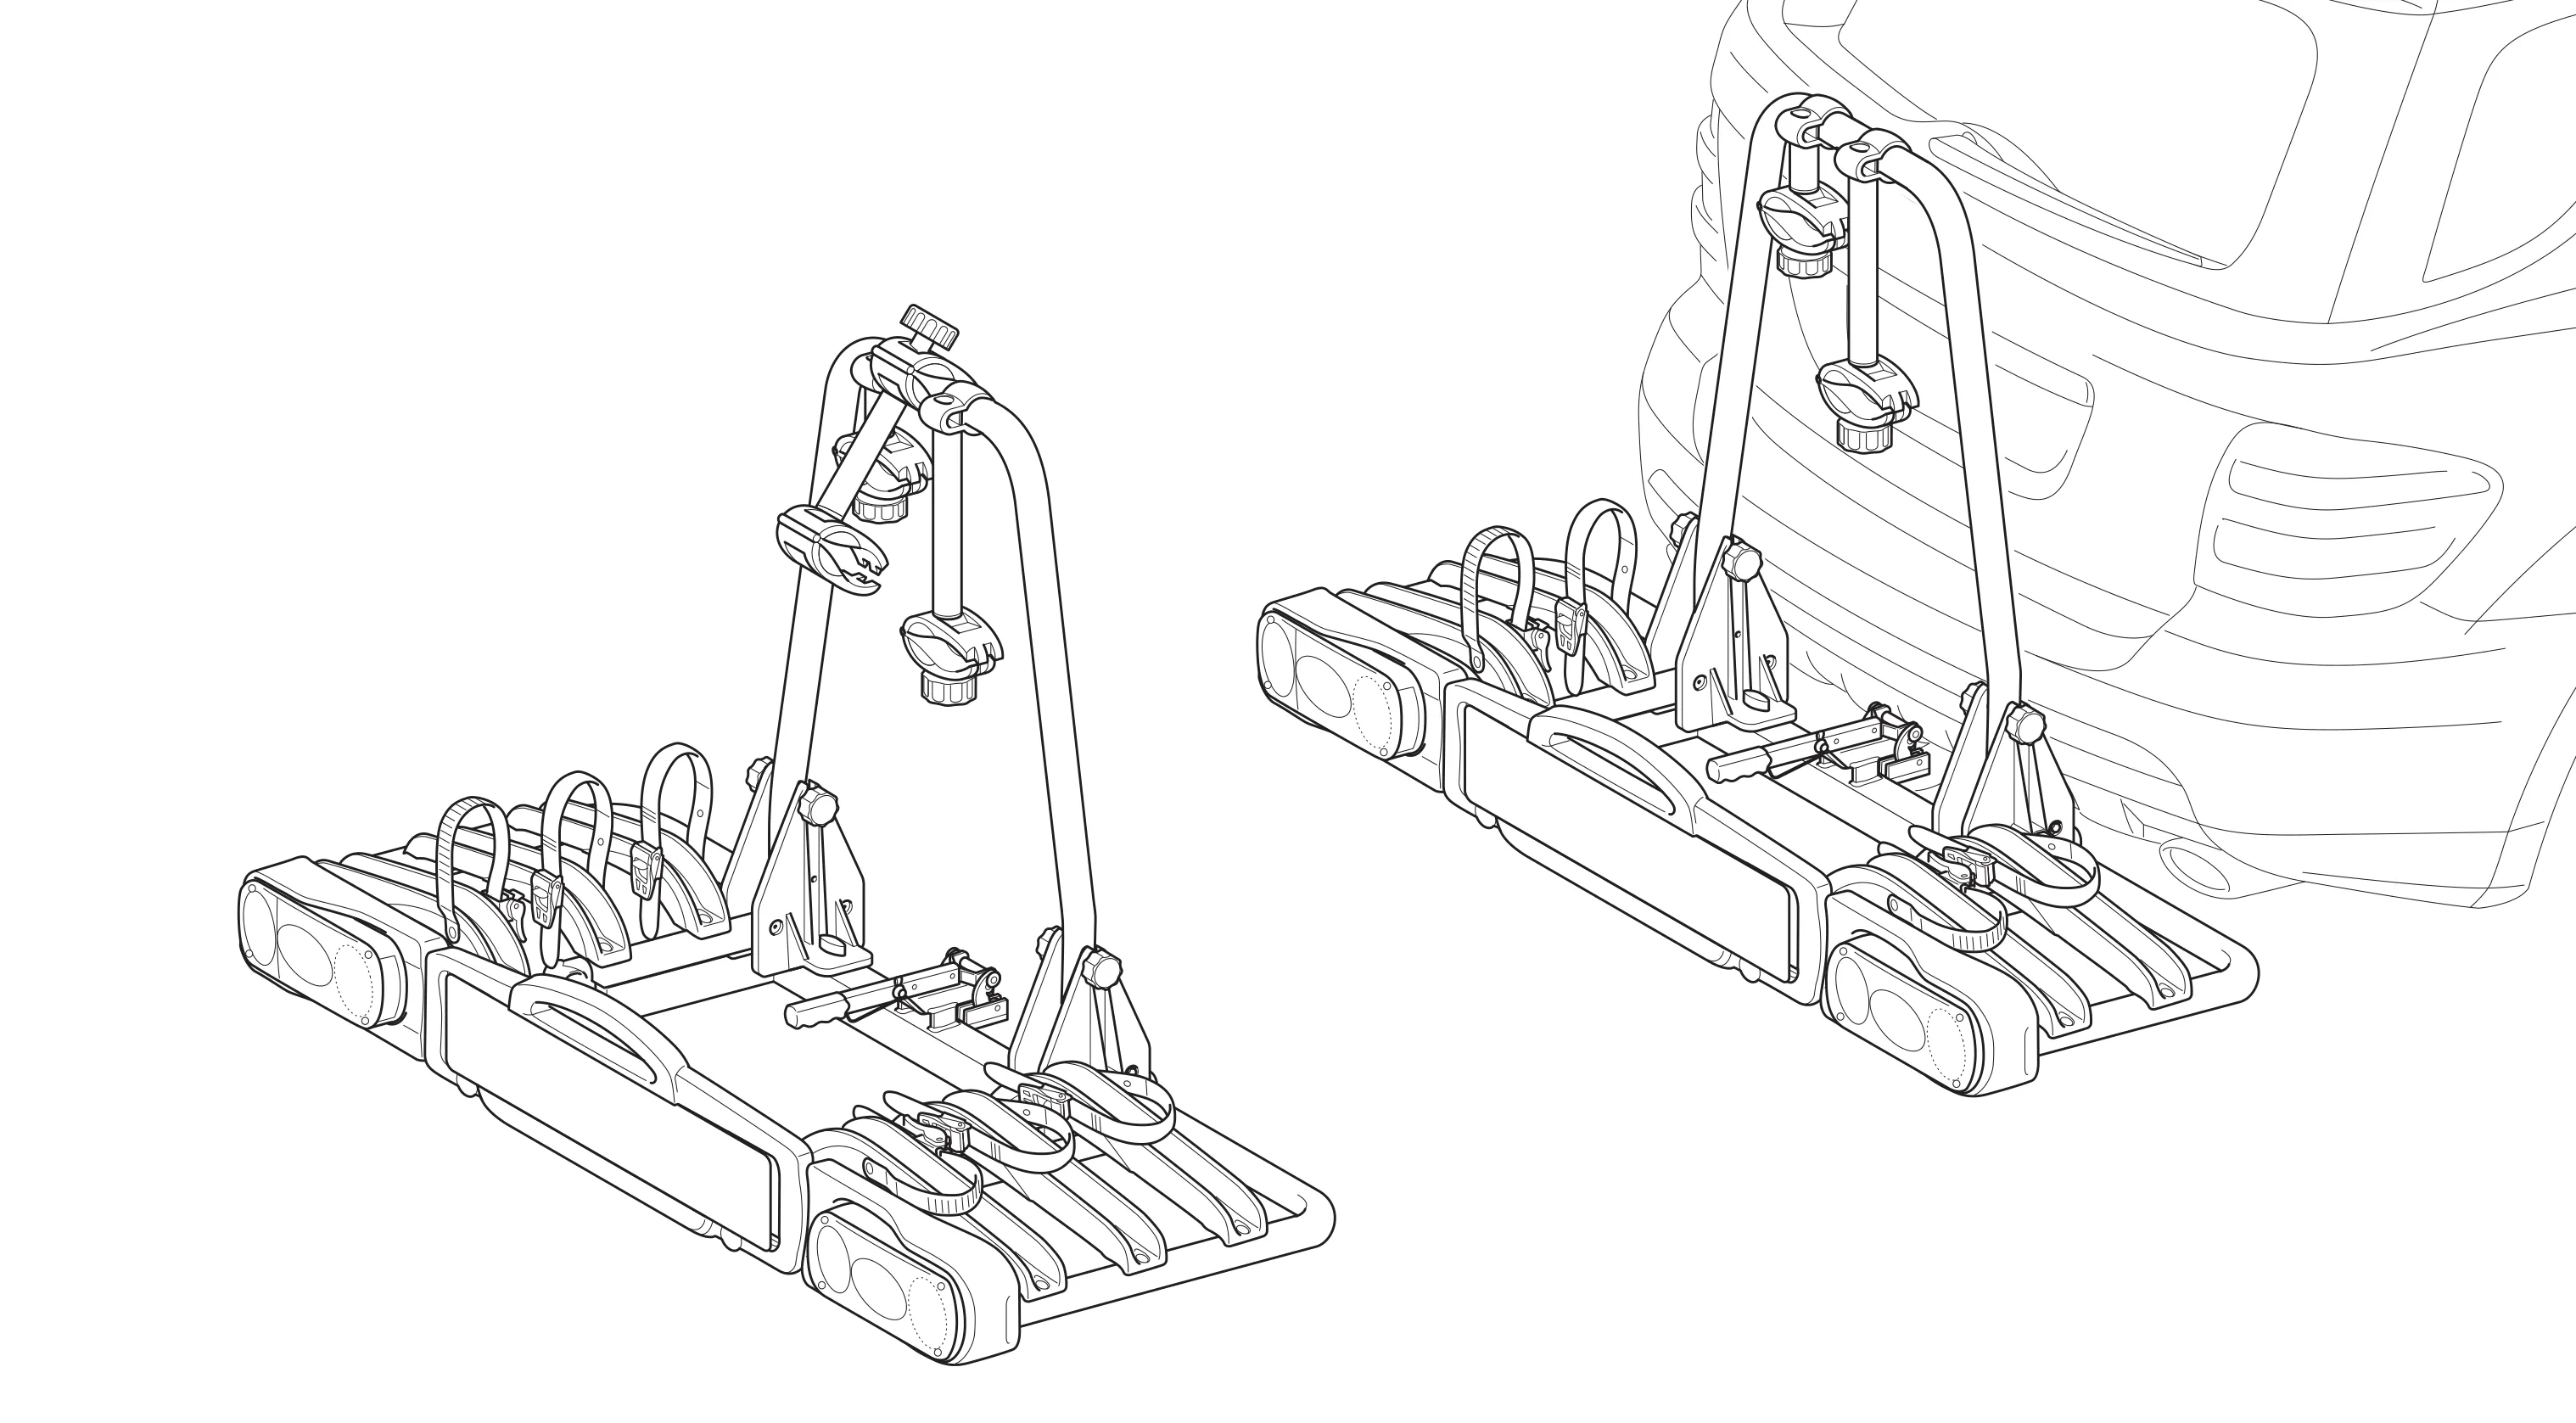
| Uebler P21 towbar bike carrier for 2 Bikes | Item No. 15600 |
|---|---|
| Uebler P31 towbar bike carrier for 3 Bikes | Order No. 15610 |
| EC type-approval number | e11*74/483*79/488*0231*00 |
Parts overview
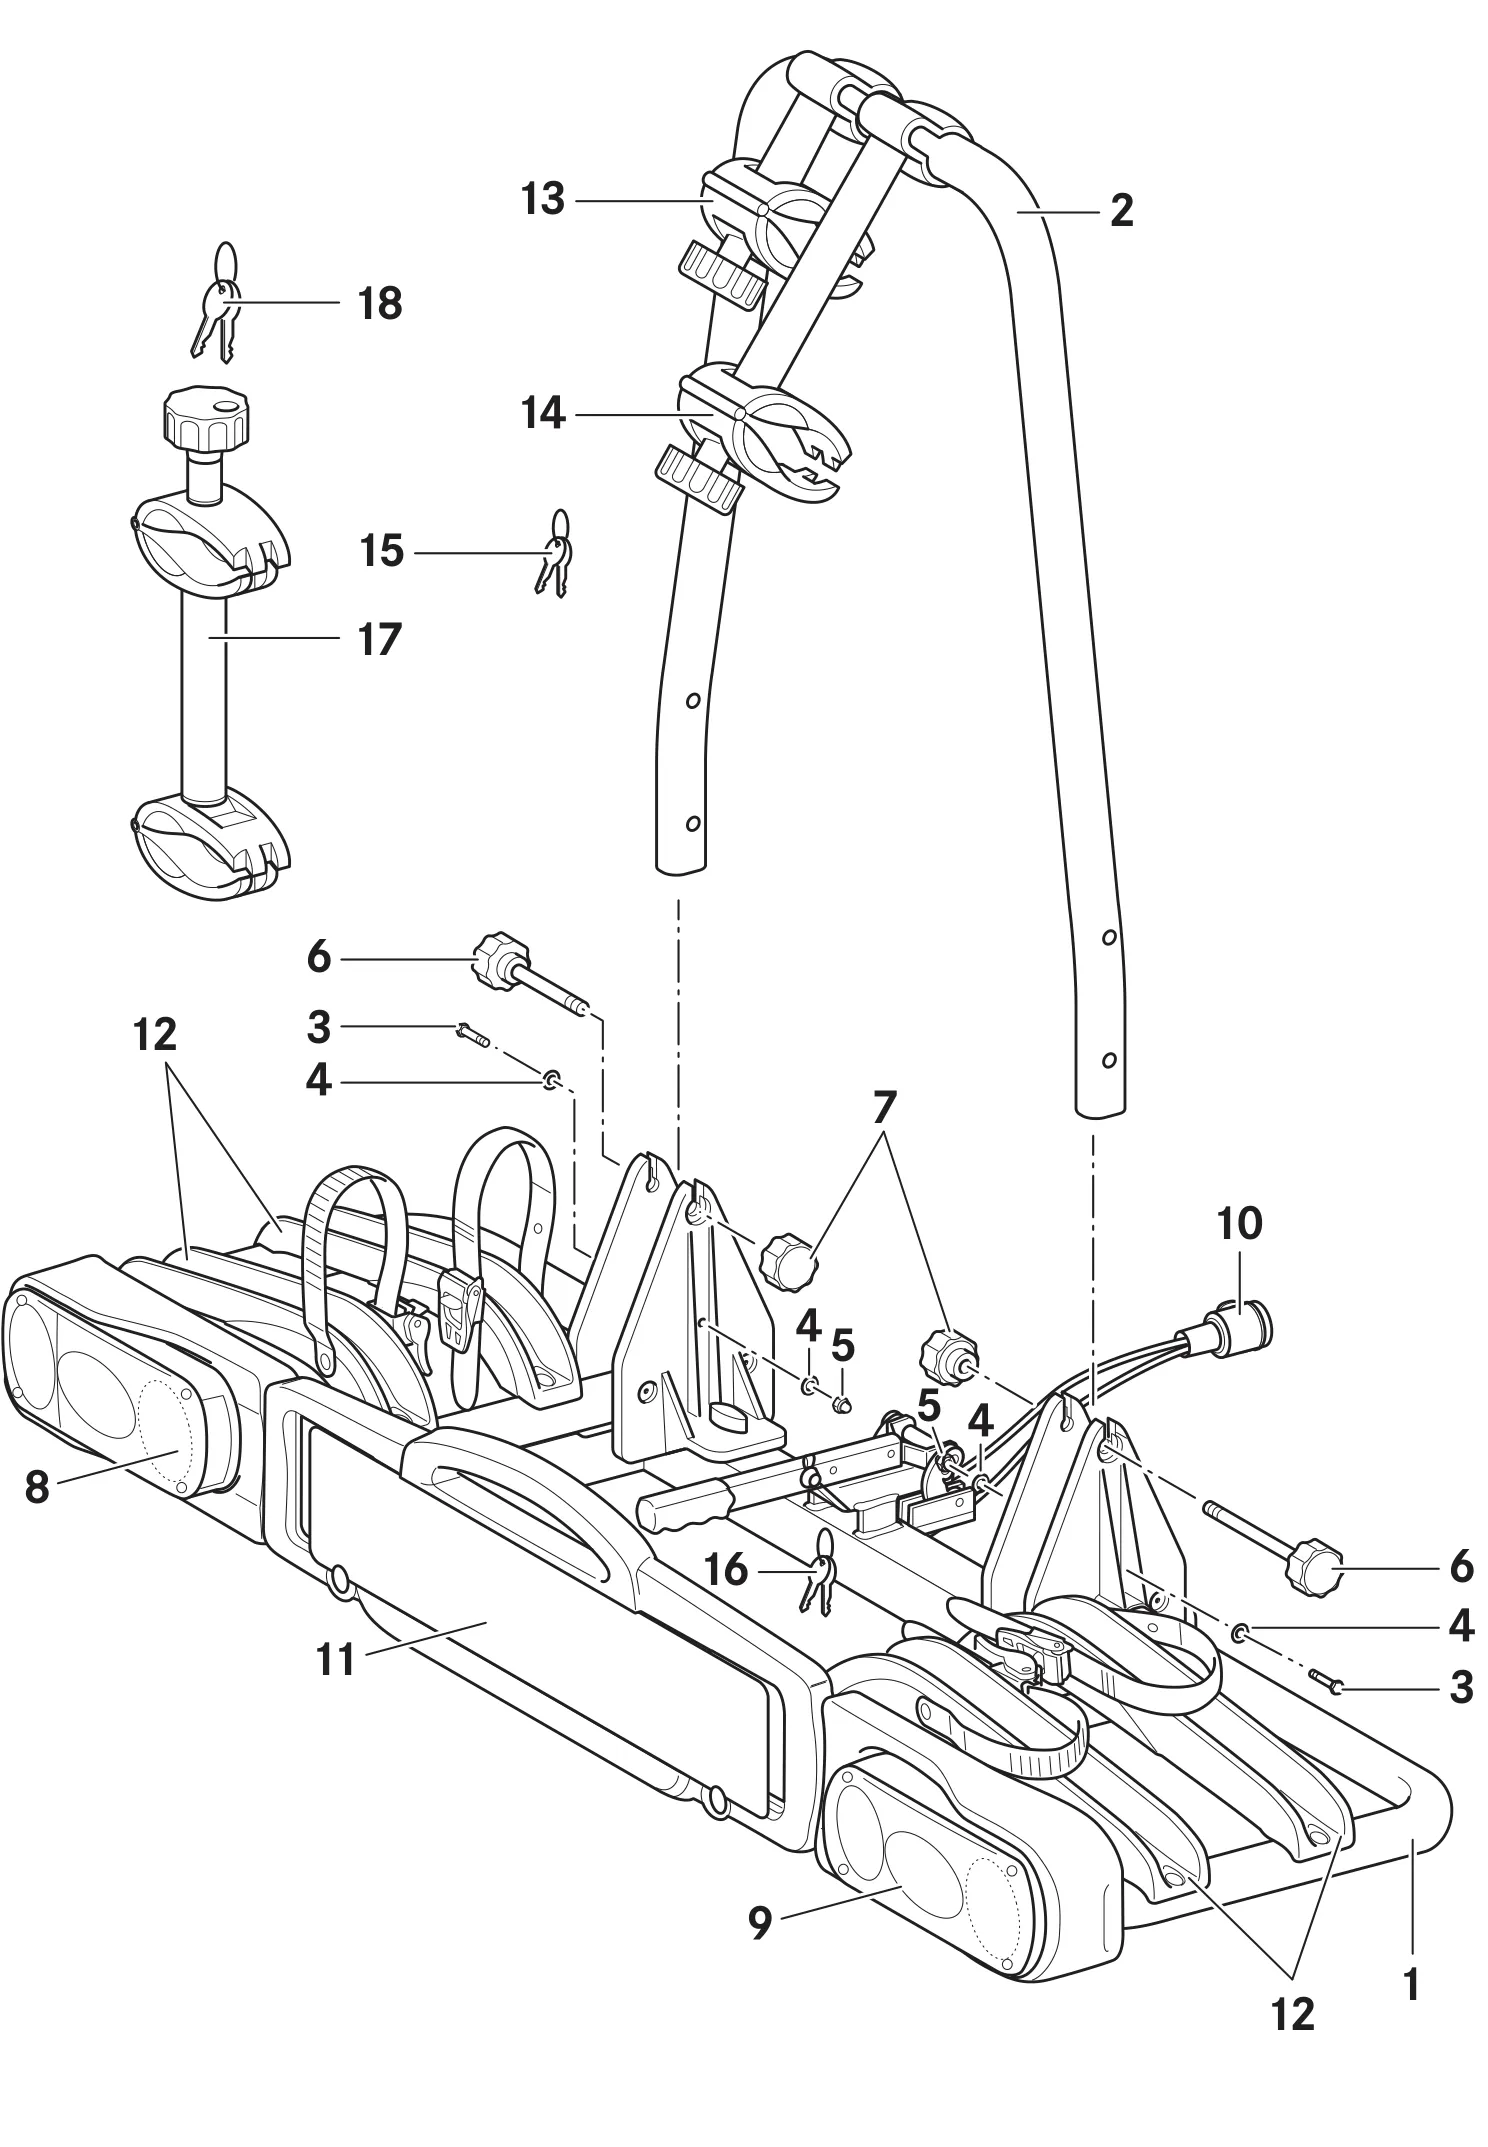
Contents of the Package
| No. | Item | P21 Quantity | P31 Quantity |
|---|---|---|---|
| 1 | Bracket | 1 | 1 |
| 2 | Carrier frame | 1 | 1 |
| 3 | Screws | 2 | 2 |
| 4 | Washers | 4 | 4 |
| 5 | Nuts | 2 | 2 |
| 6 | Screws | 2 | 2 |
| 7 | Nuts | 2 | 2 |
Part names
| No. | Designation | P21 Quantity | P31 Quantity |
|---|---|---|---|
| 8 | Left tail light | 1 | 1 |
| 9 | Right tail light | 1 | 1 |
| 10 | Connector for lighting unit | 1 | 1 |
| 11 | Number plate holder | 1 | 1 |
| 12 | Wheel rails | 4 | 6 |
| 13 | Holder for the 1st bike | 1 | 1 |
| 14 | Holder for the 2nd bike | 1 | 1 |
| 15 | Key for Mount | 4 | 4 |
| 16 | Key for lever | 2 | 2 |
| 17 | Holder for the 3rd bike | – | 1 |
| 18 | Key for holder | – | 2 |
Required tools
- 10 mm ring spanner
- Screwdriver
- Socket wrench SW 10
Technical data
| Weight of the bike carrier | |
|---|---|
| P21 for up to 2 bicycles | 13.5 kg |
| P31 for up to 3 bicycles | 15 kg |
| Maximum load capacity of the bike carriers | |
| P21 with a minimum nose weight of 50 kg | 36.5 kg |
| P21 with a minimum nose weight of 75 kg | 50 kg |
| P31 with a minimum nose weight of 50 kg | 35 kg |
| P31 for a nose weight of 75 kg or more | 54 kg |
| Maximum tube diameter for bike carriers | |
| Round tube | 80 mm |
| Oval tube | 80x45 mm |
General safety instructions
Dear Customer, we are pleased that you have chosen a UEBLER bike carrier. The procedures and safety instructions listed in this installation and operating manual must be strictly followed. We accept no liability for any damage resulting from failure to comply with these instructions.
Fitting/removing the carrier frame

- Insert the carrier frame (1) into the brackets (2) and secure it with screws (3), washers (4), and nuts (5) until the carrier frame (1) can slide within the brackets (2).
- Tighten the bolts (6) with nuts (7). Lightly grease the bolts (6) before installation.
- Snap the number plate into the number plate holder (8) and lock the locking pin (9) by turning it.
- To remove the carrier frame (1), follow the steps in reverse order.
Fitting to the vehicle

- Unlock the clamping lever (1) with the key (2).
- Unlock the clamping lever (1) using the lever (3) and swing it upward.
- Slide the bike carrier horizontally onto the towbar (4) and align it parallel to the bumper. The towbar (4) must be guided into the mounting bracket (5).
- Swing the clamping lever (1) downward until the lever (3) snaps into place, then lock it with the key (2). Remove the key (2).
- Check that the bike carrier is securely fastened by shaking it. If necessary, remove the bike carrier from the towbar (4) and reattach it.
- Plug the connector (6) for the lighting unit into the vehicle’s socket (7) and check that the lights are working.
- To remove the bike carrier from the vehicle, follow the steps in reverse order.
Fitting/removing the bikes
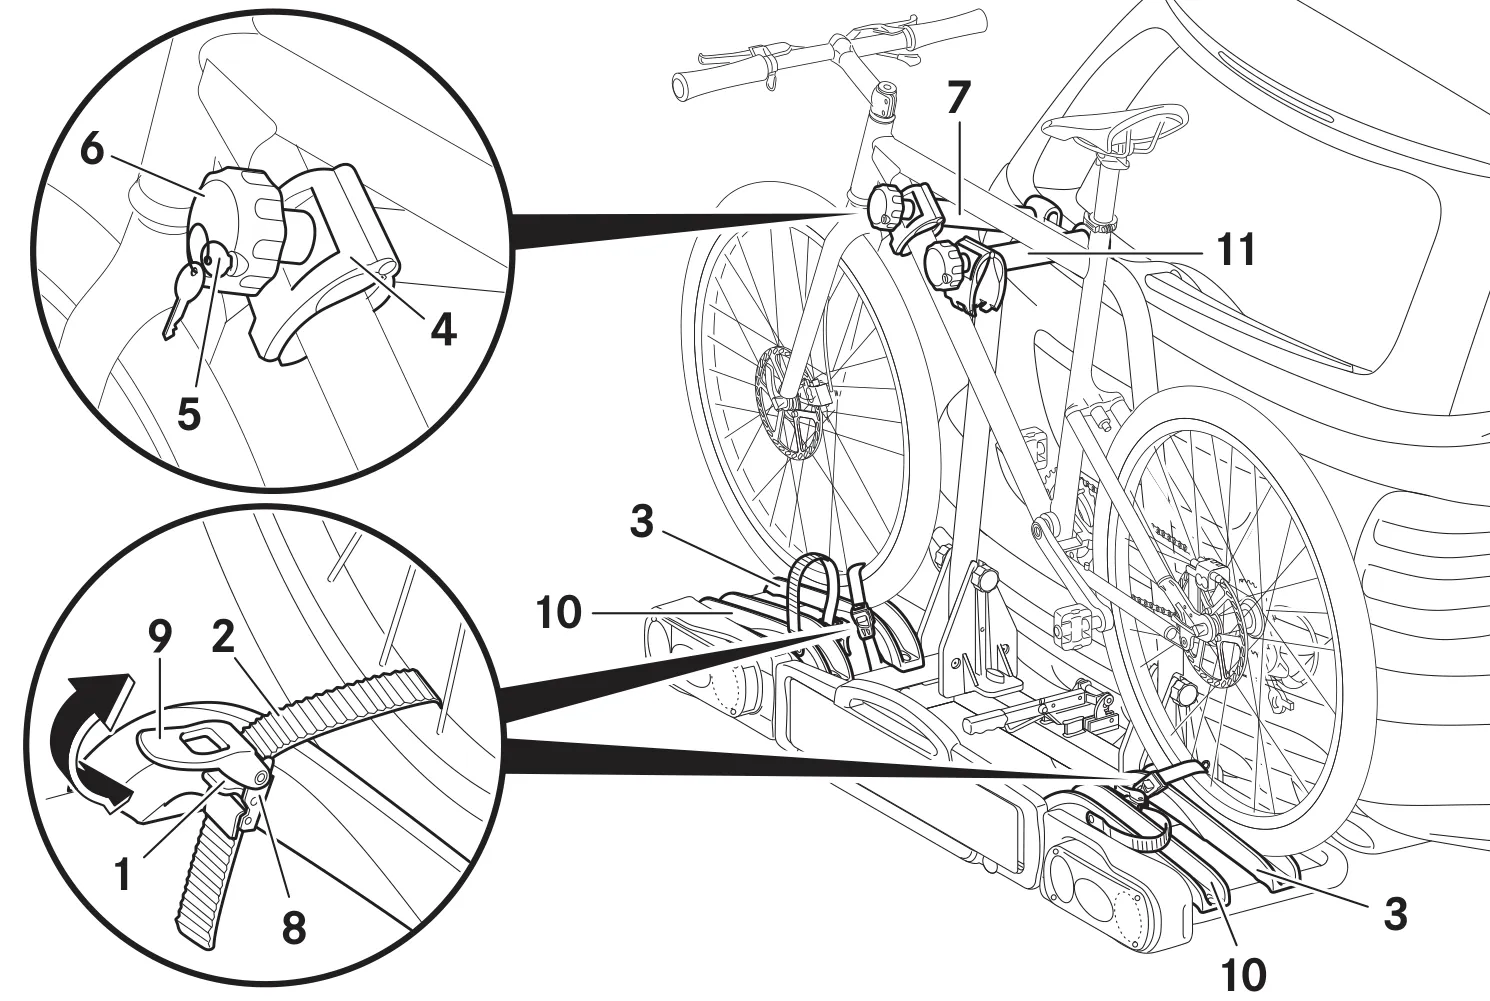
- Press the lever (1) and pull out the tensioning strap (2).
- Place the bicycle onto the wheel rails (3).
- If necessary, unlock the clamp (4) with the key (5).
- Screw the clamp (4) in place using the screw (6) until the required width for the bicycle frame is reached.
- Attach the bracket (7) to a suitable location on the bicycle, tighten the clamp (4) with the screw (6), and lock it with the wrench (5). Remove the wrench (5).
- Thread the tensioning strap (2) diagonally through the buckles (8) between two wheel spokes, centering it, and tighten it with the lever (9) (arrow).
- Mount the second bicycle in the opposite direction in the same manner on the wheel rails (10) and with the bracket (11).
- For bike carrier 15610, the third bike is secured using a bracket that connects the second bike to the third bike.
- To remove the bicycles, follow the steps in reverse order.
Folding the carrier frame down/up
The carrier frame can be folded down for space-saving storage.

Folding the carrier frame by approx. 60°
- Loosen the bolts (1) with nuts (2) and pull them out of the recesses in the brackets (4).
- Pull the carrier frame (3) out of the brackets (4) and fold it down to position I.
Folding the carrier frame by approx. 90°
- Unscrew the bolts (1) with nuts (2).
- Pull the carrier frame (3) upward out of the brackets (4) and fold it down to position II.
Folding the carrier frame up
To fold the carrier frame (3) up, follow the steps in reverse order.
Tilting the bike carrier
The bike carrier can be tilted 90° to load and unload the vehicle.

- Open the quick-release fasteners (1).
- Tilt the bike carrier 90° backward by pulling on the carrier frame (2).
- To tilt the bike carrier forward, follow the steps in reverse order.