
1.6 TDI CR engine (EA189) · Crankshaft group · Cylinder block (pulley end)
Removing and installing engine bracket
⇒ 1.8.4 Removing and installing engine bracket, Polo
1.8.4 Removing and installing engine bracket, Polo
Special tools, testers, measuring instruments and auxiliary items required ⇒ 2.2.4 Supporting engine in installation position, Polo
Removing
- Remove engine cover panel ⇒ 3 Engine cover panel.
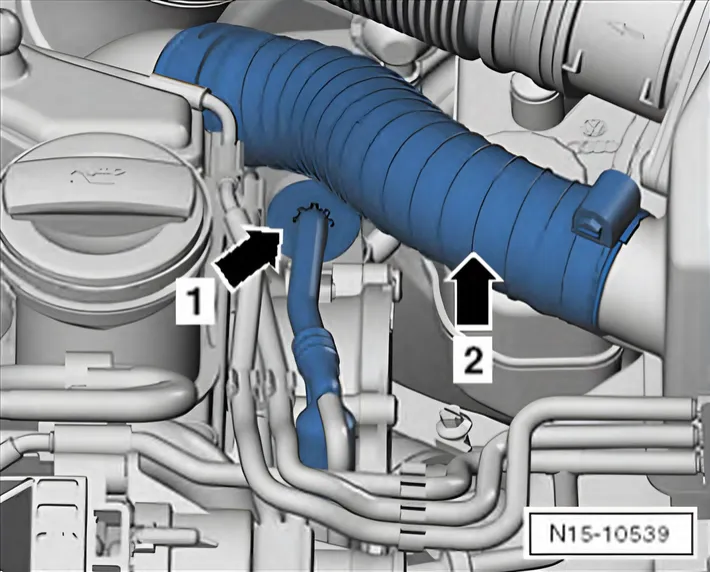
Pre-heater line -arrow 2- is not necessarily installed.
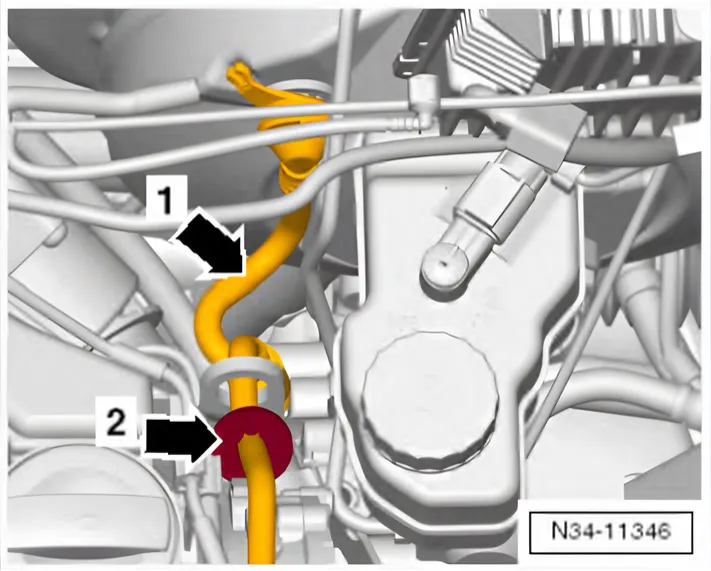
- In order to ensure that vacuum hose -arrow 1- from brake servo to engine is not damaged, you must remove it ⇒ Brake systems; Rep. gr. 47; Brake servo/brake master cylinder; Assembly overview - brake servo/brake master cylinder.
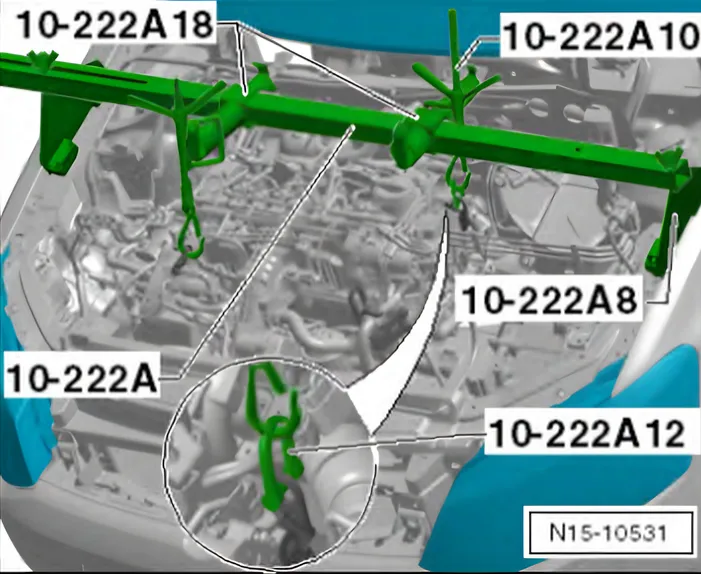
- Set up support bracket - 10 - 222 A- with necessary adapters and support engine in installation position ⇒ 2.2.4 Supporting engine in installation position, Polo.
- Remove front right wheel housing liner.
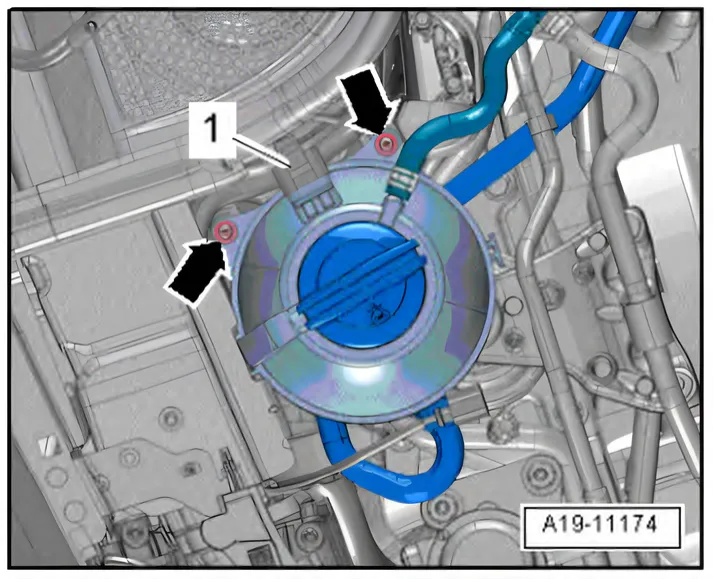
- Release coolant expansion tank to create space to remove engine bracket.
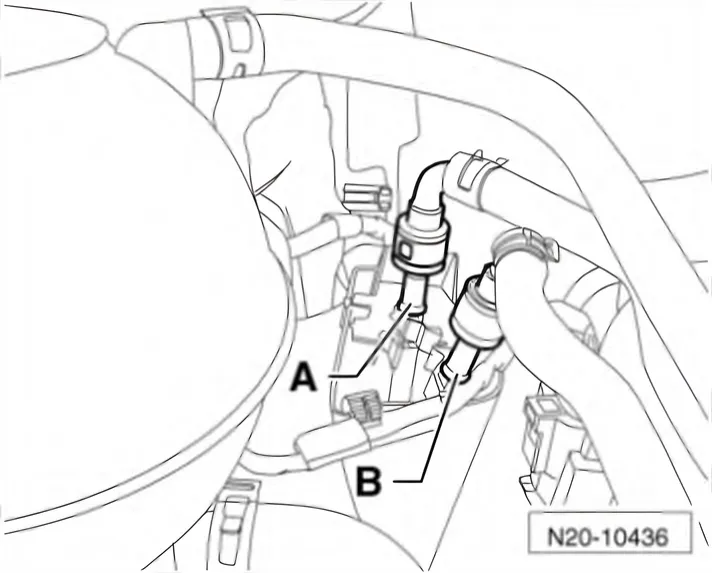
- Separate fuel supply line and return line at fuel transfer point.
The procedure for this is explained in ⇒ Rep. gr. 20; Push-on couplings; Detaching plug-in connector.
- Catch any escaping fuel.
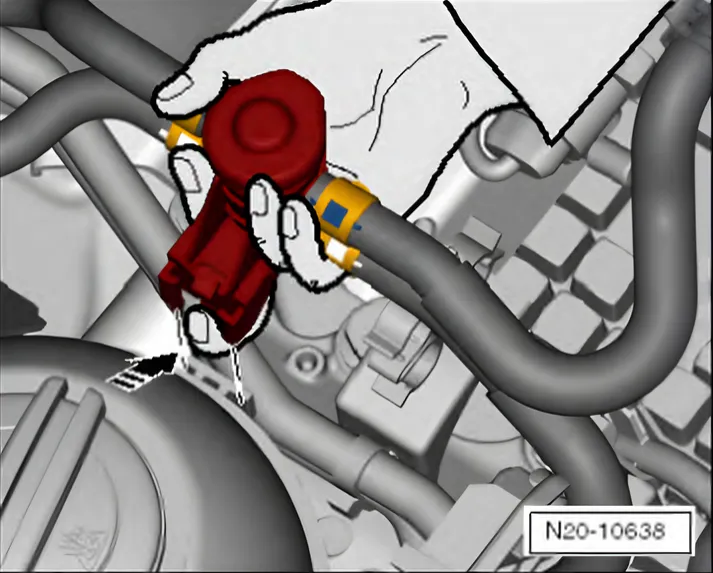
- Use a finger to release locking lug of fuel pre-heater valve.
- Pull fuel pre-heater valve upwards out of coolant expansion tank guide.
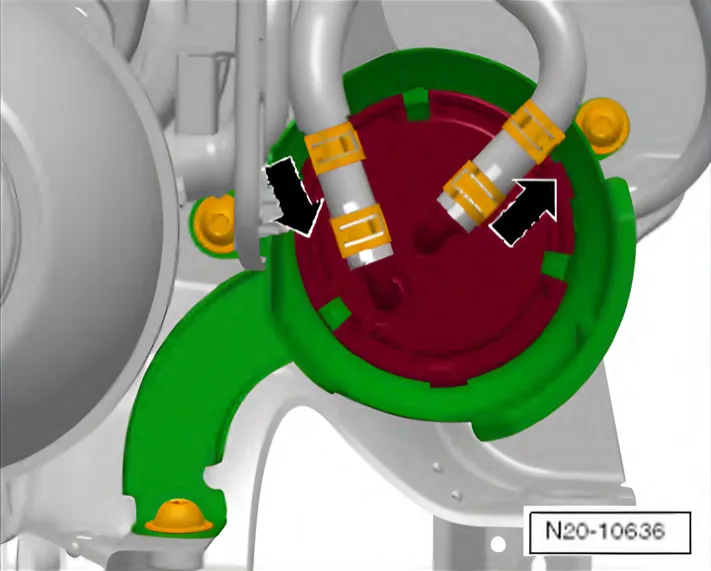
- Unclip fuel filter from lower part of fuel filter.
- Remove fuel filter upwards.
- Place fuel filter and fuel hoses together with fuel pre-heater valve on engine.
- Remove lower part of fuel filter ⇒ Rep. gr. 20; Fuel filter; Removing and installing fuel filter.
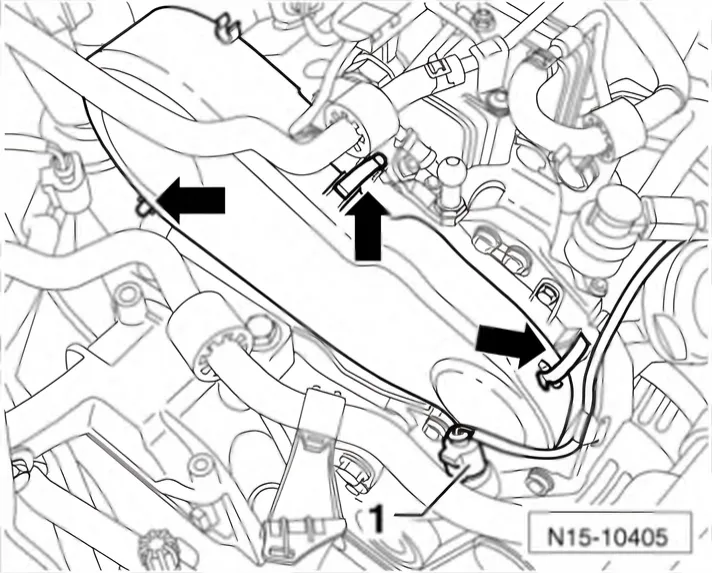
- Remove upper toothed belt guard -arrows-.
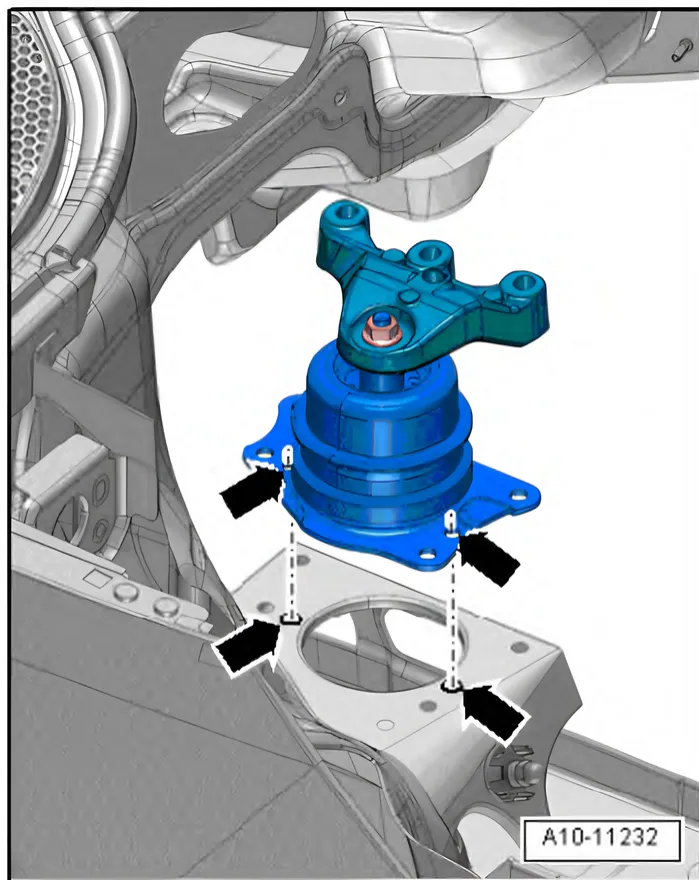
- Remove assembly mounting completely ⇒ 2.1.3 Removing and installing assembly mountings.
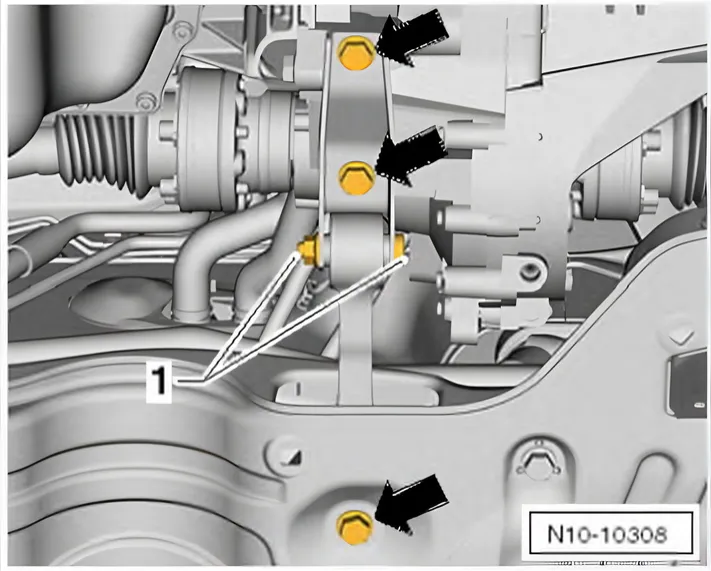
- Remove pendulum support ⇒ 2.1.2 Assembly overview – assembly mountings, Polo.
- Pull engine as far as possible towards radiator.
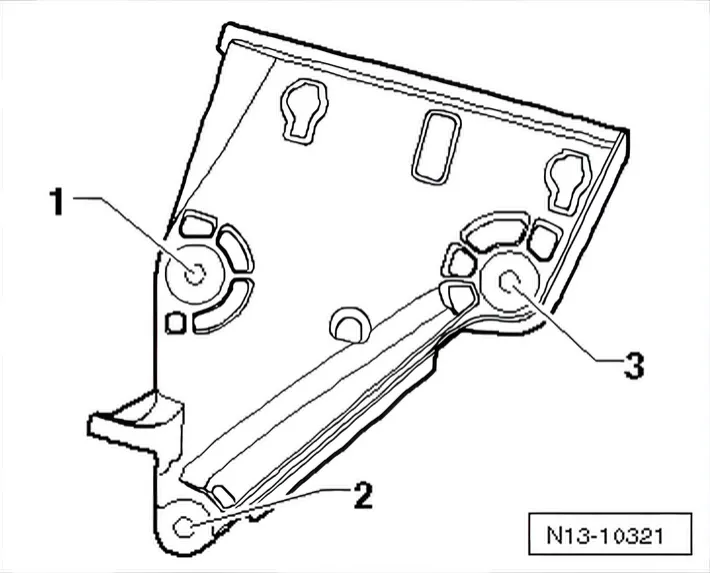
- Remove securing bolts from engine bracket in sequence -2…1-.
- Available installation space is very restricted.
- Proceed with caution to avoid damaging vehicle and engine.
- Remove engine bracket upwards.
Installing
Install in reverse order. During this procedure, observe the following:
- Insert engine bracket from above.
- First tighten new securing bolts hand-tight in sequence -1…3-.
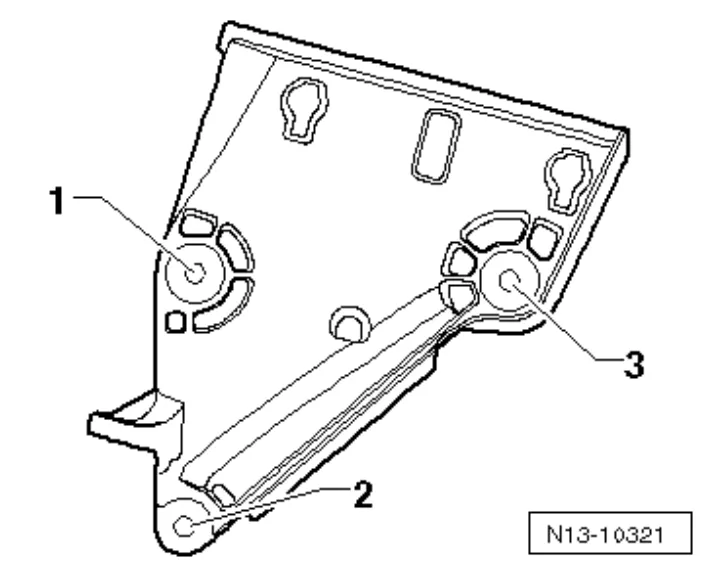
Tightening sequence for engine bracket
- Retighten securing bolts in tightening sequence to prescribed specified torque ⇒ Item 31 (2.1.2 Assembly overview - toothed belt, Polo).
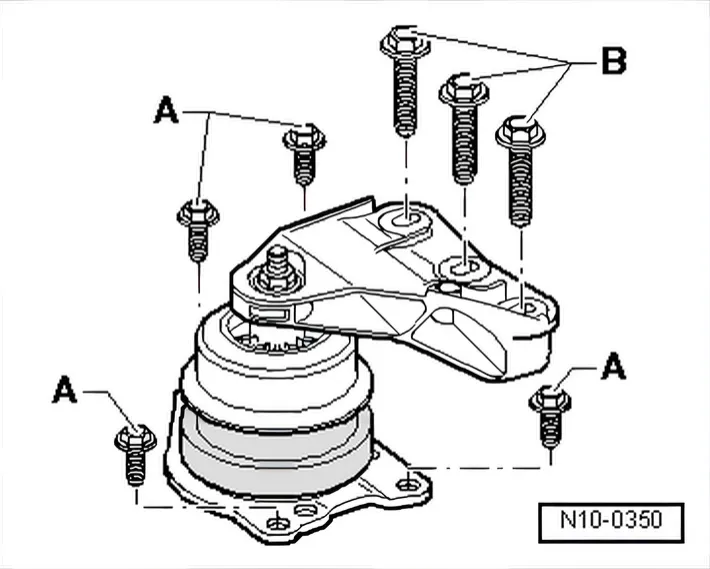
- Position engine assembly mounting but first tighten bolts -A-. Specified torque ⇒ 2.1.2 Assembly overview – assembly mountings, Polo.
- Next bring engine bracket into contact with assembly mounting using spindle.
- Fit bolts -B- in place and then tighten to specified torque ⇒ 2.1.2 Assembly overview – assembly mountings, Polo
Further assembly is performed in the reverse order of removal. During this procedure, observe the following:
- Ensure fuel hoses are seated correctly.
- Do not interchange supply line and return line (return line blue or with blue marking, supply line black).