
1.6 TDI CR engine (EA189) · Crankshaft group · Cylinder block (pulley end)
Removing and installing poly-V belt
⇒ 1.2.1 Removing and installing poly V-belt, poly V-belt drive without air conditioner compressor
1.2.1 Removing and installing poly V-belt, poly V-belt drive without air conditioner compressor
Removing and installing
- Remove noise insulation:
Polo ⇒ General body repairs, exterior; Rep. gr. 50; Noise insulation; Assembly overview - noise insulation
- Loosen right wheel housing liner in front area.
- Cut through poly V-belt.
- Further work sequence is carried out as described in the illustrated instructions enclosed with the spare part.
Install in the reverse order of removal observing the following:
- Secure front part of right wheel housing liner again.
- Install noise insulation:
Polo ⇒ General body repairs, exterior; Rep. gr. 50; Noise insulation; Assembly overview - noise insulation
1.2.2 Removing and installing poly V-belt, poly V-belt drive with tensioning roller and air-conditioning compressor
Special tools and workshop equipment required
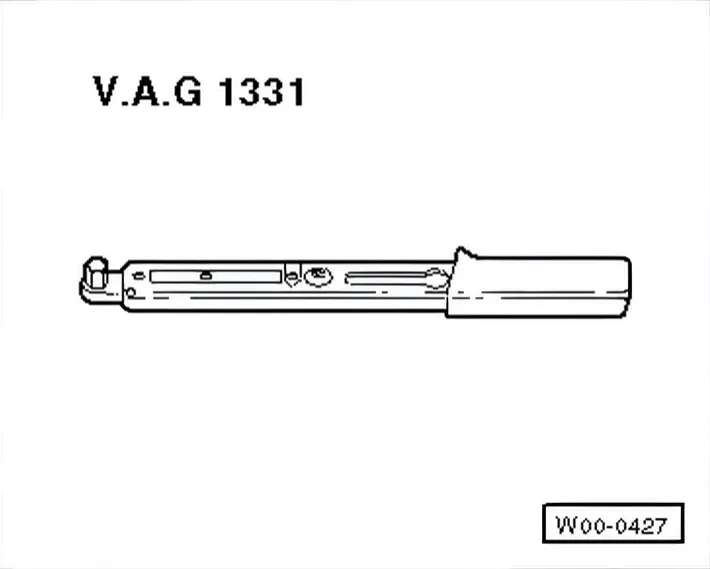
- Torque wrench - V.A.G 1331-.
Removing
- Remove noise insulation:
Polo ⇒ General body repairs, exterior; Rep. gr. 50; Noise insulation; Assembly overview - noise insulation
- Loosen right wheel housing liner in front area.
Polo
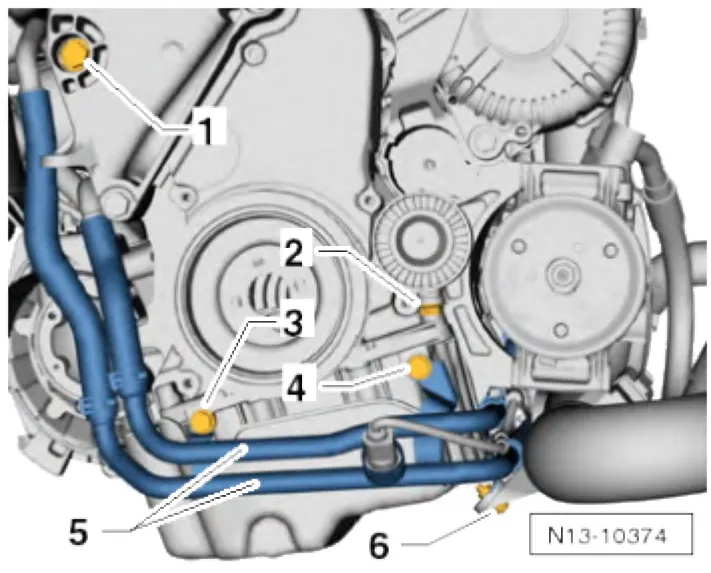
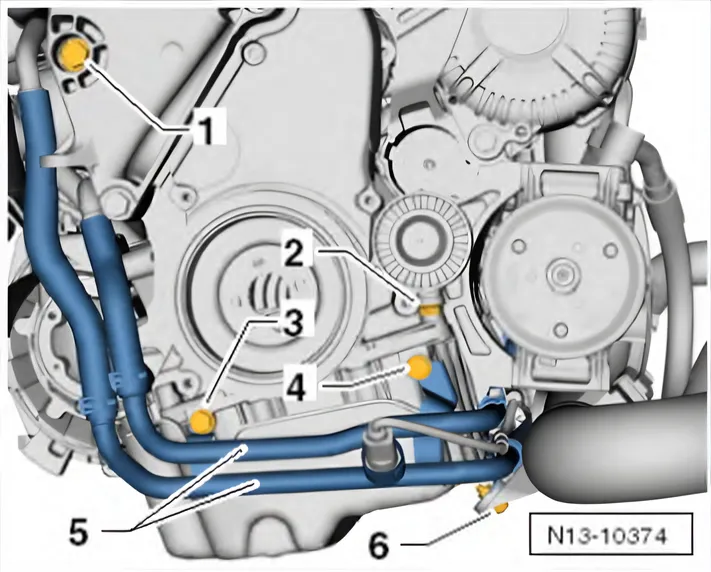
- Unscrew bolts -3, 4, 6-.
- Carefully push coolant lines -5- slightly to the side.
- To create space to remove bolt for idler roller/poly V-belt -2-.
Continued for all vehicles
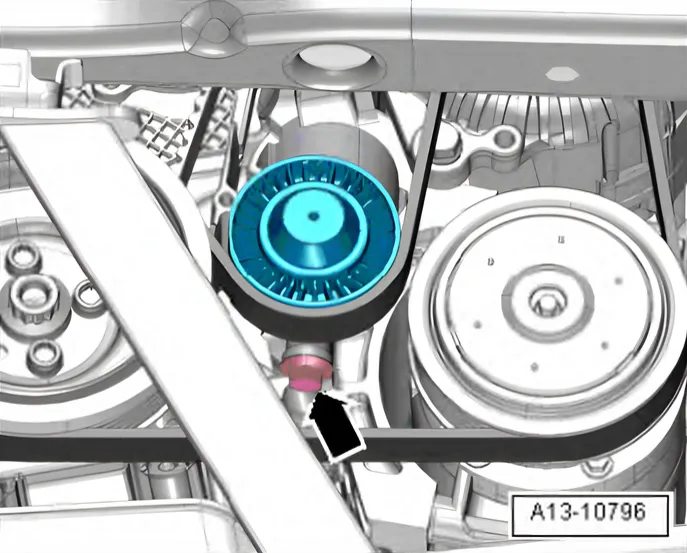
- Unscrew bolt for poly V-belt idler roller -arrow- until poly V-belt can be removed easily.
- Remove poly V-belt.
Installing
- Using a brush, coat guide surfaces of idler roller with lubricating paste. ⇒ Electronic Parts Catalogue (EKTA) G 052 751 A1.
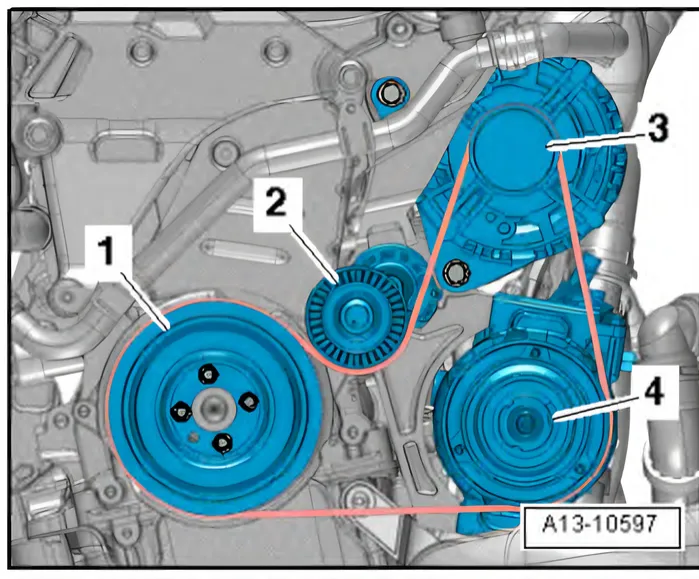
- Fit poly V-belt on poly V-belt pulley:
- 1 Vibration damper
- 2 Idler roller
- 3 Alternator
- 4 Air conditioner compressor
- Now insert idler roller, with its bolt, into guide of ancillary bracket.
Tightening sequence for poly V-belt idler roller.
- Tighten bolt in 5 stages.
| Stage | Bolt | Specified torque/turning further angle |
|---|---|---|
| 1) | -2- | Screw in by hand as far as stop • the poly V-belt is tensioned |
| 2) | -2- | turn until tensioning roller bolt reaches stop • the poly V-belt is tensioned further |
| 3) | -2- | Turn back 90° |
| 4) | -2- | 30 Nm |
| 5) | -2- | Turn 90° further |
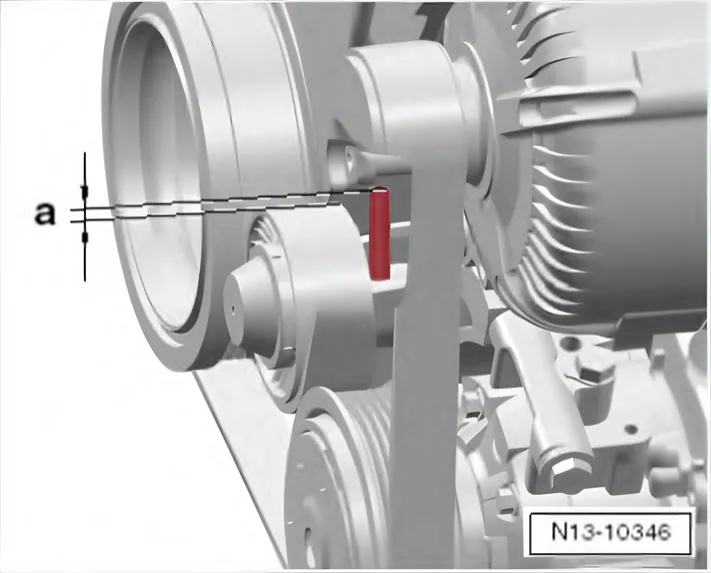
- Now check, as shown in illustration, whether the end of the bolt for idler roller/poly V-belt protrudes over the running surfaces of the idler roller. Dimension -a- = approx. 2.5 mm.
This ensures that the idler roller bolt was tightened up to its end position.
Polo
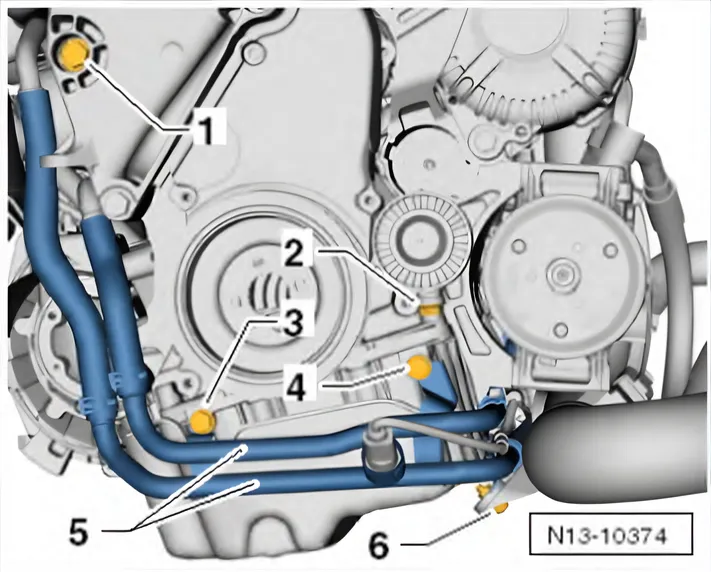
- Restore coolant lines -5- to their installation position, tighten -3, 4, 6-. 8 Nm.
Continued for all vehicles
- Turn engine at least one turn in direction of rotation at the belt pulley/vibration damper central bolt.
On completing work:
- Start engine and check belt running.
- If necessary, install front right wheel housing liner.
- Install noise insulation:
Polo ⇒ General body repairs, exterior; Rep. gr. 50; Noise insulation; Assembly overview - noise insulation
1.2.3 Removing and installing poly V-belt, poly V-belt drive with tensioning element and air-conditioning compressor
Special tools and workshop equipment required
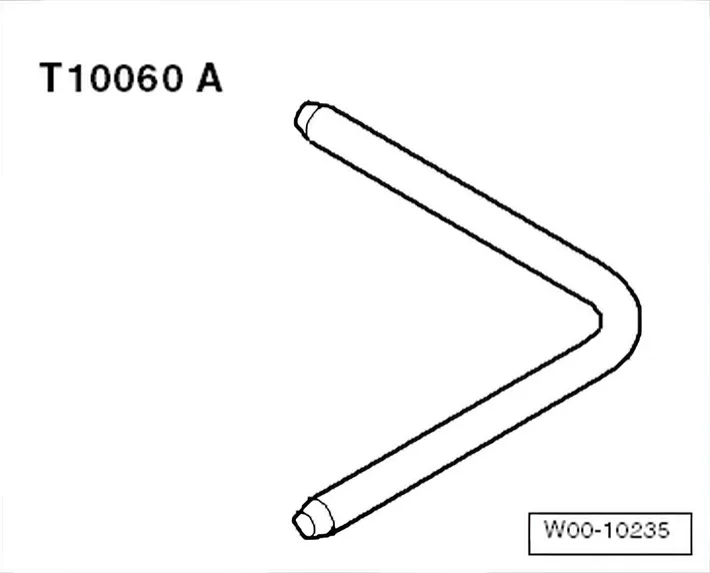
- Locking pin - T10060 A-
Removing
- Remove noise insulation:
Polo ⇒ General body repairs, exterior; Rep. gr. 50; Noise insulation; Assembly overview - noise insulation
- Mark the direction of travel of the poly V-belt.
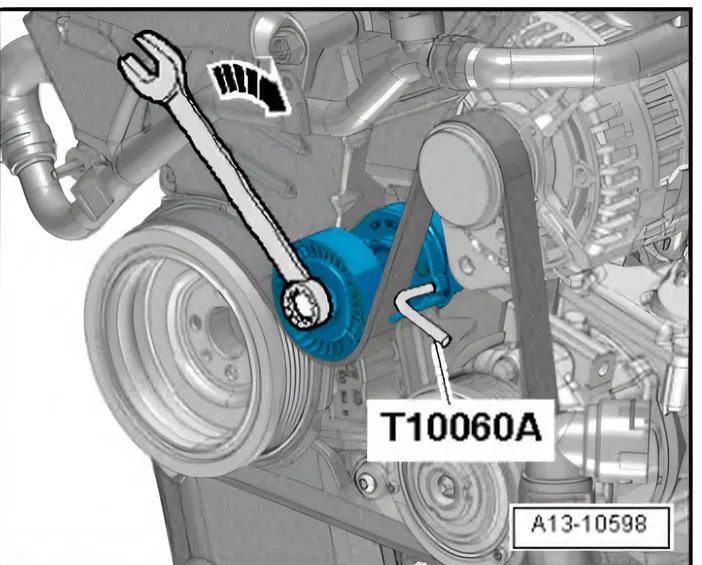
- Swing tensioning element in direction of arrow to relieve tension on poly V-belt.
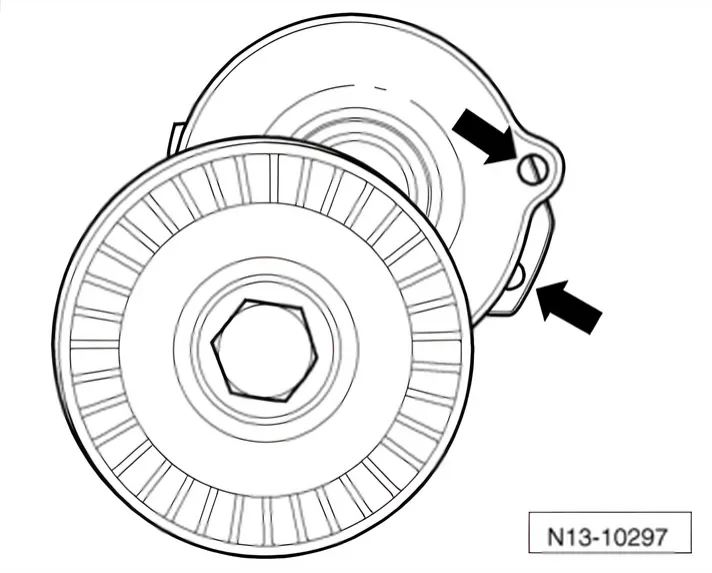
- Align holes -arrows- and lock tensioning element in position with locking pin - T10060 A-.
- Remove poly V-belt.
Installing
- Install in reverse order.
- Fit poly V-belt on pulleys.
- 1 Crankshaft
- 2 Tensioning element
- 3 Alternator
- 4 Air conditioner compressor
On completing work:
- Start engine and check belt running.
Tightening torques on this page
2 torques
1.2.2 Removing and installing poly V-belt, poly V-belt drive with tensioning roller and air-conditioning compressorTo the table ↑
| Part | Torque |
|---|---|
| 4) | 30 Nm |
1.2.2 Removing and installing poly V-belt, poly V-belt drive with tensioning roller and air-conditioning compressorTo the steps ↑
| Step | Torque |
|---|---|
| Restore coolant lines -5- to their installation position, tighten -3, 4, 6-. 8 Nm. | 8 Nm |