
1.6 TDI CR engine (EA189) · Cylinder head, valve gear · Valve gear
Valve gear – assembly overview and fastening
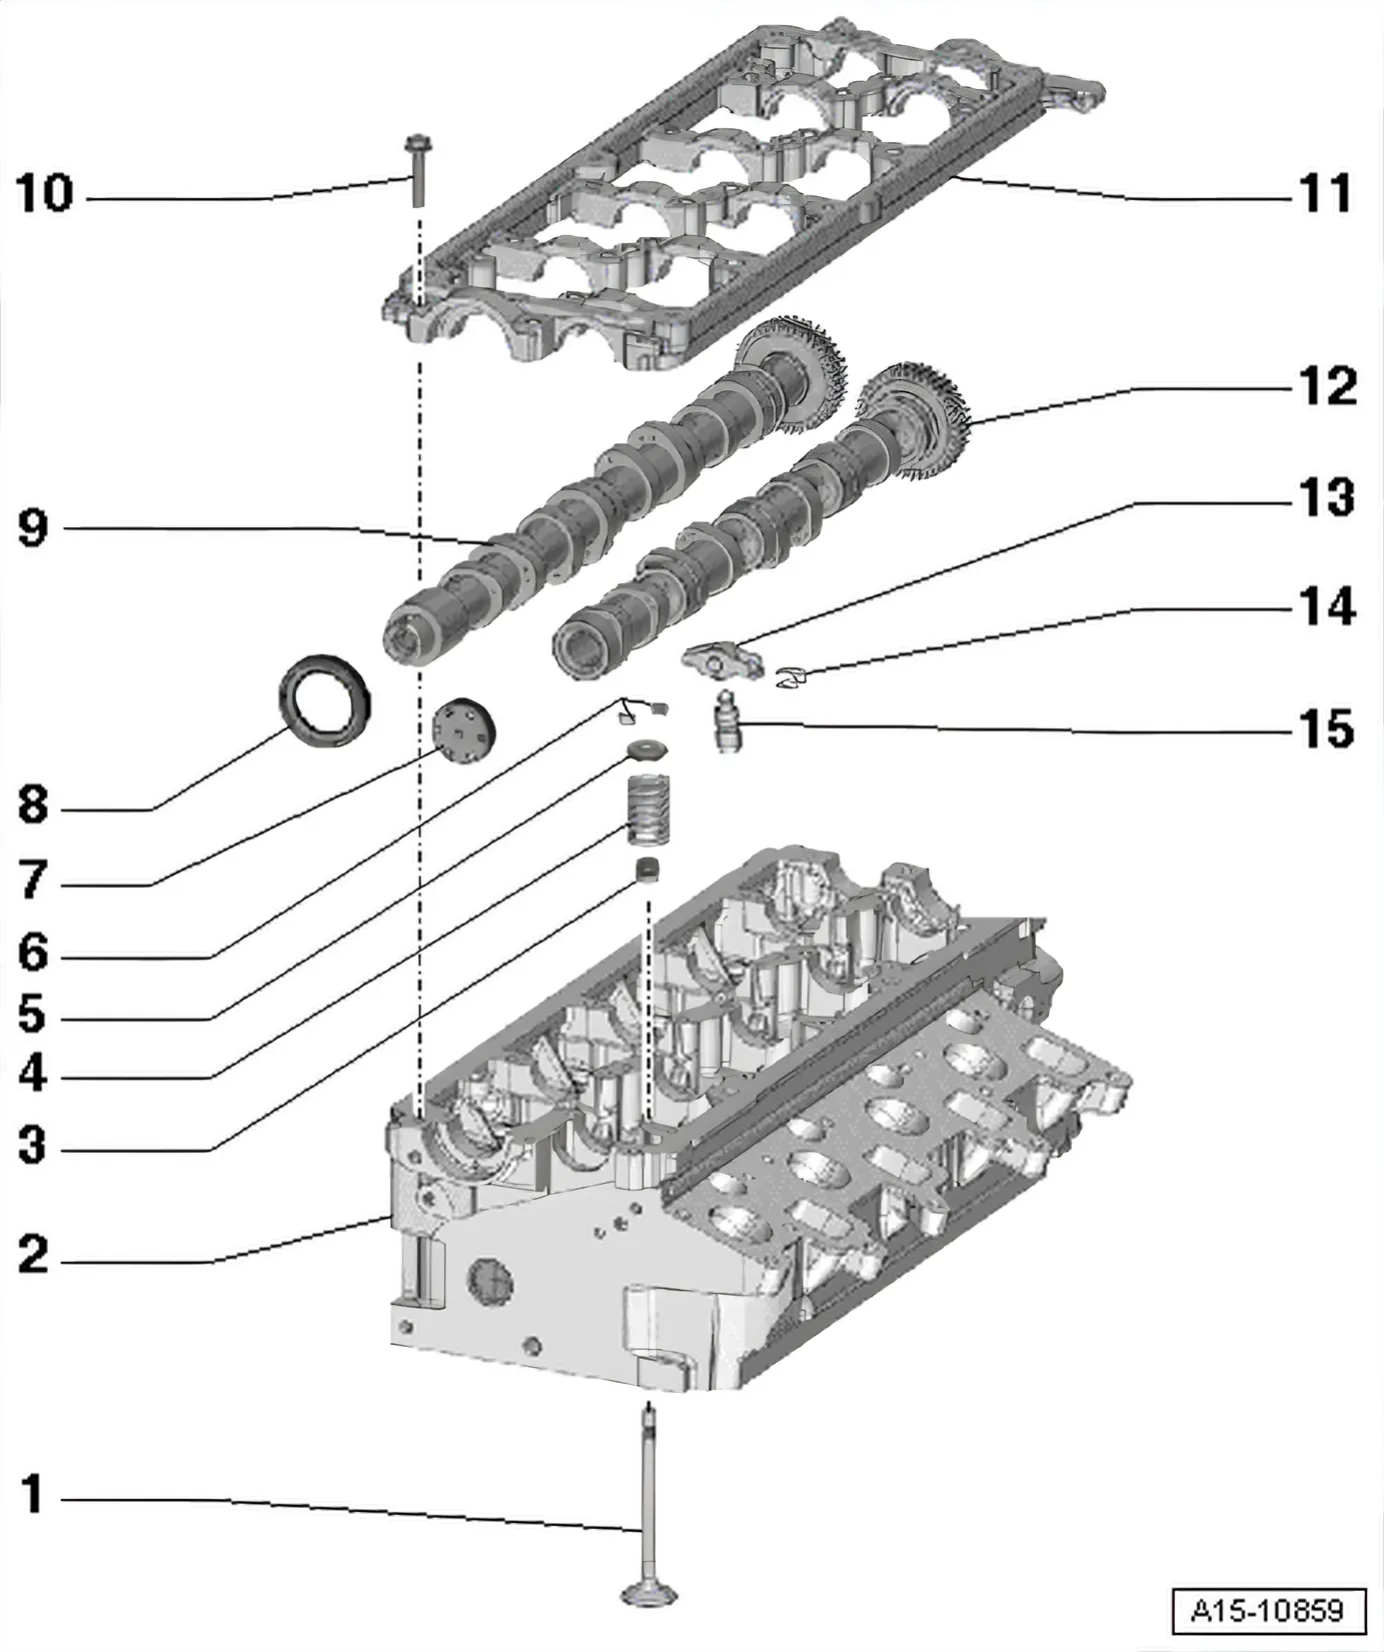
- 1 Valve
- Do not rework; only grinding-in is permissible
- Mark installation position for re-installation.
- Checking ⇒ 4.4 Checking valves
- Valve dimensions ⇒ 4.1 Valve dimensions
- Checking valve guides ⇒ 4.3 Checking valve guides
- 2 Cylinder head
- See note ⇒ 1.1 Assembly overview - cylinder head.
- Removing and installing ⇒ 1.2 Removing and installing cylinder head
- 3 Valve stem seal
- Renew with cylinder head installed ⇒ 3.7 Removing and installing valve stem seal
- Renewing with cylinder head removed ⇒ 3.7.2 Removing and installing valve stem seals with cylinder head removed.
- 4 Valve springs
- 5 Valve spring plate
- 6 Valve cotters
- 7 Cap
- Renew
- Removing: With retaining frame installed, pierce one side of cap with an awl and pry out.
- Installing: Drive in without sealant using an appropriate thrust piece.
- Drive in depth 1 to 2 mm
- 8 Oil seal
- 9 Exhaust camshaft
- Removing and installing ⇒ 3.5 Removing and installing camshaft
- Measuring axial clearance ⇒ 3.2 Measuring axial play of camshaft.
- Measuring radial clearance ⇒ 3.3 Measuring radial play of camshaft
- 10 Bolt
- Sequence when loosening
- Specified torque and tightening sequence ⇒ 3.1 Assembly overview - valve gear
- 11 Ladder frame
- With integrated camshaft bearings.
- Removing and installing ⇒ 3.5 Removing and installing camshaft
- 12 Inlet camshaft
- Removing and installing ⇒ 3.5 Removing and installing camshaft
- Measuring axial clearance ⇒ 3.2 Measuring axial play of camshaft.
- Measuring radial clearance ⇒ 3.3 Measuring radial play of camshaft
- 13 Roller rocker fingers
- Mark installation position
- Do not interchange
- Check roller bearing for ease of movement.
- Oil contact surface
- Removing and installing ⇒ 3.7 Removing and installing valve stem seal
- 14 Retaining clip
- For hydraulic compensation element.
- 15 Hydraulic compensation element
- Mark installation position for re-installation.
- Lubricate contact surfaces before installing.
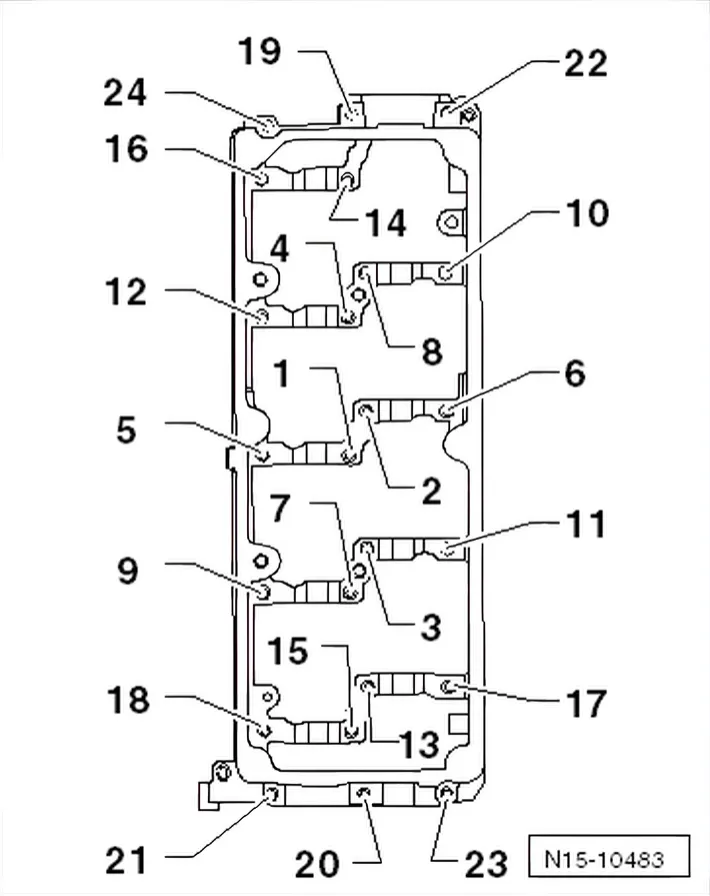
Retaining frame - specified torques and installation sequence
- Tighten bolts in 2 stages in the sequence shown:
| Stage | Bolts | Specified torque |
|---|---|---|
| 1) | -1 … 24- | Screw in by hand as far as stop • The retaining frame must make contact with the cylinder head over the entire contact surface. |
| 2) | -1 … 24- | 10 Nm |