
Body repairs – exterior · Rear doors, door components · Door components
Removing and installing door lock
Special tools and workshop equipment required
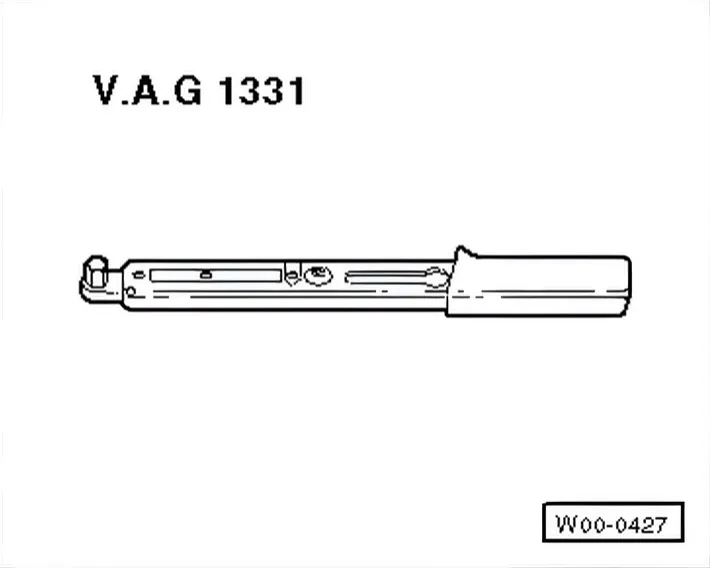
- Torque wrench - V.A.G 1331-
Removing
- Remove rear door trim ⇒ General body repairs, interior; Rep. gr. 70; Rear door trims; Removing and installing rear door trim.
- Remove cover ⇒ 2.8 Removing and installing inner door cover.
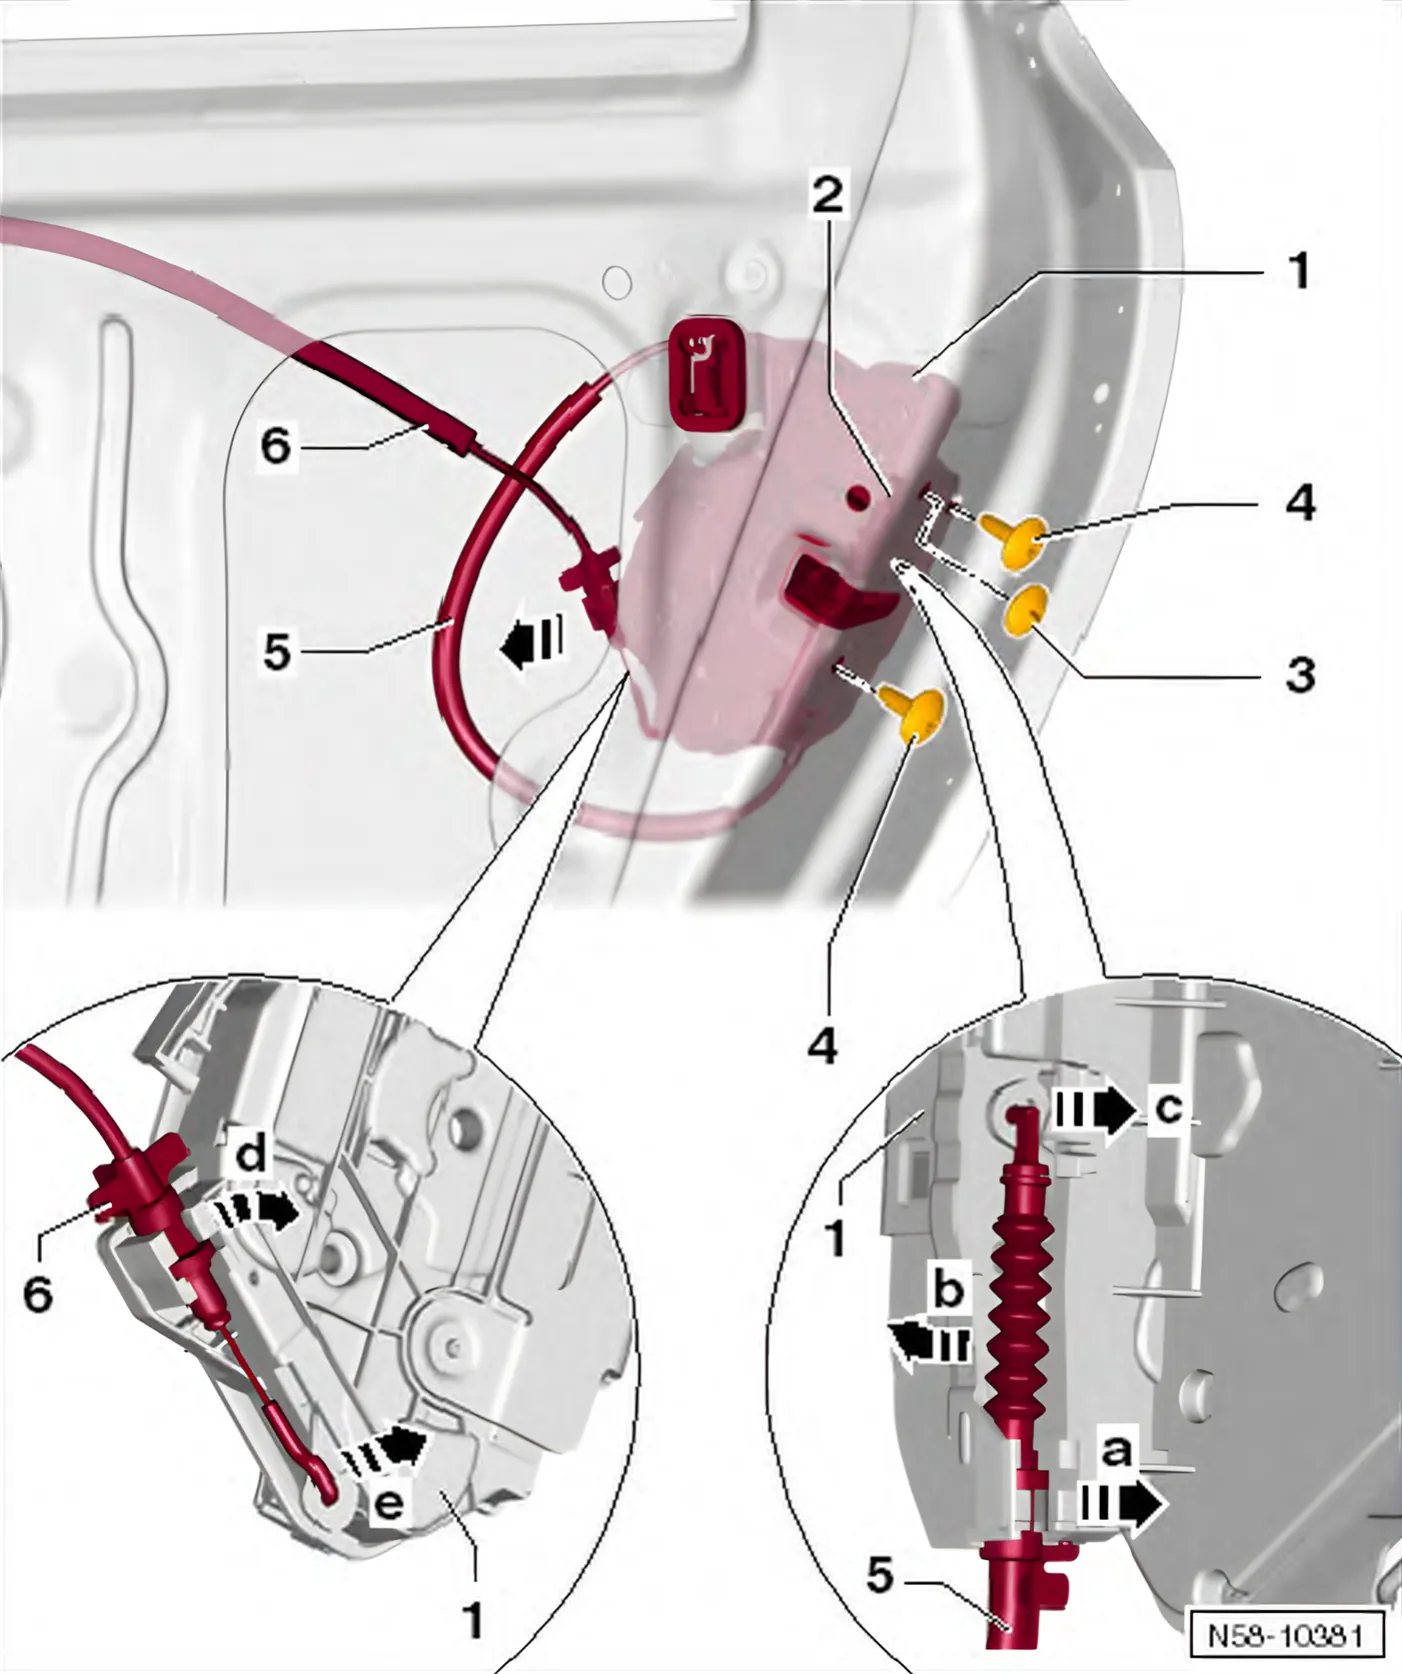
- Unscrew bolts -4-.
- Remove lock -1- from door -2-.
Releasing Bowden cable to mounting bracket
- Turn Bowden cable -5- 45° and take out of holder -arrow a-.
- Swing Bowden cable -arrow b- until it can be threaded out of eye in door lock -1- -arrow c-.
Releasing Bowden cable to interior door handle
- Turn Bowden cable -6- 45°, and remove it from retainer.
- Swing Bowden cable -arrow d- until it can be threaded out of eye in door lock -1- -arrow e-.
Installing
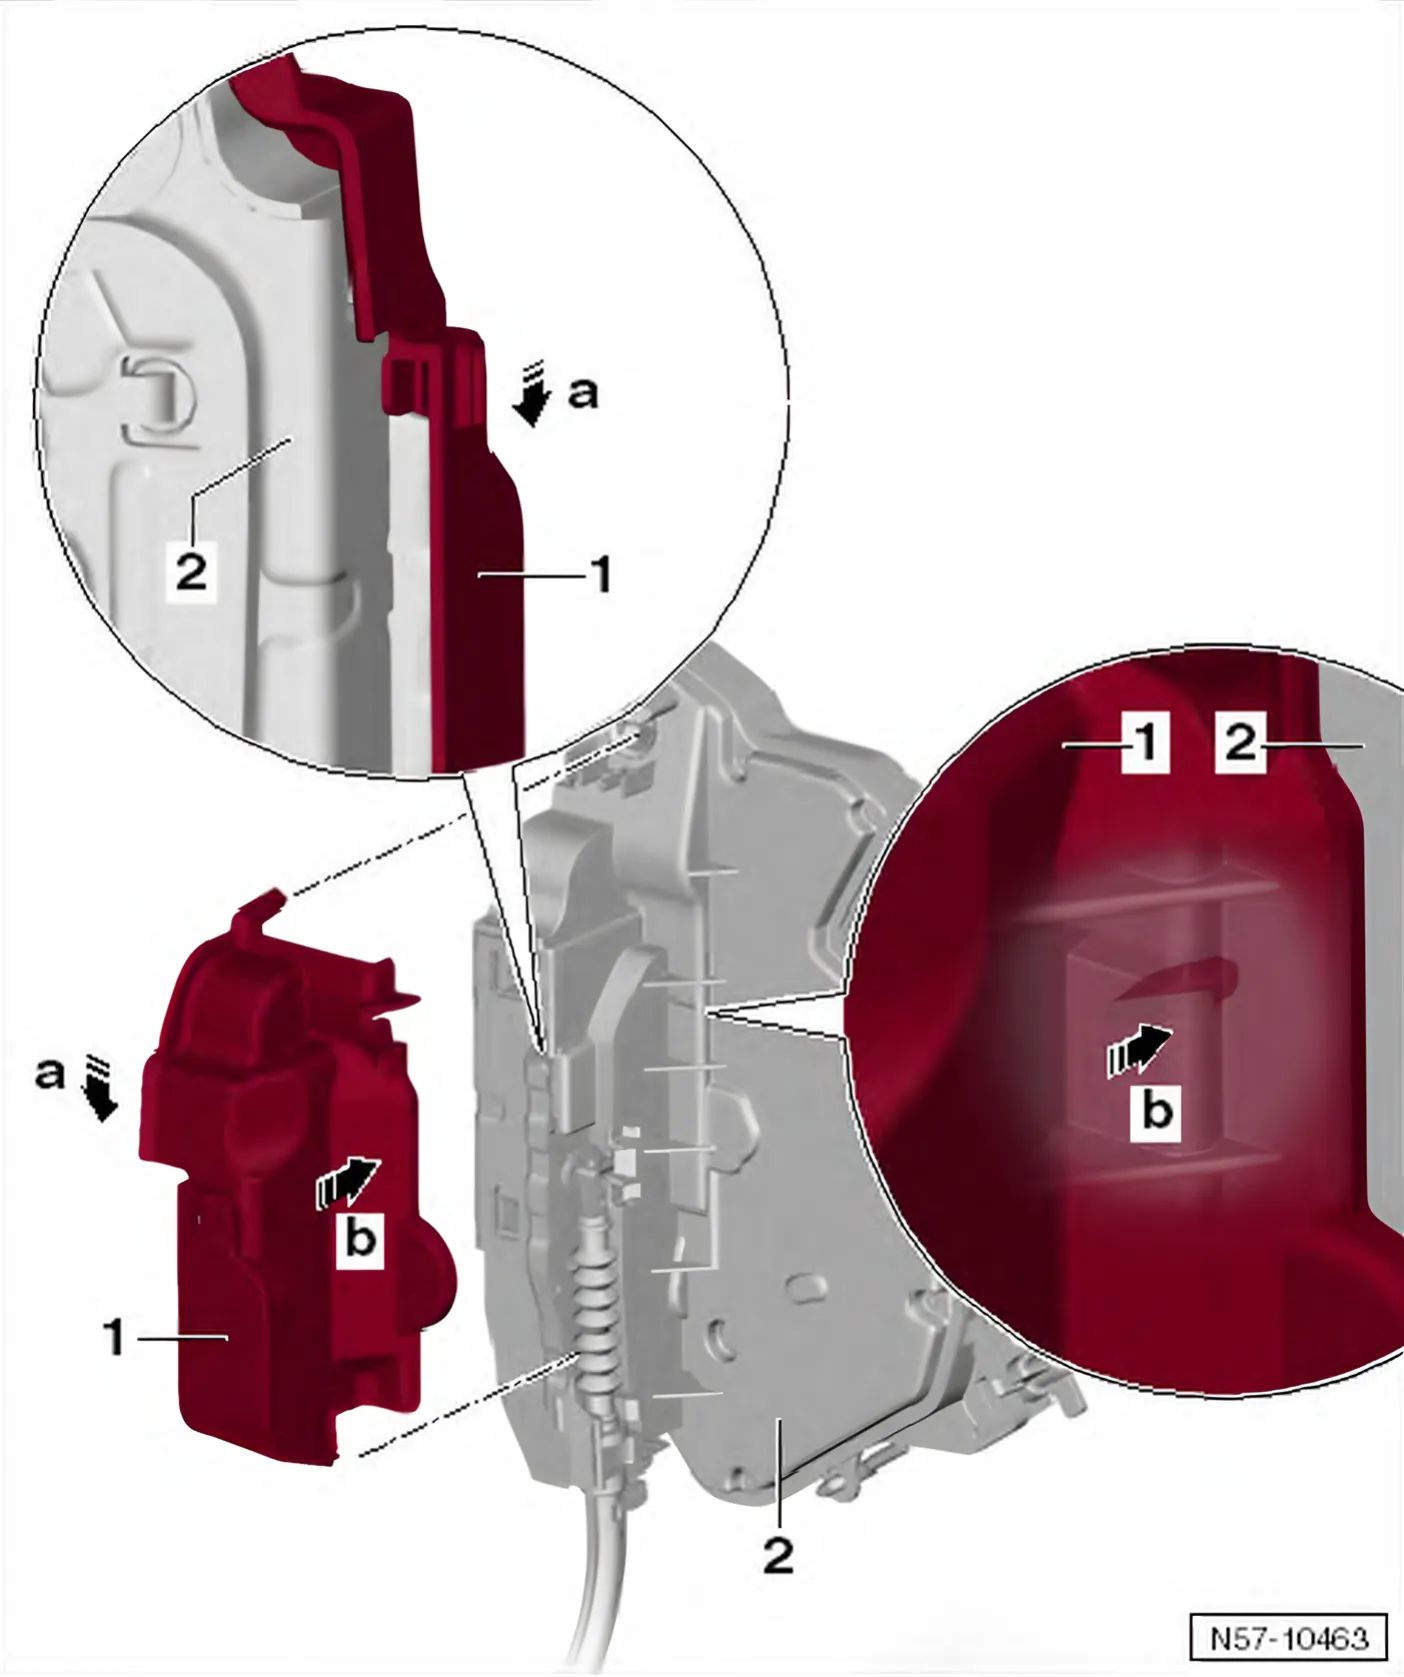
- Push cover -1- onto guide on door lock -2- -arrow a-.
- Push on cover -1- so that it locks into place on door lock in middle area of lock -2- -arrow b-.
Installation is carried out in the reverse sequence of removal.
- Specified torque of bolts -4-: 18 Nm.
Afterwards, a functional check must be performed, as an incorrectly adjusted or incorrectly engaged cable cannot open the lock.