
Running gear, axles, steering · Front suspension · Lower suspension link, swivel joint
Removing and installing lower suspension link
⇒ 4.1.1 Removing and installing lower suspension link, vehicles with manual gearbox
4.1.1 Removing and installing lower suspension link, vehicles with manual gearbox
Special tools and workshop equipment required
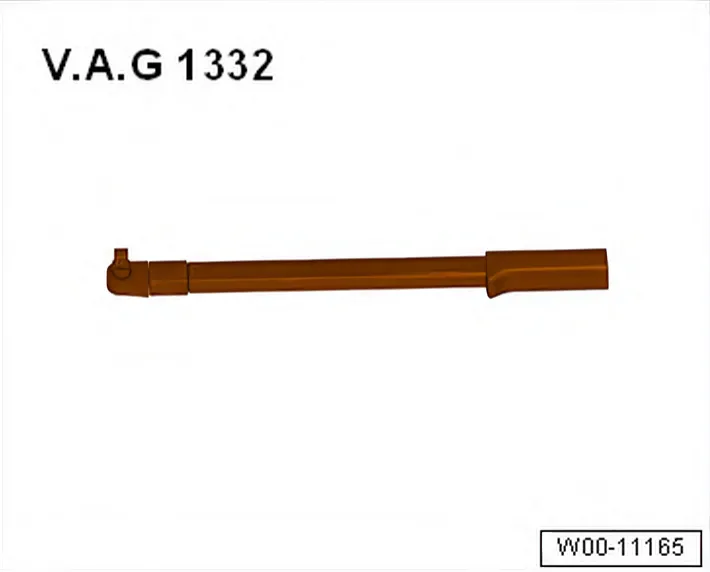
- Torque wrench - V.A.G 1332-
Removing
- Lift vehicle far enough to take weight off front axle.
- Remove front wheel.
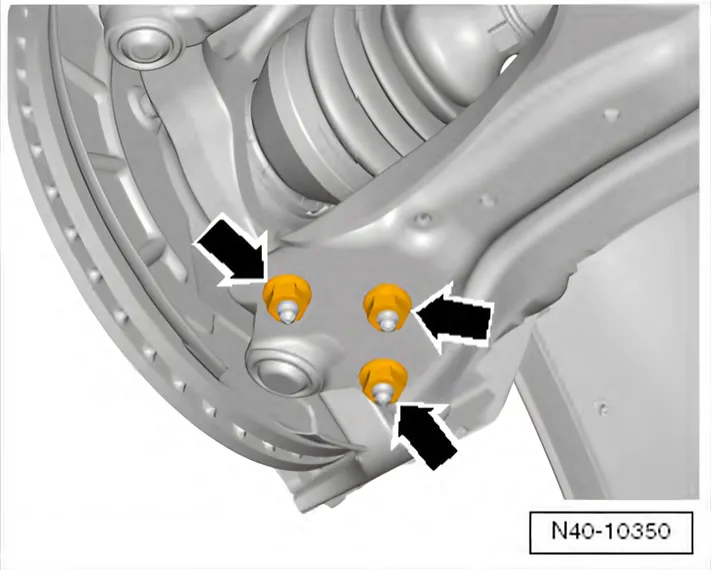
- Remove nuts -arrows-
- Pull suspension link out of swivel joint and turn wheel bearing housing outwards to relieve suspension link.
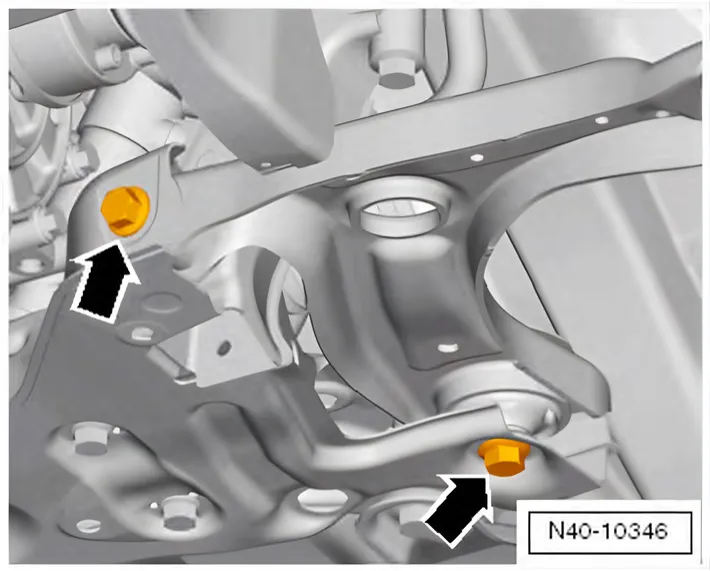
- Unscrew bolts -arrows-.
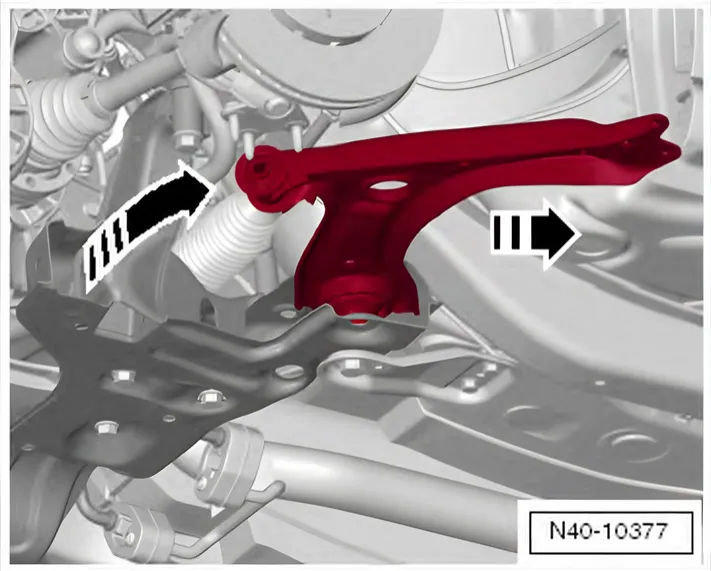
- Swivel suspension link backwards and pull out of subframe in direction of -arrow-.
Installing

- Insert rear suspension link into subframe in direction of -arrow- and swivel forwards.
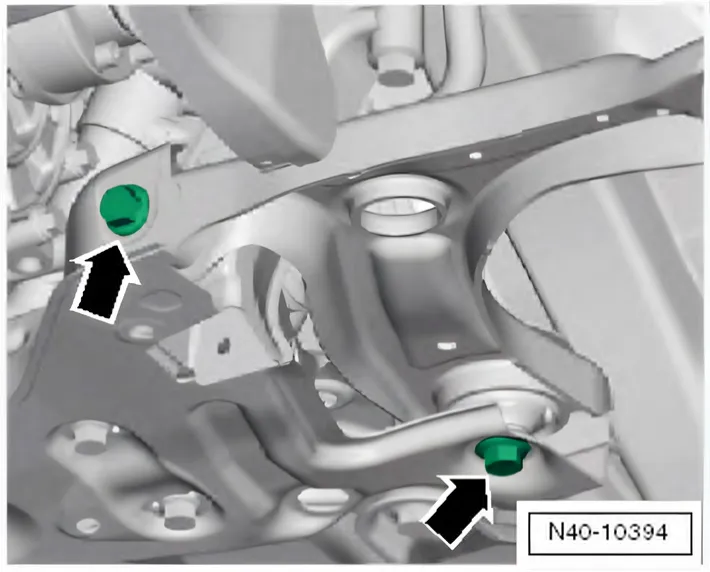
- Fit and tighten bolts -arrows-.
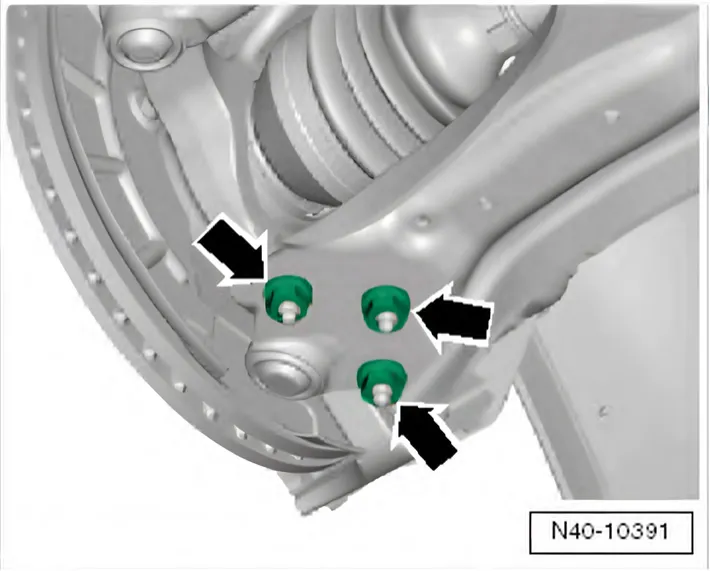
- Insert swivel joint in suspension link and tighten bolts -arrows-.
Use new nuts!
6C 2014–2017
Continue installation in reverse order of removal.
- Install wheel and tighten bolts or nuts ⇒ 1.5 Specified torques for wheel bolts.
Specified torques
| Component | Specified torque |
|---|---|
| Suspension link to subframe ♦ Use new bolts. ♦ Tighten bolts in unladen state. | 70 Nm +90° |
| 6R 2009–2014 Swivel joint to suspension link ♦ Use new nuts. | 100 Nm |
| 6C 2014–2017 Swivel joint to suspension link ♦ Use new nuts. | 40 Nm +45° |
The two manuals give different torques for the same swivel joint nuts (N10332002): 100 Nm in the Polo 6R manual, 40 Nm +45° in the Polo 6C manual. Other cars with the same swivel joints differ too: the Audi A1 8X manual gives 100 Nm, the Škoda Fabia II manual 40 Nm +45°.
6C 2014–2017
4.1.2 Removing and installing lower suspension link, vehicles with automatic or dual clutch gearbox
Only what differs from the procedure above; everything else is as above.
Special tools and workshop equipment required

- Engine support - T10533-
Removing
- Remove pendulum support ⇒ Rep. gr. 10; Assembly mountings; Removing and installing pendulum support.
- Loosen double clamp of exhaust system ⇒ Rep. gr. 26; Exhaust pipes/silencers; Assembly overview - silencer.
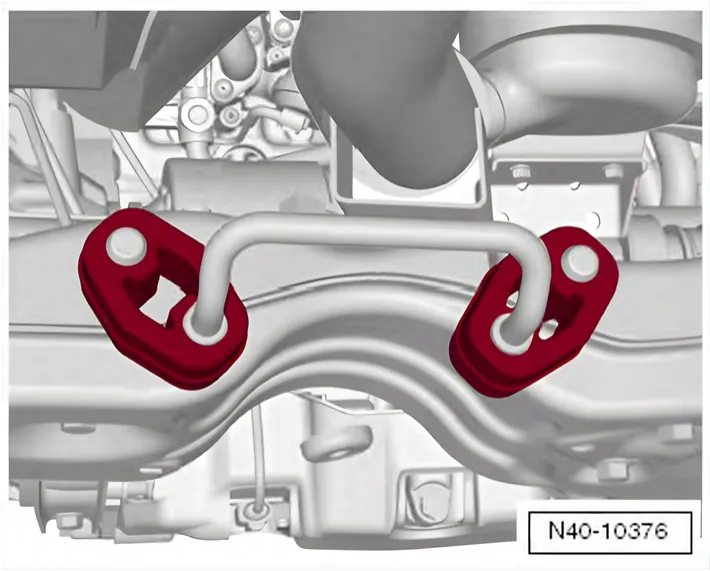
- Pull retaining rings for exhaust pipe from subframe.
- Screw engine support - T10533- completely together to make it as short as possible.
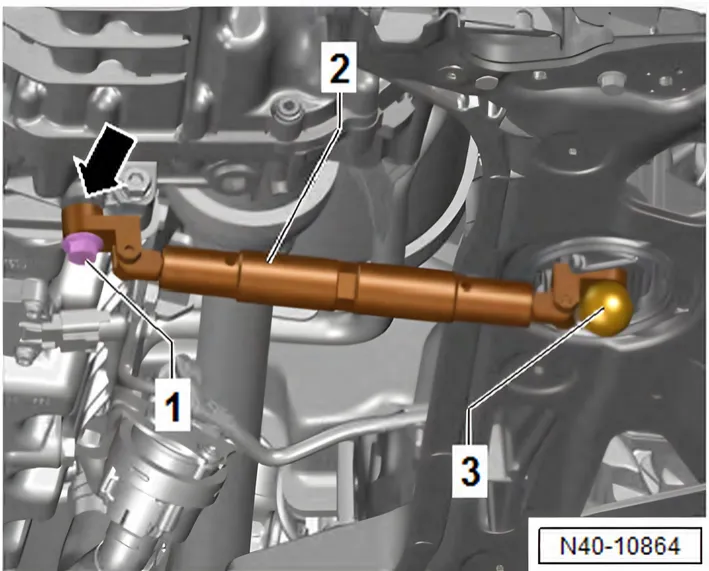
- Bolt engine support - T10533- -2- onto gearbox with the thicker bracket -arrow-. Use the shorter pendulum support securing bolt -1-.
- Press engine and gearbox far enough forward so that threaded rod - T10533/5- -3- can be inserted in pendulum support mounting.
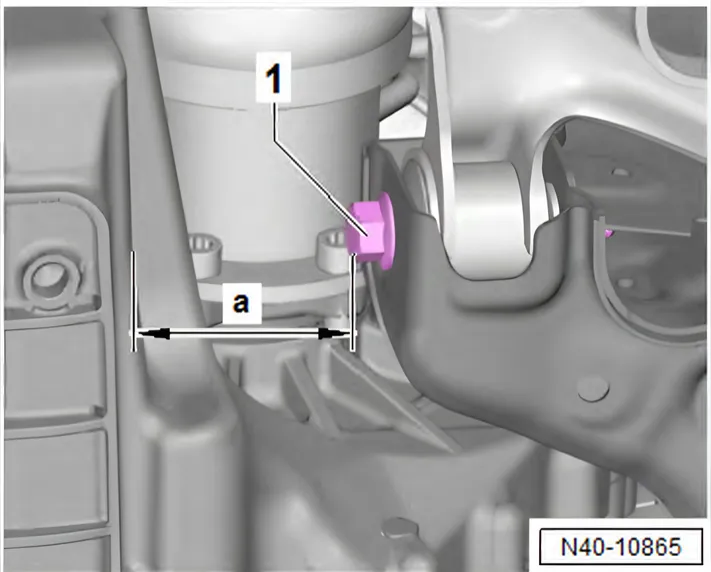
- Extend engine support - T10533- until distance -a- between suspension link bolt -1- and gearbox is attained.
a = 85 mm
Installing
Use new nuts!
- Bolt on double clamp for exhaust system ⇒ Rep. gr. 26; Exhaust pipes, silencers; Separating exhaust pipes and silencers.
- Install pendulum support ⇒ Rep. gr. 10; Assembly mountings; Removing and installing pendulum support.
Specified torques
| Component | Specified torque |
|---|---|
| Suspension link to subframe ♦ Use new bolts. ♦ Tighten bolts in unladen state. | 70 Nm +90° |
| 6R 2009–2014 Swivel joint to suspension link ♦ Use new nuts. | 100 Nm |
| 6C 2014–2017 Swivel joint to suspension link ♦ Use new nuts. | 40 Nm +45° |
The two manuals give different torques for the same swivel joint nuts (N10332002): 100 Nm in the Polo 6R manual, 40 Nm +45° in the Polo 6C manual. Other cars with the same swivel joints differ too: the Audi A1 8X manual gives 100 Nm, the Škoda Fabia II manual 40 Nm +45°.
6C 2014–2017
- Bolts for pendulum support ⇒ Rep. gr. 10; Assembly mountings; Assembly overview - assembly mountings.
- Double clamp for exhaust pipes ⇒ Rep. gr. 26; Exhaust pipes/silencers; Assembly overview - silencer.