
Running gear, axles, steering · Front suspension · Drive shaft
Checking inner constant velocity joint
Removing
Joint must be dismantled:
- to replace grease,
- if joint is severely soiled or
- if contact surfaces of balls are to be checked for wear and damage
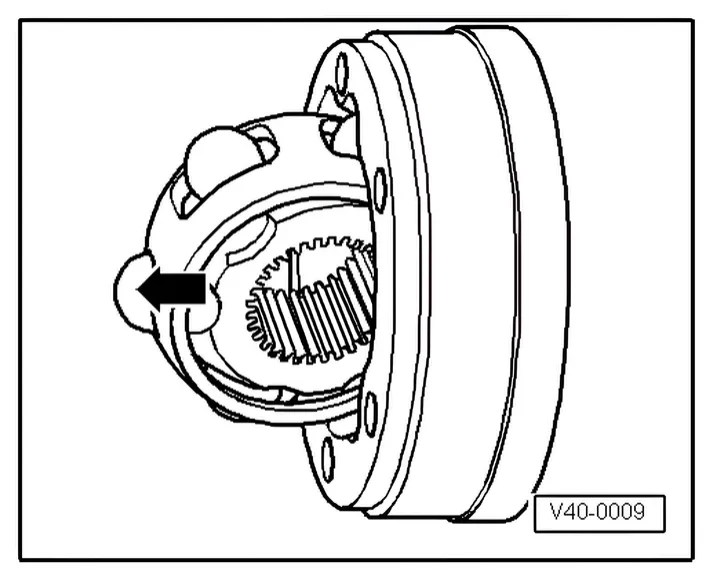
- Swing ball hub and ball cage.
- Press out joint in -direction of arrow-.
- Press balls out of cage.
The ball hub and joint body are paired. Do not interchange them.
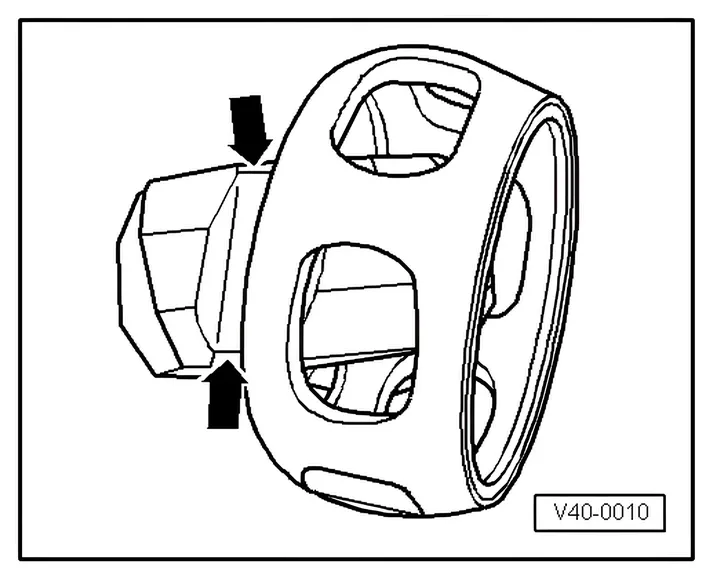
- Tip ball hub out of ball cage via ball track -arrows-.
- Check joint body, ball hub, ball cage and balls for pitting and traces of seizing.
Excessive circumferential backlash in the joint is noticeable during load change jolts. In this case the joint must be replaced. Smoothing and traces of wear of the balls are no reason to renew the joint.
Installing
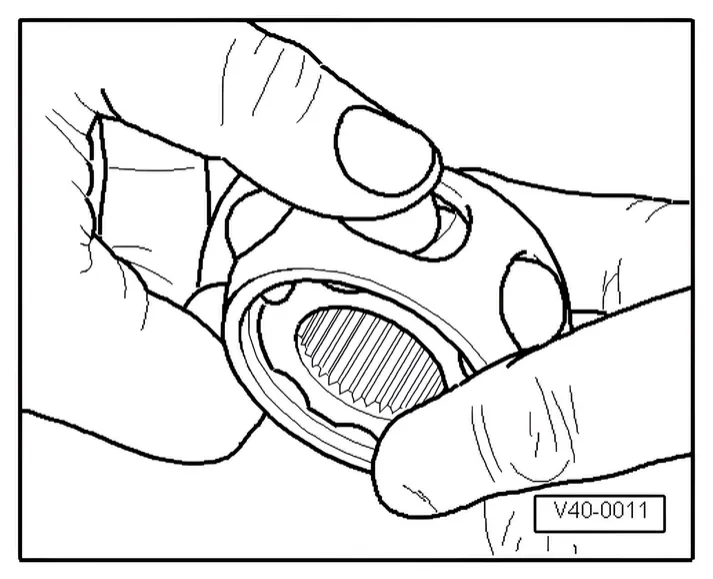
- Insert hub into cage via the two chamfers. The hub can be installed in any position. Press balls into cage.
- Insert hub with cage and balls at a right angle to joint body.
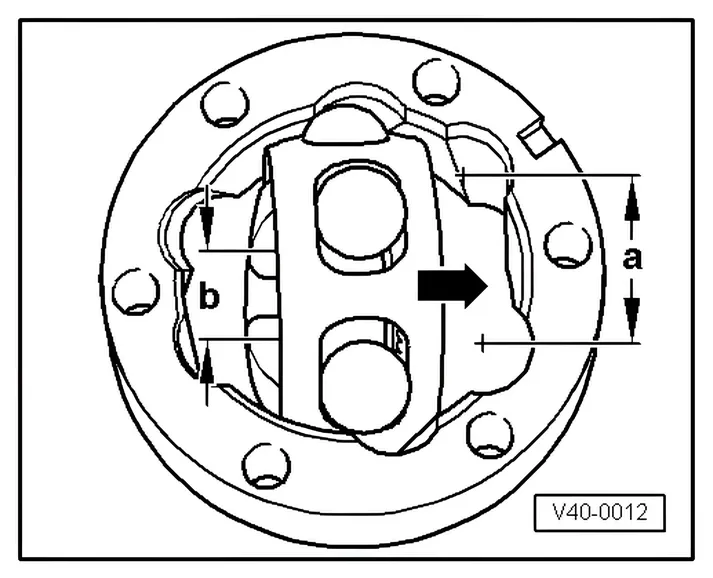
When inserting, ensure that the wide spacing -a- on the joint body is aligned with the narrow spacing -b- on the hub after it is swung in.
Chamfer on internal diameter of ball hub (splines) must face large diameter of joint body.
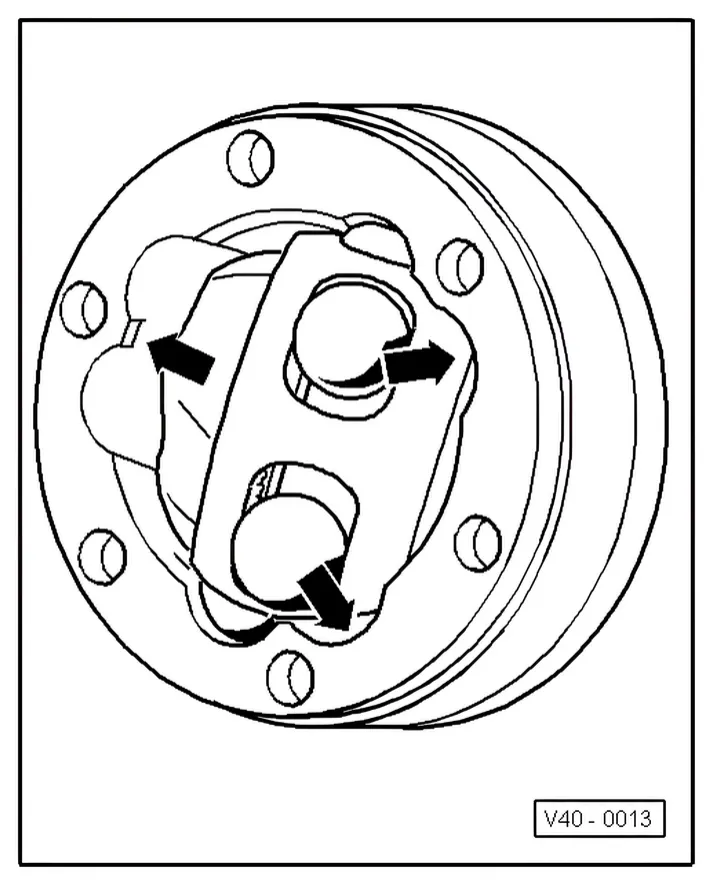
- Swivel the hub into the joint body; at the same time the hub must be swivelled out of the cage -arrows- far enough to allow the balls to fit into the ball tracks.
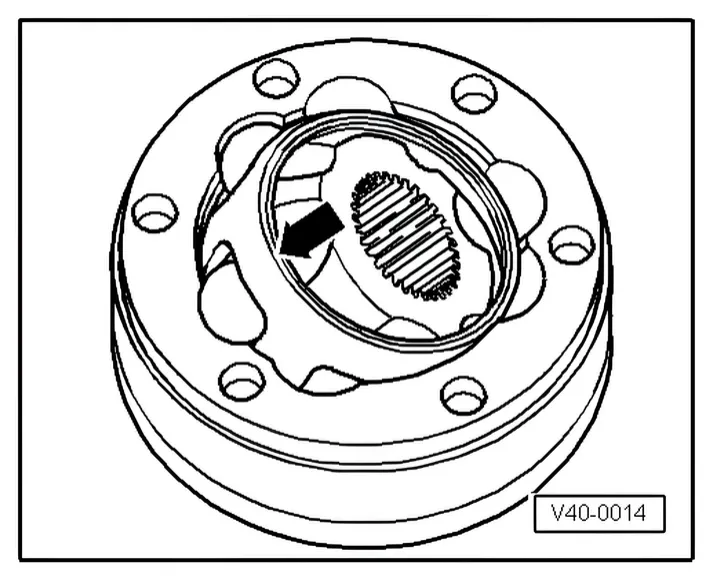
- Swivel in hub with balls by applying firm pressure to cage -arrow-.
Checking function of constant velocity joint
The constant velocity joint is correctly assembled if the ball hub can be moved by hand backwards and forwards over its entire range of axial movement.