
1.6 TDI CR engine (EA189) · Exhaust system · Exhaust gas temperature regulation
Removing and installing parts of exhaust gas temperature regulation
⇒ 3.2.1 Removing and installing exhaust gas temperature sender 1 G235
⇒ 3.2.4 Removing and installing exhaust gas temperature sender 4 G648, Polo LHD vehicles
⇒ 3.2.5 Removing and installing exhaust gas temperature sender 3 G495, Polo LHD vehicles
⇒ 3.2.6 Removing and installing exhaust gas temperature sender 3 G 495, Polo RHD vehicles
⇒ 3.2.7 Removing and installing exhaust gas temperature sender 4 G 648, Polo RHD vehicles
3.2.1 Removing and installing exhaust gas temperature sender 1 - G235-
Removing
- Separate electrical connector -3- for exhaust temperature sender 1 - G235- and move electrical wire aside.
- Remove noise insulation:
Polo ⇒ General body repairs, exterior; Rep. gr. 50; Noise insulation; Assembly overview - noise insulation
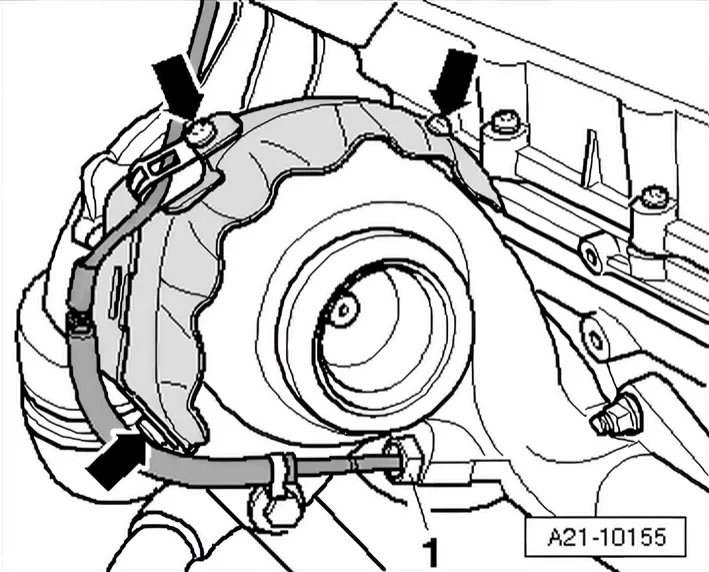
- Unscrew exhaust temperature sender 1 - G235- -item 1- from exhaust manifold.
Installing
Install in reverse order of removal, observing the following.
Installation position of exhaust gas temperature sender -G235-.
Extending the torque wrench - V.A.G 1331- with the spanner from tool set - T10395/7- allows the correct torque of 45 Nm to be achieved.
Lubricate thread of sender using high-temperature paste - G 052 112 A3-.
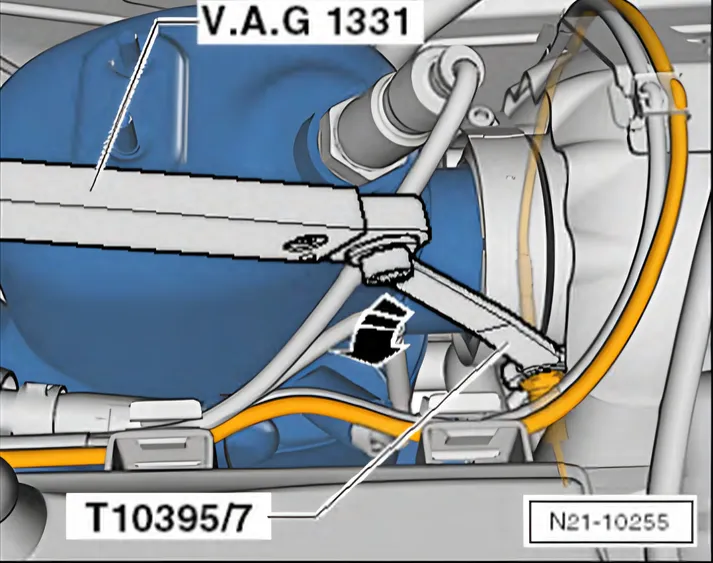
- Screw exhaust gas temperature sensor 1 - G 235- in by hand.
- Then apply tightening torque using torque wrench - V.A.G 1331- together with wrench from tool set - T10395/7-.
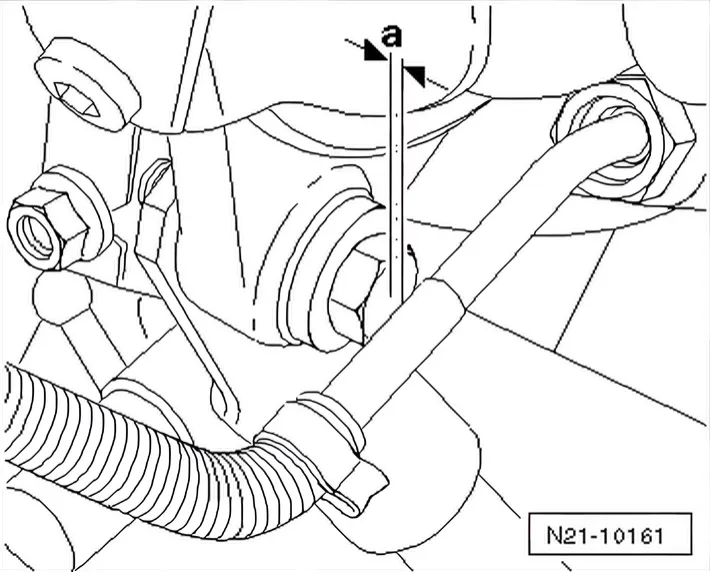
- Angled shaft must have a distance -a- = 3 … 5 mm to bolting of turbocharger support.
3.2.4 Removing and installing exhaust gas temperature sender 4 - G648-, Polo LHD vehicles
Special tools and workshop equipment required
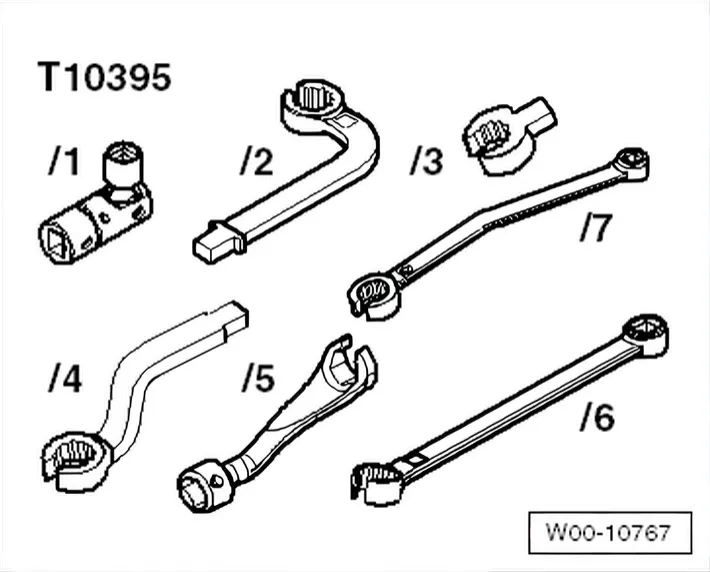
- Tool insert, AF 17 mm - T10395-
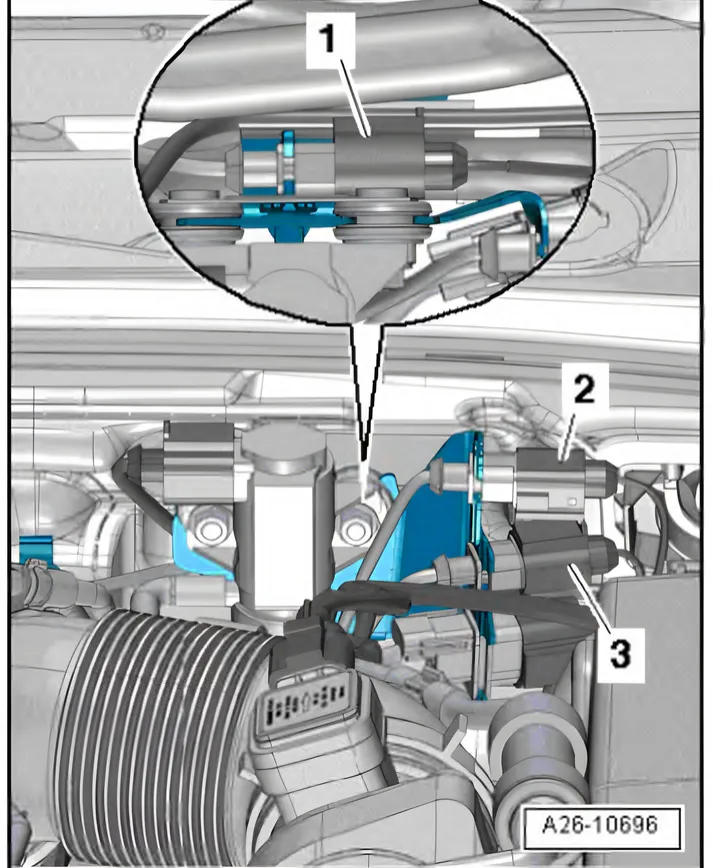
Removing
- Separate electrical connector -2- for exhaust temperature sender 4 - G648- and move electrical wire aside.
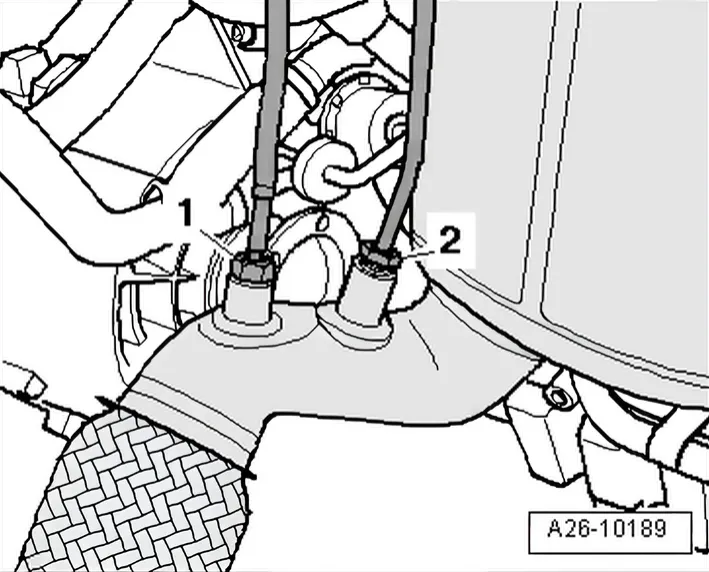
Installing
Install in reverse order of removal, observing the following.
- Specified torque.
3.2.5 Removing and installing exhaust gas temperature sender 3 - G495-, Polo LHD vehicles
Special tools and workshop equipment required
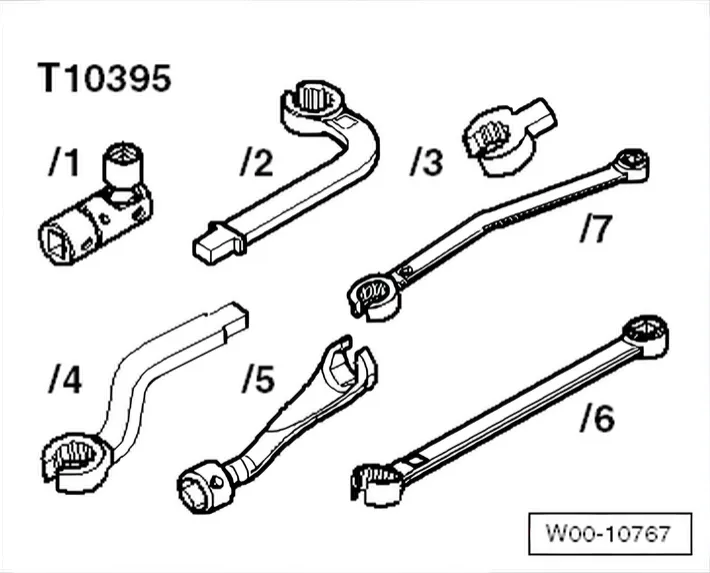
- Tool insert, AF 17 mm - T10395-
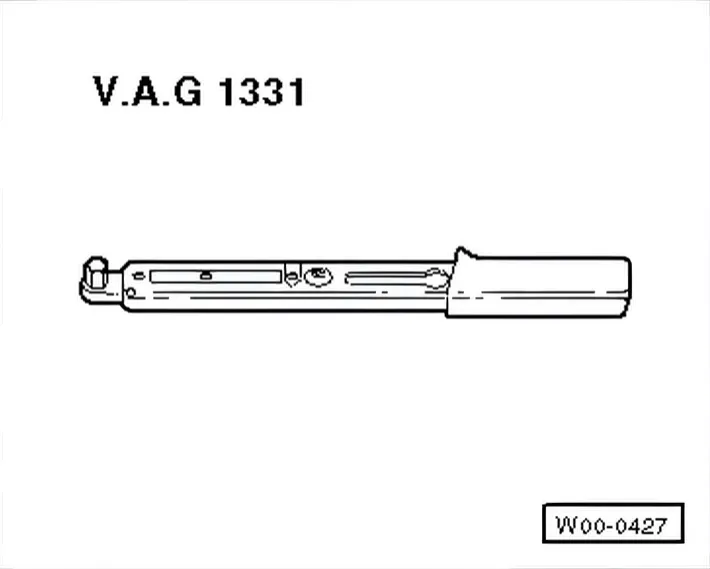
- Torque wrench - V.A.G 1331-
Removing
- Remove Lambda probe - G39- ⇒ 6.2 Removing and installing Lambda probe.
- Separate electrical connector -1- for exhaust temperature sender 3 - G495- and move electrical wire aside.
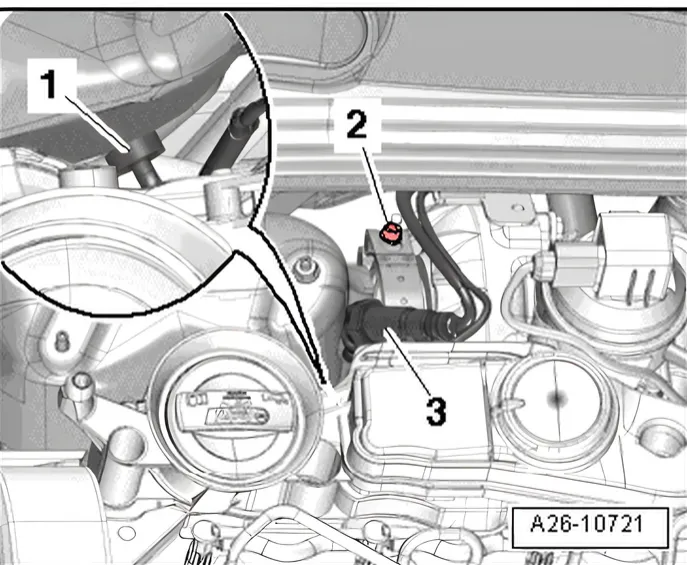
- Unscrew exhaust gas temperature sender 3 - G495- -item 1- using tool from 17 mm tool kit - T10395-.
Installing
Install in reverse order of removal, observing the following.
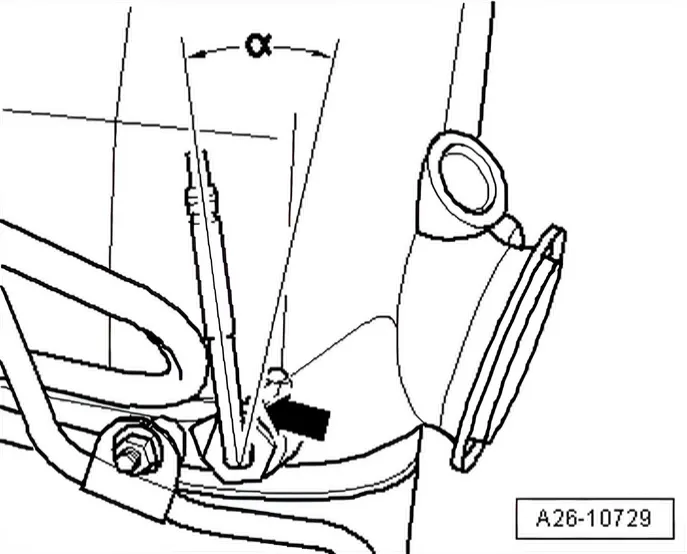
Installation position of temperature sender -G495- -item 1-:
- Angled end facing left side of vehicle.
- Angle -α- to mark -arrow- = approx. 17°.
Extending the torque wrench - V.A.G 1331- with the spanner from tool set - T10395/6- allows the correct torque of 45 Nm to be achieved.
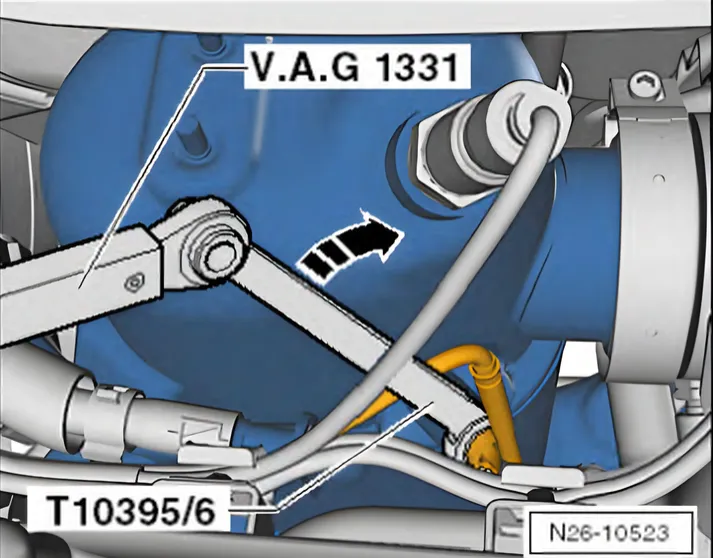
- Screw exhaust temperature sender 1 - G 495- in by hand.
- Then apply tightening torque using torque wrench - V.A.G 1331- together with wrench from tool set - T10395/6-.
3.2.6 Removing and installing exhaust gas temperature sender 3 - G 495-, Polo RHD vehicles
Special tools and workshop equipment required
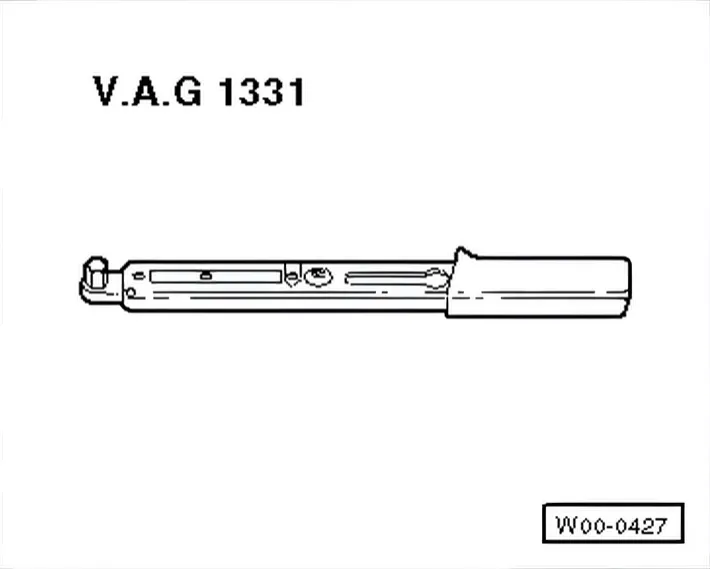
- Torque wrench - V.A.G 1331-
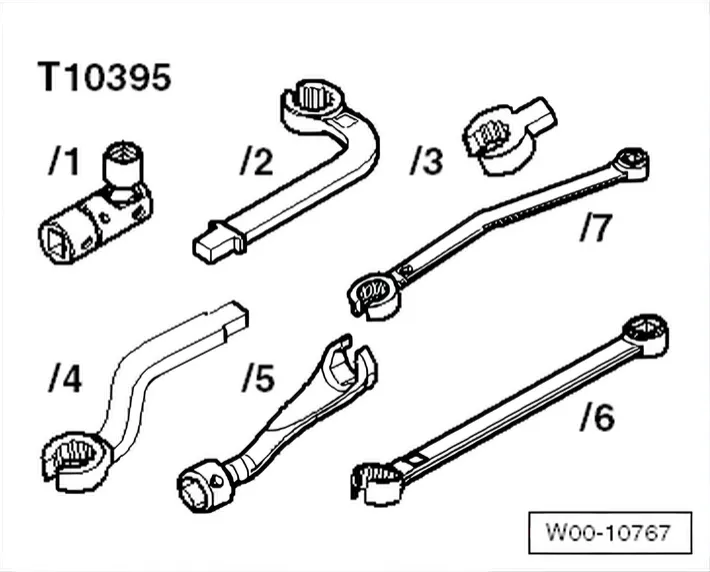
- Tool set - T10395-
Specified torque for exhaust temperature sender 3 - G 495- upstream of particulate filter (right-hand drive)
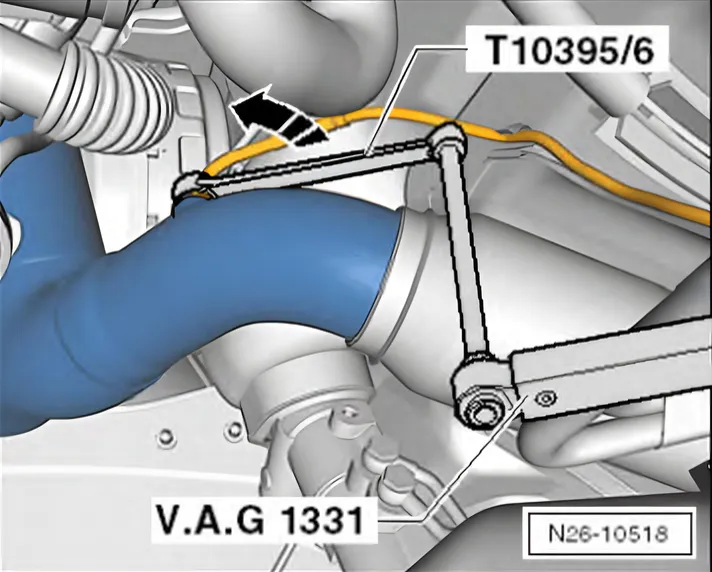
Use torque wrench - V.A.G 1331- with spanner from tool set - T10395/6- to tighten.
Extending the torque wrench - V.A.G 1331- with the spanner from tool set - T10395/6- allows the correct torque of 45 Nm to be achieved.
3.2.7 Removing and installing exhaust gas temperature sender 4 - G 648-, Polo RHD vehicles
Special tools and workshop equipment required
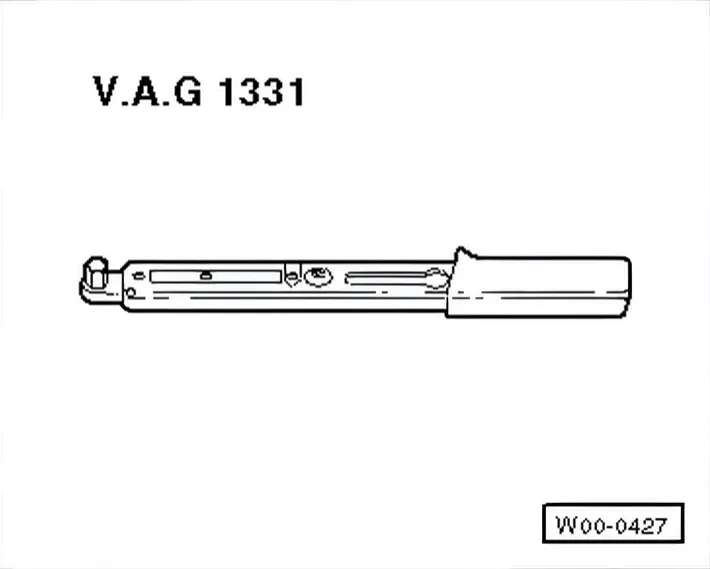
- Torque wrench - V.A.G 1331-
- Tool set - T10395-
Specified torque for exhaust temperature sender 4 - G 648- downstream of particulate filter
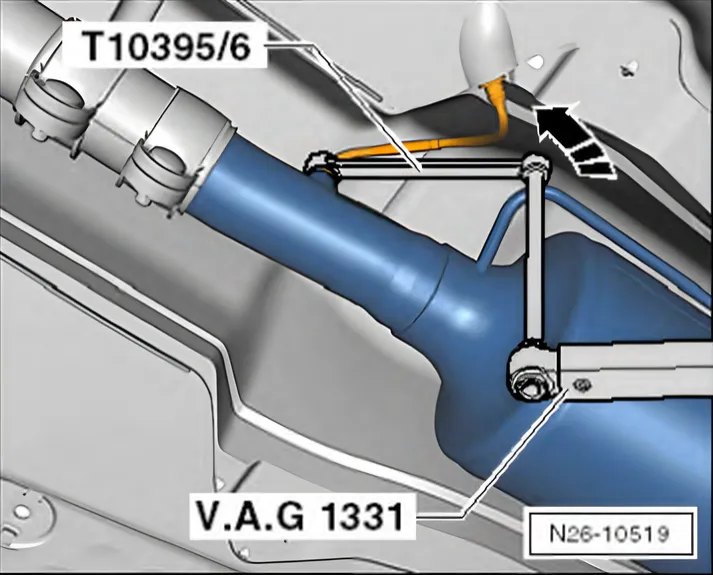
Use torque wrench - V.A.G 1331- with spanner from tool set - T10395/6- to tighten.
Extending the torque wrench - V.A.G 1331- with the spanner from tool set - T10395/6- allows the correct torque of 45 Nm to be achieved.
Tightening torques on this page
4 torques
3.2.1 Removing and installing exhaust gas temperature sender 1 - G235-To the steps ↑
| Step | Torque |
|---|---|
| The torque wrench - V.A.G 1331- must be set to 28 Nm in this case. | 28 Nm |
| Extending the torque wrench - V.A.G 1331- with the spanner from tool set - T10395/7- allows the correct torque of 45 Nm to be achieved. | 45 Nm |
3.2.5 Removing and installing exhaust gas temperature sender 3 - G495-, Polo LHD vehiclesTo the steps ↑
3.2.6 Removing and installing exhaust gas temperature sender 3 - G 495-, Polo RHD vehiclesTo the steps ↑
3.2.7 Removing and installing exhaust gas temperature sender 4 - G 648-, Polo RHD vehiclesTo the steps ↑
| Step | Torque |
|---|---|
| The torque wrench - V.A.G 1331- must be set to 29 Nm in this case. | 29 Nm |
| Extending the torque wrench - V.A.G 1331- with the spanner from tool set - T10395/6- allows the correct torque of 45 Nm to be achieved. | 45 Nm |