
7-speed DSG gearbox 0AM (DQ200) · Clutch · Dual Clutch, Removing and Installing, through Transmission Production Date 05/2011
Dual Clutch, Removing, through Transmission Production Date 05/2011
Special tools and workshop equipment required
- T-Handle Hook - 3438-
- Support Bridge - T10323-
- -T10356/5- from the Subframe Bushing Assembly Tool Kit - T10356-
- Puller - Clutch - T10373-
- Clutch Press Piece - T10376-
- Engine Bung Set - VAS6122-
- Remove the transmission:
- Refer to
- Refer to ⇒ 5 Transmission, Removing and Installing, Jetta from MY 2011
- The DSG Transmission Mechatronic - J743- is installed in the transmission.
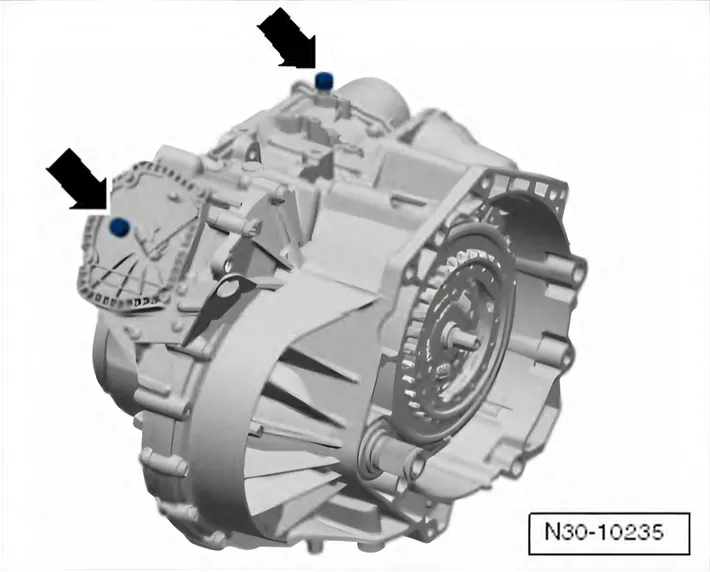
- Remove both caps -arrows- and seal with suitable oil-tight plugs from the Engine Bung Set - VAS6122- for example.
Checking the hydraulic fluid level for the Mechatronic is not possible. The Mechatronic vent must be sealed oil-tight before performing any assembly work.
Fluid that has leaked out of the Mechatronic hydraulic area may not be refilled or checked. Replace the Mechatronic if fluid is leaking.
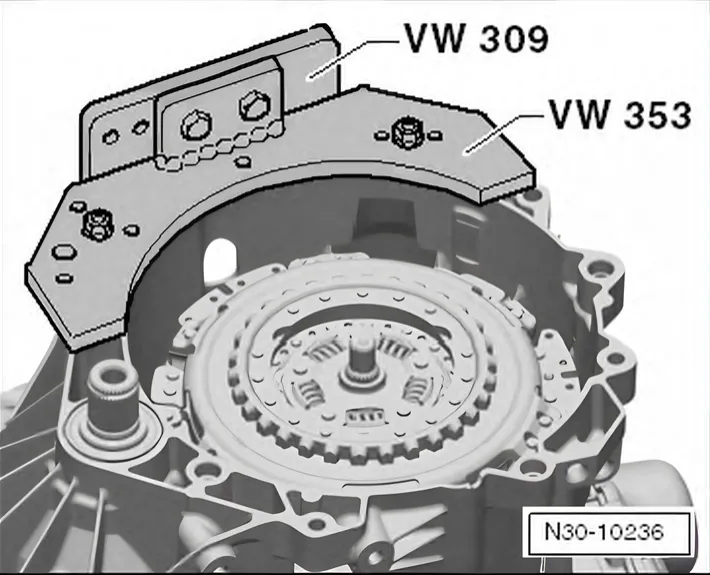
Turn the transmission on the engine/transmission holder with the clutch facing up.
Refer to ⇒ 6 Transmission, Transporting and Securing To Assembly Stand for information on securely transporting the transmission and securing to the assembly stand.
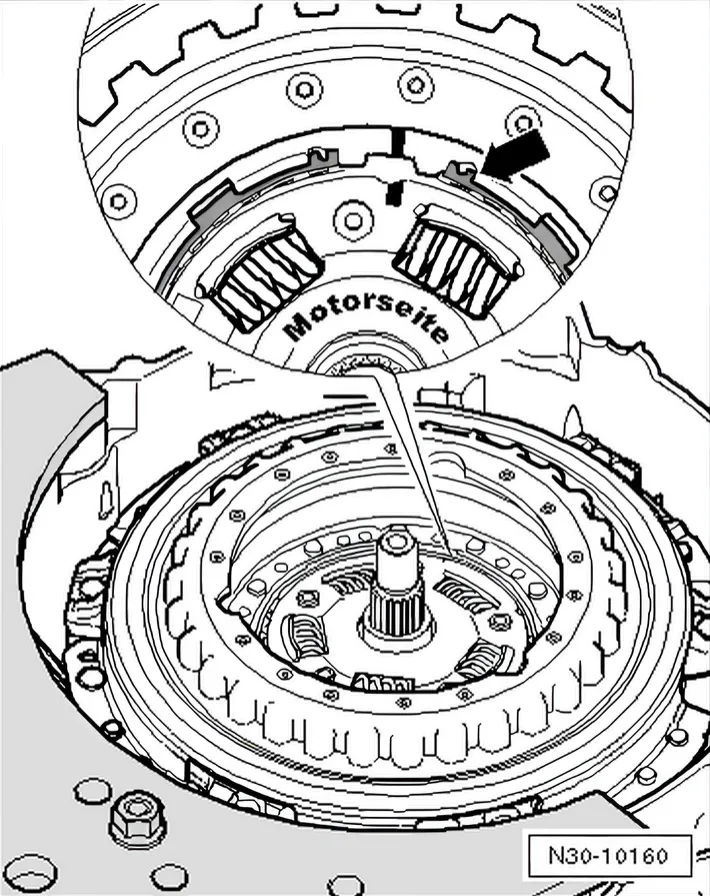
- Remove the locking ring -arrow- from the hub.
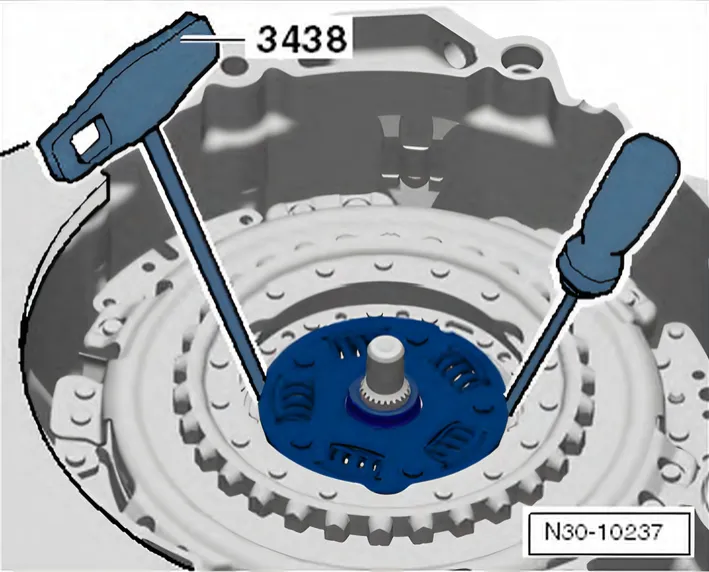
- Remove the hub using T-Handle Hook - 3438- and a screwdriver.
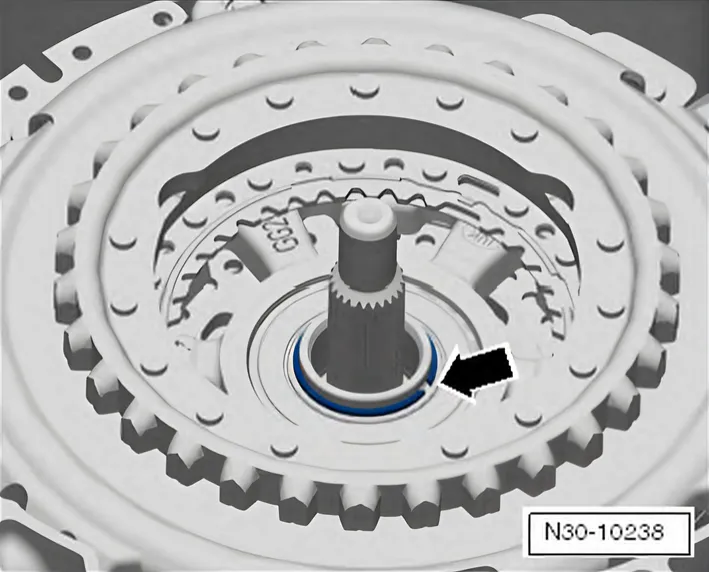
- Remove the locking ring -arrow- from the clutch.
If it is Not Possible to Remove the Locking Ring:
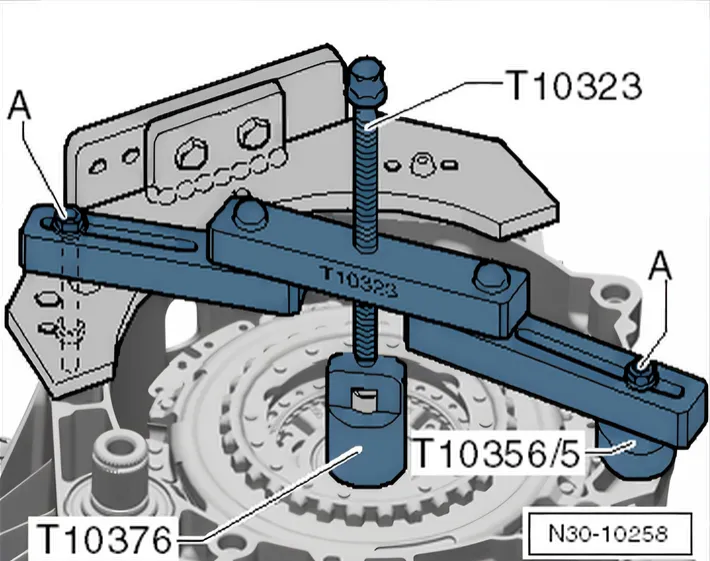
- Position the Support Bridge - T1032- parallel to the transmission flange, as illustrated.
- If necessary, even out the gaps with Assembly Tool - 5 - T10356A/5- for example.
- Tighten the bolts -A- hand-tight.
- Turn the spindle against the Clutch Press Piece - T10376- to lower it.
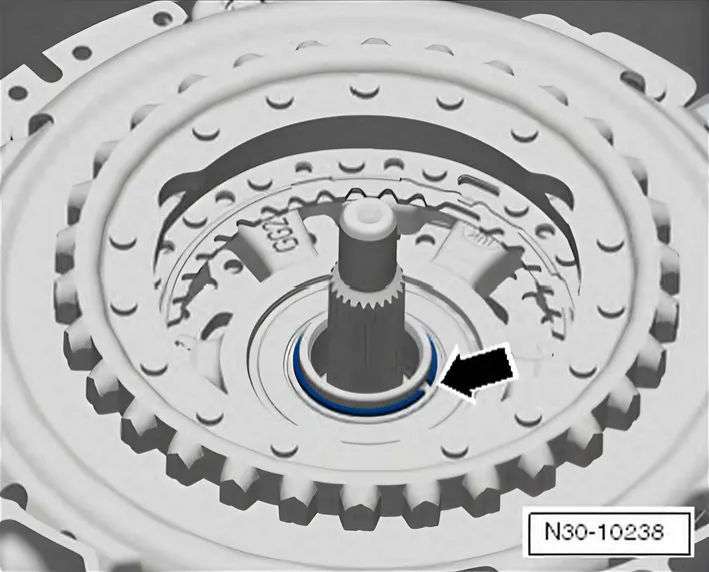
- Remove the special tool and remove the circlip -arrow- for the clutch.
Continuation for Removing the Locking Ring:
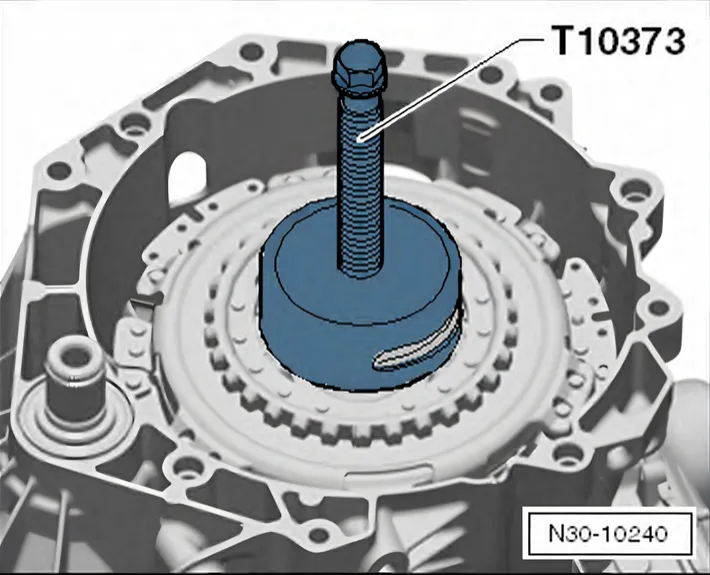
- Insert the Puller - Clutch - T10373- into the clutch and remove the clutch.
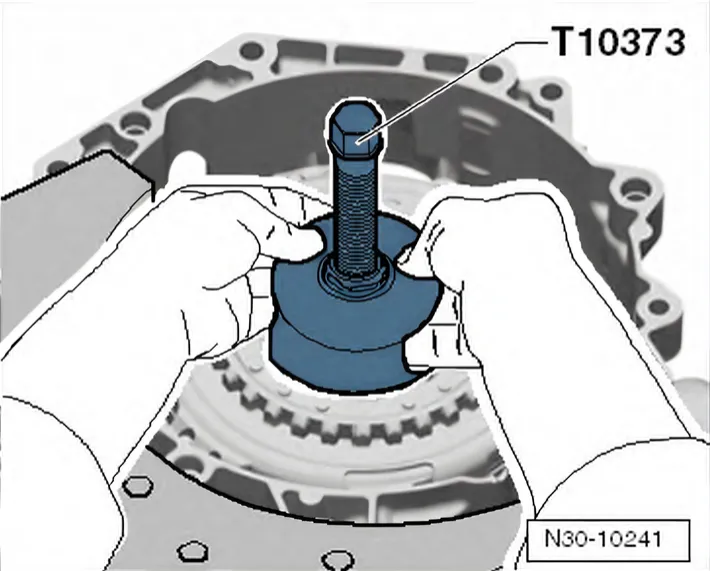
- Remove the clutch together with the Puller - Clutch - T10373-.
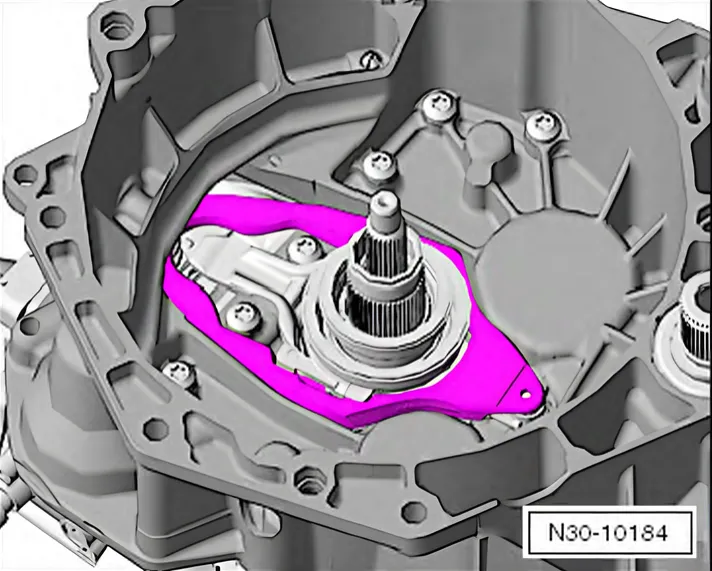
- Remove the small engaging bearing.
- Remove the large engaging lever.
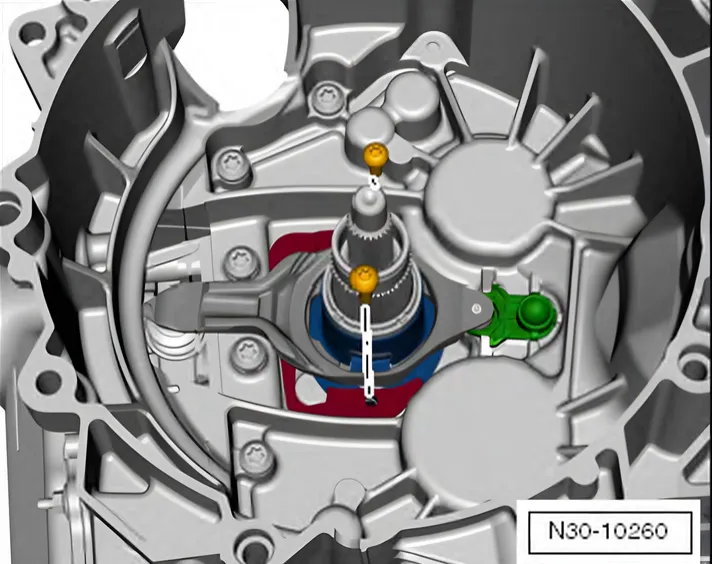
- Remove the bolts and remove the engaging lever with the bracket.
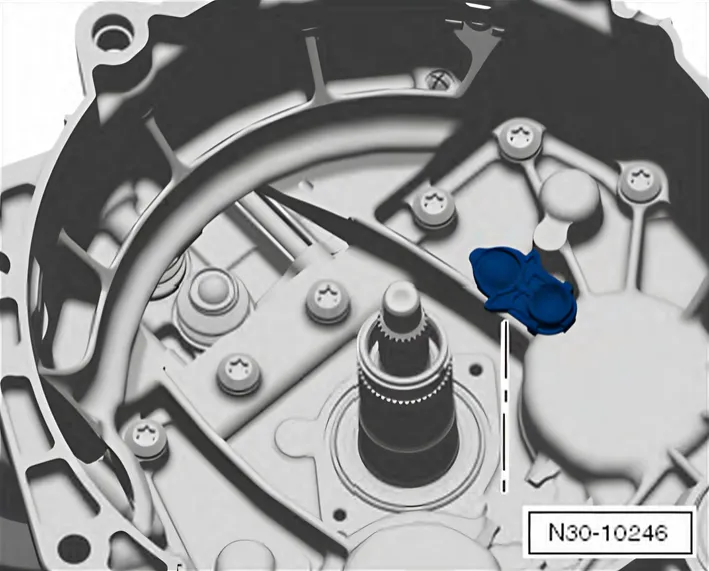
- Remove the engaging lever mount.
Before installing the clutch, check if the »clutch needs to be adjusted or not during assembly«. Refer to ⇒ 1.3 K 1 and K 2 Clutch Engaging Bearing Position, Adjusting, Transmission Production Date through 05/2011.
Adjusting. Refer to ⇒ 1.3 K 1 and K 2 Clutch Engaging Bearing Position, Adjusting, Transmission Production Date through 05/2011
Install the Dual Clutch. Refer to ⇒ 1.4 Dual Clutch, Installing, Transmission Production Date through 05/2011.