
7-speed DSG gearbox 0AM (DQ200) · Clutch · Dual Clutch, Removing and Installing, through Transmission Production Date 05/2011
Dual Clutch, Installing, Transmission Production Date through 05/2011
Special tools and workshop equipment required
- Support Bridge - T10323-
- -T10356/5- from the Subframe Bushing Assembly Tool Kit - T10356-
- Puller - Clutch - T10373-
- Clutch Press Piece - T10376-
- Adhesive - AMV 195 KD1 01-
- Tightening specifications. Refer to ⇒ 1.1 Overview - Dual Clutch, through Transmission Production Date 05/2011.
When replacing the dual clutch and its components, the “K 1 and K 2” engaging bearing position must always be readjusted. Refer to ⇒ 1.3 K 1 and K 2 Clutch Engaging Bearing Position, Adjusting, Transmission Production Date through 05/2011.
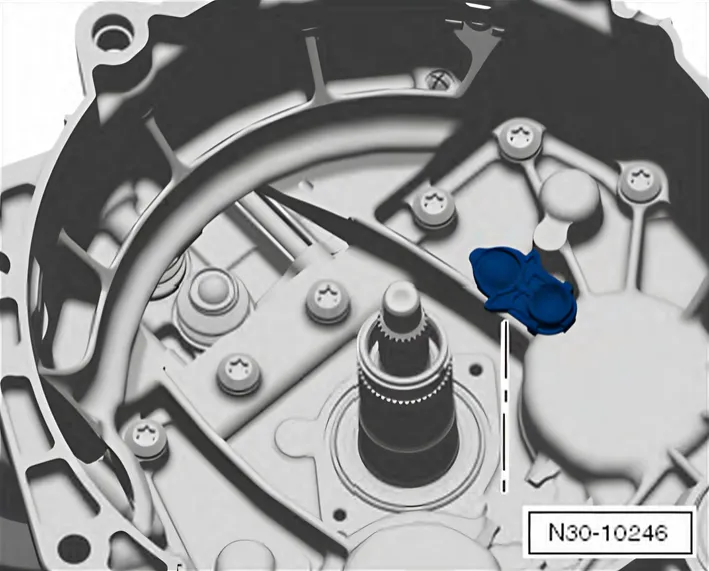
- Insert the engaging lever mount.
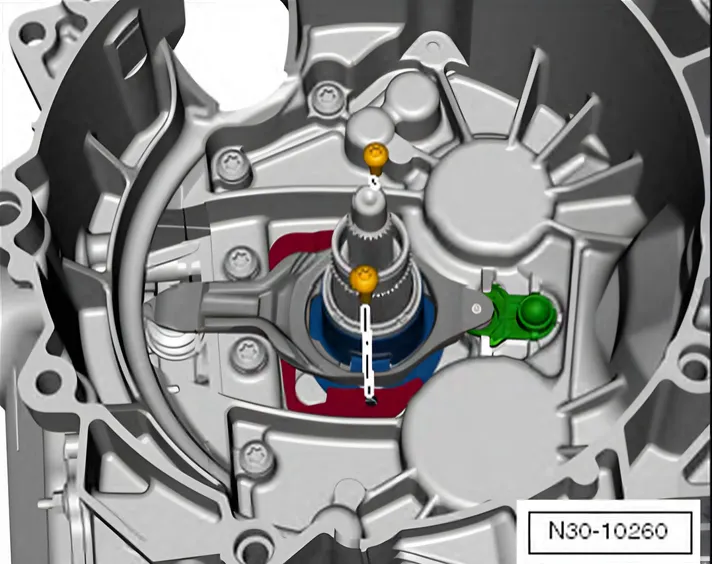
- Install the small engaging lever with the bracket.
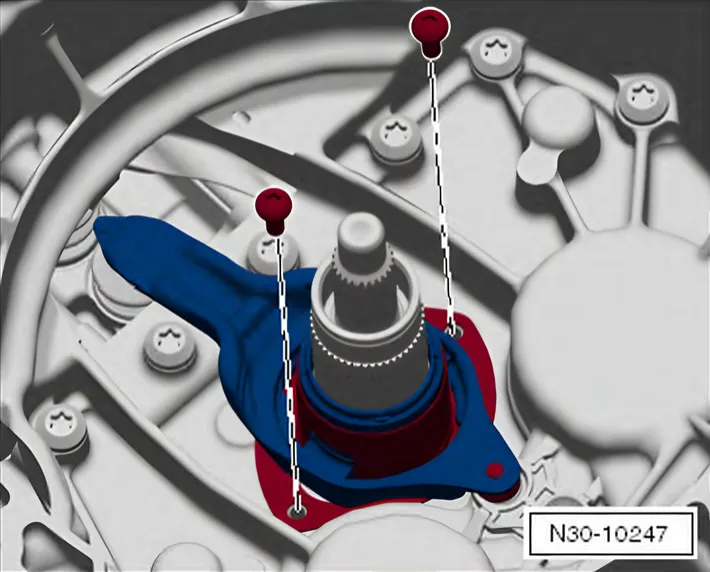
- Tighten the small engaging lever with two new bolts.
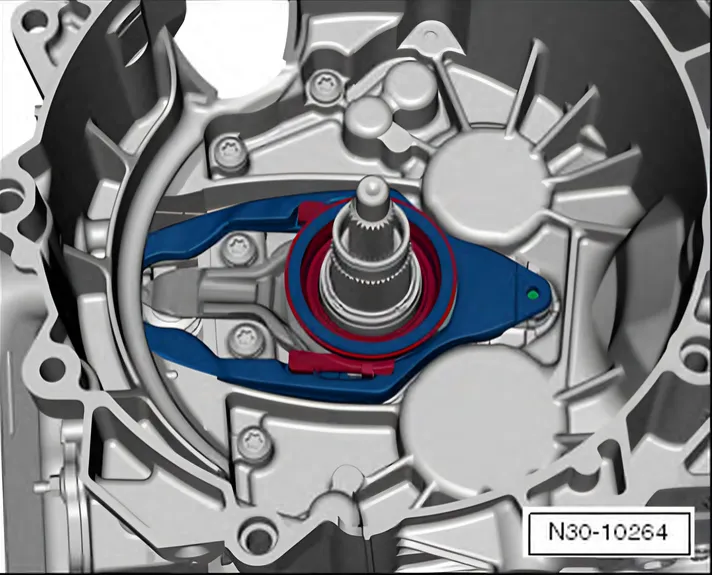
- Install the large engaging lever.
- Make sure both engaging levers fit correctly.
Adjusting the engaging bearings can only be performed prior to installing the dual clutch.
The position of the engaging bearing must be adjusted after completing the following:
- The dual clutch was replaced.
- The engaging levers were replaced.
- The engaging lever mount was replaced.
- The engaging bearings were replaced.
It is necessary to adjust the position of the “K 1 and K 2” engaging bearings first if one of the above mentioned procedures was performed and the readjusted shim is inserted. Refer to ⇒ 1.3 K 1 and K 2 Clutch Engaging Bearing Position, Adjusting, Transmission Production Date through 05/2011.
Continue with assembling only when the adjustment is correct.
The removed shims can be used again if no new parts were installed.
Only one shim per engaging bearing can be inserted for the adjustment.
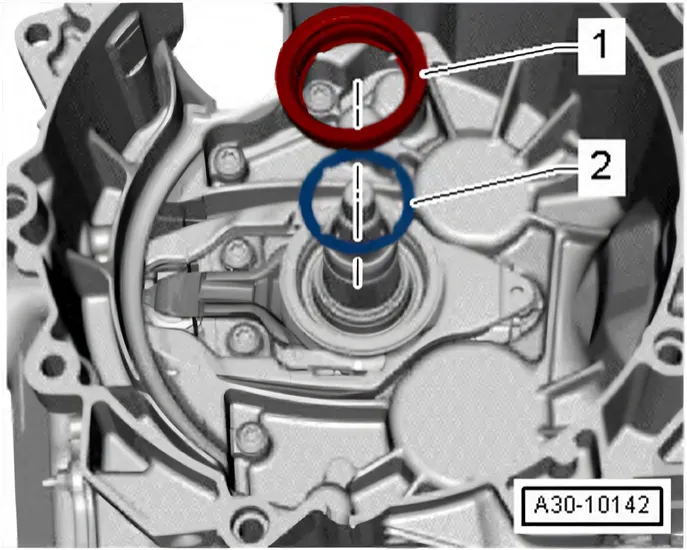
- Insert the small engaging bearing -1- with the measured shim -2- for the “K 2” clutch.
The Shim Belongs Under the Small Engaging Bearing. Install the Shim First.
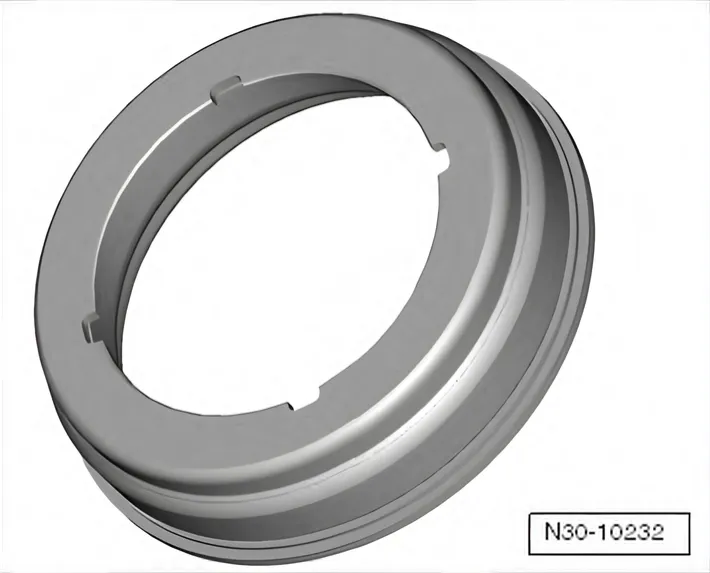
- The small engaging bearing fits in only one position due to the 4 grooves.
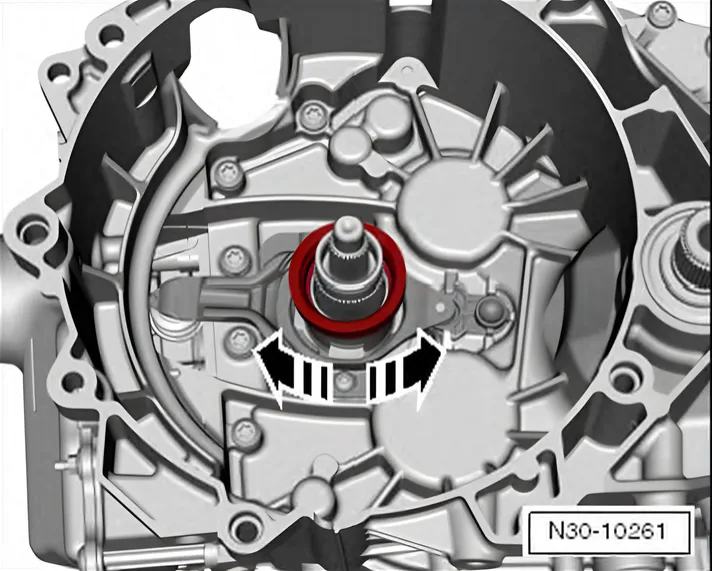
- Turn the engaging bearing in direction of -arrows- to make sure it is installed correctly and fits correctly in the grooves.
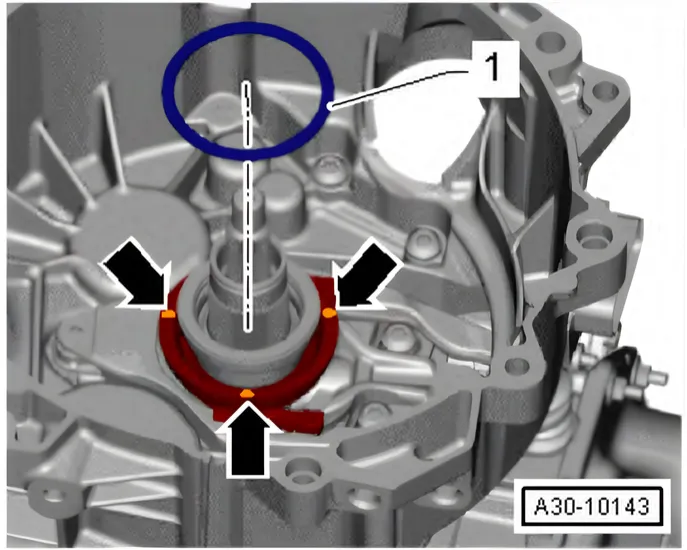
- Secure the »large« shim -1- for the “K 1” clutch with three drops of Adhesive - AMV 195 KD1 01- -arrows-.
This prevents the shim from sliding out of its position when inserting the clutch.
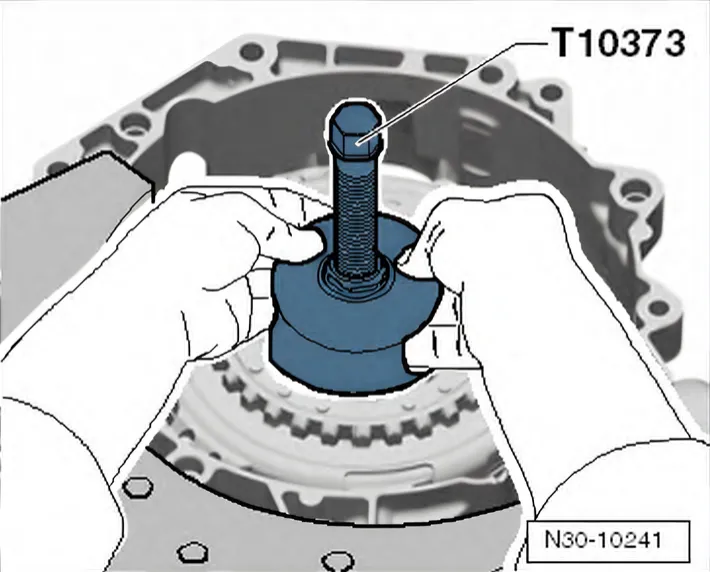
- Turn back the spindle on the Puller - Clutch - T10373-.
- Install the clutch in the transmission using the Puller - Clutch - T10373- as shown.
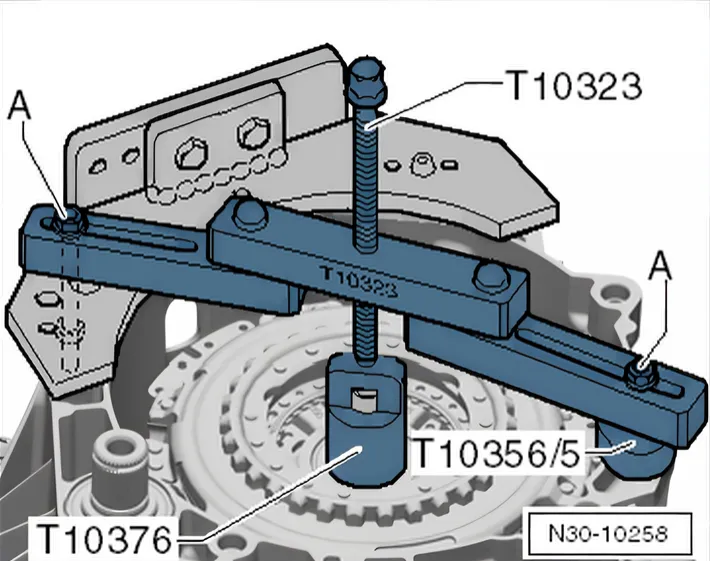
- Position the Support Bridge - T1032- parallel to the transmission flange, as illustrated.
- If necessary, even out the gaps using, for example, -T10356/5- from the Assembly Tool - T10356A-.
- Tighten the bolts -A- hand-tight.
- Install the clutch all the way.
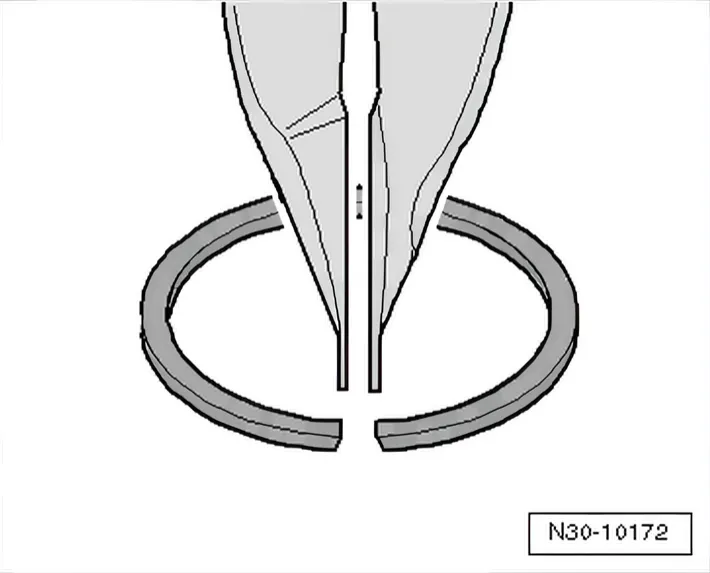
- Hold the new locking ring with locking ring pliers, as illustrated.
- Installed position: narrow ends of the locking ring at the top.
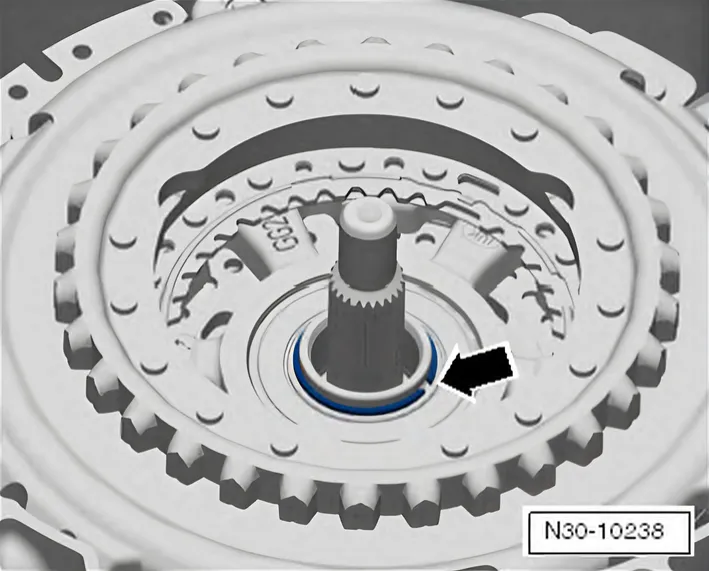
- Install the circlip -arrow-
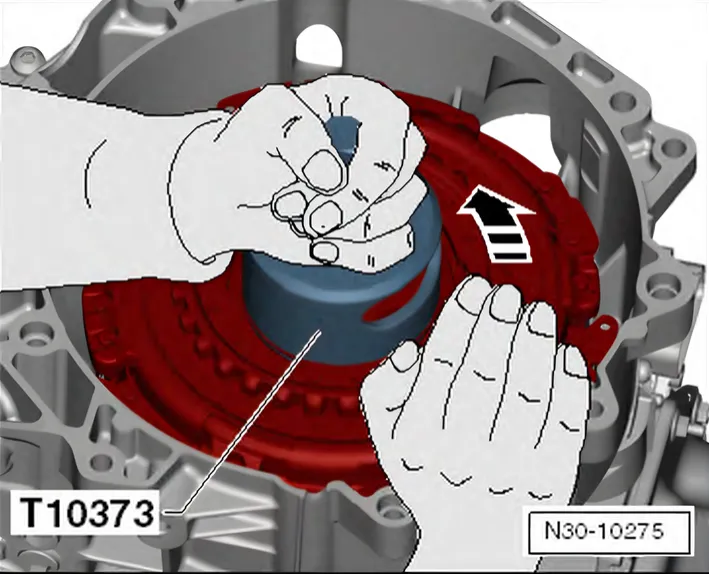
- Turn the clutch against the Puller - Clutch - T10373- by hand without using any other tools so that it can move into its operating position in direction of -arrow-.
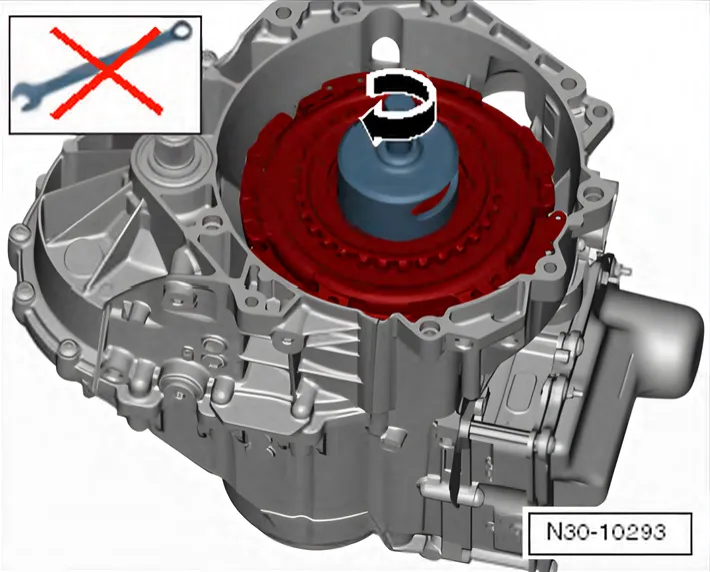
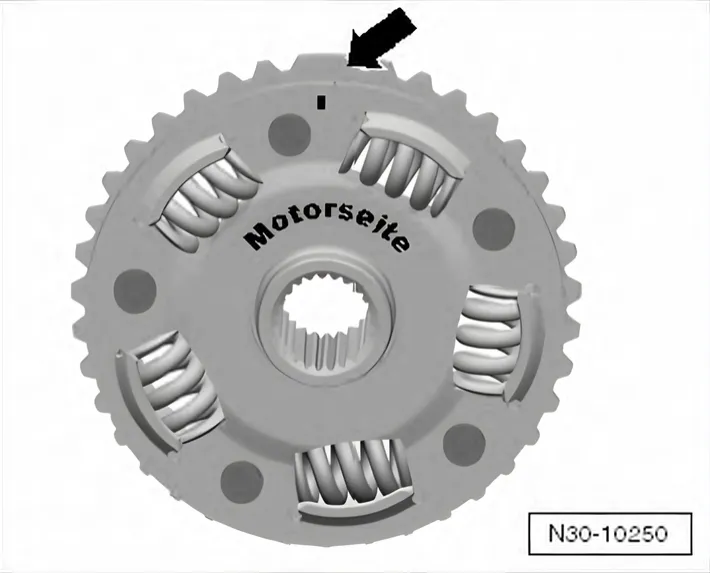
- Install the hub.
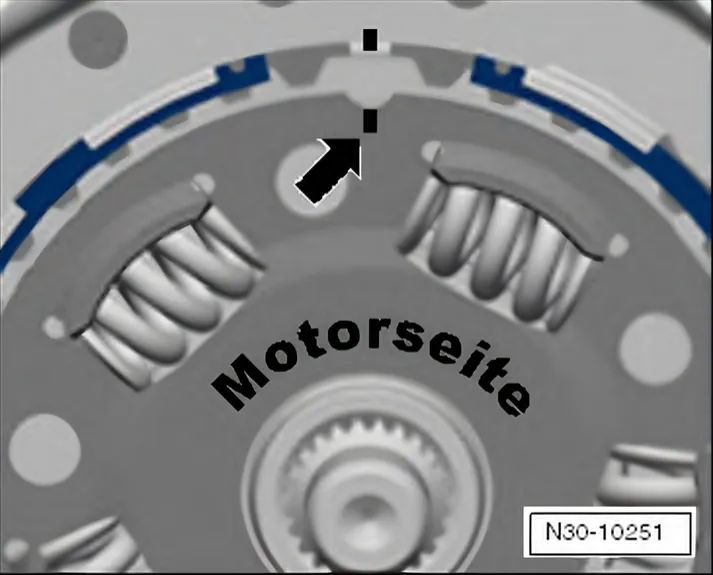
- The hub as a single »large tooth« -arrow- and fits in only one position.
- The »large tooth« has a marking -arrow- on the engine side.
огромный архив документации по автомобилям Volkswagen, Skoda, Seat, Audi
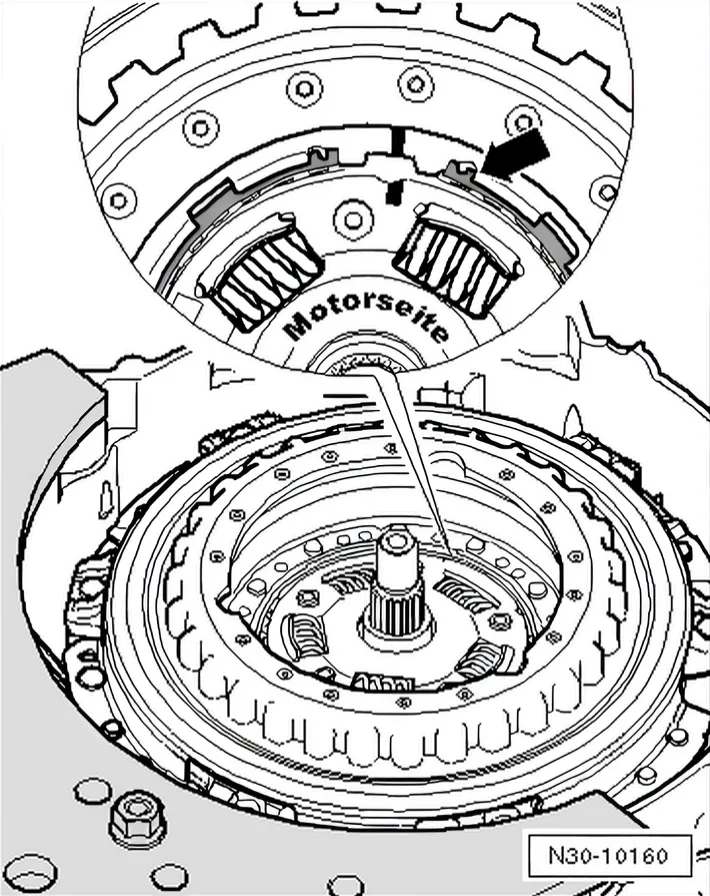
- Insert the locking ring -arrow-.
- The end of the locking ring must face the »nose« on the clutch.
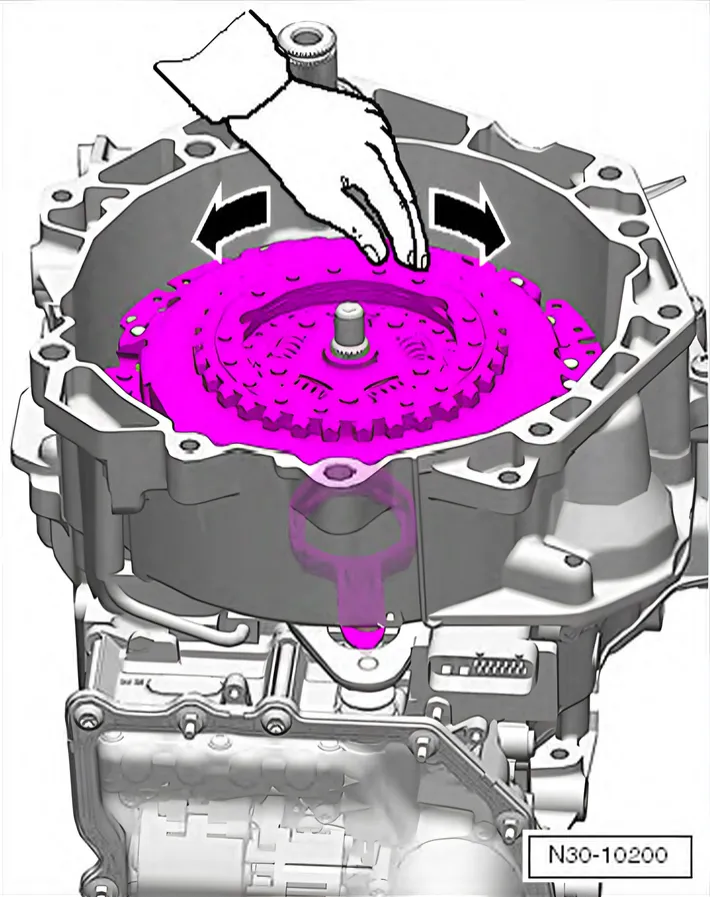
- Turn the clutch by hand and pay attention to the small engaging lever when turning.
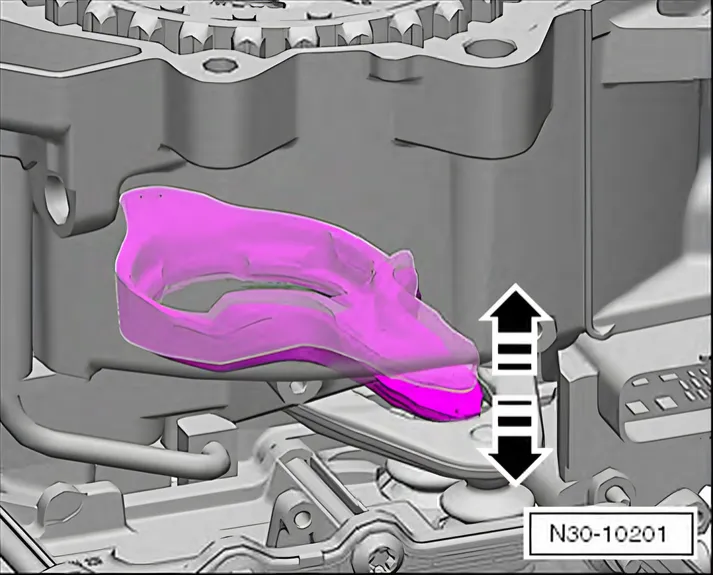
- The small engaging lever must not move at all when turning the clutch. It must not move back and forth.
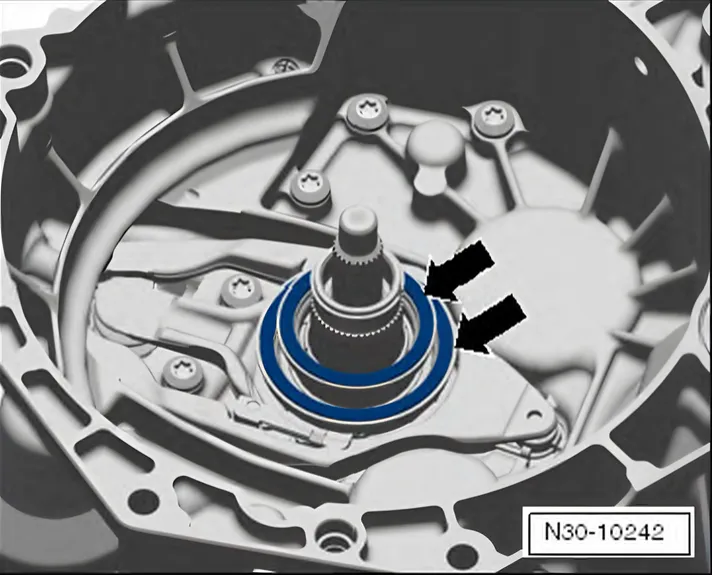
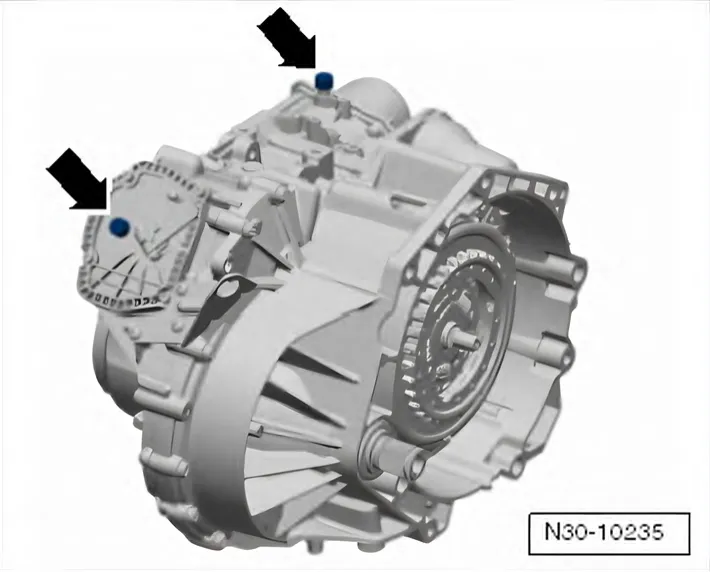
- Remove the plugs and mount both breather caps -arrowsagain.
- After installing the transmission, perform the Complete basic setting using Guided Functions in the Vehicle Diagnostic Tester.