
1.6 TDI CR engine (EA189) · Lubrication · Sump, oil pump
Removing and installing sump
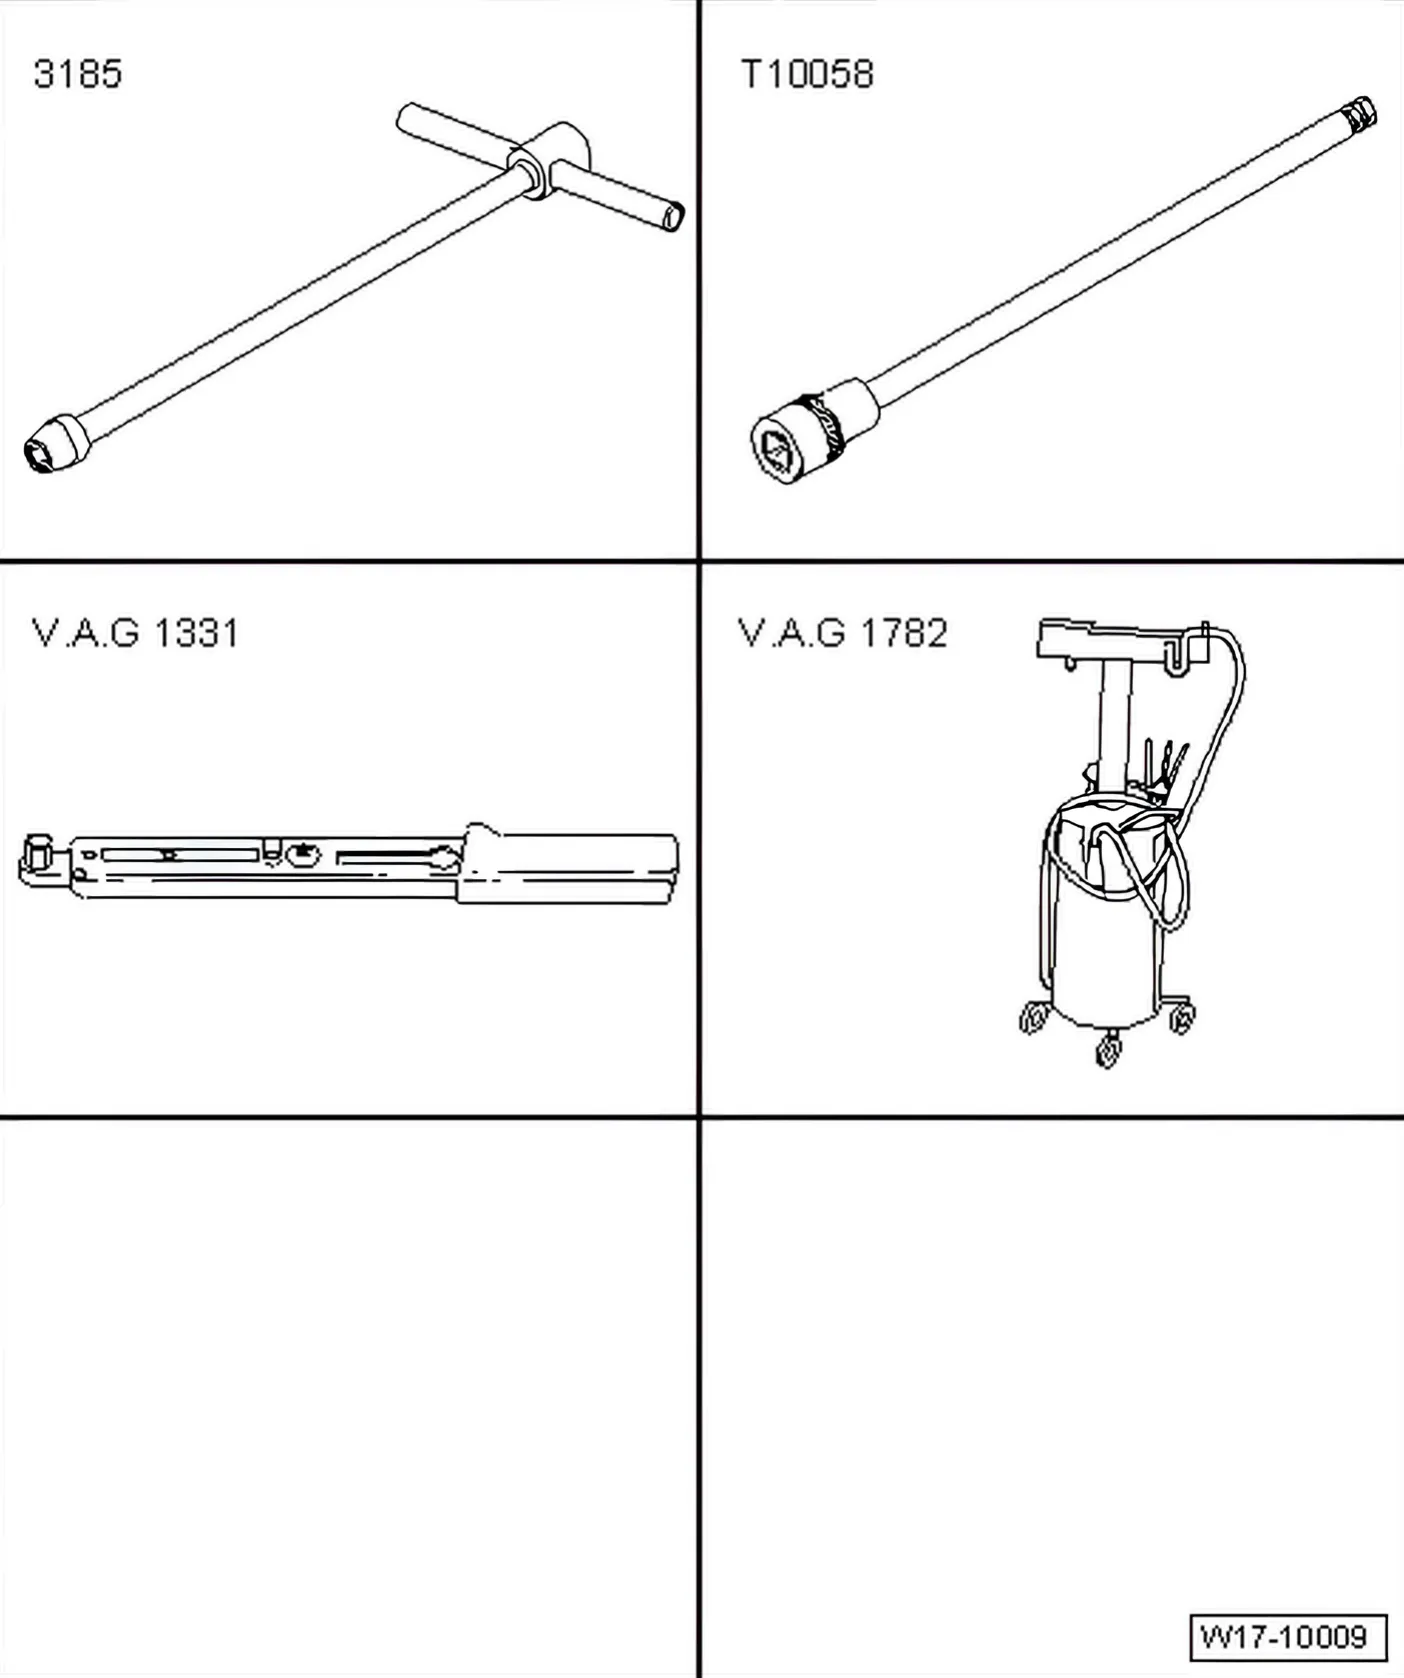
Special tools and workshop equipment required
- 10 mm jointed spanner - VAS 3185-
- Multi-point bit - T10058-
- Torque wrench (5 … 50 Nm) - V.A.G 1331-
- Used oil collection and extraction unit - V.A.G 1782-
- Sealant as per ⇒ Electronic Parts Catalogue (ETKA)
- Hand drill with plastic brush
- Safety glasses
- Scraper
Removing
- Remove noise insulation:
Polo ⇒ General body repairs, exterior; Rep. gr. 50; Noise insulation; Assembly overview - noise insulation
- Place used oil collection and extraction unit - V.A.G 1782- under engine and drain engine oil.
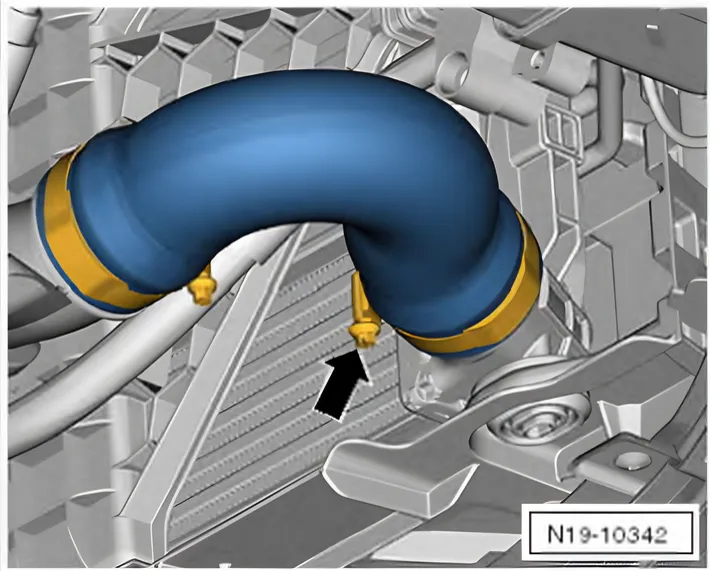
- Remove connecting hose »cold side«.
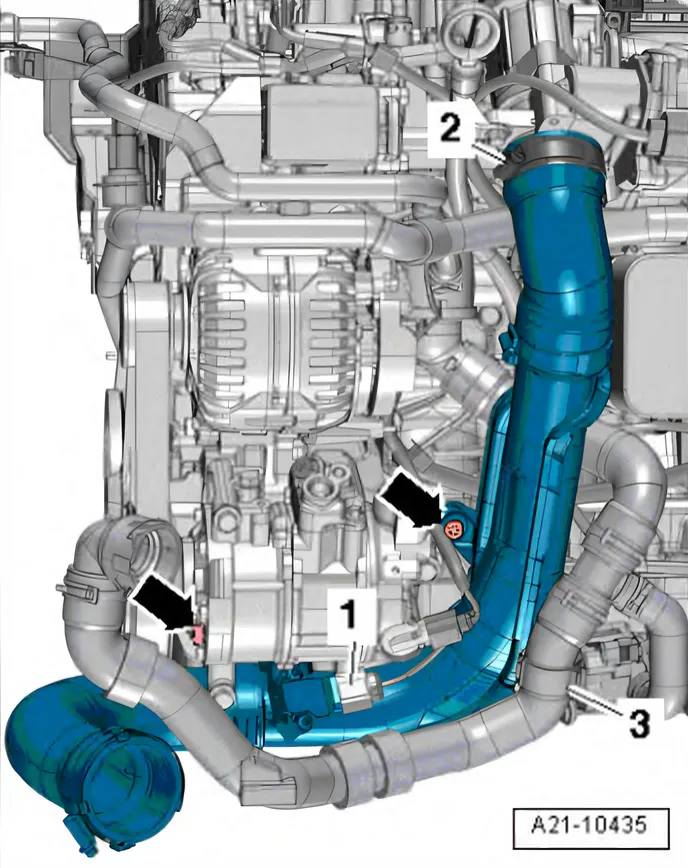
- Separate electrical connector -1- on charge pressure sender - G 31- / intake air temperature sensor - G 42- and remove right charge air pipe.
- Remove securing bolts -arrows- of charge air pipe and press pipe aside.
- Free off coolant hose -3-.
- Release hose clip -2-.
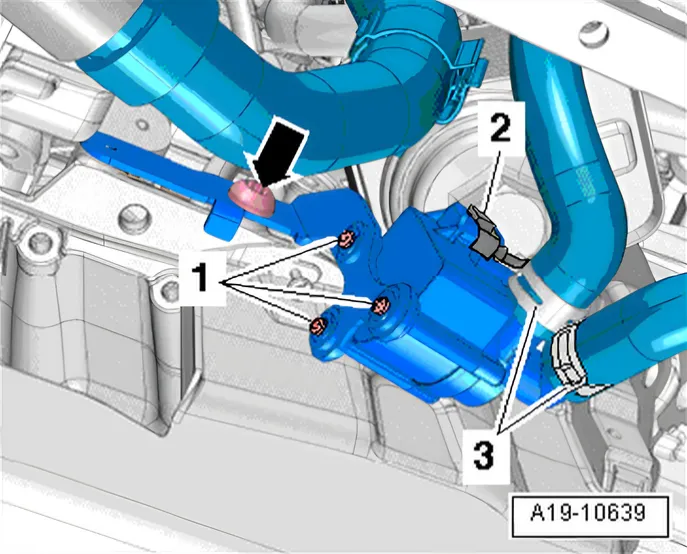
- Remove securing bolt -arrow- and push coolant circulation pump 2 - V178- aside.
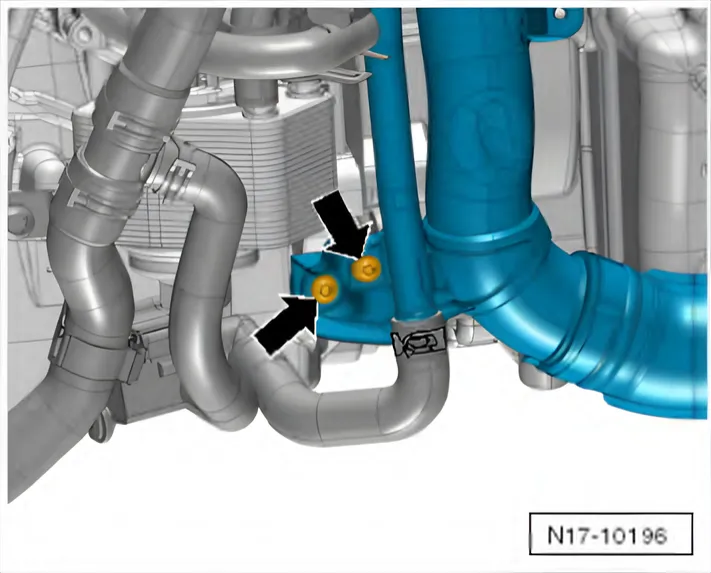
- Remove securing bolts -arrows- of charge air pipe on »hot side«.
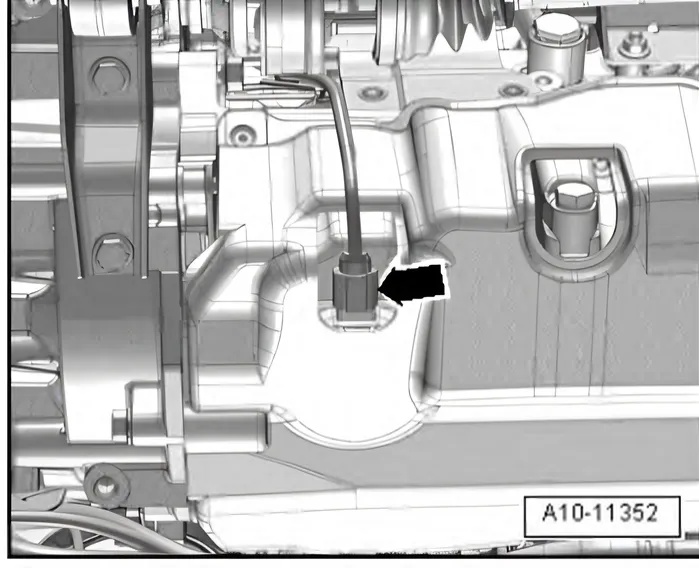
- Disconnect electrical connector -arrow- on oil level and oil temperature sender - G266-.
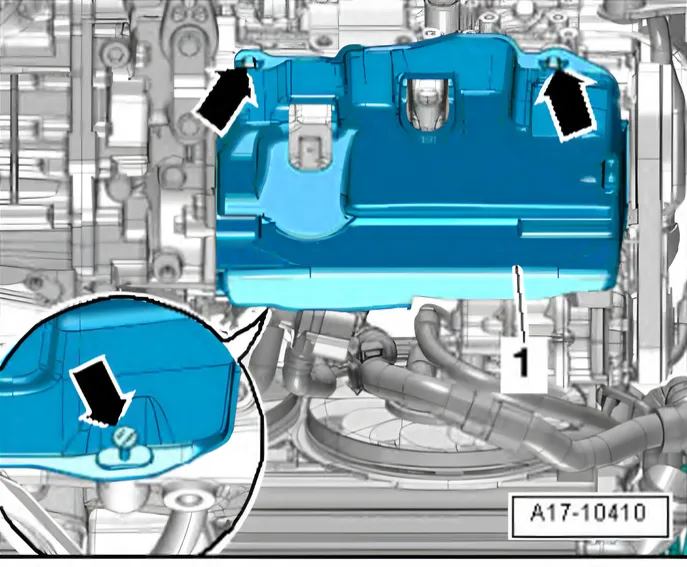
- Open fasteners -arrows- and remove noise insulation -1- for sump.
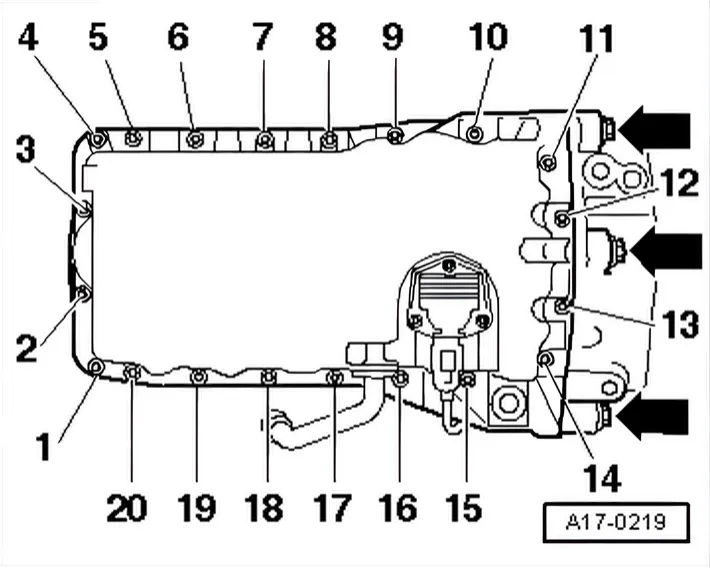
- Remove connecting bolts -arrows- for sump to gearbox.
- Remove oil sump securing bolts in diagonal sequence.
- Release sump carefully from adhesive.
- Loosen sump with light blows of a rubber headed hammer if necessary.
- Remove sealant residue from cylinder block using a flat scraper.
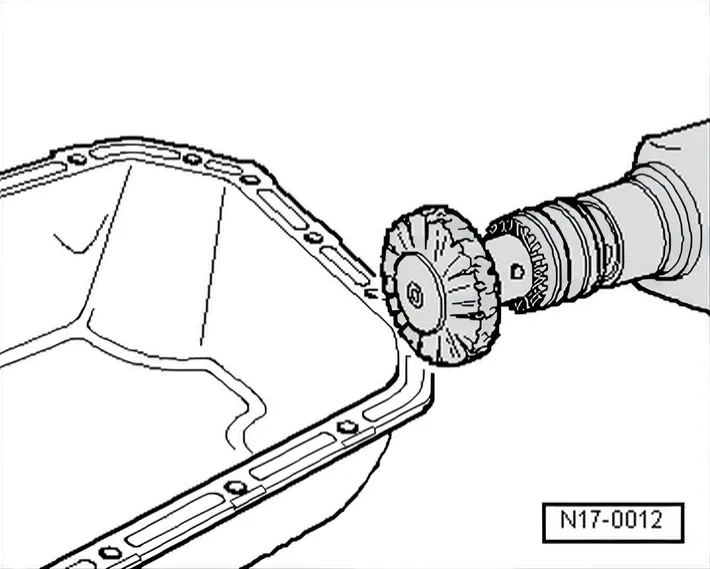
- Remove sealant residues from sump and cylinder block using rotating plastic brush or similar.
- Clean sealing surfaces; they must be oil and grease free.
Installing
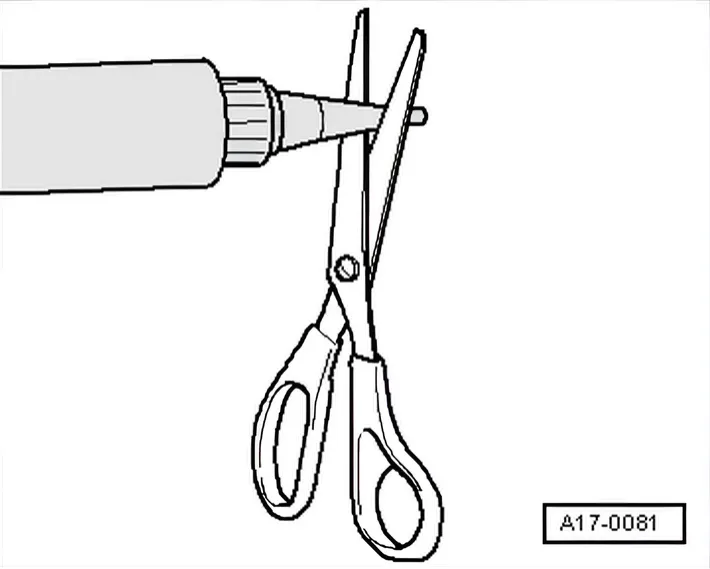
- Cut off nozzle on tube at front marking (∅ of nozzle approx. 2 mm).
- Apply bead of sealant onto clean sealing surface of sump as illustrated.
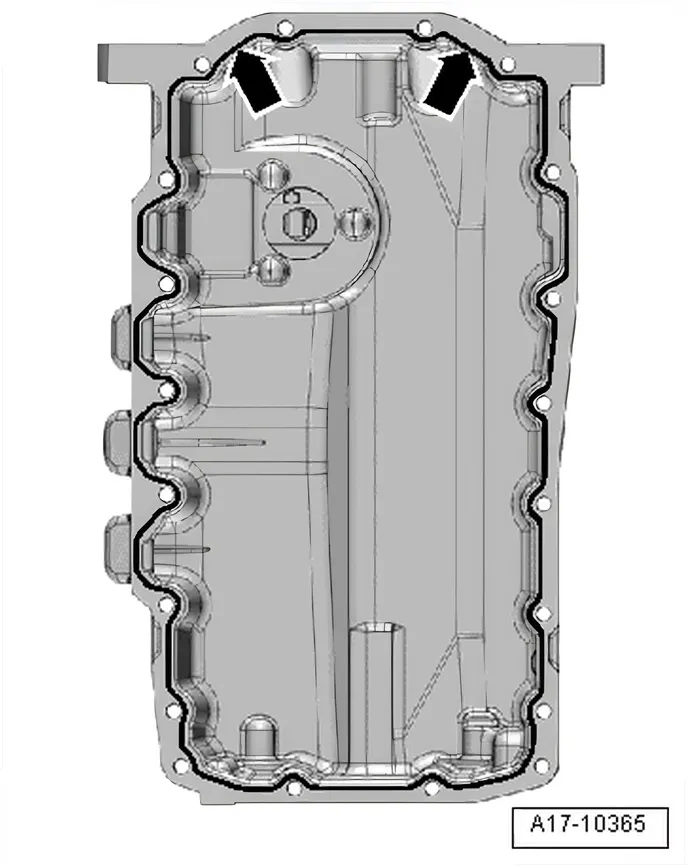
- Thickness of sealant bead: 2…3 mm.
- Run bead along inner side of bolt holes -arrows-.
- Position oil sump and tighten bolts ⇒ 1.1 Assembly overview - sump/oil pump.
- The oil sump must be flush with the gearbox flange at the intermediate plate.
Further assembly is basically a reverse of the dismantling sequence.
- Replenish engine oil and check oil level ⇒ 1.5.2 Checking engine oil level.
Tightening torques on this page
1 torque
In the steps
| Step | Torque |
|---|---|
| Torque wrench (5 … 50 Nm) - V.A.G 1331- | 50 Nm |