
Body repairs – exterior · Glazing · Door windows
Removing and installing rear door window
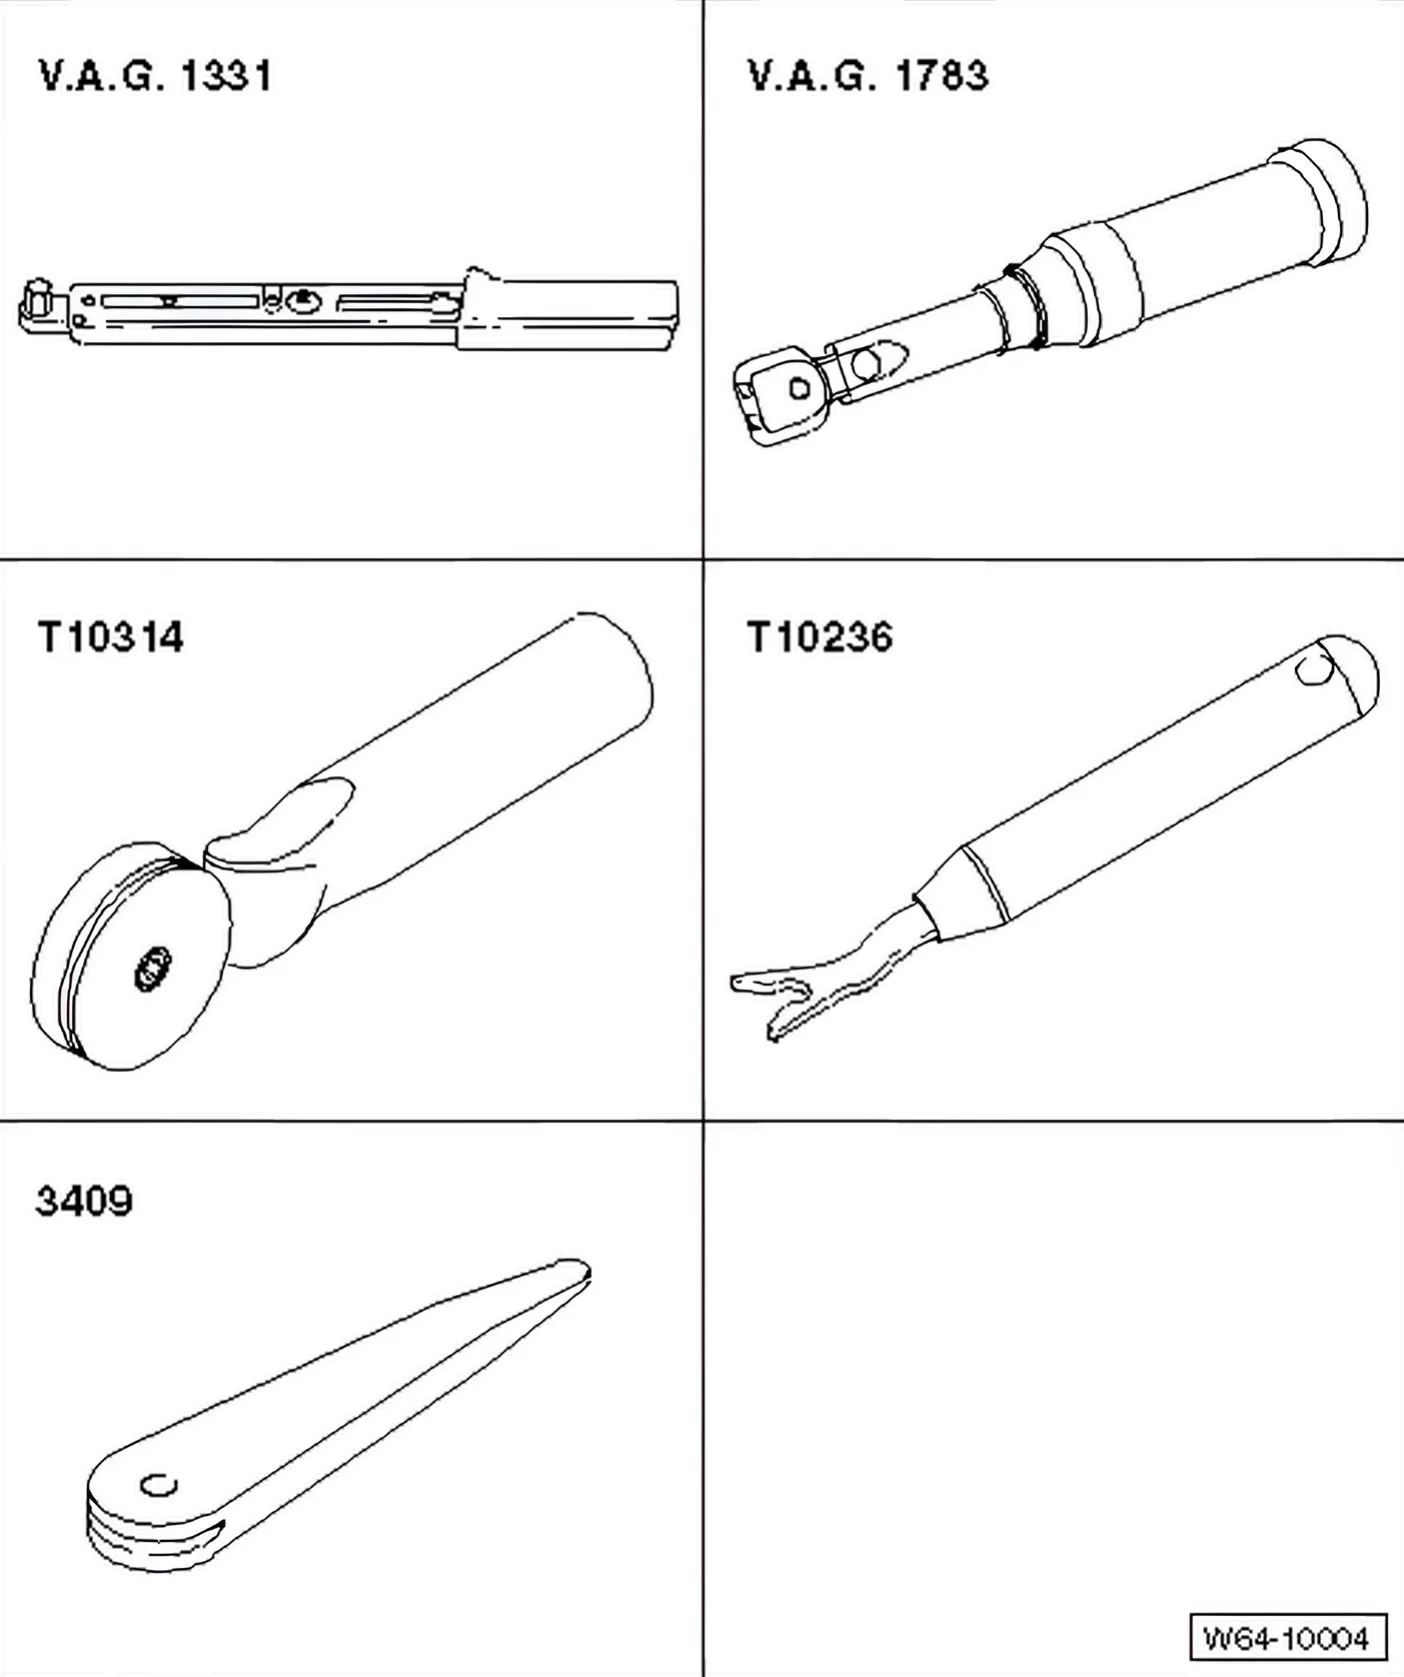
Special tools and workshop equipment required
- Torque wrench - V.A.G 1331-
- Torque wrench - V.A.G 1783-
- Roller - T 10314-
- Release tool - T 10236-
- Removal wedge - 3409-
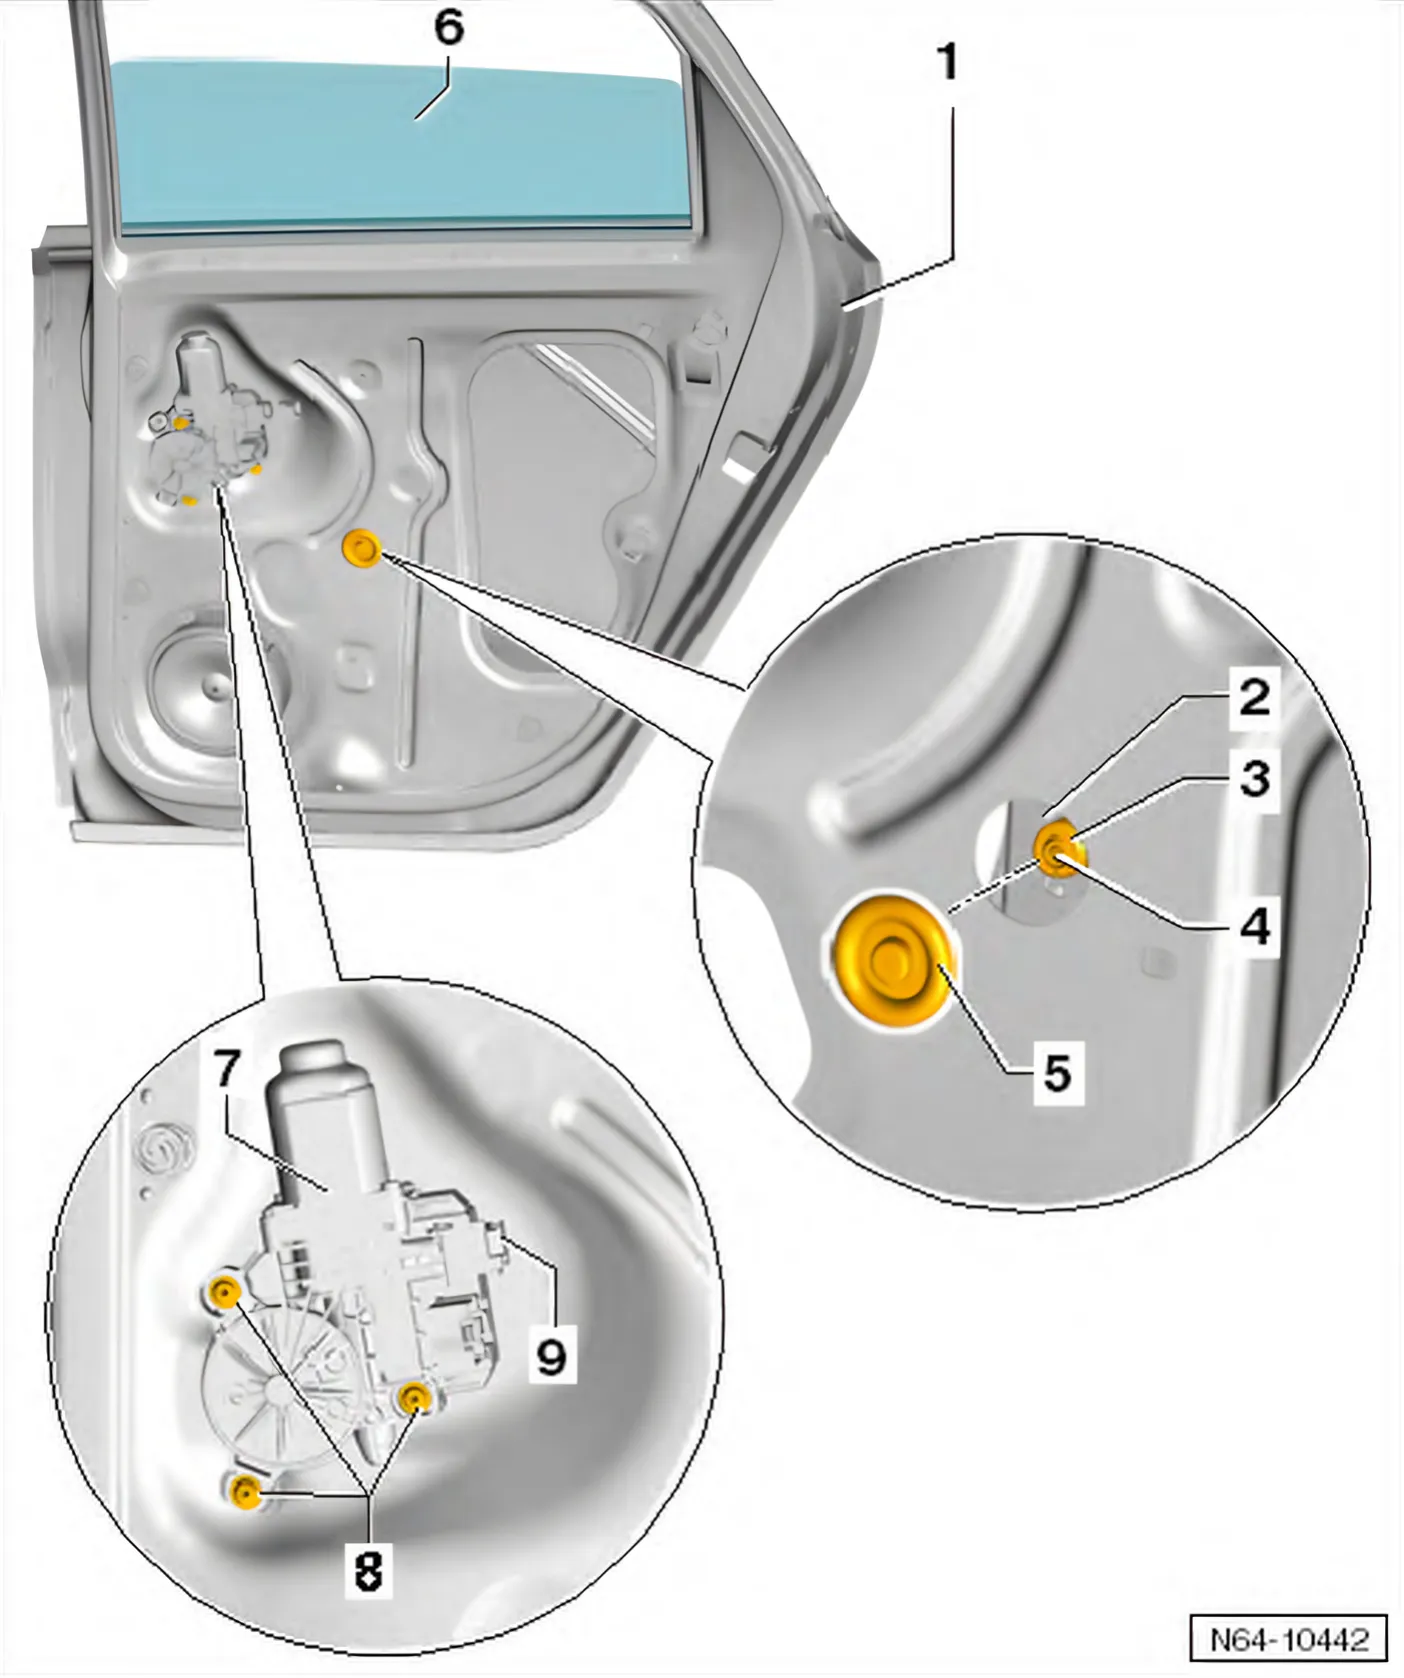
Removing
- Remove rear door trim ⇒ General body repairs, interior; Rep. gr. 70; Rear door trims; Removing and installing rear door trim.
- Lever out cover cap -5-.
- Lower door window -6- until spreader pin -4- and spreader plug -3- in cut-out of window regulator -2- are accessible.
- Screw 5 mm bolt (approx. 70 mm long) into spreader pin -4-, and pull bolt together with spreader pin out of spreader plug -3-.
- Screw an 8 mm bolt (approx. 80 mm long) into spreader plug -3-.
- Pull spreader plug -3- out of window regulator guide -1- and, in doing so, out of door window.
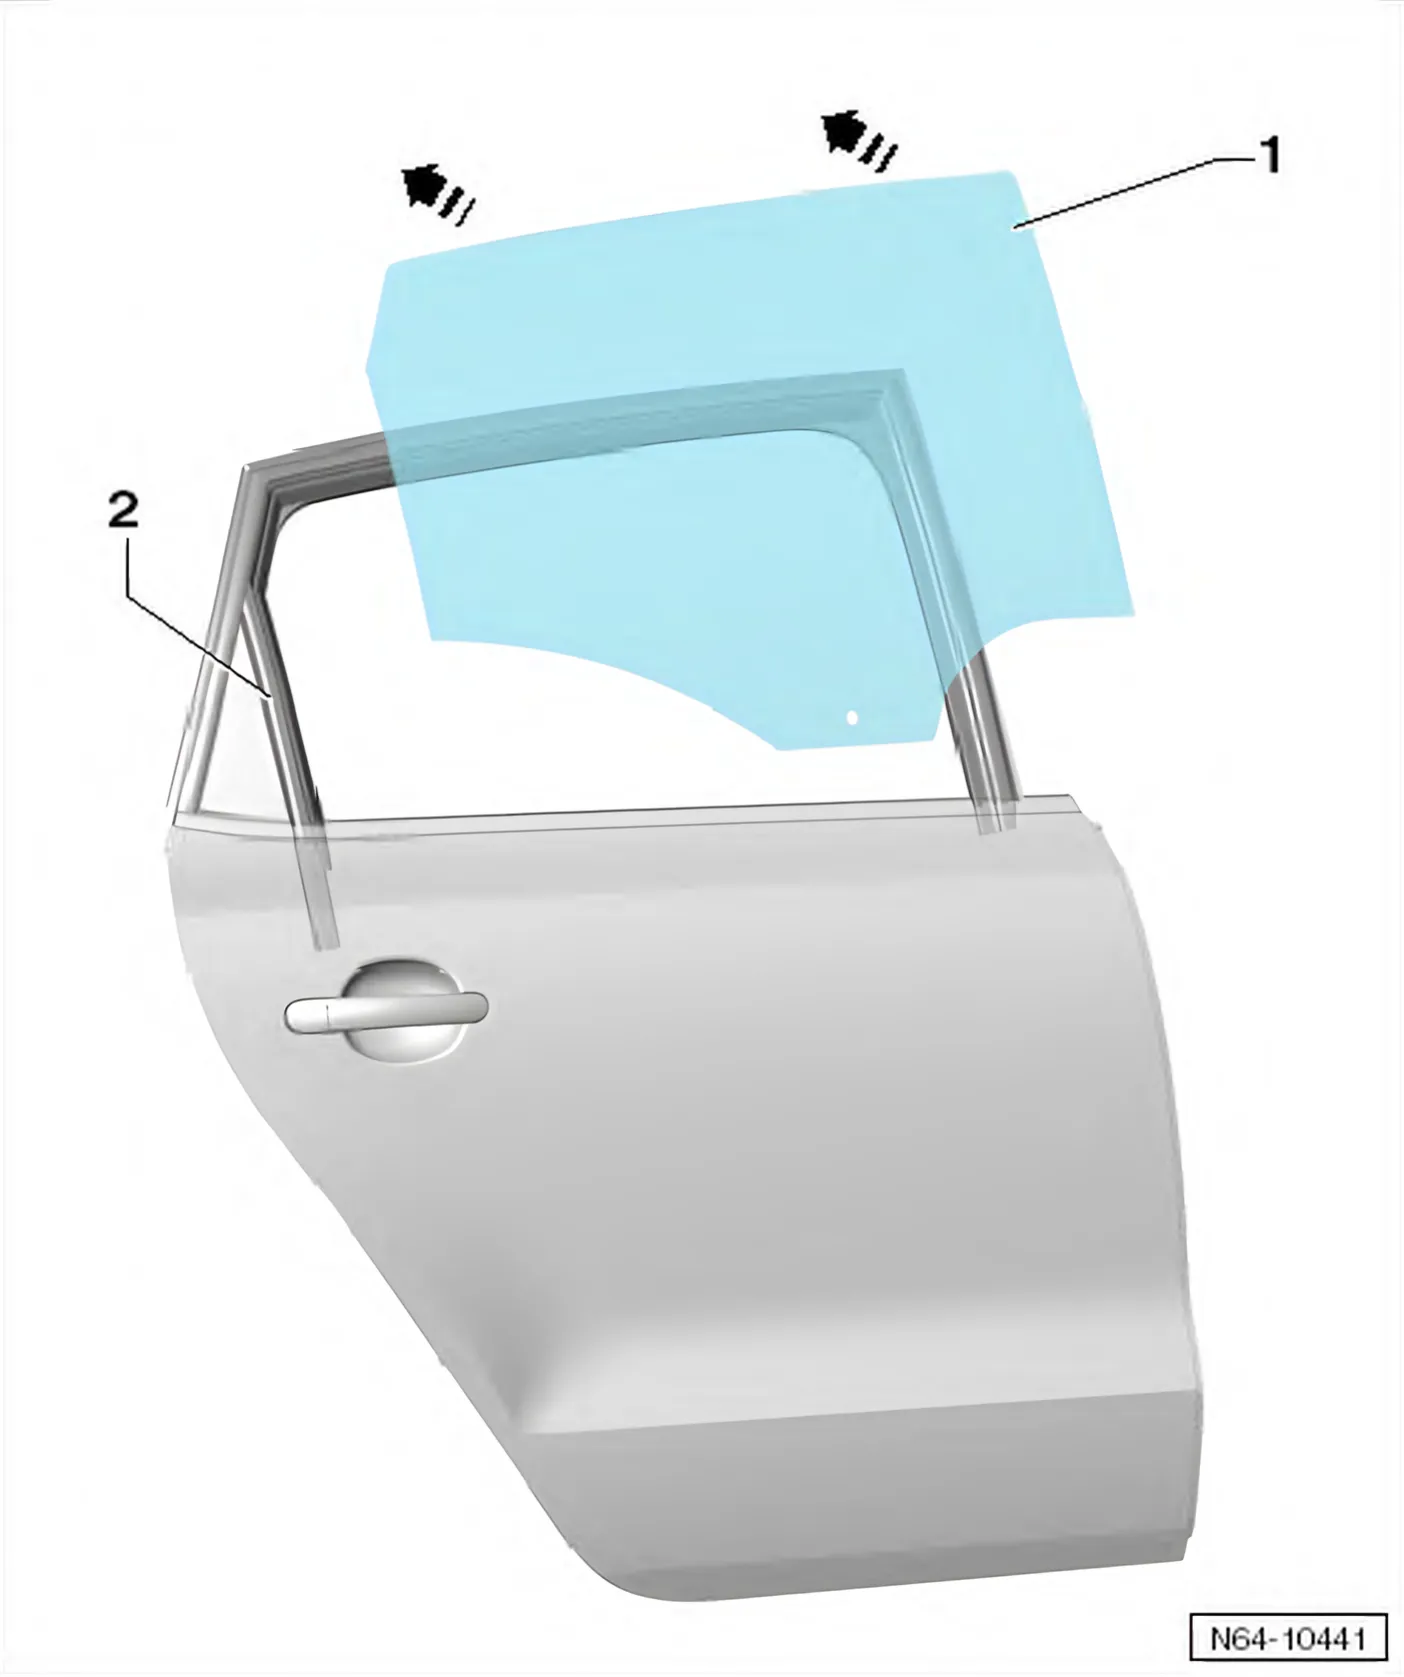
- Remove trim ⇒ 3.14 Removing and installing C-pillar trim on door.
- Pull rear part of window channel -2- out of mounting.
- Pull door window -1- upwards at an angle -arrows- to vehicle exterior out of window slot.
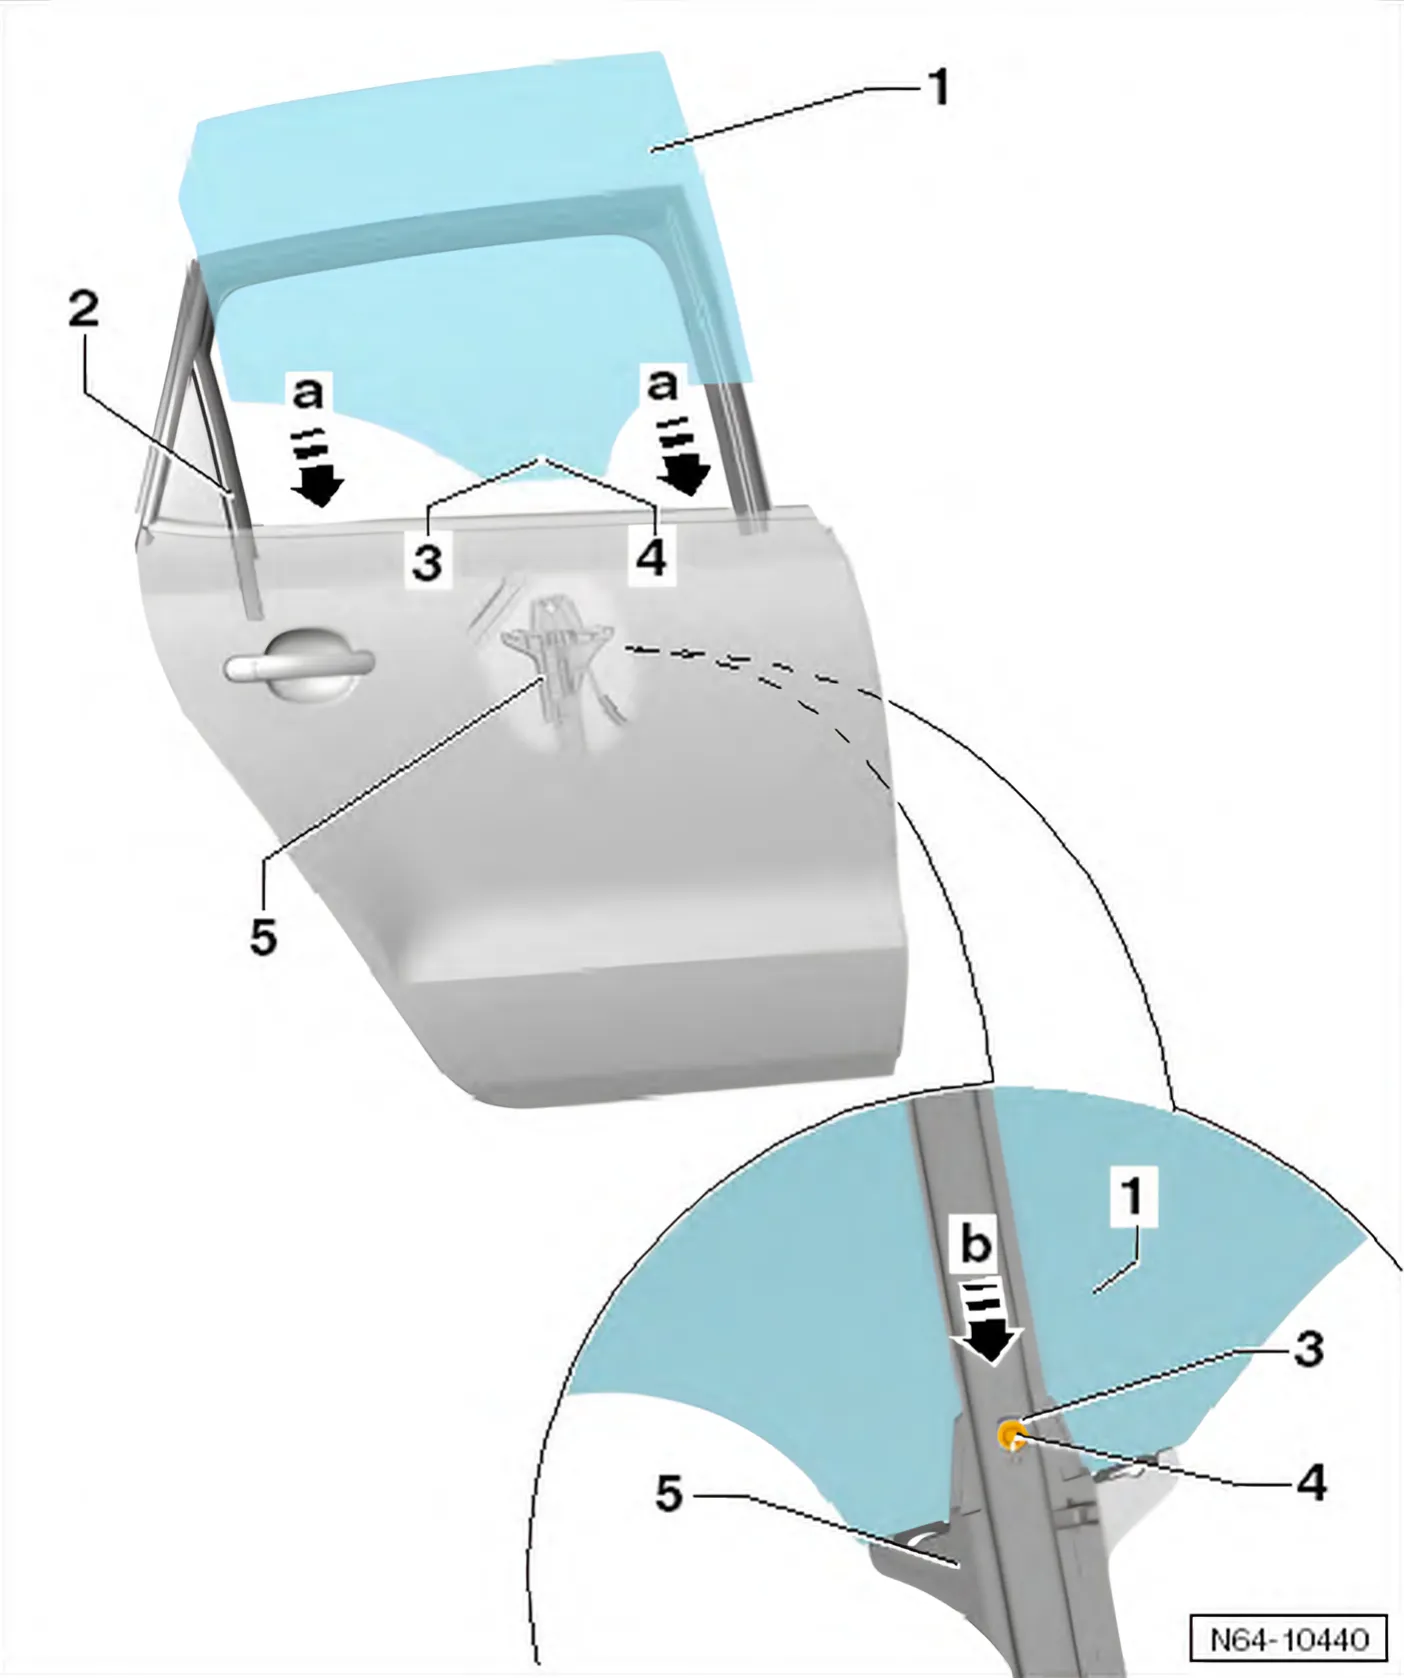
Installing
- Insert spreader plug -3- and centre it in the middle with the window glass -1- removed.
- Press spreader pin -4- flush into spreader plug -3-.
- Insert door window -1- into door -2- -arrows a- and insert door window into slot of window regulator guide -5-.
- With light pressure from above -arrows b-, push down window -1- until it engages with window regulator -5-.
- Then perform remaining installation in reverse order of removal.
- Carry out functional test function before installing door trim.