
7-speed DSG gearbox 0AM (DQ200) · Controls, Housing · DSG Transmission Mechatronic J743
DSG Transmission Mechatronic J743, Installing
Special tools and workshop equipment required
- Guide Bolt - Mechatronic - T10406-
Installing
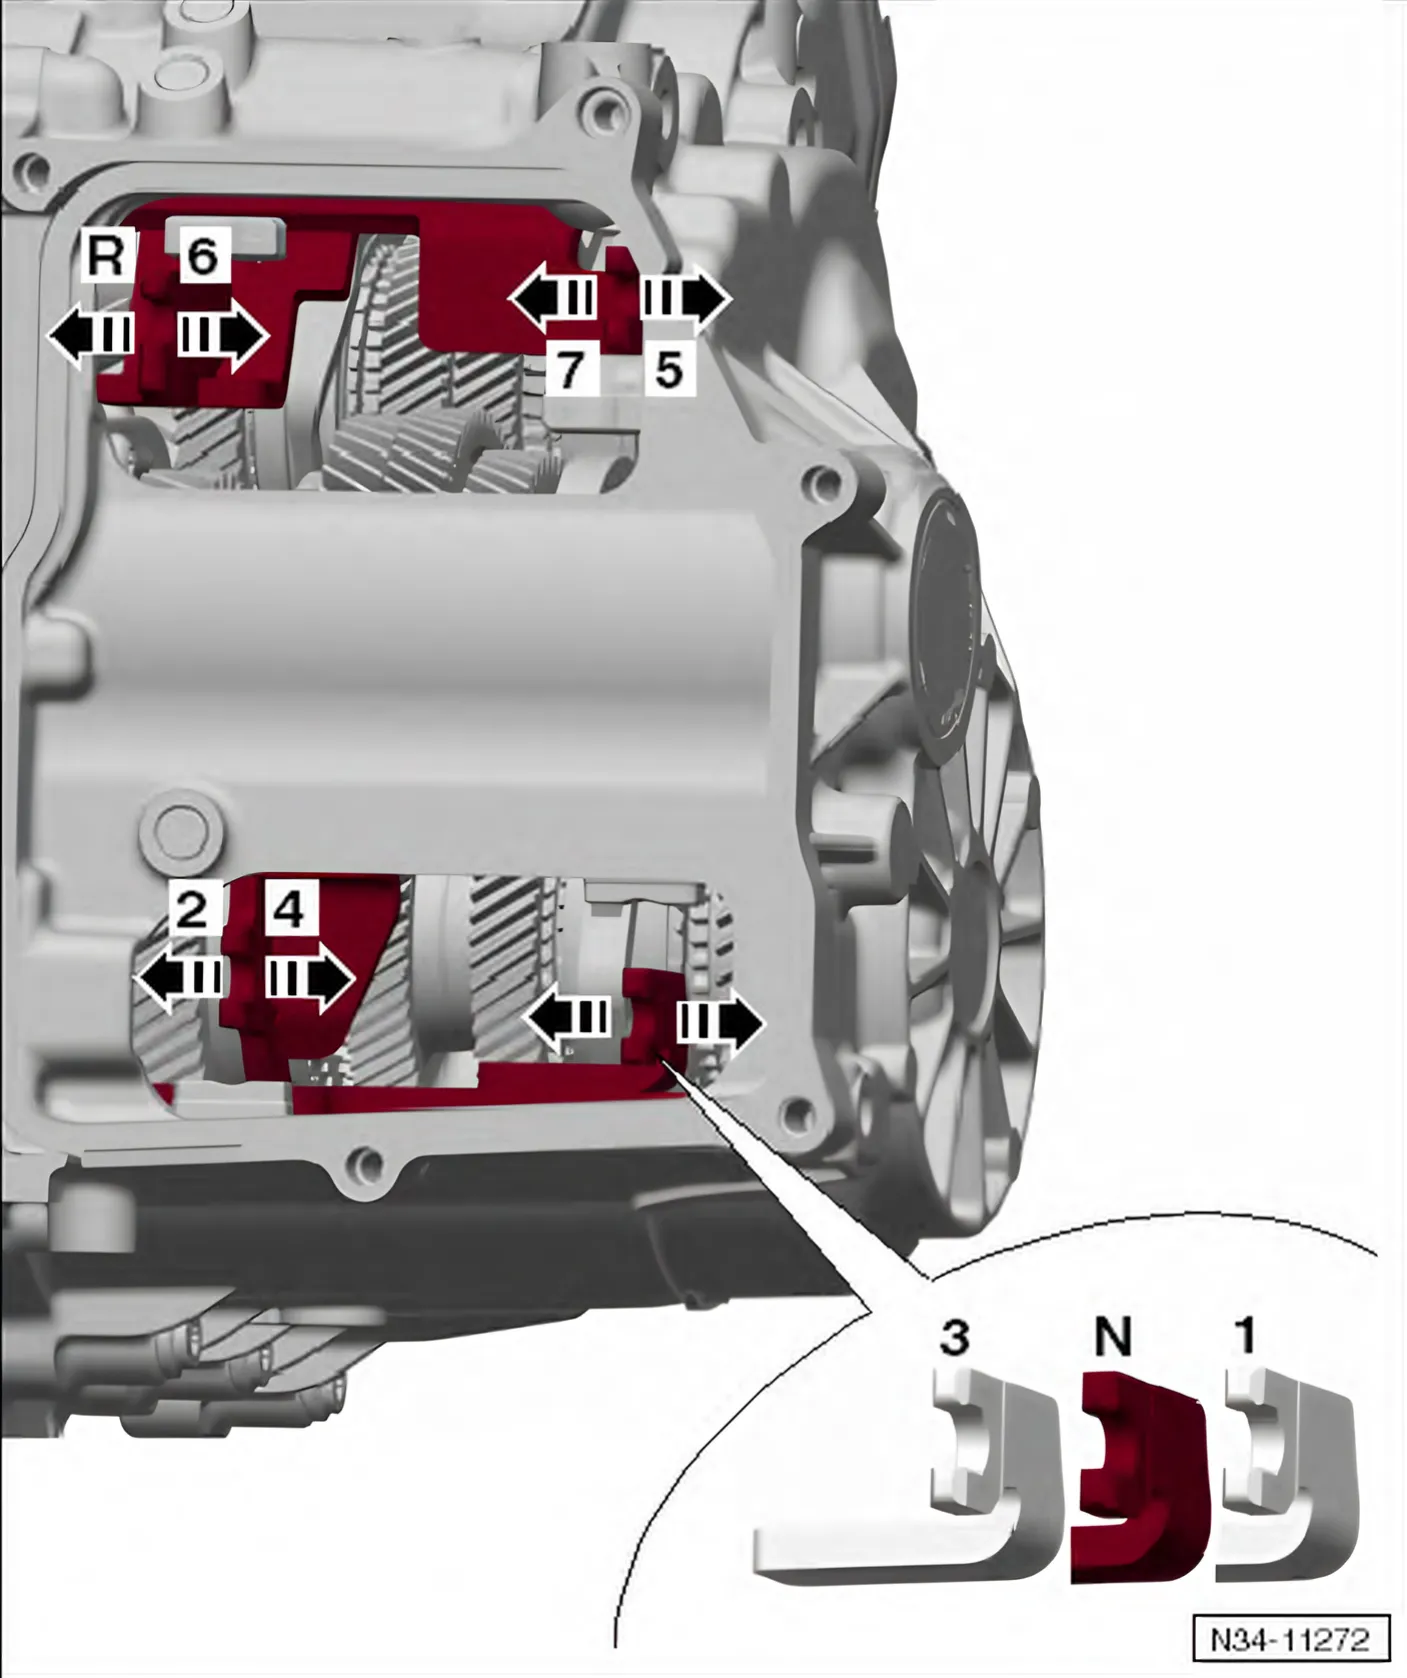
- Check each of the 4 shift forks by hand.
Each Shift Fork has 3 Settings: »gear engaged - neutral - gear engaged«.
- Shift each fork into every setting consecutively. Then remove all gears and set the shift forks back into »center position«.
The front wheel can be turned slightly for support. Then the forks will shift »easier«.
- Clean the sealing surface that the Mechatronic will later rest on.
Oil residue on the sealing surface causes the future error diagnosis to be »leaking«.
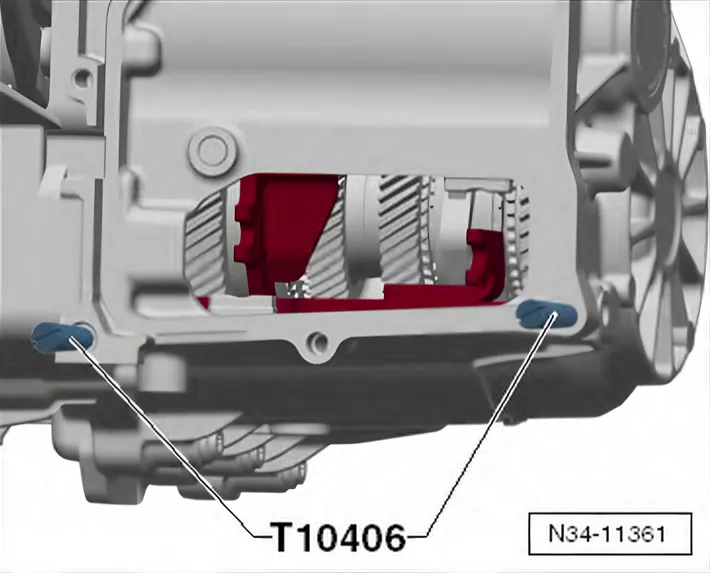
- Install the Guide Bolt - Mechatronic - T10406- hand-tight.
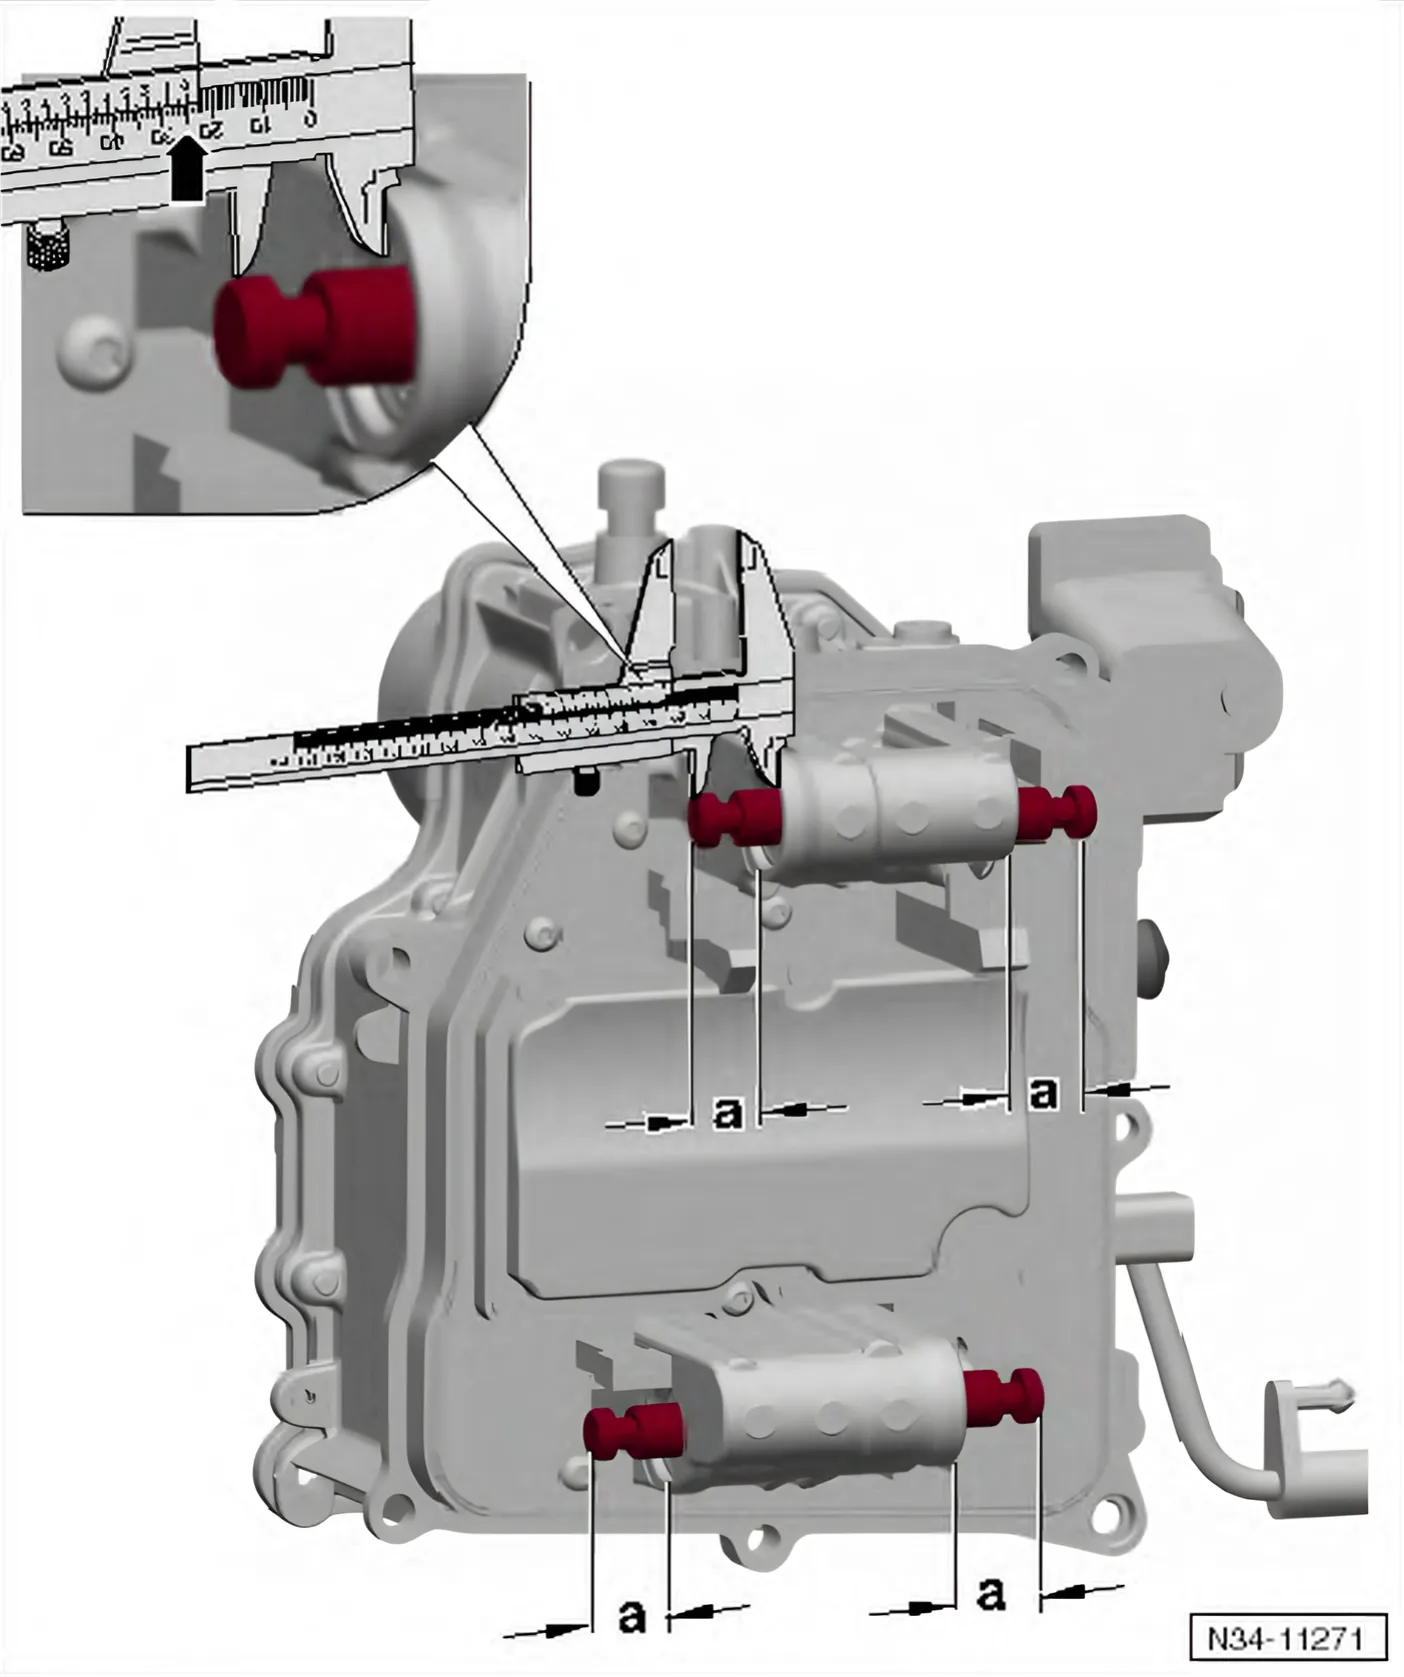
Make sure all 4 gear positioners stick out 25 mm -a-.
- Please clean the Mechatronic sealing surface.
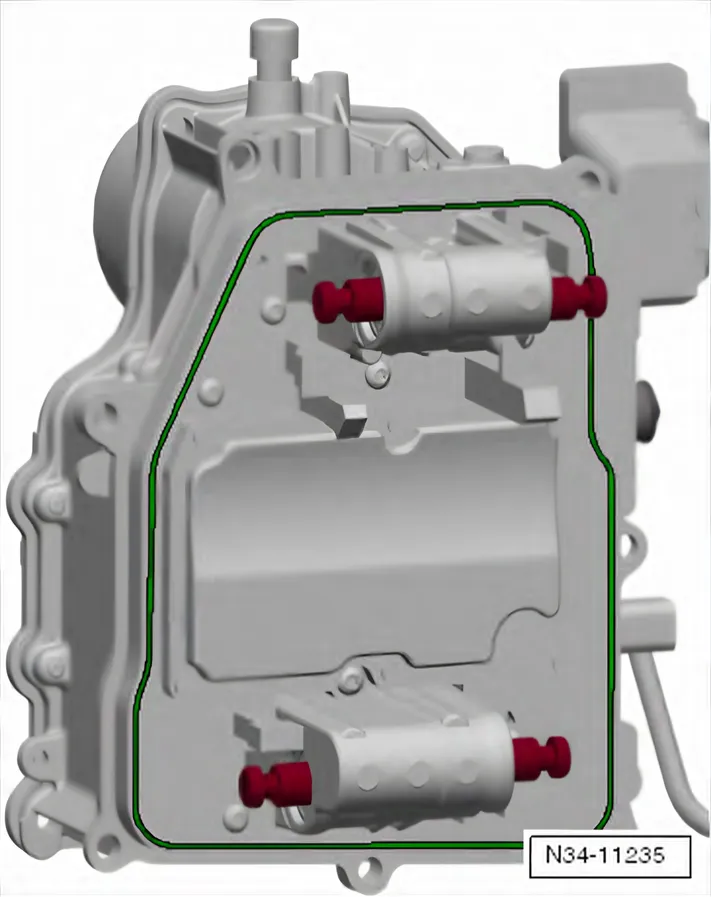
- Check the seal on the Mechatronic.
The seal must be fastened all around.
- Pay attention to the Transmission Input Speed Sensor 3 - G641-. The clip must not be damaged.
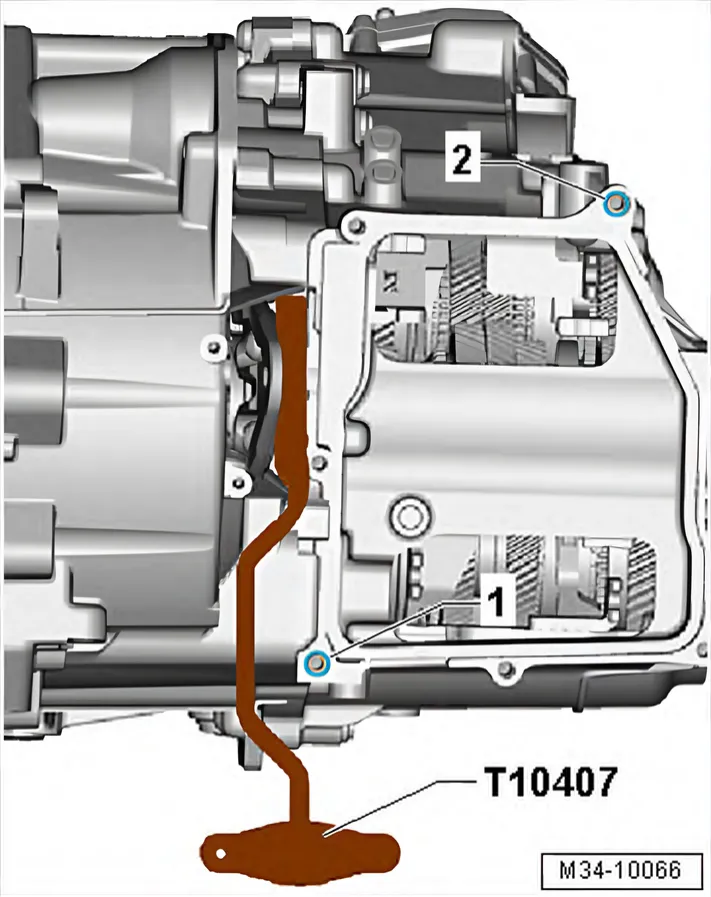
The Assembly Lever - T10407- is inserted between the engaging lever and the transmission housing.
The two alignment sleeves -1 and 2- for centering the Mechatronic on the transmission housing must be installed.
- Mount the Mechatronic.
- When handling and mounting, make sure the shift forks are not accidentally pushed out of their position.
- Also pay attention to the engaging lever and plunger at the Mechatronic.
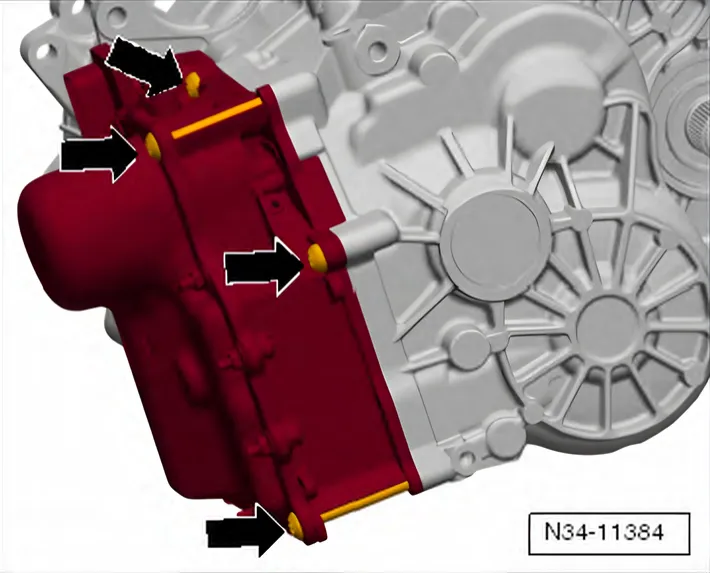
- Install 7 new bolts hand-tight.
- Remove the Guide Bolt - Mechatronic - T10406- again.
огромный архив документации по автомобилям Volkswagen, Skoda, Seat, Audi
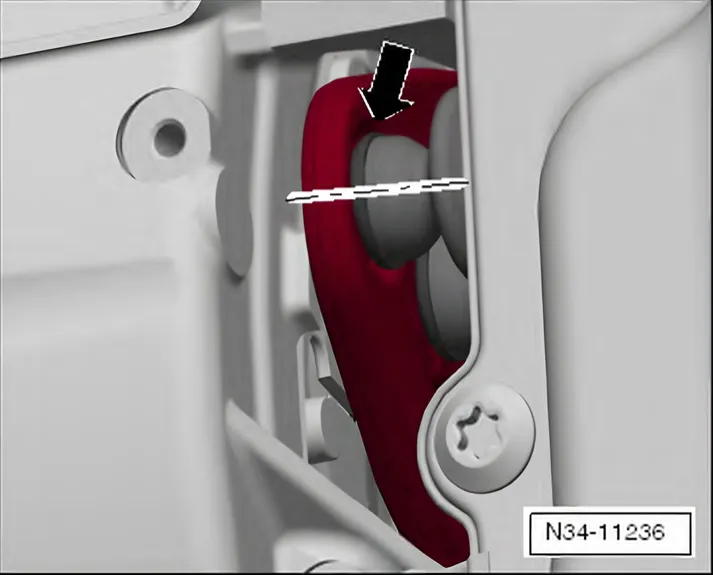
- Make sure the plungers fit correctly in the engaging lever socket when doing so.
- Pull the plungers out far enough until they fit correctly in the sockets.
The plungers can be brought into position using a bent welding wire hook (self-made).
- Now check the plunger positions once again.
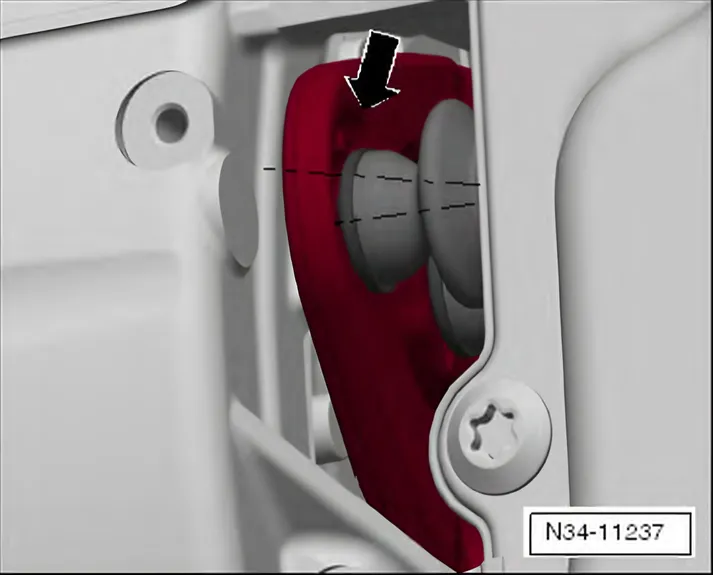
Plungers that are positioned incorrectly will damage the Mechatronic.
- Diagonally tighten the Mechatronic to 10 Nm.
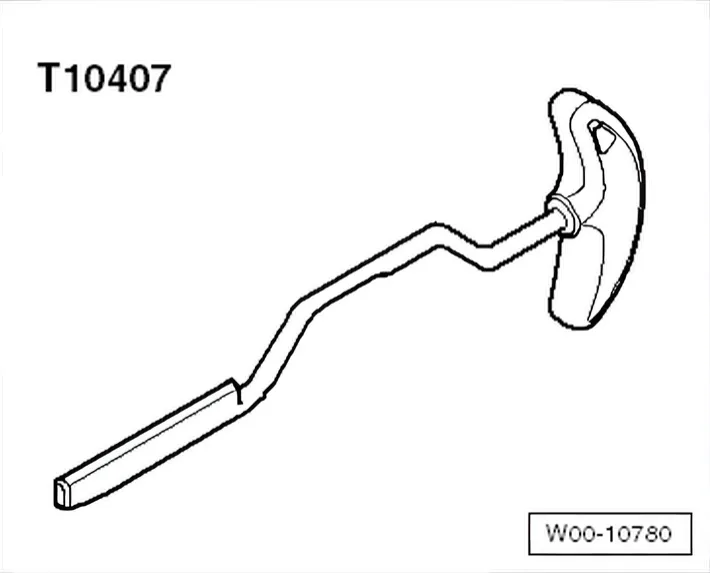
- Turn the Assembly Lever - Mechatronic - T10407- to the right and remove.
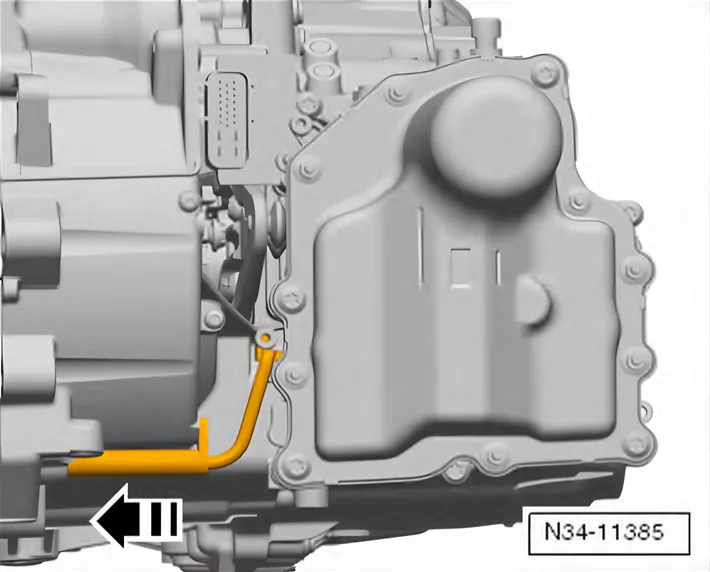
- Install the Transmission Input Speed Sensor 3 - G641-.
- Watch the sensor. The clip must not be damaged.
- The sensor must fit completely in its retainer and must be touching the transmission housing. Replace the Mechatronic if the sensor is »loose« or if the clip is broken.
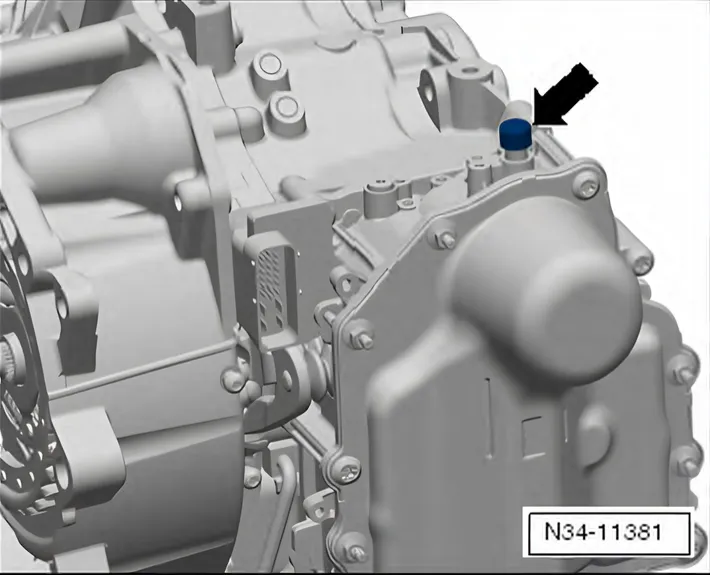
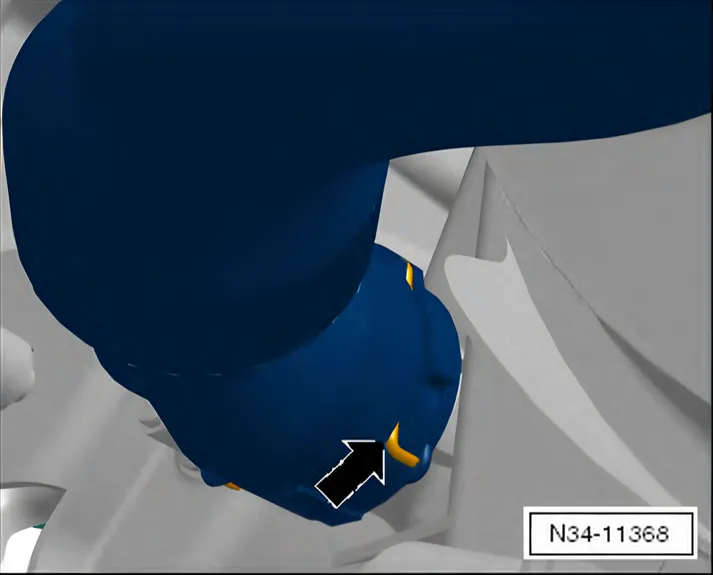
- Remove the plug and mount the vent cap -arrow-.
- To discharge any static electricity, touch vehicle ground with hand (without wearing a glove). Refer to ⇒ 7.2 Transmission.
- Connect and lock the Mechatronic connector.
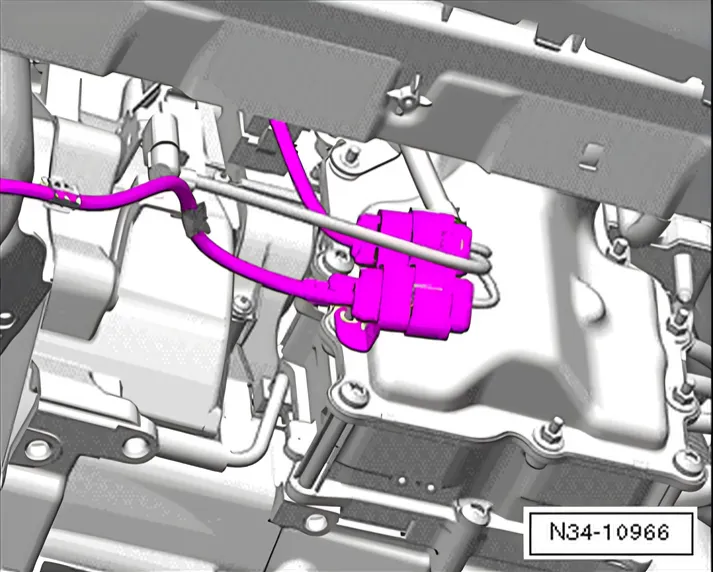
- Attach all of the front brackets to the transmission.
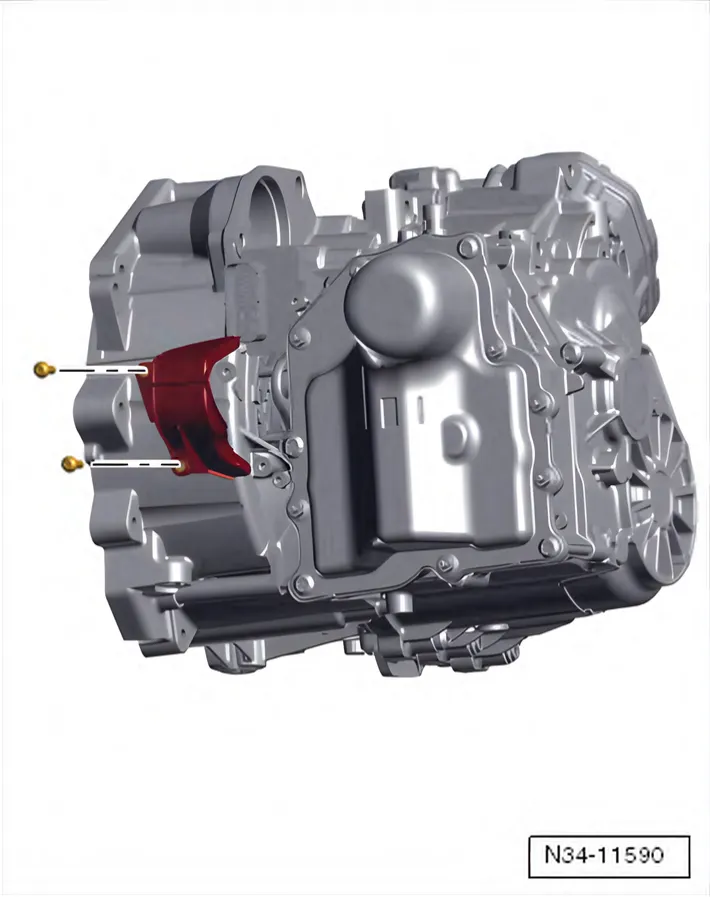
Some Vehicles have A Cover Over the Engaging Levers.
The cover prevents dirt from getting in.
Tightening Specification: 8 Nm.
Now fill the transmission fluid. Refer to ⇒ 1 Transmission Fluid, Replacing.
- Install the starter. Refer to ⇒ Electrical Equipment; Rep. Gr. 27; Starter; Starter, Removing and Installing.
- If removed, install the charge air or coolant hoses.
- Install the battery and the battery tray. Refer to ⇒ Electrical Equipment; Rep. Gr. 27; Battery; Battery, Removing and Installing.
- Install the air filter housing:
- Gasoline engine. Refer to ⇒ Rep. Gr. 24; Air Filter; Overview - Air Filter Housing.
- TDI engine. Refer to ⇒ Rep. Gr. 23; Diesel Direct Injection System; Overview - Air Filter.
- Fill the coolant if necessary. Refer to ⇒ Rep. Gr. 19; Cooling System Components.
- Install the noise insulation. Refer to ⇒ Body Exterior; Rep. Gr. 50; Noise Insulation.
- Connect the Vehicle Diagnostic Tester and Perform basic
measurement. Refer to
- If necessary, place the plug on the »removed« Mechatronic.
Now the Mechatronic can be sealed for shipping.
Tightening torques on this page
2 torques
In the steps
| Step | Torque |
|---|---|
| Diagonally tighten the Mechatronic to 10 Nm. | 10 Nm |
| Tightening Specification: 8 Nm. | 8 Nm |