
1.6 TDI CR engine (EA189) · Turbocharging/supercharging · Charge air system
Charge-air hose connections – assembly overview and fastening
⇒ 2.3.1 Hose connections with grooved unions
⇒ 2.3.2 Hose connections with plug-in connectors
⇒ 2.3.3 Removing and installing charge air pipe hot side
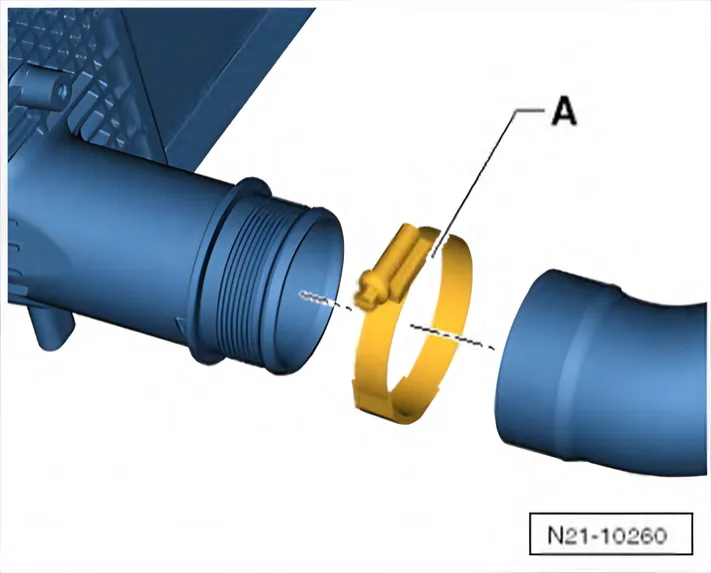
2.3.1 Hose connections with grooved unions
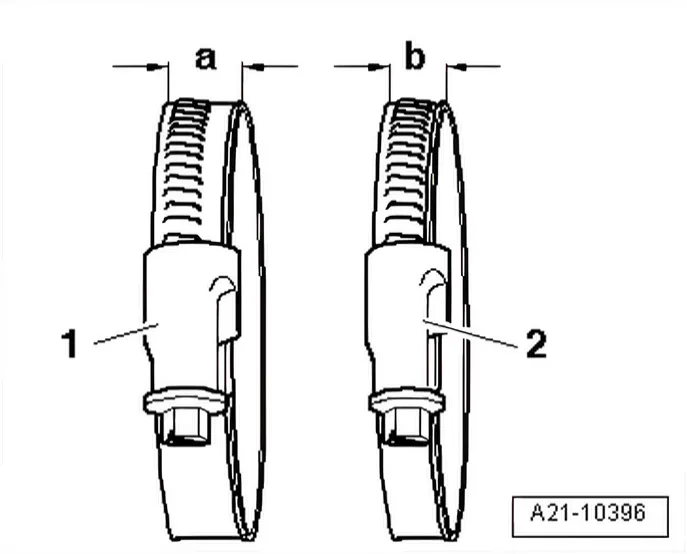
Installing air hoses with screw-type clips
Specified torques for
- 1 Hose clip -a- = 13 mm wide: 5.5 Nm
- 2 Hose clip -b- = 9 mm wide: 3 Nm
2.3.2 Hose connections with plug-in connectors
Removing
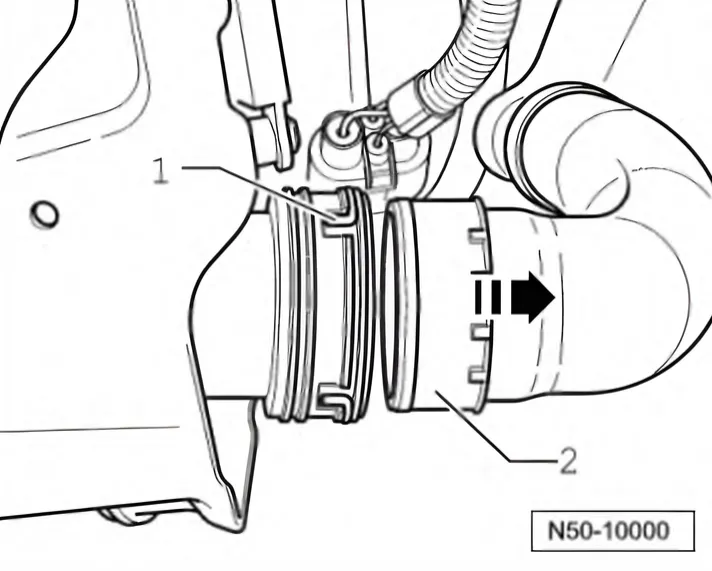
- Release plug-in connector by pulling securing clip -1-. Pull hose/pipe-2- off without the use of tools.
Installing
- If renewed, place seal in groove of charge air hose. Ensure the seal is correctly seated in the groove.
- Lubricate sealing surface and seal with oil.
- Bring retaining clip to release position -1-.
- Push charge air hose into coupling to stop.
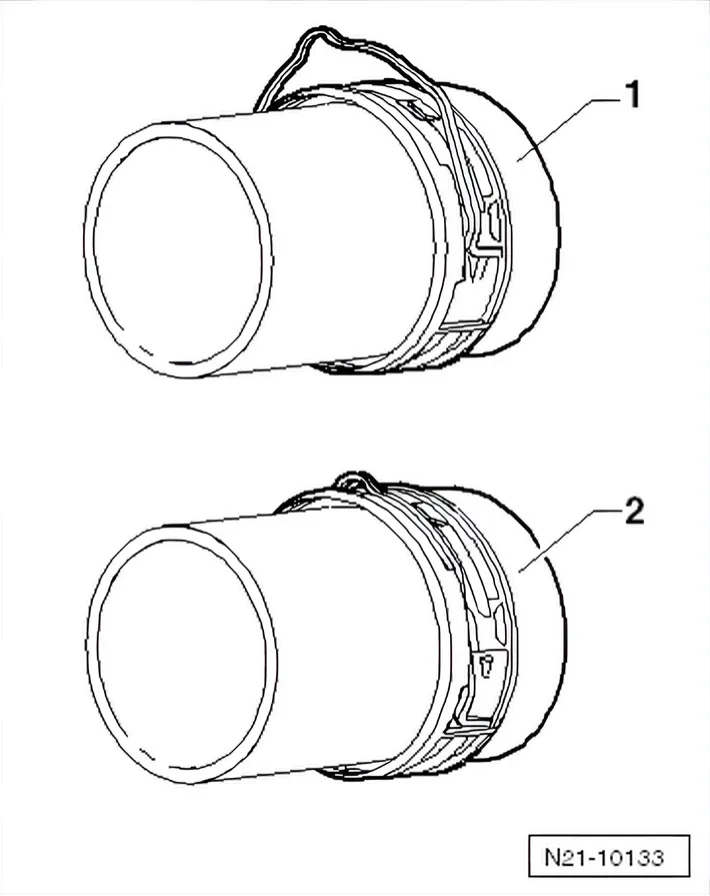
- Bring securing clip to locking position -2- and then push charge air hose again.
- Check if plug-in connector seats correctly and is properly engaged by pulling hose.
2.3.3 Removing and installing charge air pipe »hot« side
Procedure
- Remove engine cover panel ⇒ 3 Engine cover panel.
- With ignition switched off, disconnect battery earth strap. ⇒ Electrical system; Rep. gr. 27; Battery; Disconnecting and connecting battery
- Remove battery and battery tray ⇒ Electrical system; Rep. gr. 27; Battery; Removing and installing battery.
- Remove air filter housing with air mass meter and connecting pipe ⇒ 7.2.2 Removing and installing air filter housing, Polo.
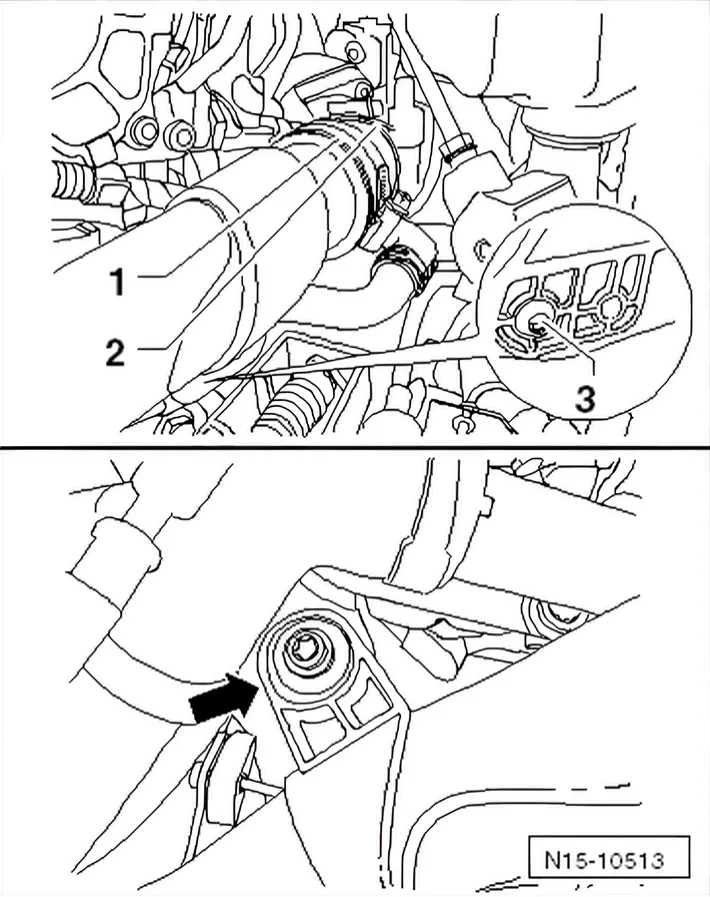
- Loosen clamp -2- on connecting hose to pulsation damper. Unscrew securing bolt -3- from charge air pipe.
- Unscrew securing bolt -arrow- from charge air pipe. Pull connecting hose from pulsation damper as far as possible.
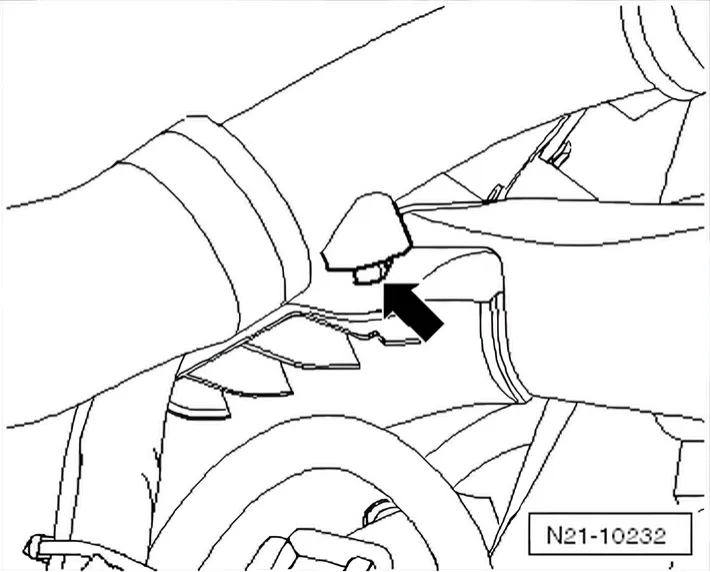
- Unclip top coolant hose on charge air pipe -arrow-.
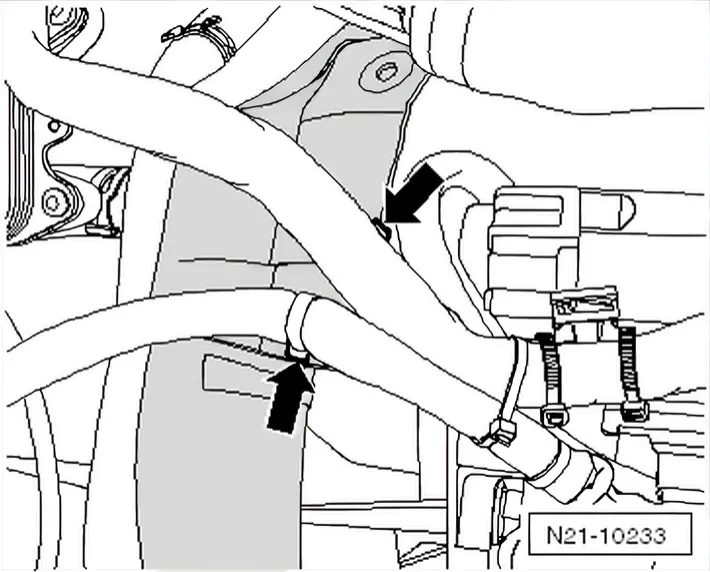
- Unclip wiring harness on charge air pipe -arrows-.
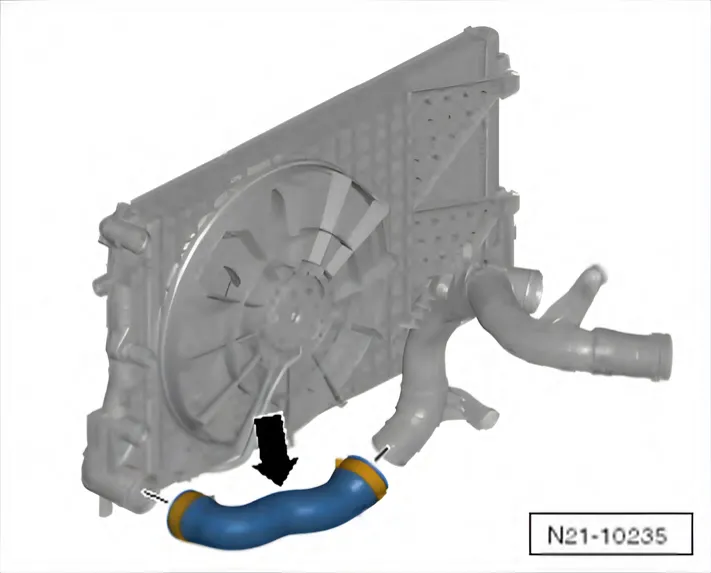
- Remove connecting hose -arrow- »hot side«.
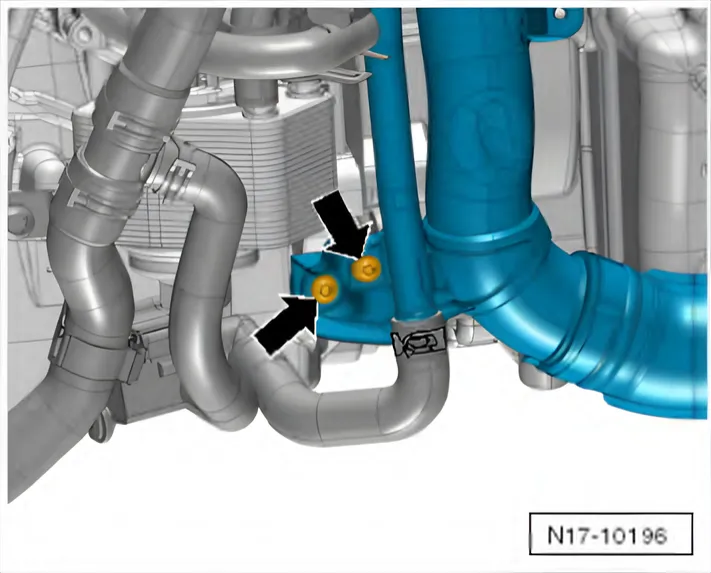
- Remove securing bolts -arrows- of charge air pipe on »hot side«.
- Remove charge air pipe.
Installing
- Install in reverse order. When doing this, observe the following:
- First start all securing bolts on charge air pipe. Then tighten. Specified torque:.
Renew any damaged cable ties and clips.
Tightening torques on this page
2 torques
2.3.1 Hose connections with grooved unionsTo the drawing ↑
| Item | Part | Torque |
|---|---|---|
| 1 | Hose clip -a- = 13 mm wide: | 5.5 Nm |
| 2 | Hose clip -b- = 9 mm wide: | 3 Nm |