
7-speed DSG gearbox 0AM (DQ200) · Final Drive, Differential · Seals
Left Flange Shaft Seal, Replacing
Right side. Refer to ⇒ 1.4 Right Flange Shaft Seal, Replacing
Special tools and workshop equipment required
- Slide Hammer Set - VW771-
- Seal Installer - Flange Shaft - 3305-
- Tensioning Strap - T10038-
- Socket And Extended Bit - T10107A- or Long Hex Socket - VAG1669-
- Used Oil Collection and Extraction Unit - SMN372500-
- Sealing Grease - G 052 128 A1-
Removing
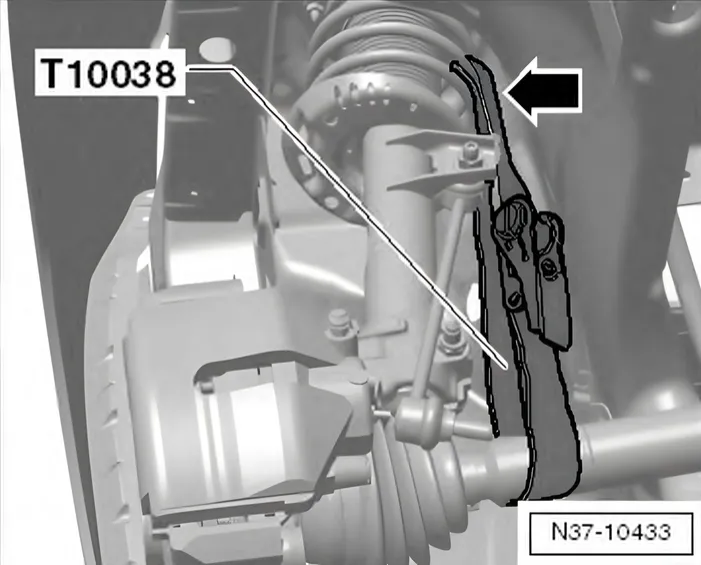
- Remove the noise insulation. Refer to ⇒ Body Exterior; Rep. Gr. 50; Noise Insulation.
- Remove the left wheel housing liner. Refer to ⇒ Body Exterior; Rep. Gr. 66; Wheel Housing Liner; Overview - Front Wheel Housing Liner.
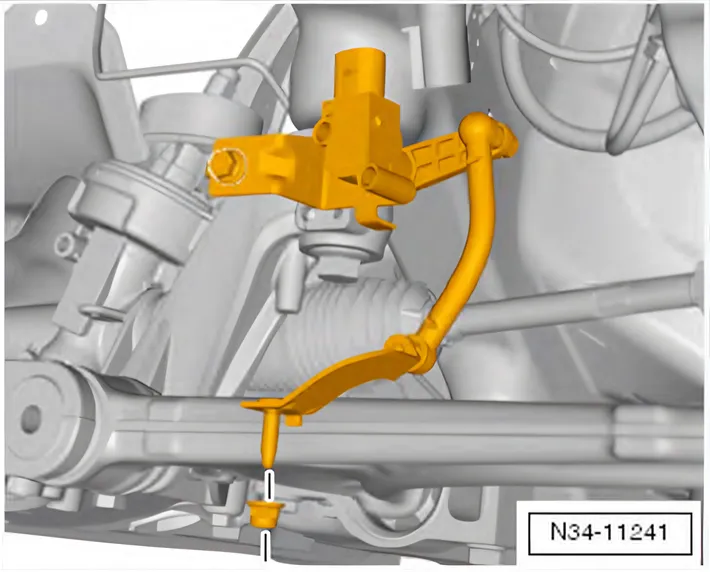
- If equipped, remove the Left Front Level Control System Sensor - G78- from the control arm.
Tightening specification. Refer to ⇒ Suspension, Wheels, Steering; Rep. Gr. 40; Front Suspension and Control Arm; Overview
- Front Suspension and Control Arm.
- Turn the steering wheel all the way to the left and remove the left drive axle from the flange shaft. Refer to ⇒ Suspension, Wheels, Steering; Rep. Gr. 40; Drive Axles, Removing and Installing.
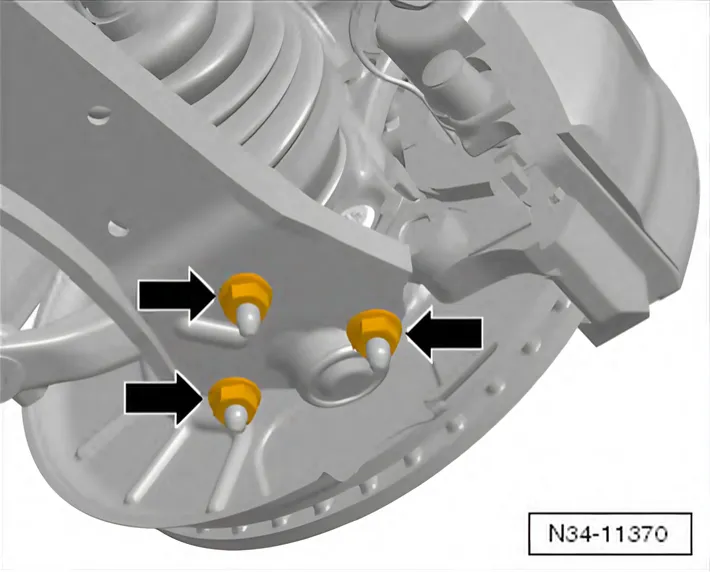
- Remove only the left control arm from the ball joint -arrows-.
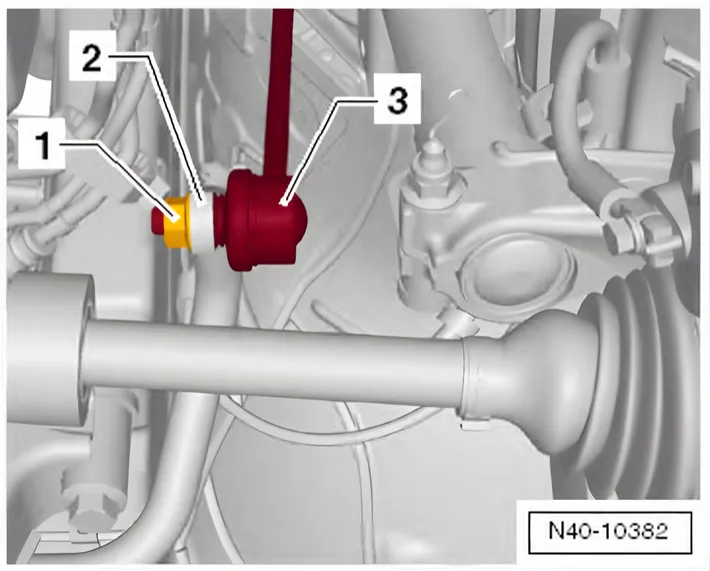
- Remove the nut -1- from the coupling rod -3-. Refer to ⇒ Suspension, Wheels, Steering; Rep. Gr. 40; Front Suspension and Control Arm; Overview - Front Suspension and Control Arm or ⇒ Suspension, Wheels, Steering; Rep. Gr. 40; Front Suspension and Control Arm; Overview - Front Suspension and Control Arm.
- Remove the coupling rod and turn the stabilizer bar -2- slightly upward.
- Swivel the left drive axle into the wheel housing.
- Tie up the drive axle as high as possible. Do not damage the paint on the drive axle.
- Place the Used Oil Collection and Extraction Unit - SMN372500- or Drip Tray under the transmission.
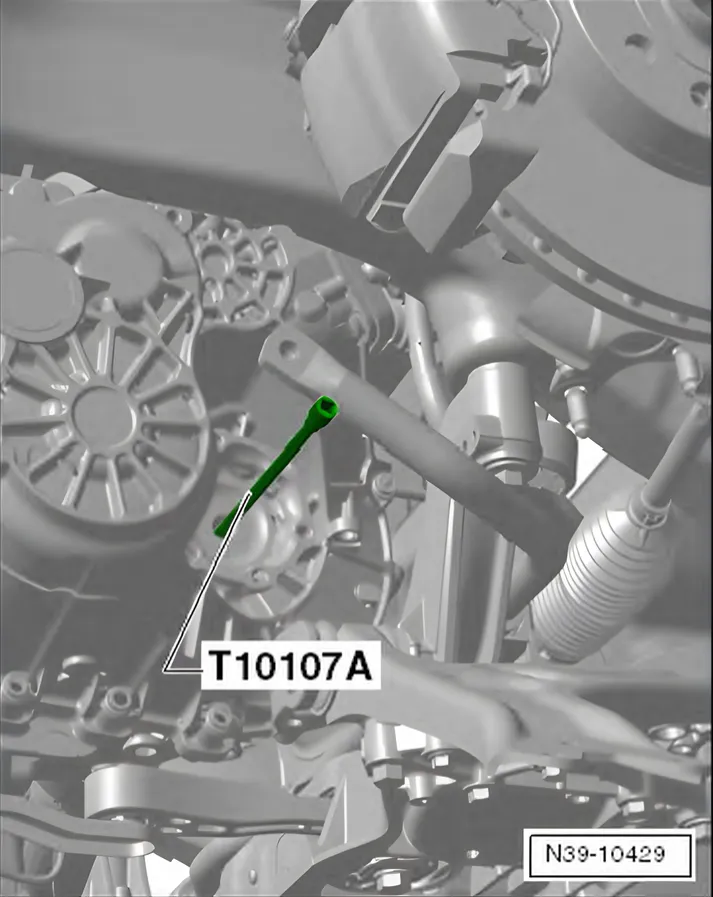
- Remove the left flange shaft bolt at the transmission using the Socket And Extended Bit - T10107A-. Insert two bolts in the flange and counterhold with a tire iron.
The bolt has 6 mm inner hex. The bolt can also be removed and installed using the Long Hex Socket - VAG1669-.
- Remove the flange shaft.
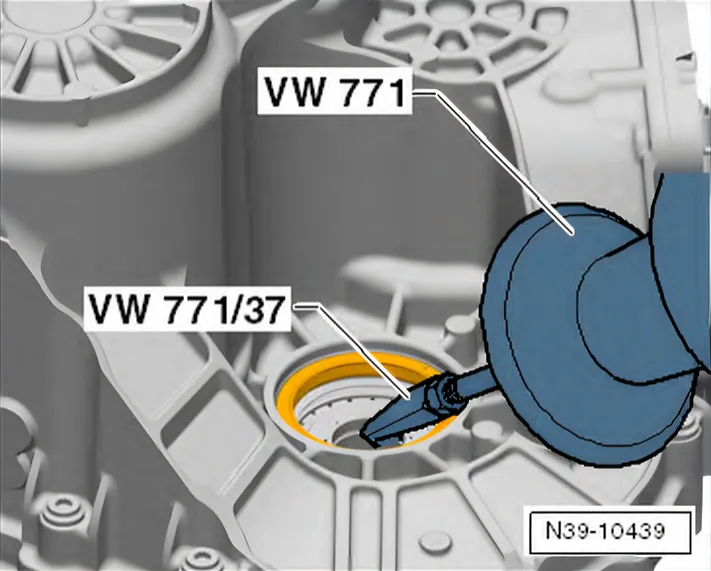
- Remove flange shaft seal.
Installing
- Lightly oil the new gasket on the outer circumference.
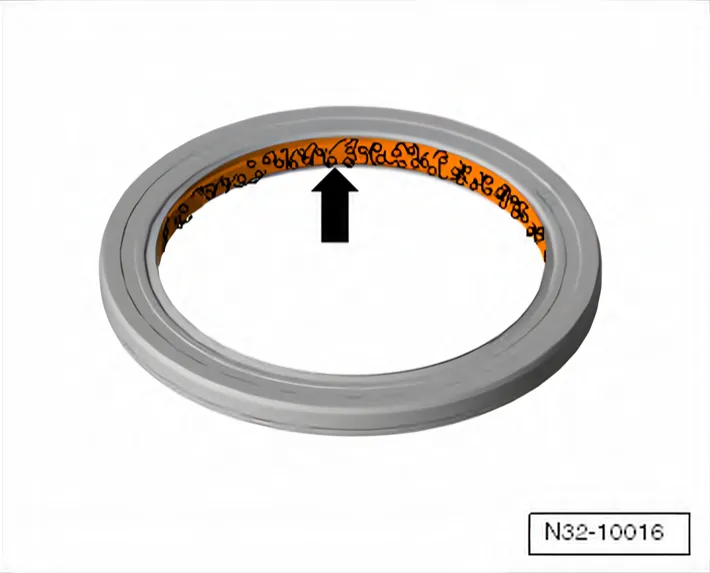
- Fill the space with the new seal between the sealing and dust lip halfway with Sealing Grease - G 052 128- -arrow-.
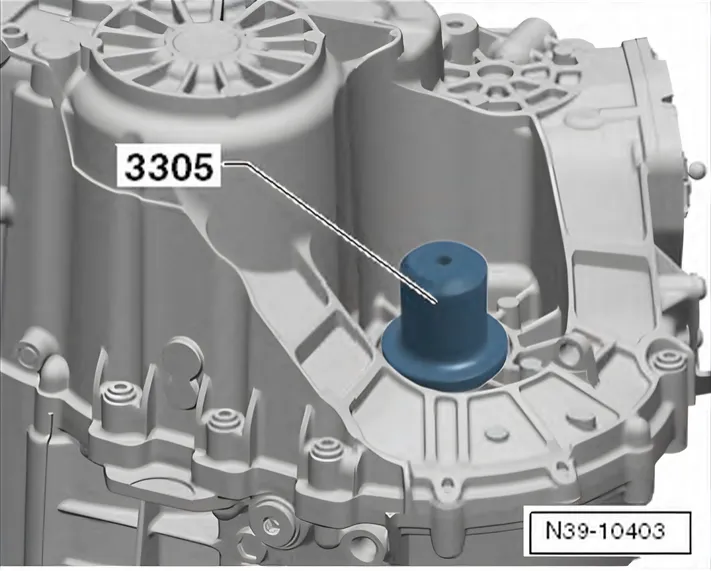
- Drive in the new seal all the way using the Seal Installer - Flange Shaft - 3305-. Do not tilt the seal.
- Install the flange shaft.
- Tighten the new bolt to 30 Nm. Push the flange shaft against the transmission so that the bolt engages in the thread.
- Reinstall the drive axle. Refer to ⇒ Suspension, Wheels, Steering; Rep. Gr. 40; Drive Axles, Removing and Installing.
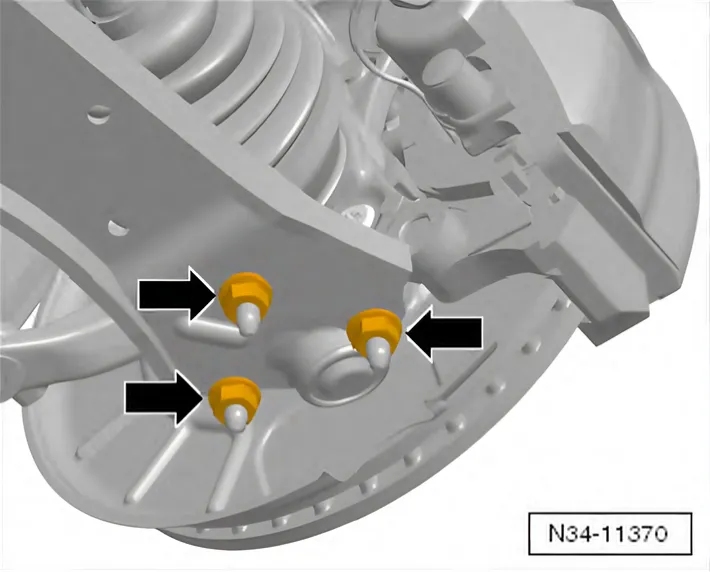
- Reattach the control arm and coupling rod. Refer to ⇒ Suspension, Wheels, Steering; Rep. Gr. 40; Front Suspension and Control Arm; Overview - Front Suspension and Control Arm or ⇒ Suspension, Wheels, Steering; Rep. Gr. 40; Front Suspension and Control Arm; Overview - Front Suspension and Control Arm.
- Refill any transmission fluid that may have leaked out while removing the seal. Refer to ⇒ 1 Transmission Fluid, Replacing.
- Install the noise insulation. Refer to ⇒ Body Exterior; Rep. Gr. 50; Noise Insulation.
огромный архив документации по автомобилям Volkswagen, Skoda, Seat, Audi
Tightening torques on this page
1 torque
In the steps
| Step | Torque |
|---|---|
| Tighten the new bolt to 30 Nm. Push the flange shaft against the transmission so that the bolt engages in the thread. | 30 Nm |