
Body repairs – exterior · Exterior equipment · Spoiler
Removing and installing side piece of spoiler
⇒ 2.4.1 Removing and installing side piece of spoiler, Polo BlueMotion
⇒ 2.4.2 Removing and installing side piece of spoiler, Polo Blue GT
2.4.1 Removing and installing side piece of spoiler, Polo »BlueMotion«
Special tools and workshop equipment required
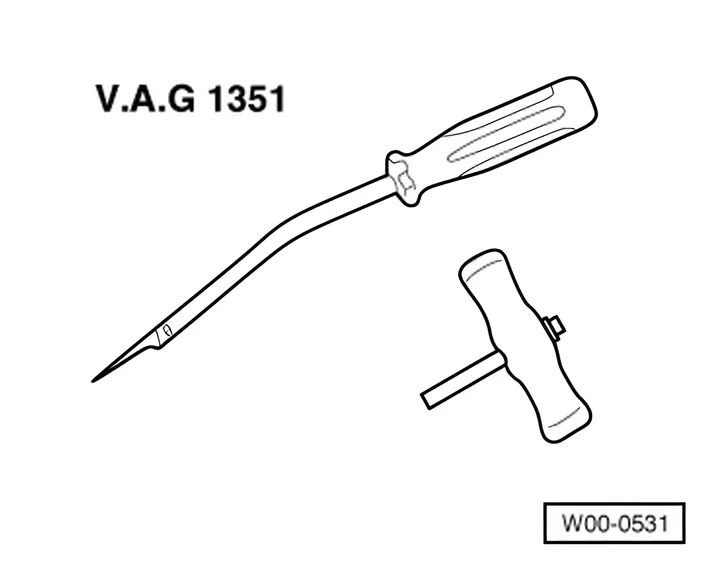
- Pull handle - V.A.G 1351/1-
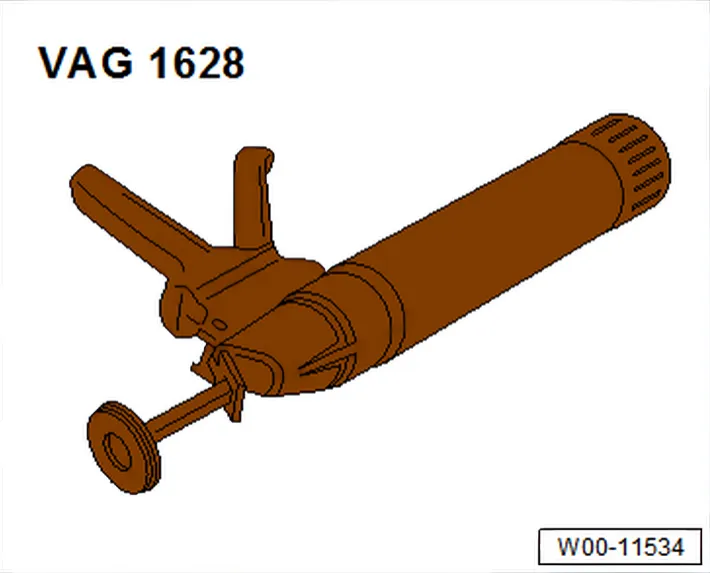
- Hand-cartridge gun - V.A.G 1628-
Materials
1) Observe instructions for use on the information sheet provided by the manufacturer.
2) Observe minimum curing period ⇒ 10.1.5 Minimum curing period for bonded addon parts.
3) Heat according to manufacturer's instructions, using cartridge heater - V.A.G 1939-.
4) Small cartridge, 180 ml, for sealing and/or when a 400 ml double cartridge alone is not sufficient.
5) The part numbers of materials can be found in the ⇒ Electronic Parts Catalogue “ETKA”.
Removing
- Middle piece of roof spoiler already removed ⇒ 2.2.1 Removing and installing spoiler, Polo »BlueMotion«
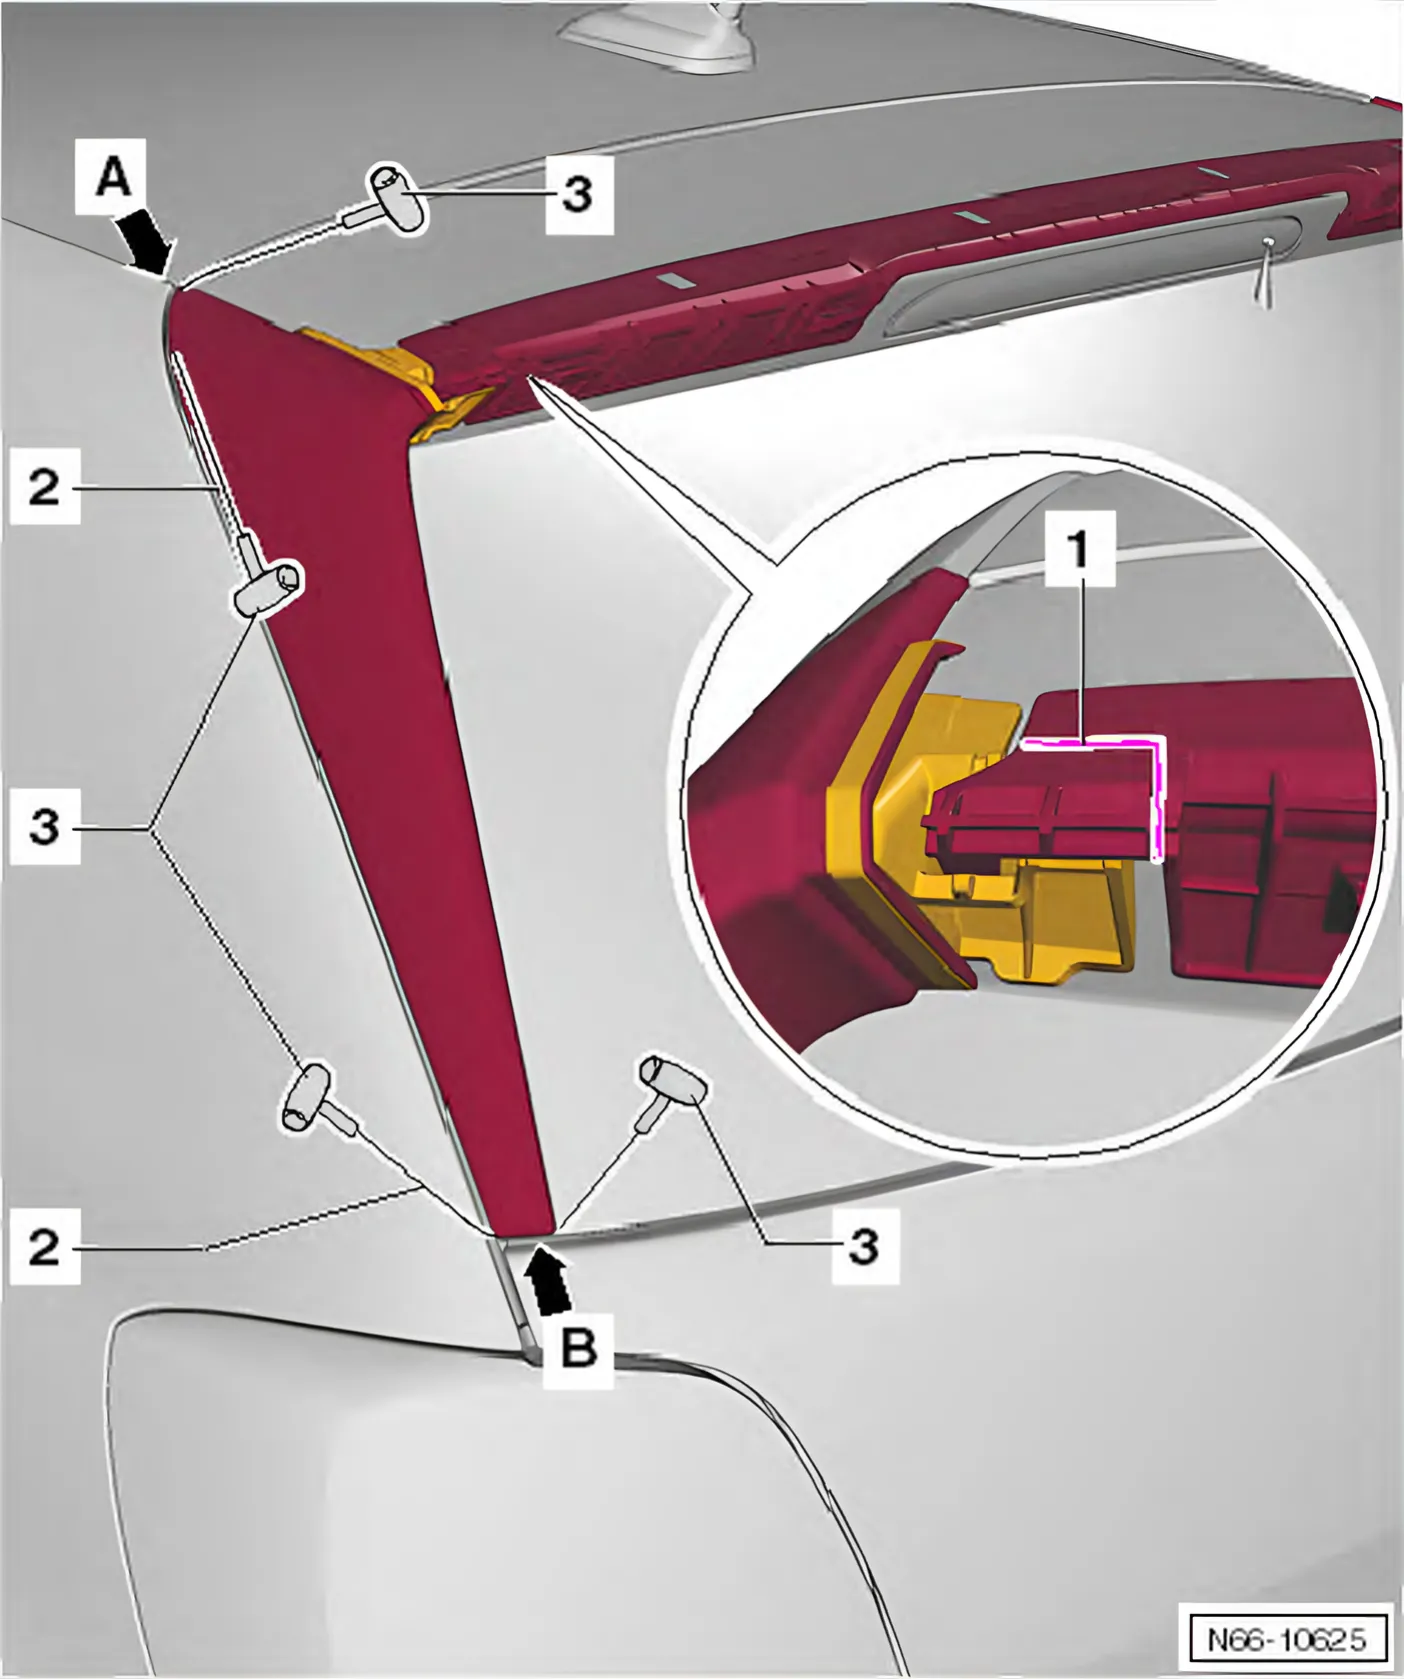
- Cut through fastener between adapter and side piece of roof edge on adapter -1-.
- At top, position cutting cord -2- under side piece of roof spoiler
- A-.
- Cut through adhesive sealant using pull handles - V.A.G 1351/1- -3- and cutting cord -2-.
- At bottom, position cutting cord -2- under side piece of roof spoiler -B-.
- Cut through adhesive sealant using pull handles - V.A.G 1351/1- -3- and cutting cord -2-.
- Remove side piece of roof spoiler.
- If necessary, remove adapter ⇒ 2.3.1 Removing adapter, Polo BlueMotion.
Installing
- Place side piece of roof spoiler on rear lid and mark position.
- Remove side piece of roof spoiler.
- Clean side piece of roof spoiler, rear lid and rear windows with cleaning solution.
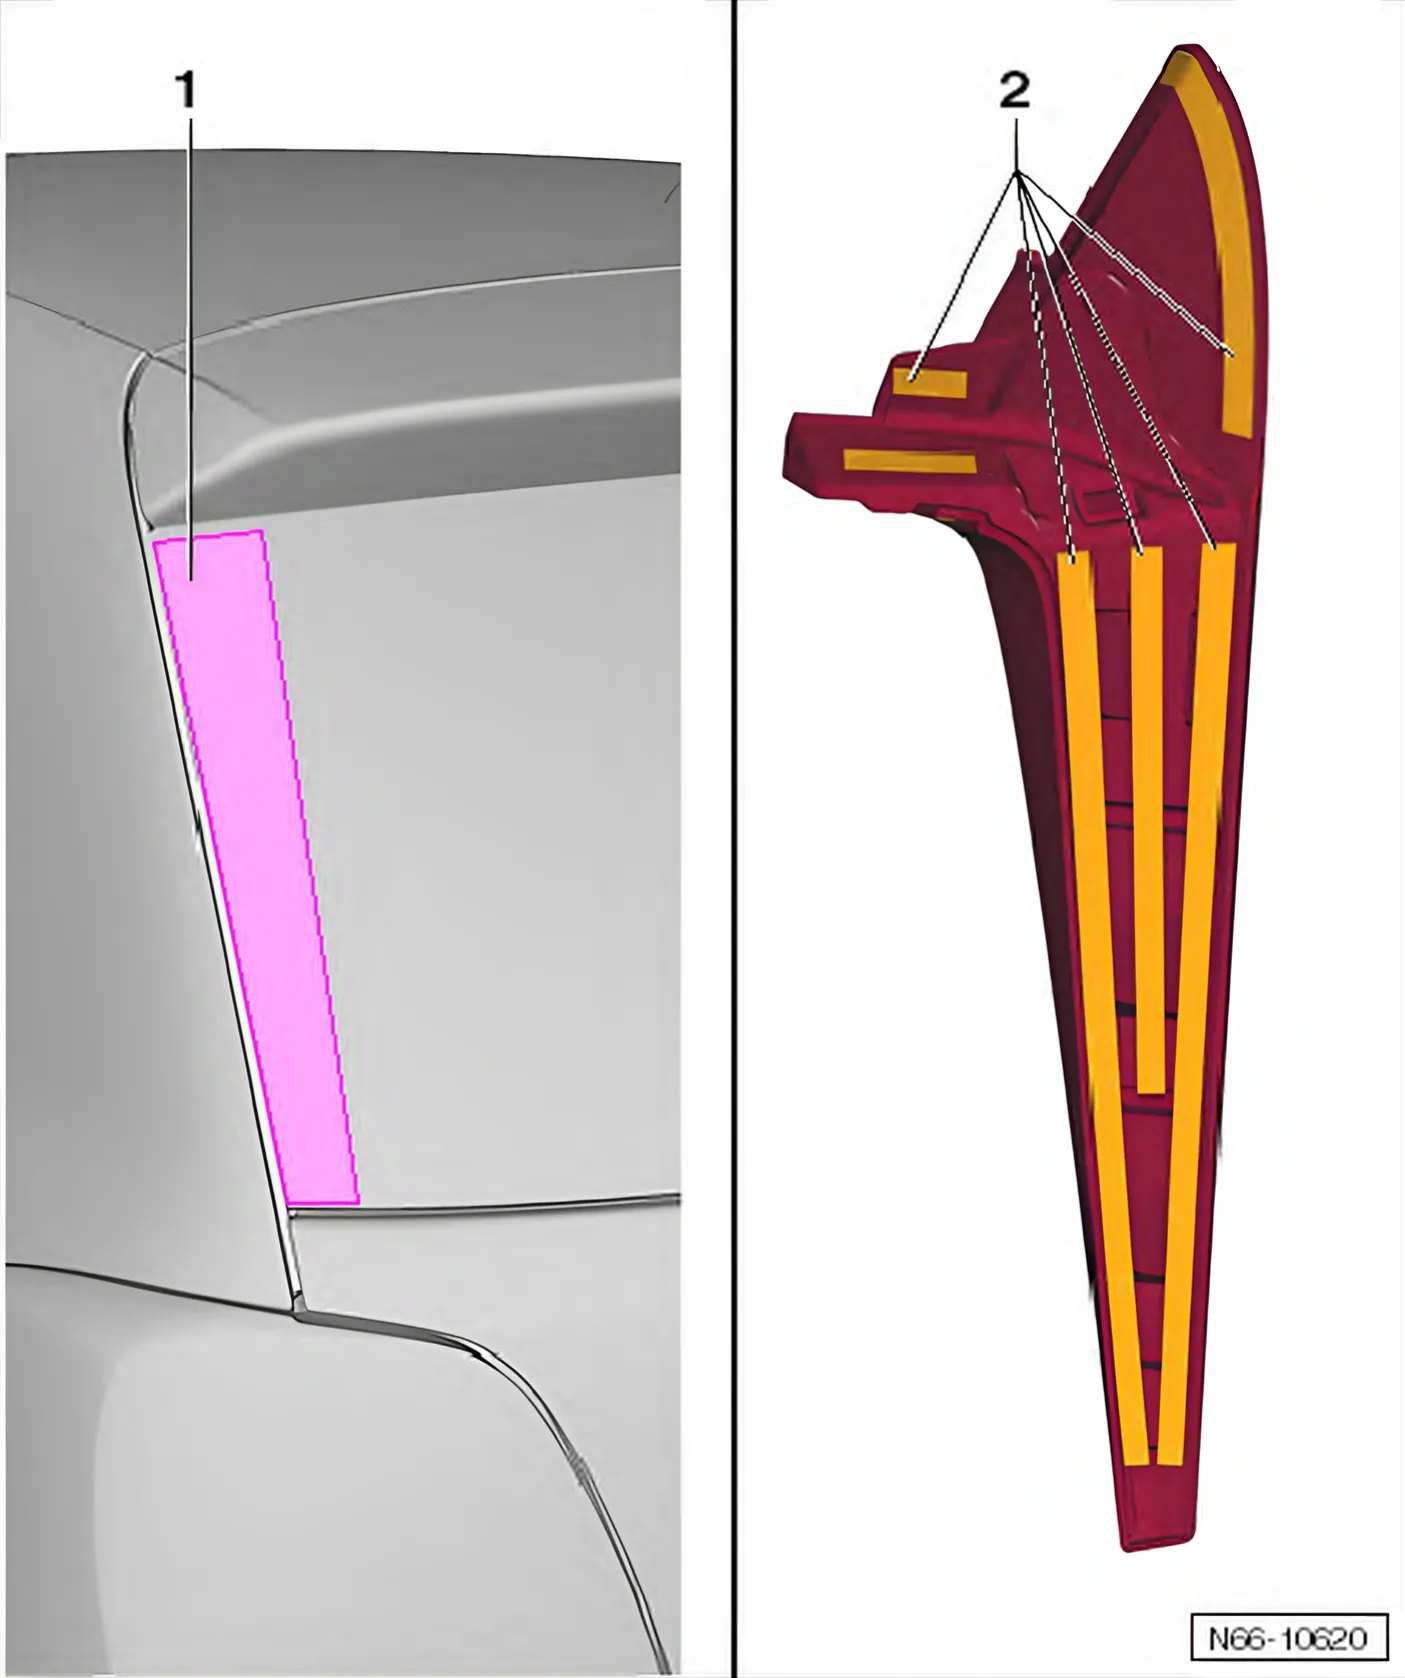
- Apply glass/paint primer to bonding surface -1- on rear window, and allow to flash off.
- Apply glass/paint primer to bonding surfaces -2- on side piece of roof spoiler, and allow to flash off.
- Stick double-sided adhesive tape to embossed areas -2-.
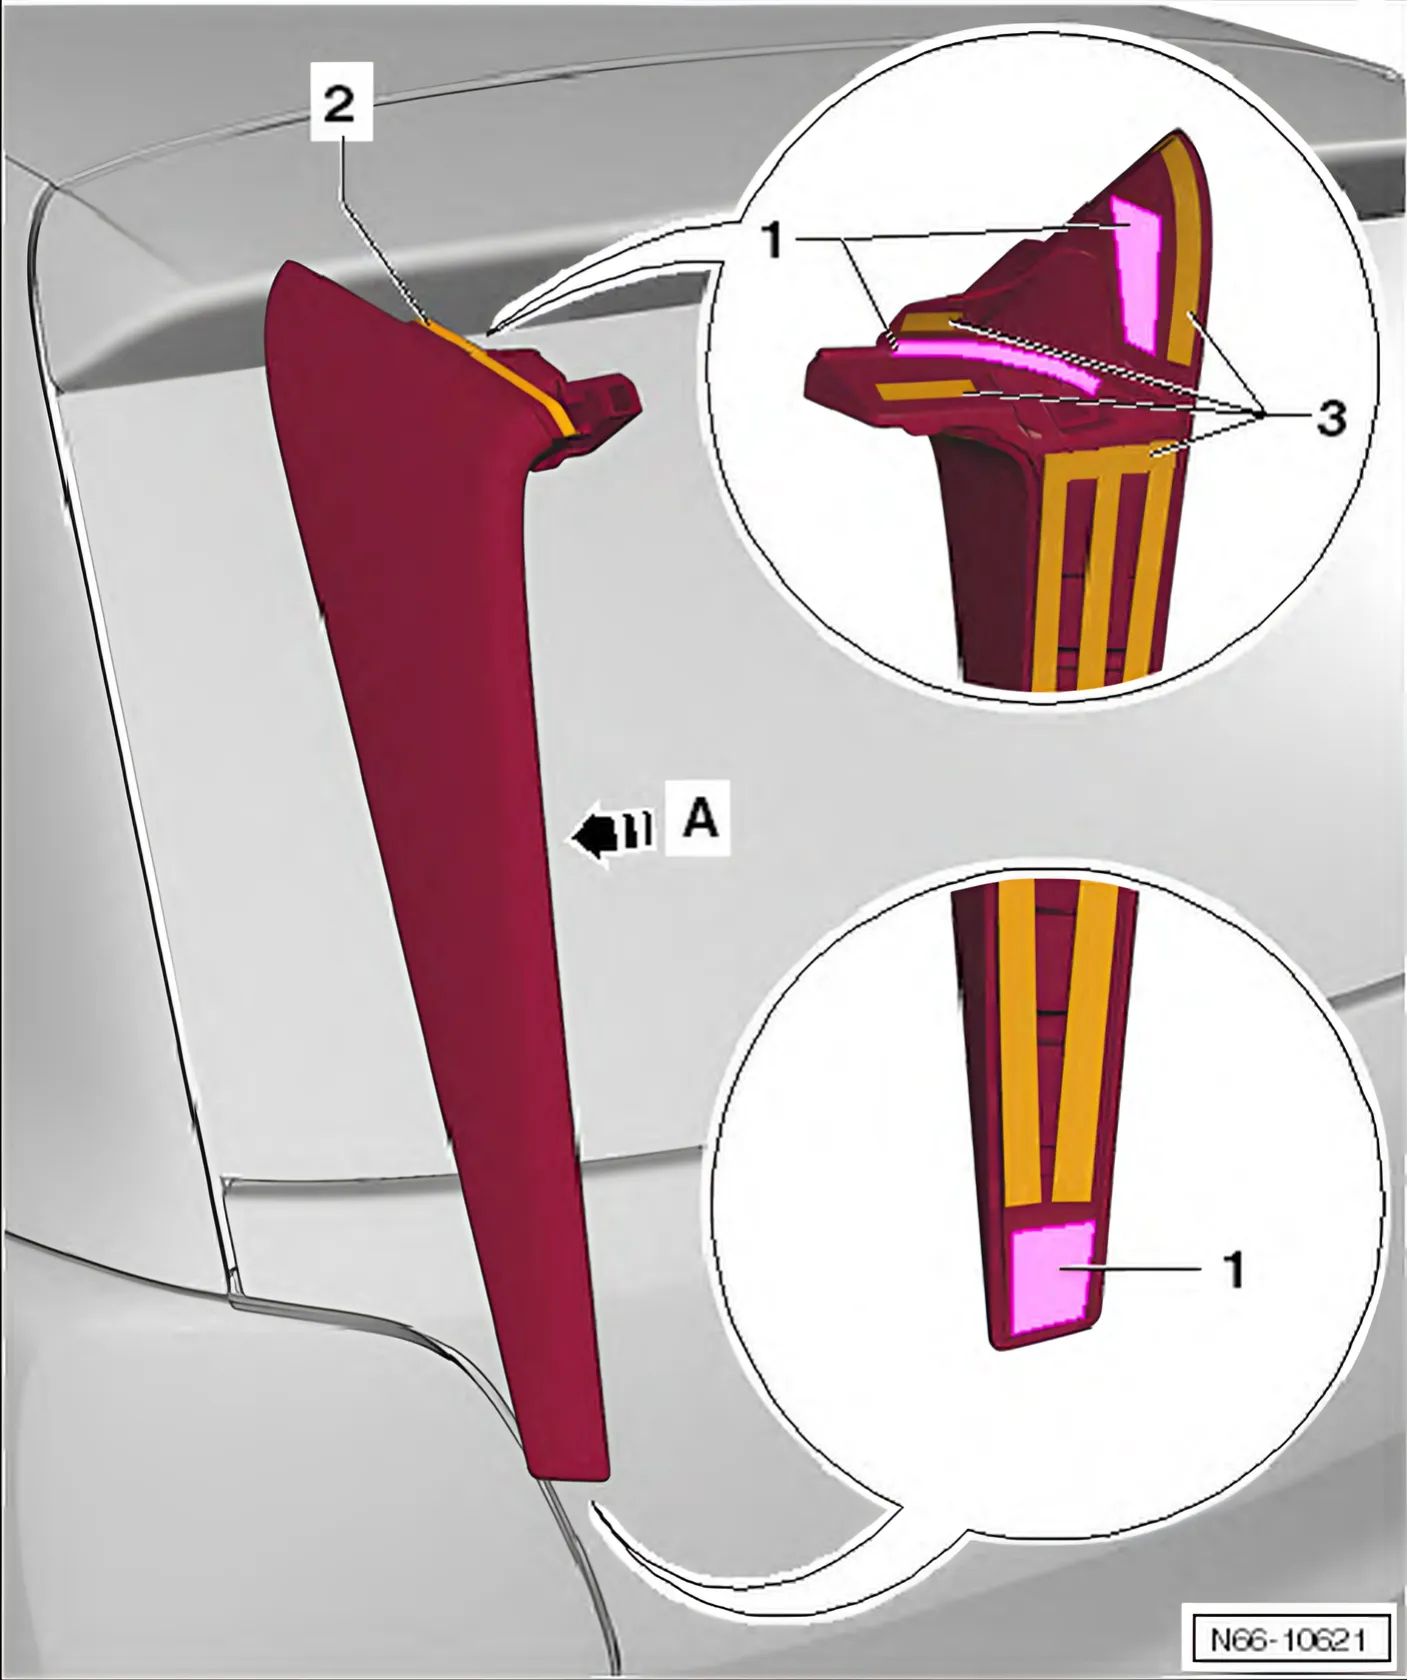
- Apply 1-pack window adhesive -1- on side piece of roof spoiler.
- Place side piece of roof spoiler on rear lid and align.
- Pull protective foil off double-sided adhesive tape -3-.
- Press side piece of roof spoiler on vertically to rear window -arrow A-.
- Stick chafe protection -2- onto edge of component.
- Install middle piece of roof spoiler ⇒ 2.2.1 Removing and installing spoiler, Polo »BlueMotion«.
2.4.2 Removing and installing side piece of spoiler, Polo »Blue GT«
Special tools and workshop equipment required
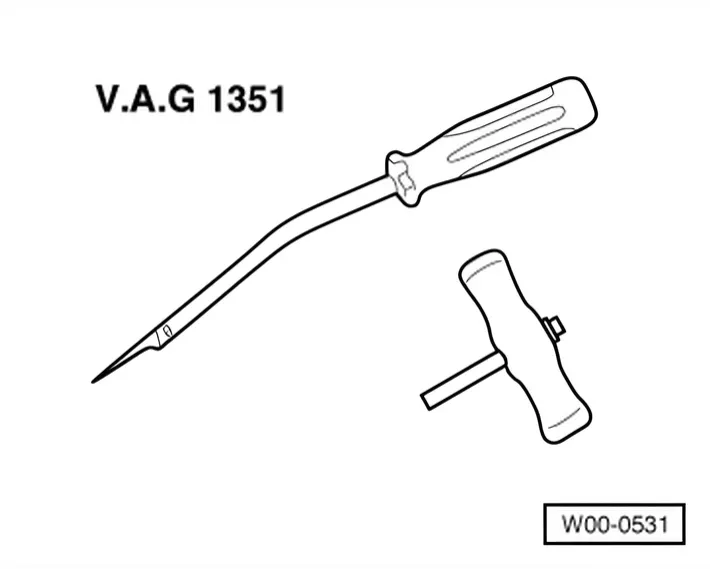
- Pull handle - V.A.G 1351/1-

- Hot-air blower - V.A.G 1416-
- Hand-cartridge gun - V.A.G 1628-
Materials
1) Observe instructions for use on the information sheet provided by the manufacturer.
2) Observe minimum curing period ⇒ 10.1.5 Minimum curing period for bonded addon parts.
3) Heat according to manufacturer's instructions, using cartridge heater - V.A.G 1939-.
4) Small cartridge, 180 ml, for sealing and/or when a 400 ml double cartridge alone is not sufficient.
5) The part numbers of materials can be found in the ⇒ Electronic Parts Catalogue “ETKA”.
Removing
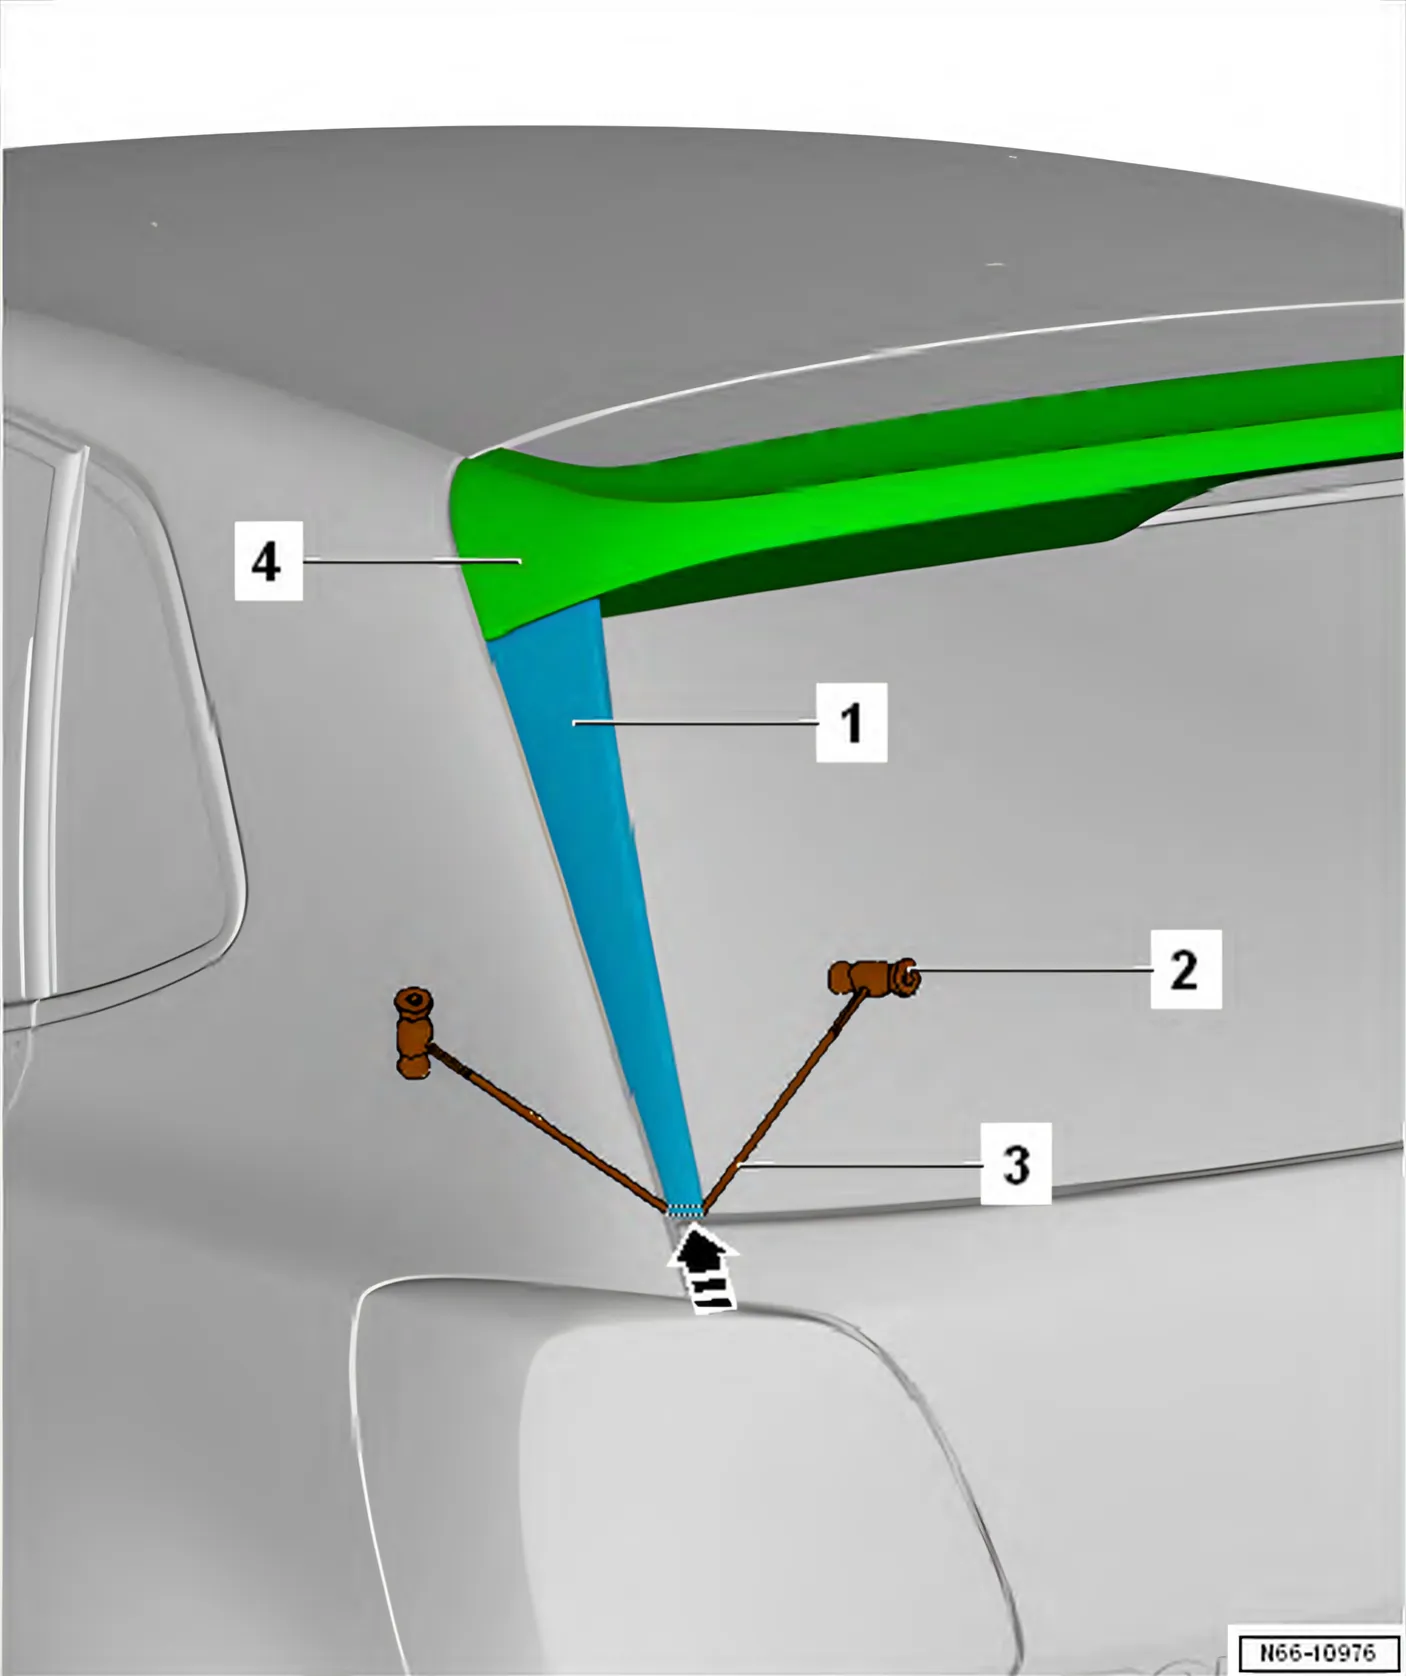
- Insert cutting cord -3- under -arrow- under side spoiler -1-.
- Cut through adhesive sealant using pull handles - V.A.G 1351/1- -2- and cutting cord -3-.
- Warm upper section side spoiler -1- near roof spoiler -4- using hot air blower - V.A.G 1416-.
- Carefully pull side spoiler -1- off rear window and roof spoiler.
Installing

- Lay side spoiler -1- on rear window and mark position with adhesive tape -5-.
- Remove side spoiler -1-.
- Clean rear window with cleaning solution.
- Then apply glass and paint primer -6- to bonding surfaces on rear window and allow to flash-off.
- Apply glass and paint primer to bonding surfaces -4- of side spoiler -1- and allow to flash-off.
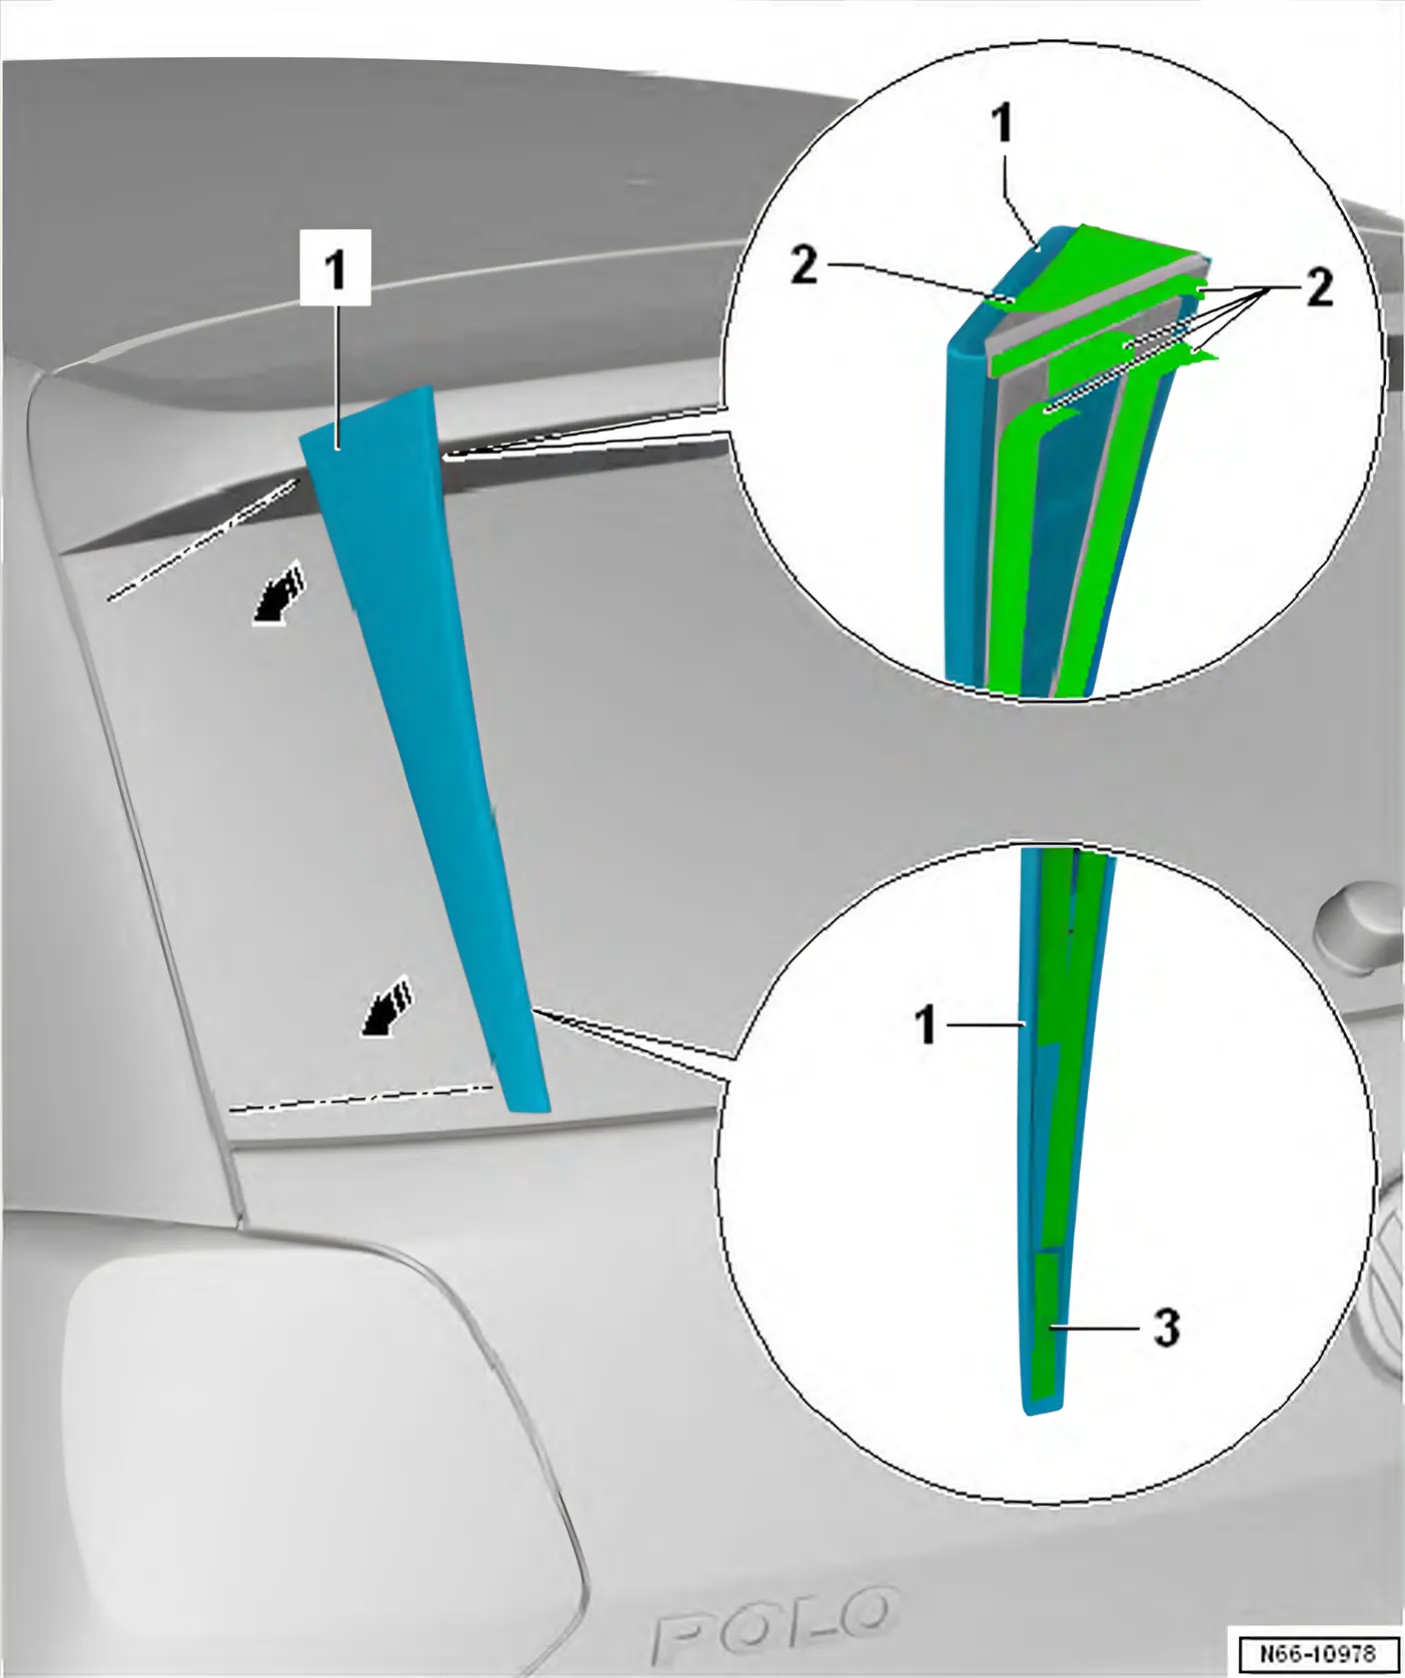
- Apply 1K glass adhesive to bonding surface -3- of side spoiler -1-.
- Align side spoiler -1- with roof spoiler.
- Pull backing -2- off double-sided adhesive tape from top to bottom.
- Press side spoiler -1- vertically against rear window in -direction of arrow-.