
Body repairs – exterior · Bonnet, rear lid · Tank flap unit
Tank flap unit
3.1 Assembly overview - tank flap unit
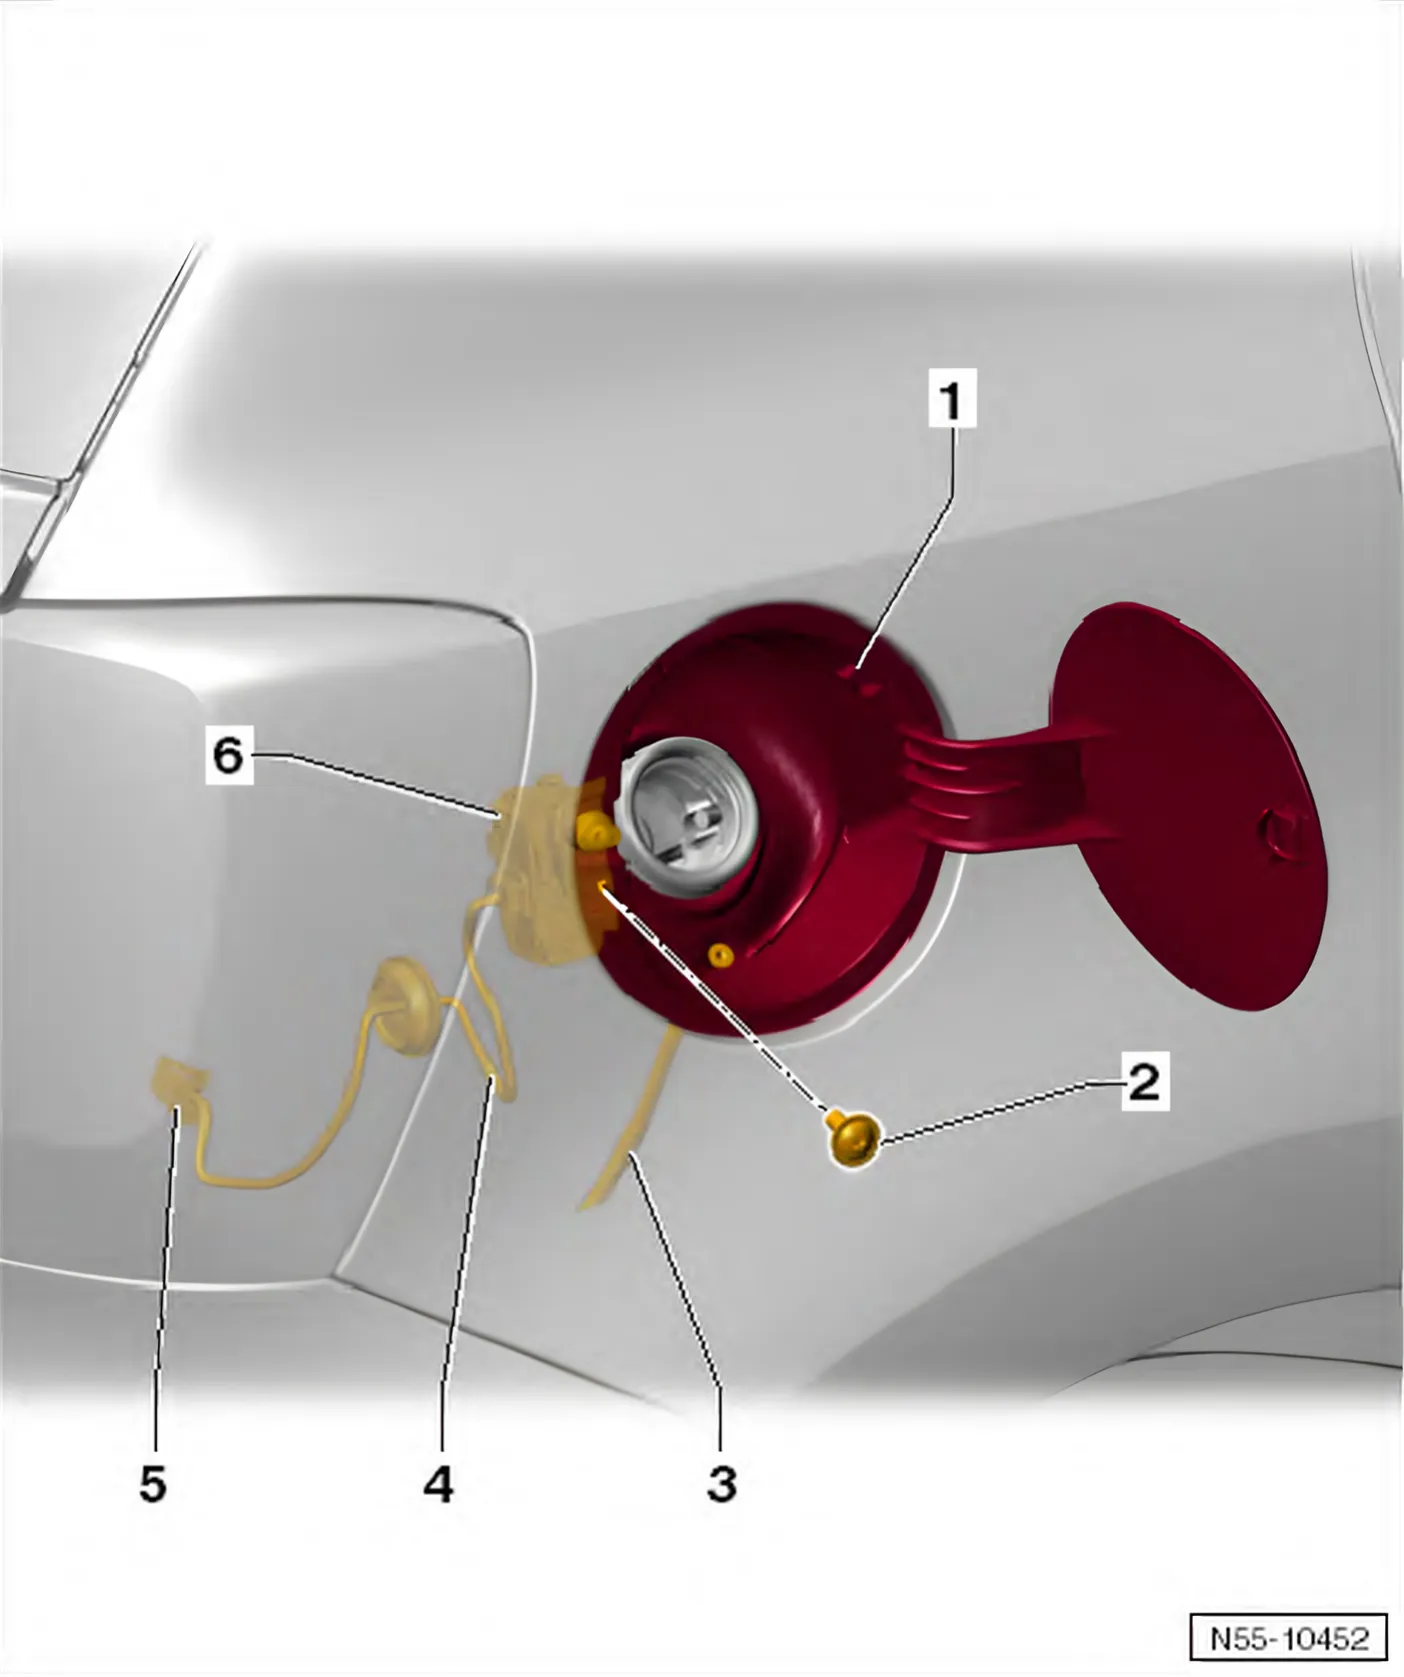
- 1 Tank flap unit
- Removing and installing ⇒ 3.2 Removing and installing tank flap unit
- 2 Bolt
- Specified torque: 1.5 Nm
- 3 Water drain hose
- Routed between wheel housing and wheel housing liner
- 4 Line
- With rubber grommet
- 5 Electrical connector
- 6 Control element
- Removing and installing ⇒ 3.3 Removing and installing actuator
- Without emergency release.
3.2 Removing and installing tank flap unit
Special tools and workshop equipment required
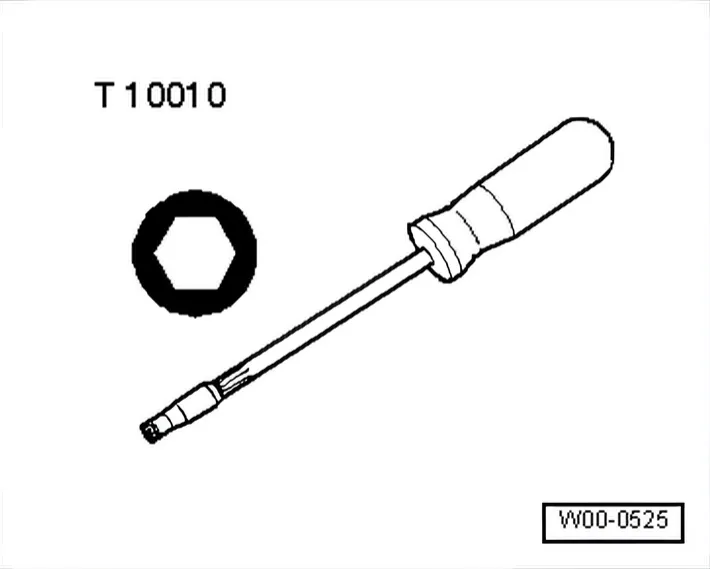
- Torx screwdriver - T 10010-
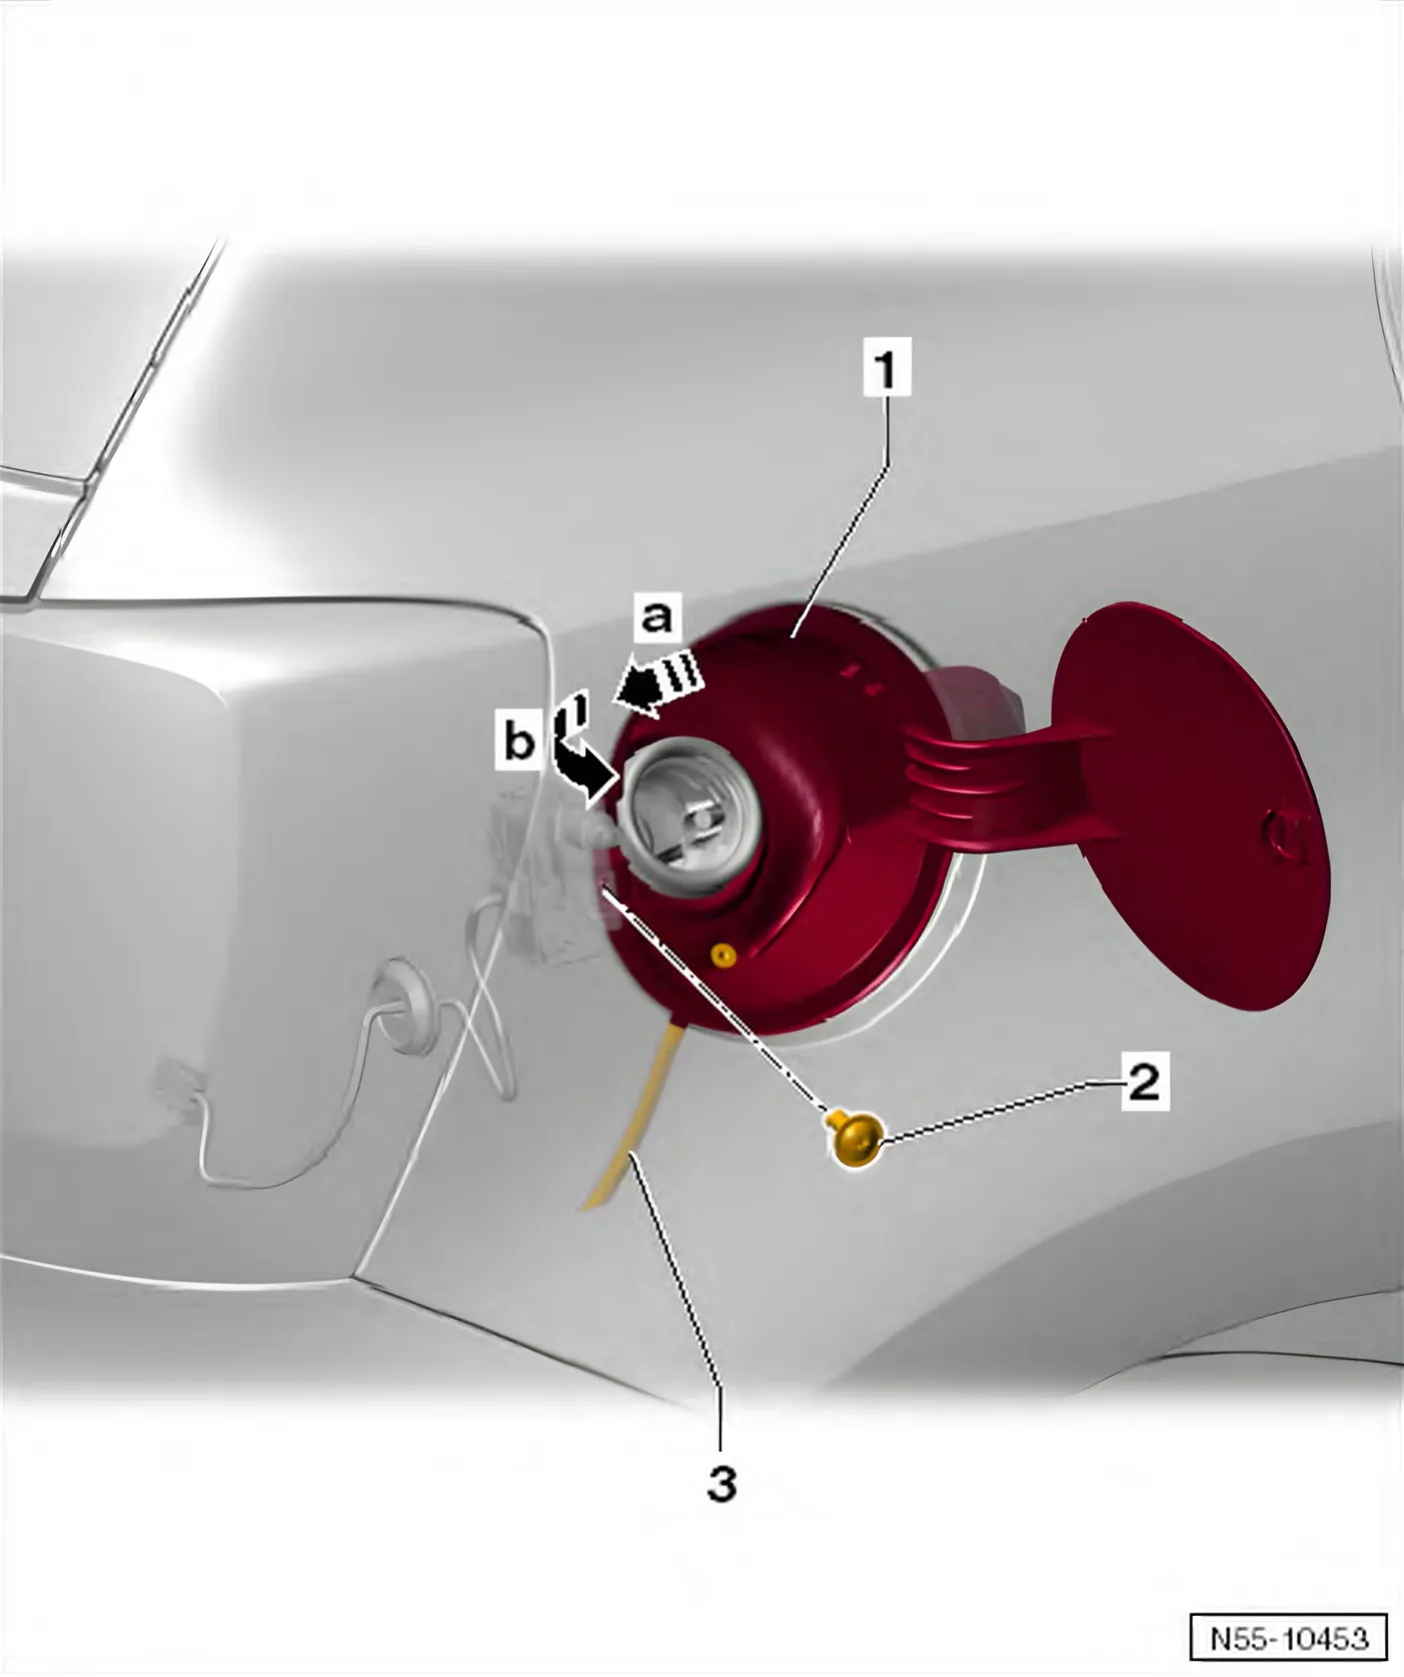
Removing
- Screw off tank cover.
- Unscrew bolt -2-.
- Peel rubber grommet off the fuel filler neck.
- Pull tank flap unit -1- together with water drainage hose -3- towards rear -arrow a- out of fasteners and swing tank flap unit -1- out of side panel -arrow b-.
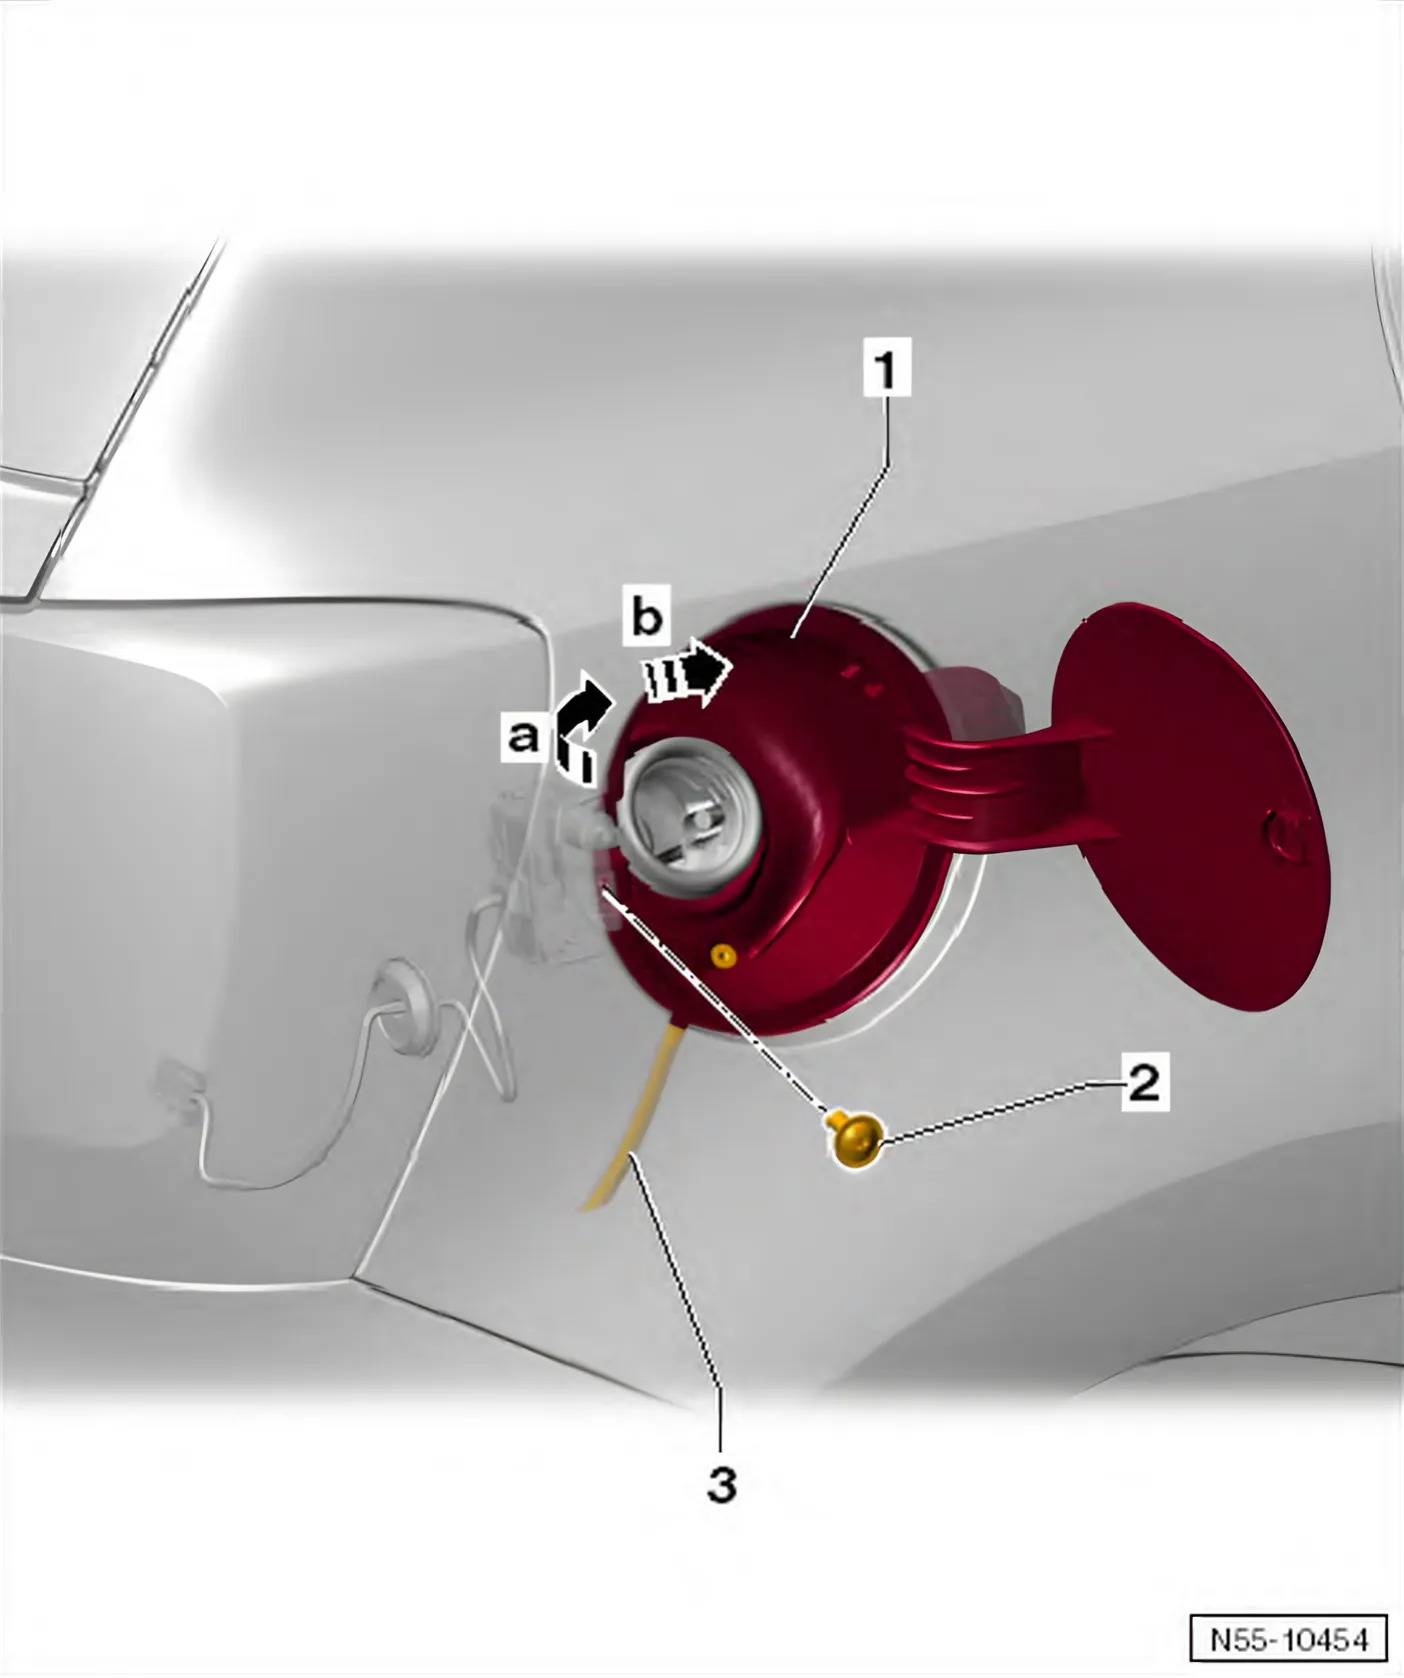
Installing
- Actuator is installed.
- Insert water drainage hose -3- through opening in tank flap unit and then pull it through as far as it will go.
- Push water drainage hose -3- into side panel.
- With hinge side leading, push tank flap unit -1- into side panel -arrow a-.
- Then, swing tank flap unit completely into the side panel -arrow b-. Make sure that locking hooks engage correctly in side panel.
- Pull rubber sleeve over fuel tank filler neck and tighten screw.
Specified torque for bolt -2-: 1.5 Nm
3.3 Removing and installing actuator
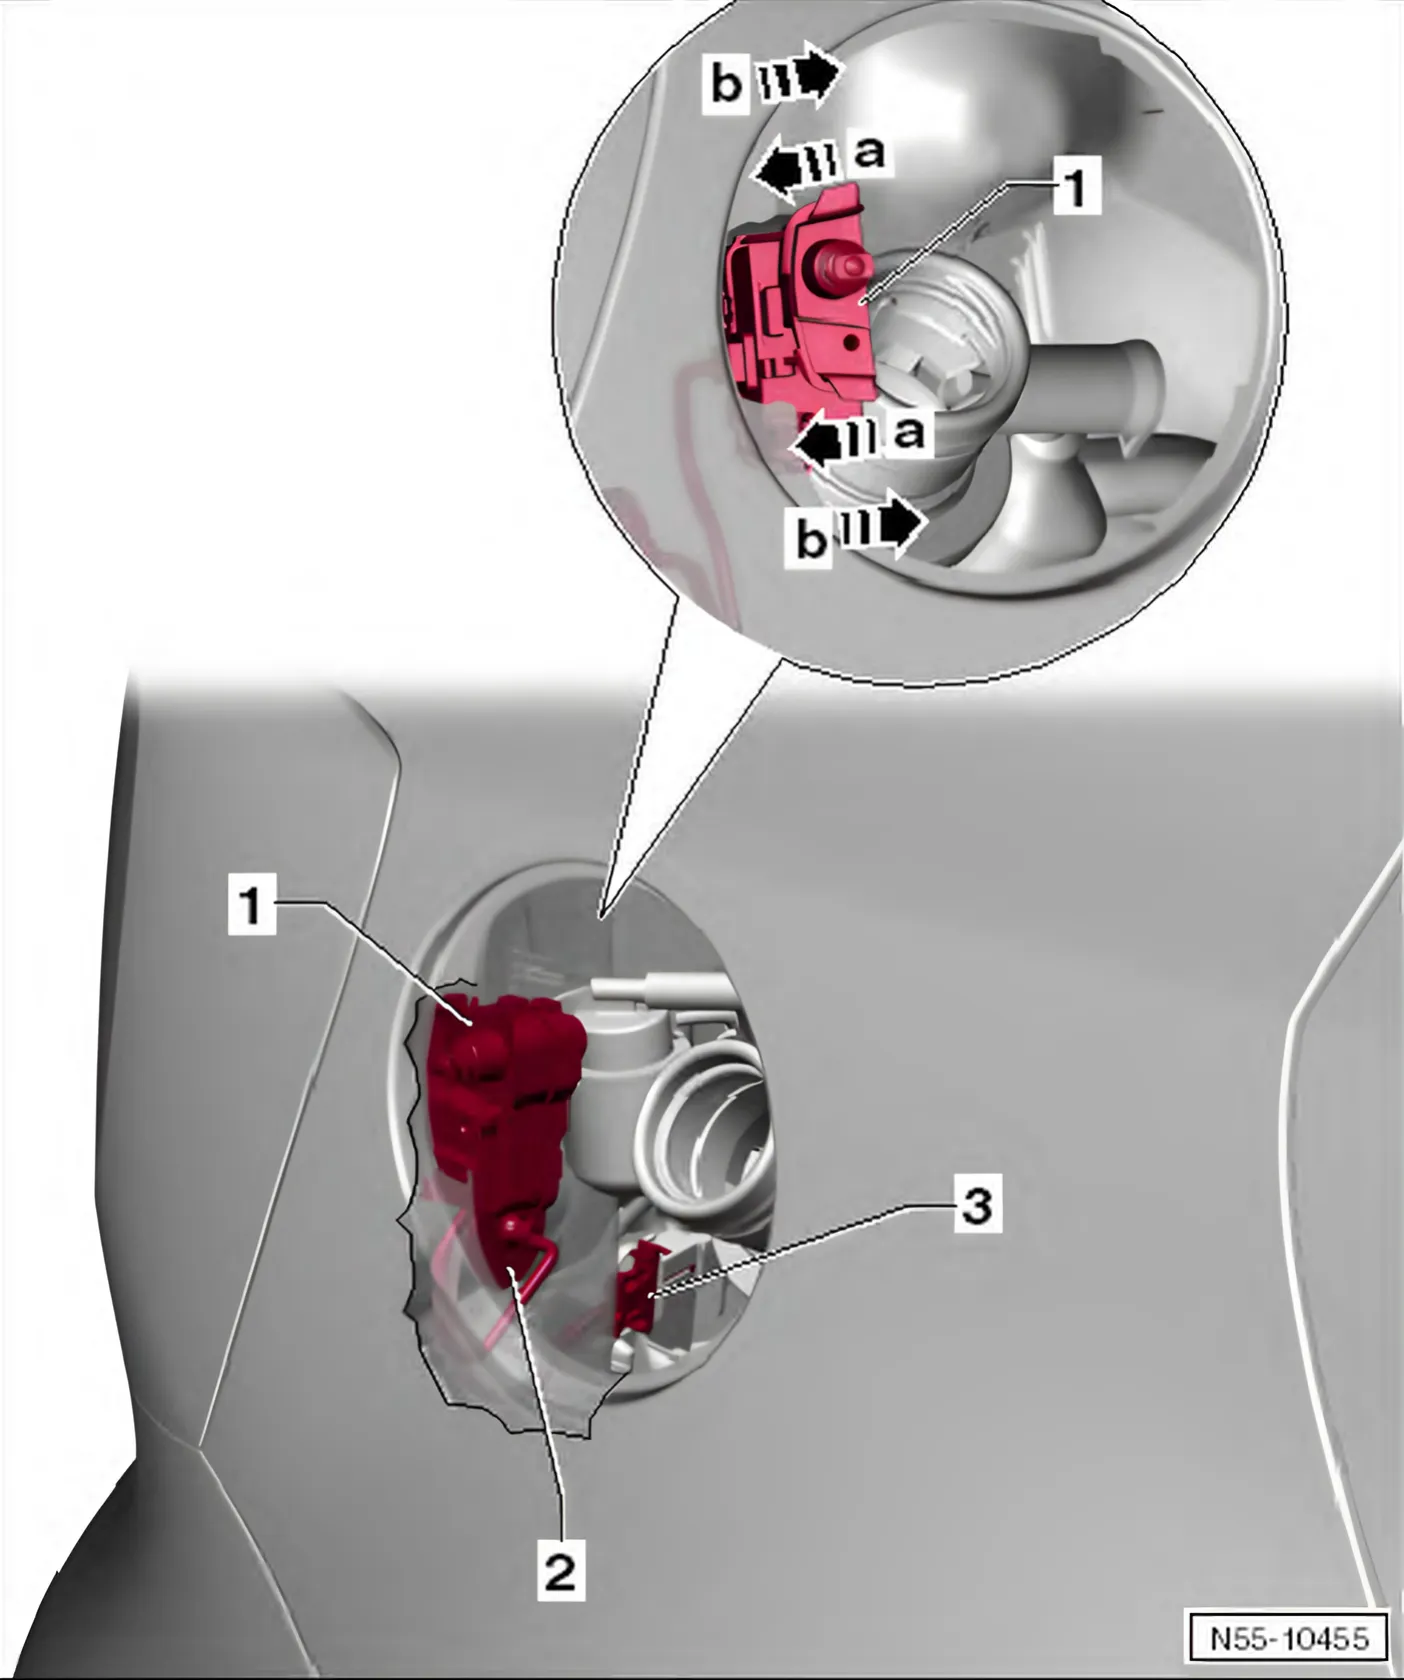
Removing
- Remove tank flap ⇒ 3.2 Removing and installing tank flap unit.
- Release connector -3-; located beneath tail light in luggage compartment.
- Use a cord to secure connector.
- Pull actuator -1-, with line and rubber grommet -2-, out from side panel -arrow b-.
- The cord remains in vehicle.
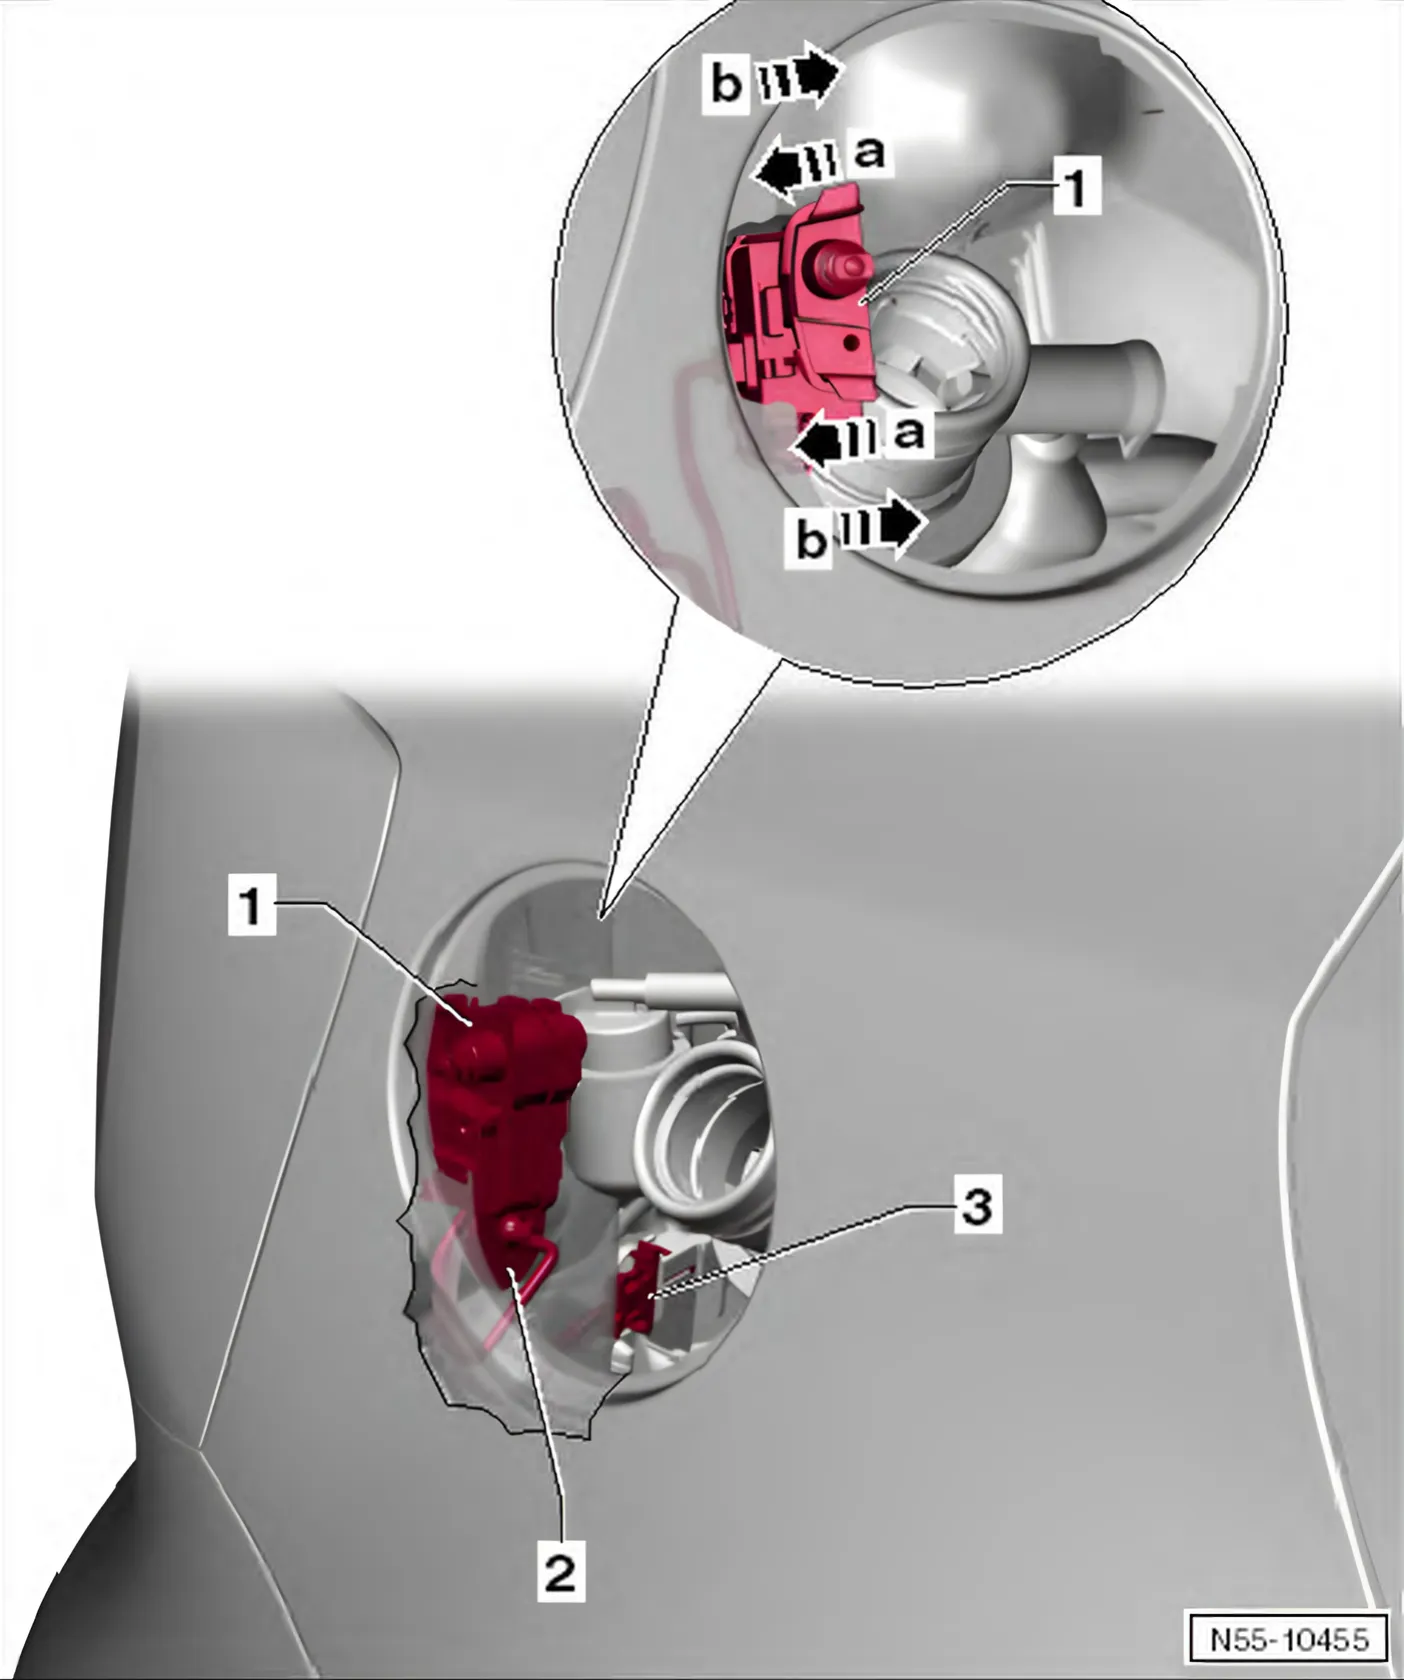
Installing
- Attach the cord to connector.
- Use the cord to pull the actuator -1- with cable -2- into side panel -arrow a-.
- Detach the cord.
- Check that grommet -2- is seated correctly and connect connector -3-.
- Install tank flap ⇒ 3.2 Removing and installing tank flap unit.
Further installation is carried out in reverse order of removal.