
Body repairs – exterior · Sunroof · Sliding sunroof
Sliding sunroof – assembly overview and fastening
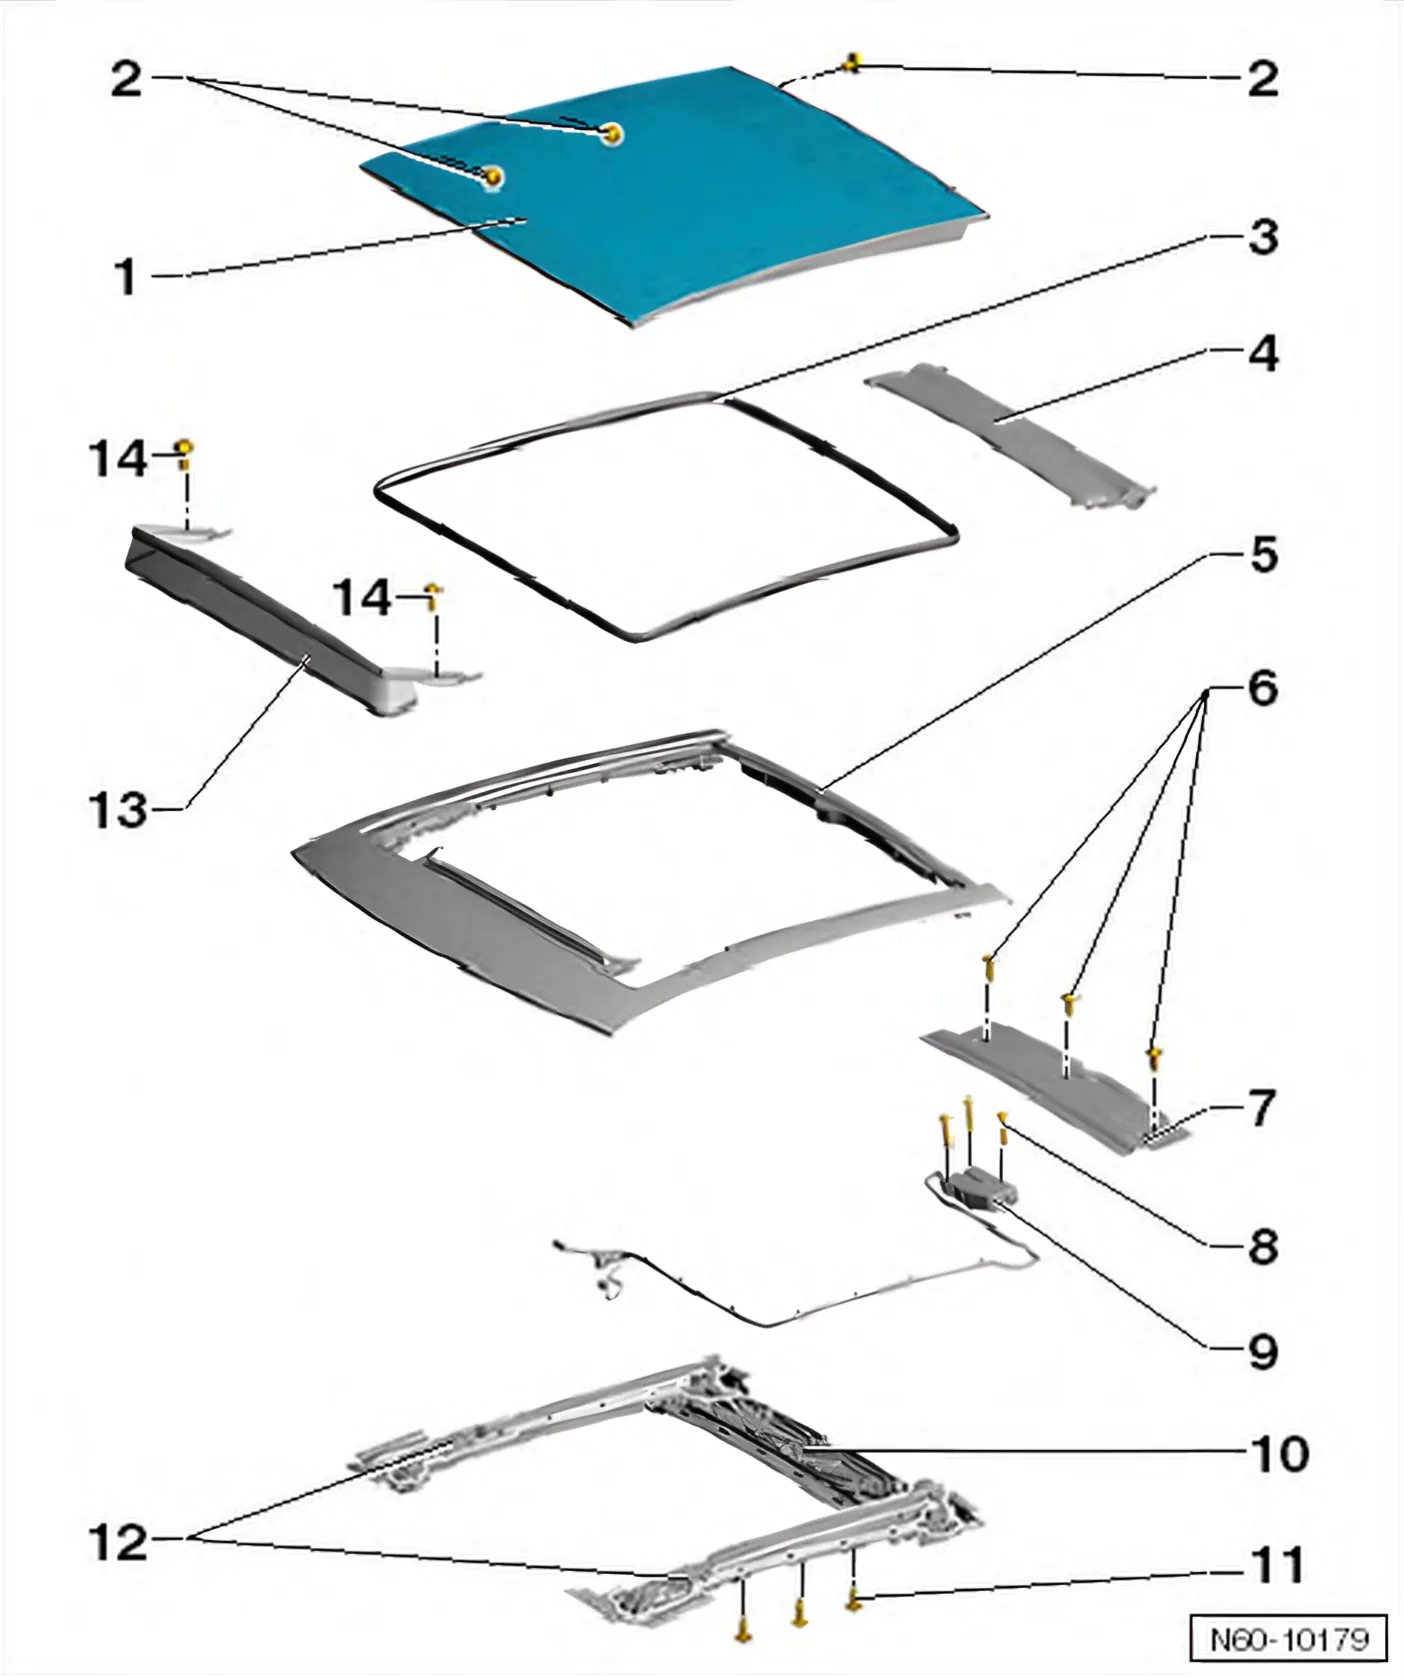
- 1 Glass panel for panorama tilting sunroof (single pane safety glass)
- Removing and installing glass panel for panorama tilting sunroof ⇒ 1.7 Removing and installing glass panel
- If drive defective, remove glass panel ⇒ 1.8 Removing glass panel when drive is defective
- Adjusting glass panel for panorama tilting sunroof: ⇒ 1.9 Adjusting glass panel
- 2 Bolt
- Bolts are microencapsulated and must always be renewed after loosening.
- Qty. 6
- 5.5 Nm
- 3 Seal
- Removing and installing ⇒ 1.14 Removing and installing interior seal
- 4 Sun blind
- Removing and installing ⇒ 1.17 Removing and installing sunroof roller blind
- 5 Assembly frame
- Removing and installing assembly frame ⇒ 1.5 Removing and installing sliding sunroof frame
- Guide channels are to be greased, if required, with special grease G 060 751 A2 only otherwise correct operation cannot be guaranteed.
- 6 Bolt
- For the cover
- Qty. 3
- 2.5 Nm
- 7 Cover
- 8 Bolt
- For sliding sunroof motor.
- Qty. 3
- 4 Nm
- 9 Electric drive
- Removing and installing ⇒ 1.12 Removing and installing sliding sunroof adjustment control unit - J245-
- If drive defective, remove
- Initialising the drive ⇒ 1.19 Adapting sliding sunroof adjustment control unit - J245-
- 10 Securing bracket
- For sun blind and drive
- Forms one component in conjunction with the guide rails
- Removing and installing ⇒ 1.10 Removing and installing guide plate
- 11 Bolt
- Bolts are microencapsulated and must always be renewed after loosening.
- Qty. 13
- 3 Nm
- 12 Guide rails
- With tilting mechanism and cables
- Forms one component in conjunction with securing bracket
- Removing and installing ⇒ 1.10 Removing and installing guide plate
- 13 Wind deflector
- 14 Bolt
- For wind deflector.
- Qty. 2
- 2 Nm