
1.4 TSI engine (EA211) · Cooling · Radiator, radiator fan
Removing and installing water radiator for charge air cooling circuit
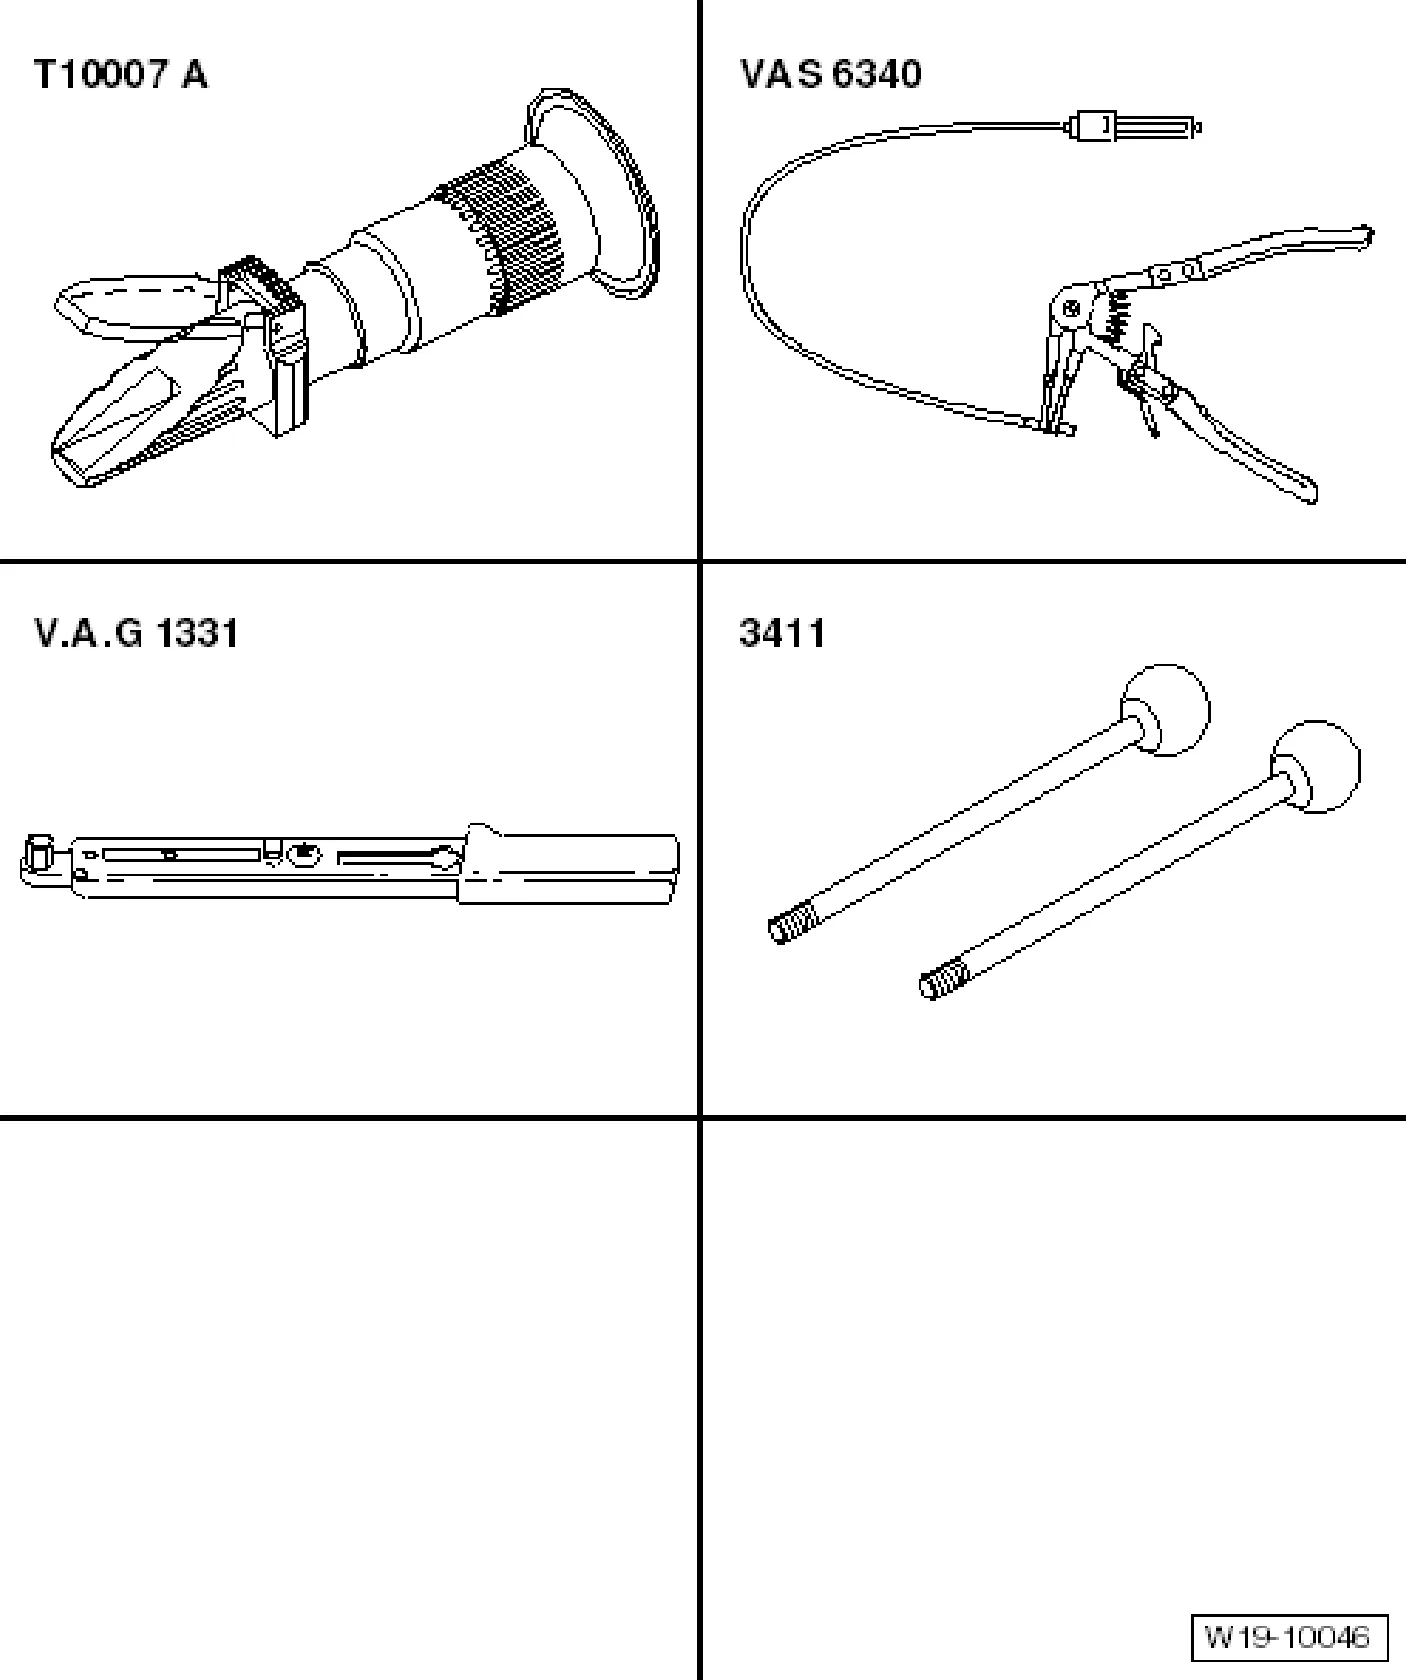
Special tools and workshop equipment required
- Refractometer - T10007 A-
- Hose clamp pliers - VAS 6340-
- Torque wrench (5 … 50 Nm) - V.A.G 1331-
- Guide pins - 3411-
Removing
- Remove noise insulation ⇒ General body repairs, exterior; Rep. gr. 66; Noise insulation.
- Clamp off coolant hoses leading to water radiator for charge air cooling circuit using hose clamps, up to 25 mm - 3094-.
- Drain coolant from water radiator for charge air cooling circuit ⇒ 1.3 Draining and adding coolant.
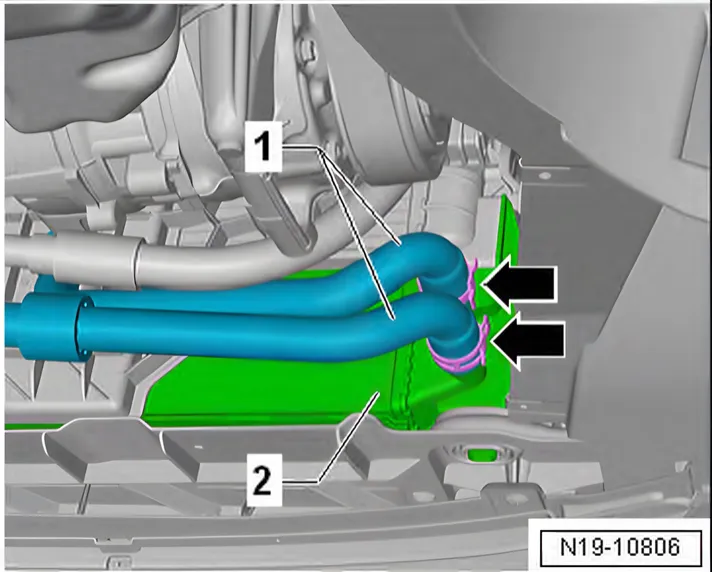
- Open spring-type clips -arrows-.
- Pull hoses -1- off water radiator for charge air cooling circuit -2-.
- Remove radiator cowl ⇒ 4.5 Removing and installing radiator cowl with radiator fan.
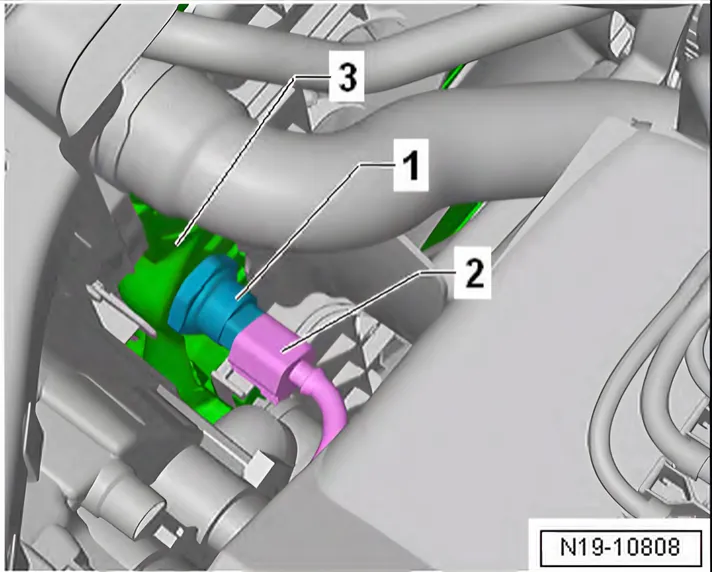
- Release and pull off connector -2- on radiator outlet coolant temperature sender - G83- -1-.
- Remove front bumper cover ⇒ General body repairs, exterior; Rep. gr. 66; Noise insulation.
- Move lock carrier to service position ⇒ General body repairs, exterior; Rep. gr. 50; Lock carrier; Moving to and from service position.
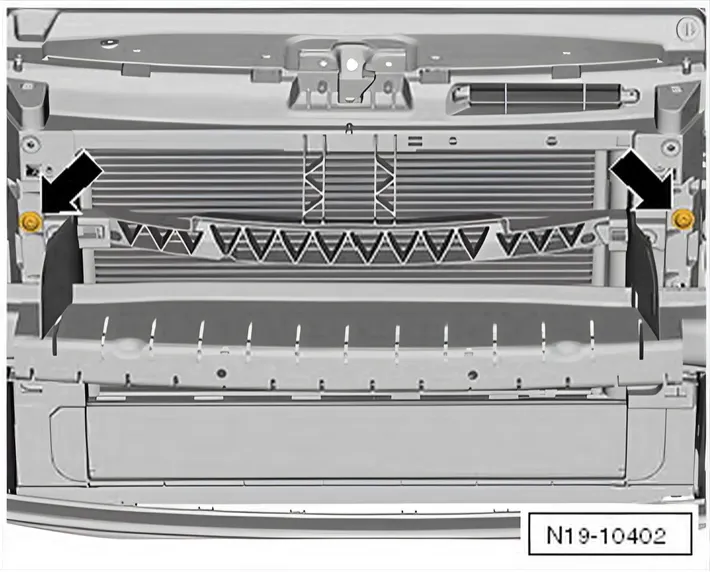
- Unscrew securing bolts -arrows-.
- Lift radiator out of lower mountings and press it slightly towards rear.
Vehicles with air conditioning system
- Unscrew bolts -arrows-.
- Do not stretch, kink or bend refrigerant lines and hoses.
- Place condenser in bonnet lock latch at front and secure with cable ties to prevent it from falling.
Continued for all vehicles
- Secure radiator -1- to prevent it from falling.
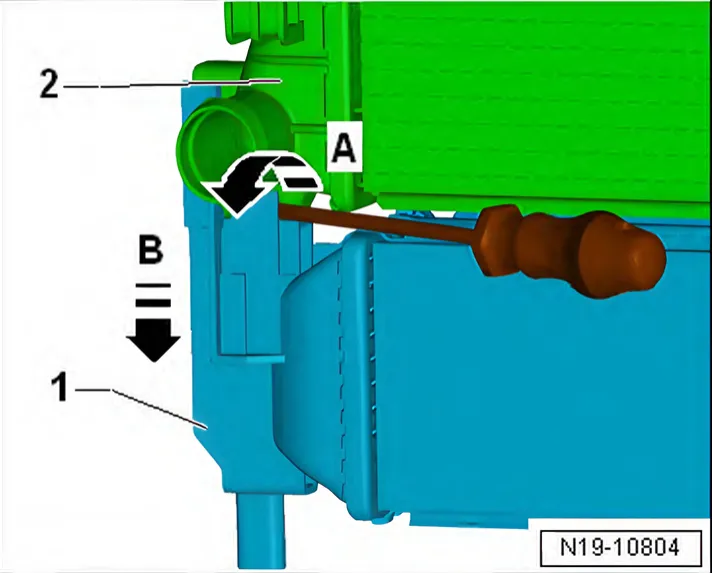
- Push a wide flat-bladed screwdriver at front and rear into the left fastener on the water radiator for charge air cooling circuit -1-.
- Open latch by turning screwdriver in -direction of arrow A-.
- In this position, slightly pull water radiator for charge air cooling circuit -1- on left side in -direction of arrow B- off radiator -2-.
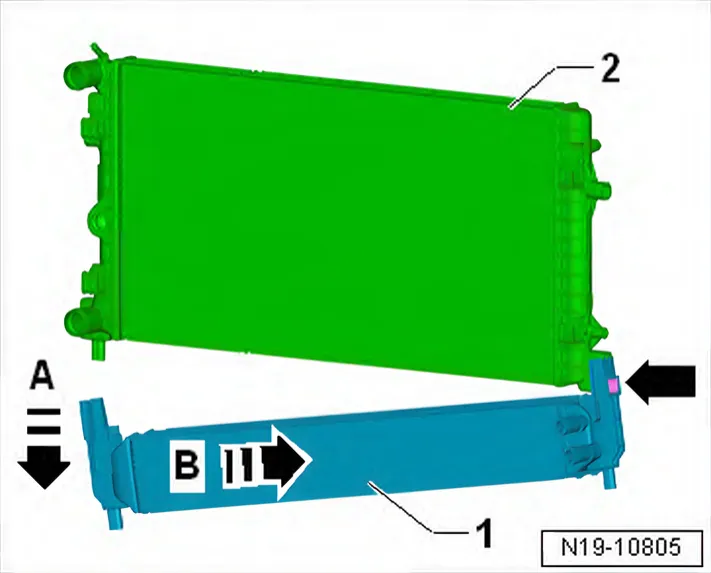
- Lower water radiator for charge air cooling circuit -1- further in -direction of arrow A-.
- At the same time, push radiator for charge air cooling circuit -1- in -direction of arrow B-.
- Detach water radiator for charge air cooling circuit -1- on right from mounting -arrow- on radiator -2-.
- Remove water radiator for charge air cooling circuit -1- downwards.
Installing
Install in reverse order of removal. The following should be observed:
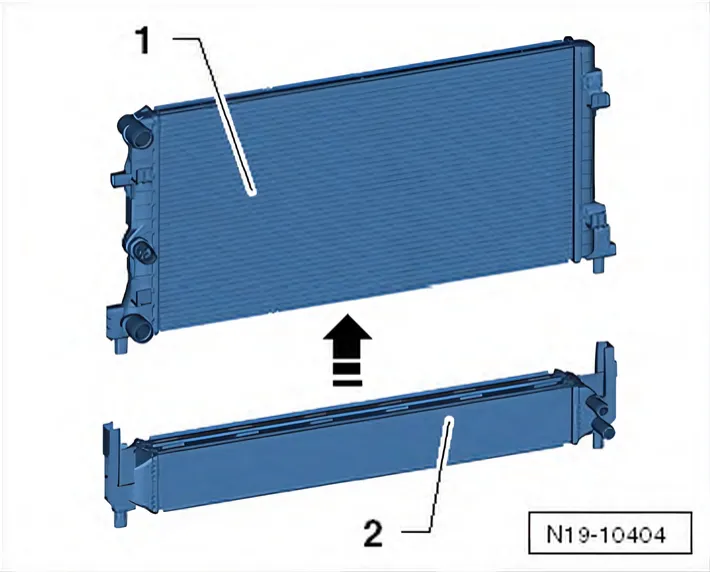
- Insert water radiator for charge air cooling circuit -2- into right mounting.
- Properly engage water radiator for charge air cooling circuit -2- in -direction of arrow- in mountings on radiator -1-.
- Check firm seating by pulling.
- Install front bumper cover ⇒ General body repairs, exterior; Rep. gr. 63; Front bumper
- Install radiator cowl ⇒ 4.5 Removing and installing radiator cowl with radiator fan.
- Add coolant ⇒ 1.3 Draining and adding coolant.
Torque settings