
1.4 TSI engine (EA211) · Cooling · Cooling system/coolant
Draining and adding coolant

Special tools and workshop equipment required
- Adapter for cooling system tester - V.A.G 1274/8-
- Hose clamp pliers - VAS 6340-
- Coolant system charge unit - VAS 6096-
- Drip tray for workshop hoist - VAS 6208-
- Refractometer - T10007 A-
- Safety glasses
- Safety gloves
Draining
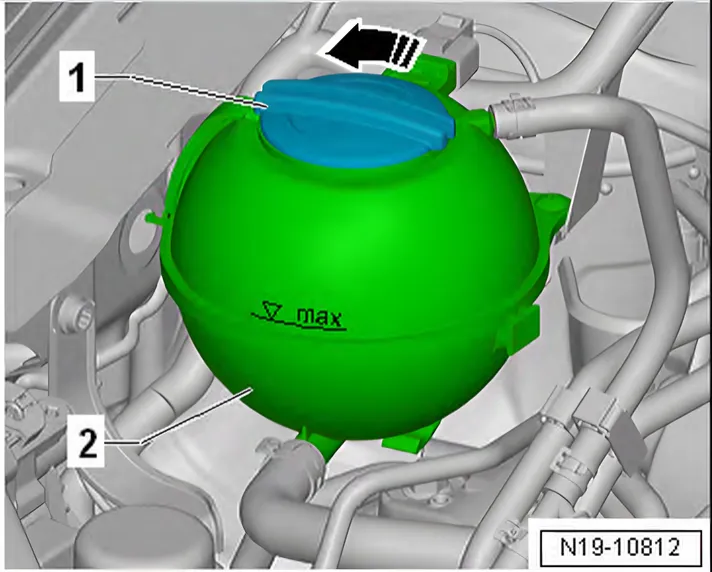
- Carefully open filler cap -1- on coolant expansion tank -2- in -direction of arrow-.
- Remove noise insulation ⇒ General body repairs, exterior; Rep. gr. 66; Noise insulation.
- Place drip tray for workshop hoist - VAS 6208- underneath.
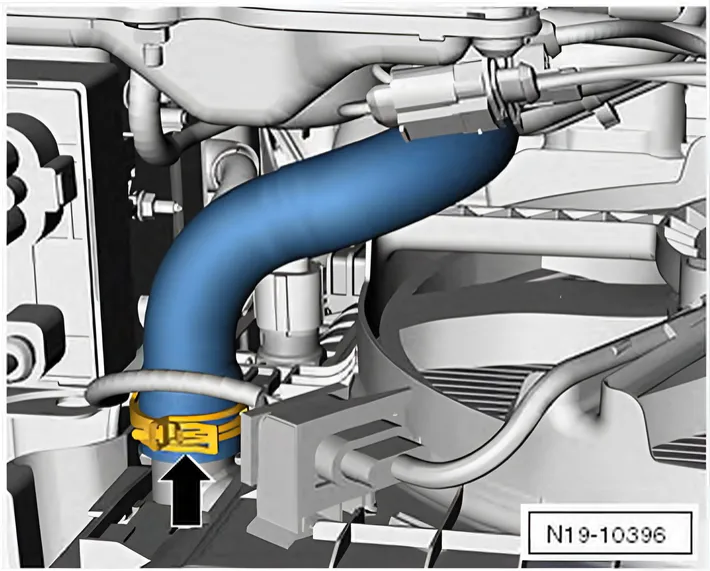
Draining coolant from radiator:
- Open spring-type clip -arrow- and pull coolant hose off.
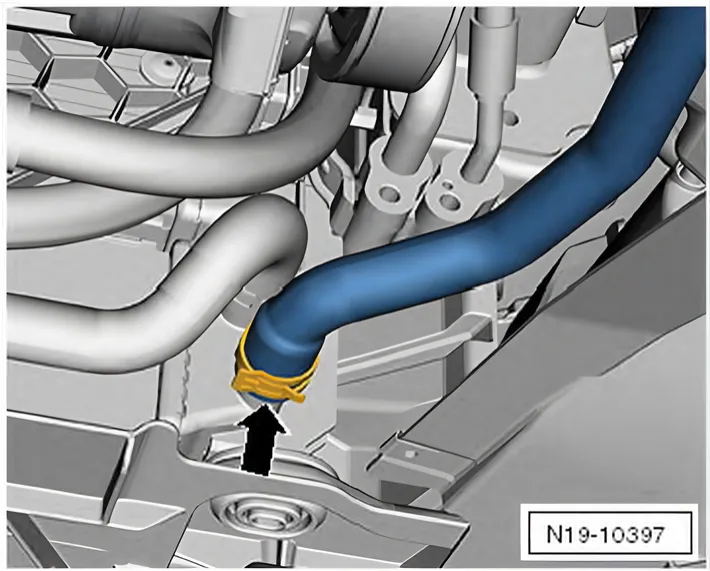
Draining coolant from radiator for charge air cooling circuit:
- Open spring-type clip -arrow-.
- Pull coolant hose off water radiator for charge air cooling circuit.
Continued for all vehicles:
Filling
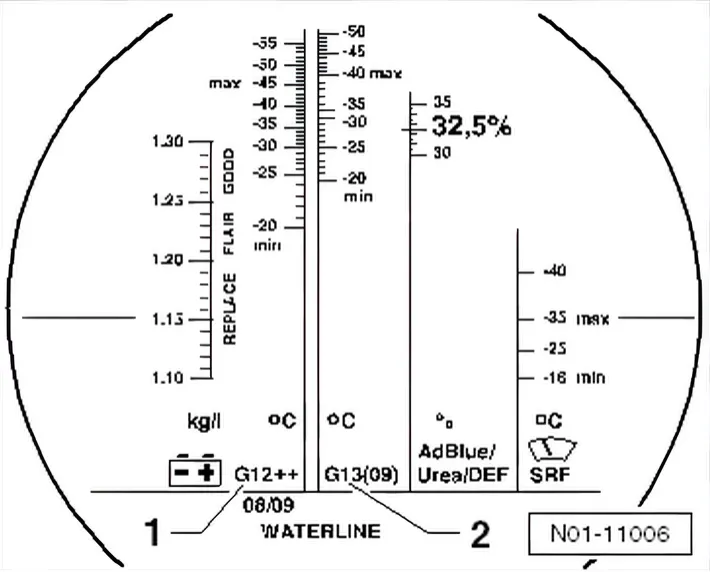
Coolant mixture ratio
| Frost protection to | Coolant additive concentration | Coolant additive 1) | Distilled water 1) |
|---|---|---|---|
| -25°C | 40% | 3.2 l | 4.8 l |
| -36°C | 50% | 4.0 l | 4.0 l |
1) The quantity of coolant can vary depending on the vehicle equipment.
- Coolant: ⇒ Electronic Parts Catalogue.
- Connect coolant hose on bottom left to radiator.
- Secure coolant hose with spring-type clip -arrow-.
- Connect coolant hose to water radiator for charge air cooling circuit.
- Secure coolant hose with spring-type clip -arrow-.
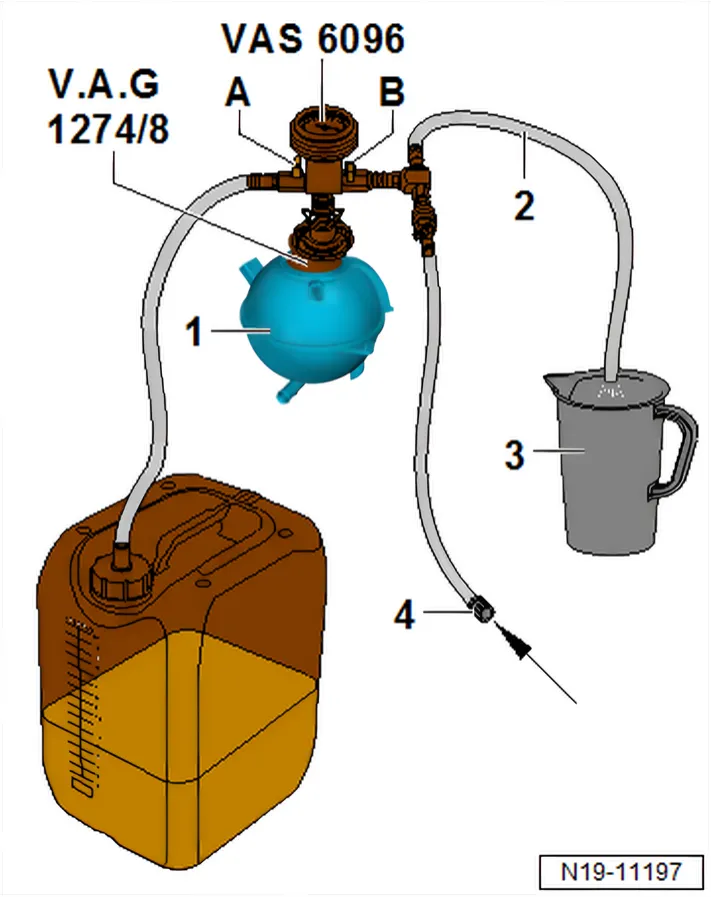
- Fill spare container for cooling system charge unit - VAS 6096/1- of cooling system charge unit - VAS 6096- with at least 10 litres of pre-mixed coolant.
- Make sure to use correct mixing ratio.
- Screw adapter for cooling system tester - V.A.G 1274/8- onto coolant expansion tank -1-.
- Install cooling system charge unit - VAS 6096- to adapter - V.A.G 1274/8-.
- Feed vent hose -2- into a small container -3-.
- Close valves -A- and -B- (turn lever transverse to direction of flow to do this).
- Connect hose -4- to compressed air.
- Pressure: 6 to 10 bar.
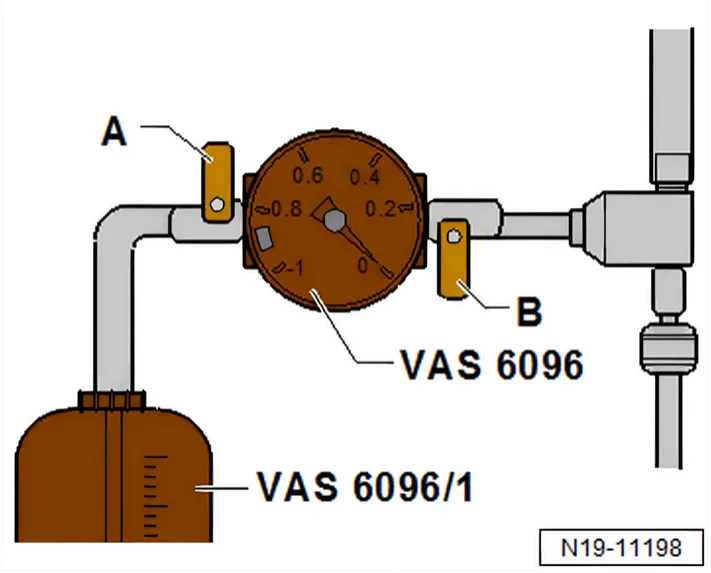
- Open valve -B-; turn lever in direction of flow to do this.
- The suction-jet pump reduces pressure in the cooling system to below atmospheric pressure.
- The needle on the gauge should move into the green zone.
- Also, open valve -A- briefly.
- To do this, turn lever in direction of flow so that hose of spare container for cooling system charge unit - VAS 6096/1- is filled with coolant.
- Close valve -A- again.
- Leave valve -B- open for a further 2 minutes.
- The suction-jet pump will continue generating a vacuum in the cooling system.
- The needle on the gauge must remain in the green zone.
- Close valve -B-.
- The needle on the gauge must stay in the green zone.
- The low pressure in the cooling system is then sufficient for subsequent filling.
- Pull off compressed air hose.
- Open valve -A-.
- The vacuum in the cooling system draws coolant from the spare container for cooling system charge unit - VAS 6096/1-, thus filling the cooling system.
- Remove cooling system charge unit - VAS 6096- from coolant expansion tank.

- Fill coolant up to max. marking -arrow- on coolant expansion tank -1-.
- Install noise insulation ⇒ General body repairs, exterior; Rep. gr. 66; Noise insulation.
- On vehicles with auxiliary heater, switch on auxiliary heater for about 30 seconds.
- Set temperature regulator to “HI”.
- Switch off air conditioner compressor. To do this, press AC button.
- LED in the button must not light up.
- Start engine and run it for max. 2 min. at a speed of approx. 1,500 rpm.
- Fill coolant up to the overflow hole of the coolant expansion tank while the engine is running.
- Tighten cap of coolant expansion tank until it engages.
- Run engine at idling speed until the coolant hoses on the radiator are heated up.
- Switch off engine and let it cool off.

- Check coolant level in coolant expansion tank -1-.
- When the engine is cold, the coolant level must be between the min. and the max. markings.
- When the engine is at operating temperature, it is permissible that the coolant level is at the "max." mark -arrow-.
- Fill more coolant if necessary.