
1.2 TDI CR engine (EA189) · Crankshaft group · Cylinder block (pulley end)
Ancillary bracket
⇒ 1.9.1 Assembly overview - ancillary bracket
⇒ 1.9.2 Ancillary bracket (removing and installing)
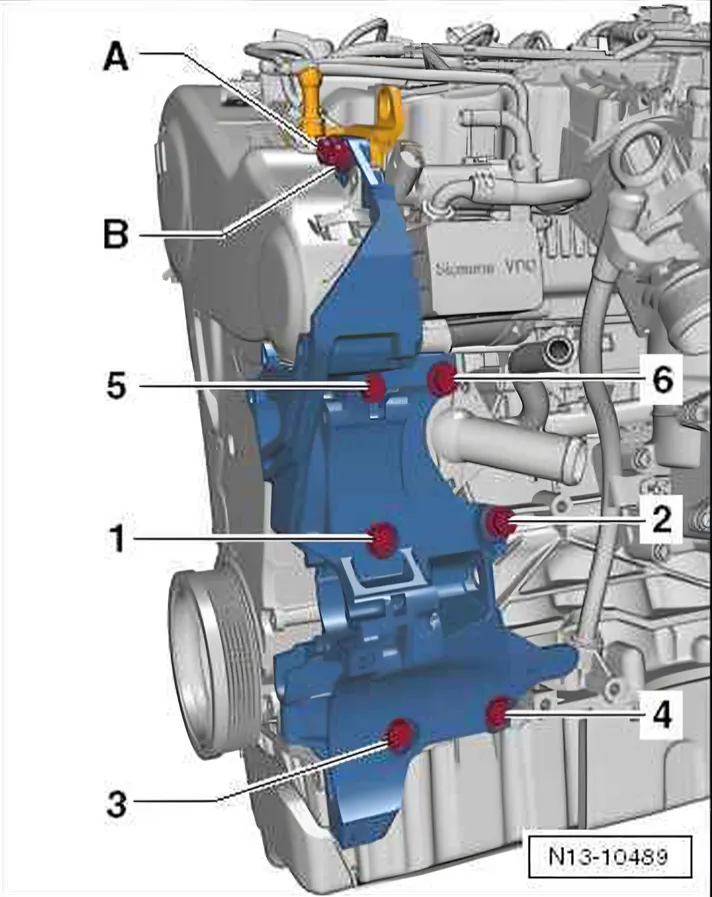
1.9.1 Assembly overview - ancillary bracket
- Install bolts as follows:
- Bolts -1- and -2- M10 x 52.
- Bolts -3- and -4- M10 x 30.
- Bolts -5- and -6- M10 x 60.
- Lifting eye bolts -A- and -B- 25 Nm.
- Tighten bolts -1 to 6- in 4 stages in the sequence shown:
| Sta ge | Bolts | Specified torque/turning further angle |
|---|---|---|
| 1) | -1 … 6- | Screw in by hand as far as stop |
| 2) | -1 … 6- | 40 Nm |
| 3) | -3- and -4- | Turn 45° further |
| 4) | -1, 2, 5, 6- | Turn 90° further |
1.9.2 Ancillary bracket (removing and installing)
»Carry out the following work sequence«
Removing
- Remove high-pressure pump ⇒ 4.1 Assembly overview - high-pressure pump.
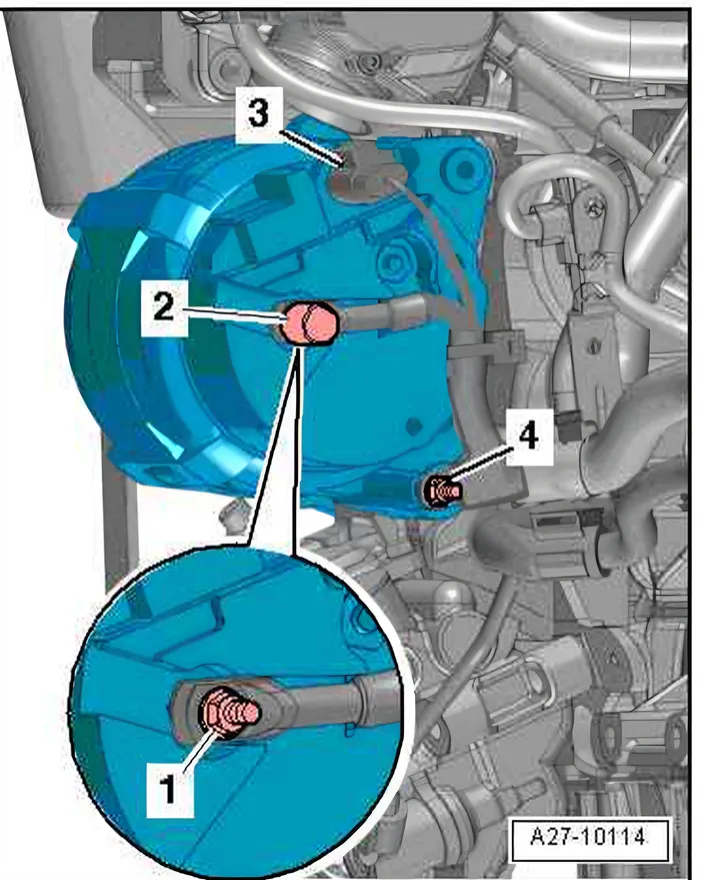
- Remove the generator ⇒ Electrical system; Rep. gr. 27.
Vehicles with air conditioning system
- Unbolt air conditioner compressor from ancillary bracket and secure to lock carrier ⇒ Heating, air conditioning; Rep. gr. 87; Removing and installing air conditioner compressor.
Continued for all vehicles
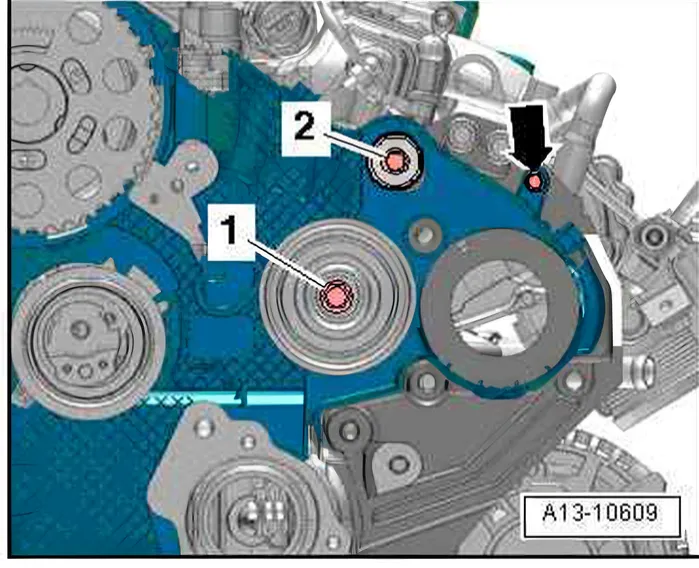
- Unbolt idler rollers -1 + 2-, unscrew bolt -arrow- for toothed belt guard.
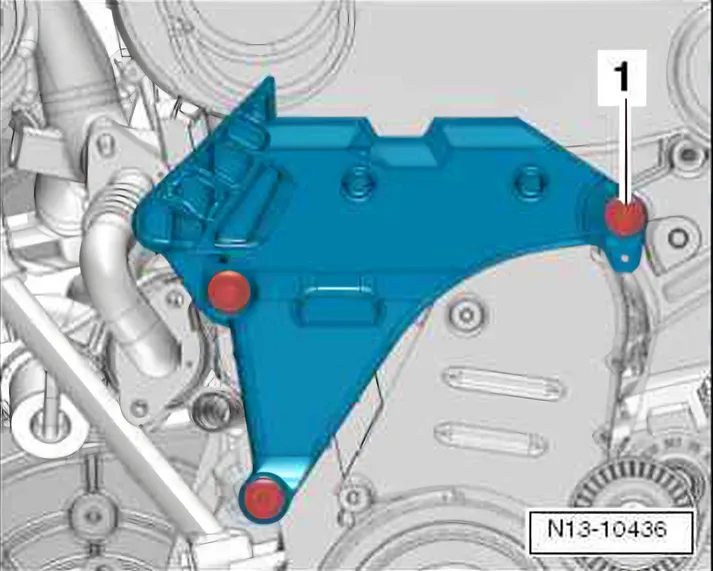
- Loosen securing bolt for engine bracket -1-.
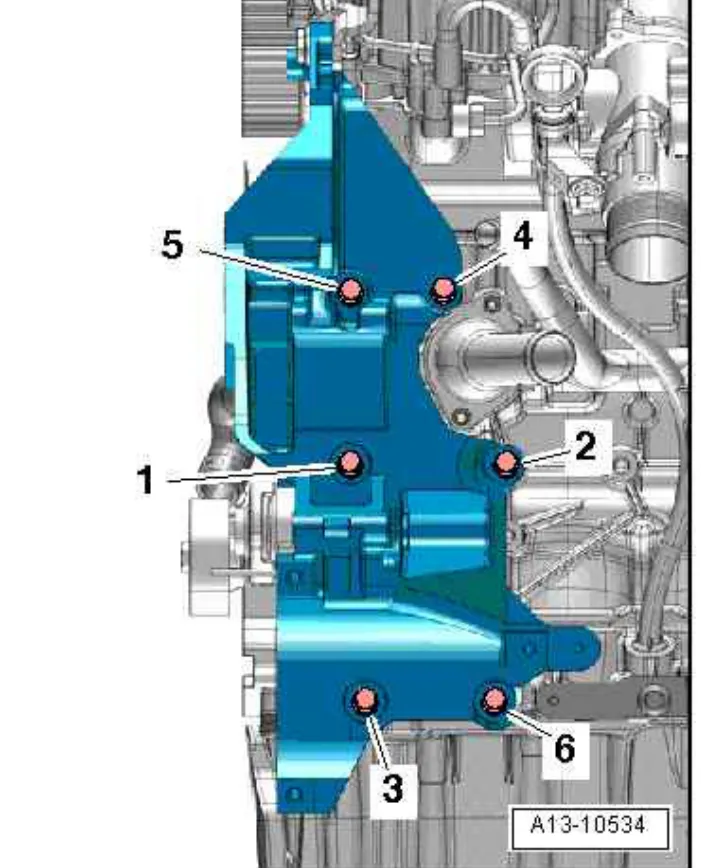
- Unscrew bolts -6…1-, remove ancillary bracket.
Installing
Specified torque and tightening sequence ⇒ 1.8 Removing and installing vibration damper
Install in reverse order. During this procedure, observe the following:
- Note any fitted sleeves in ancillary bracket and renew missing ones if necessary.
- Renew all bolts to be tightened with torque angle.
- Tack engine bracket bolt before tightening ancillary bracket securing bolt.
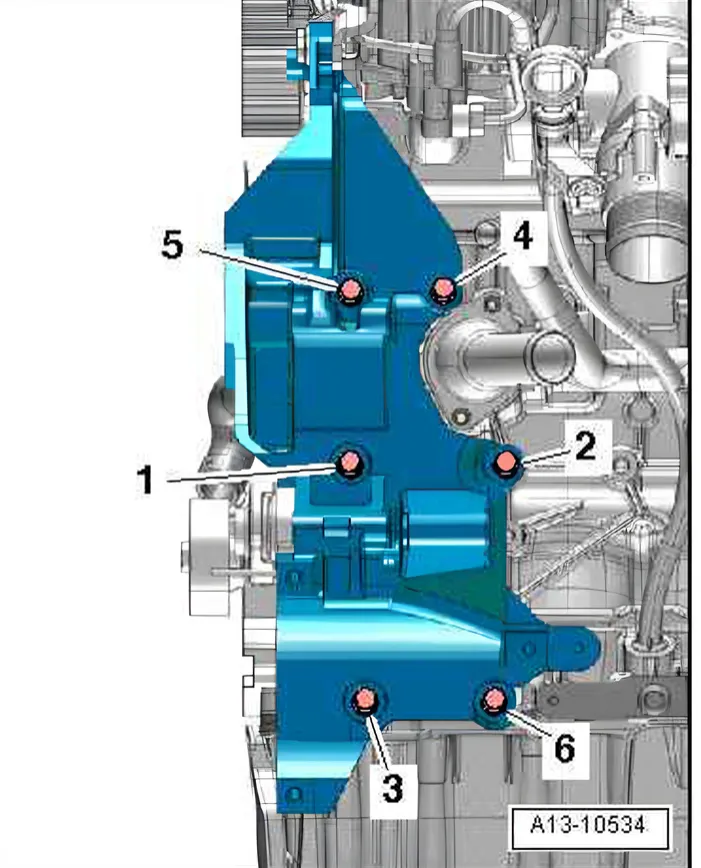
- Tighten securing bolts in sequence -1…6-.
- Renew and tighten bolt for engine bracket -1- ⇒ 2 Assembly mountings.
- Installing high-pressure pump ⇒ 4.1 Assembly overview - high-pressure pump.
- Install toothed belt (adjust valve timing) ⇒ 2.2.1 Removing.
- Installing the generator ⇒ Electrical system; Rep. gr. 27.
- Remove air conditioner compressor from lock carrier and install on ancillary bracket ⇒ Heating, air conditioning; Rep. gr. 87; Removing and installing air conditioner compressor.
- Filling/bleeding high-pressure pump/fuel system ⇒ 1.3 Filling/bleeding fuel system.