
Body interior · Passenger protection · Seat belt verification
Removing and installing seat occupied sensor, front passenger side - G128-
Removing
- Remove front seat ⇒ 1.1 Removing and installing front seat.
- Remove front belt buckle ⇒ 1.5 Removing and installing front belt buckle.
- Removing seat trim on tunnel side ⇒ 1.2 Removing and installing seat trim on tunnel side.
- Remove seat trim on sill side:
- Seat without height adjustment ⇒ 1.3.1 Removing and installing seat trim on sill side, seat without height adjustment.
- Seat with height adjustment ⇒ 1.3.2 Removing and installing seat trim on sill side, seat with height adjustment.
- Removing mounting for drawer, if fitted ⇒ 1.6 Removing and installing mounting for drawer.
- Remove backrest:
- 4-door models ⇒ 1.7 Removing and installing front backrest.
- Removing cover and padding, front seat cushion ⇒ 1.1 Removing and installing seat cover and seat cushion for seat pan.
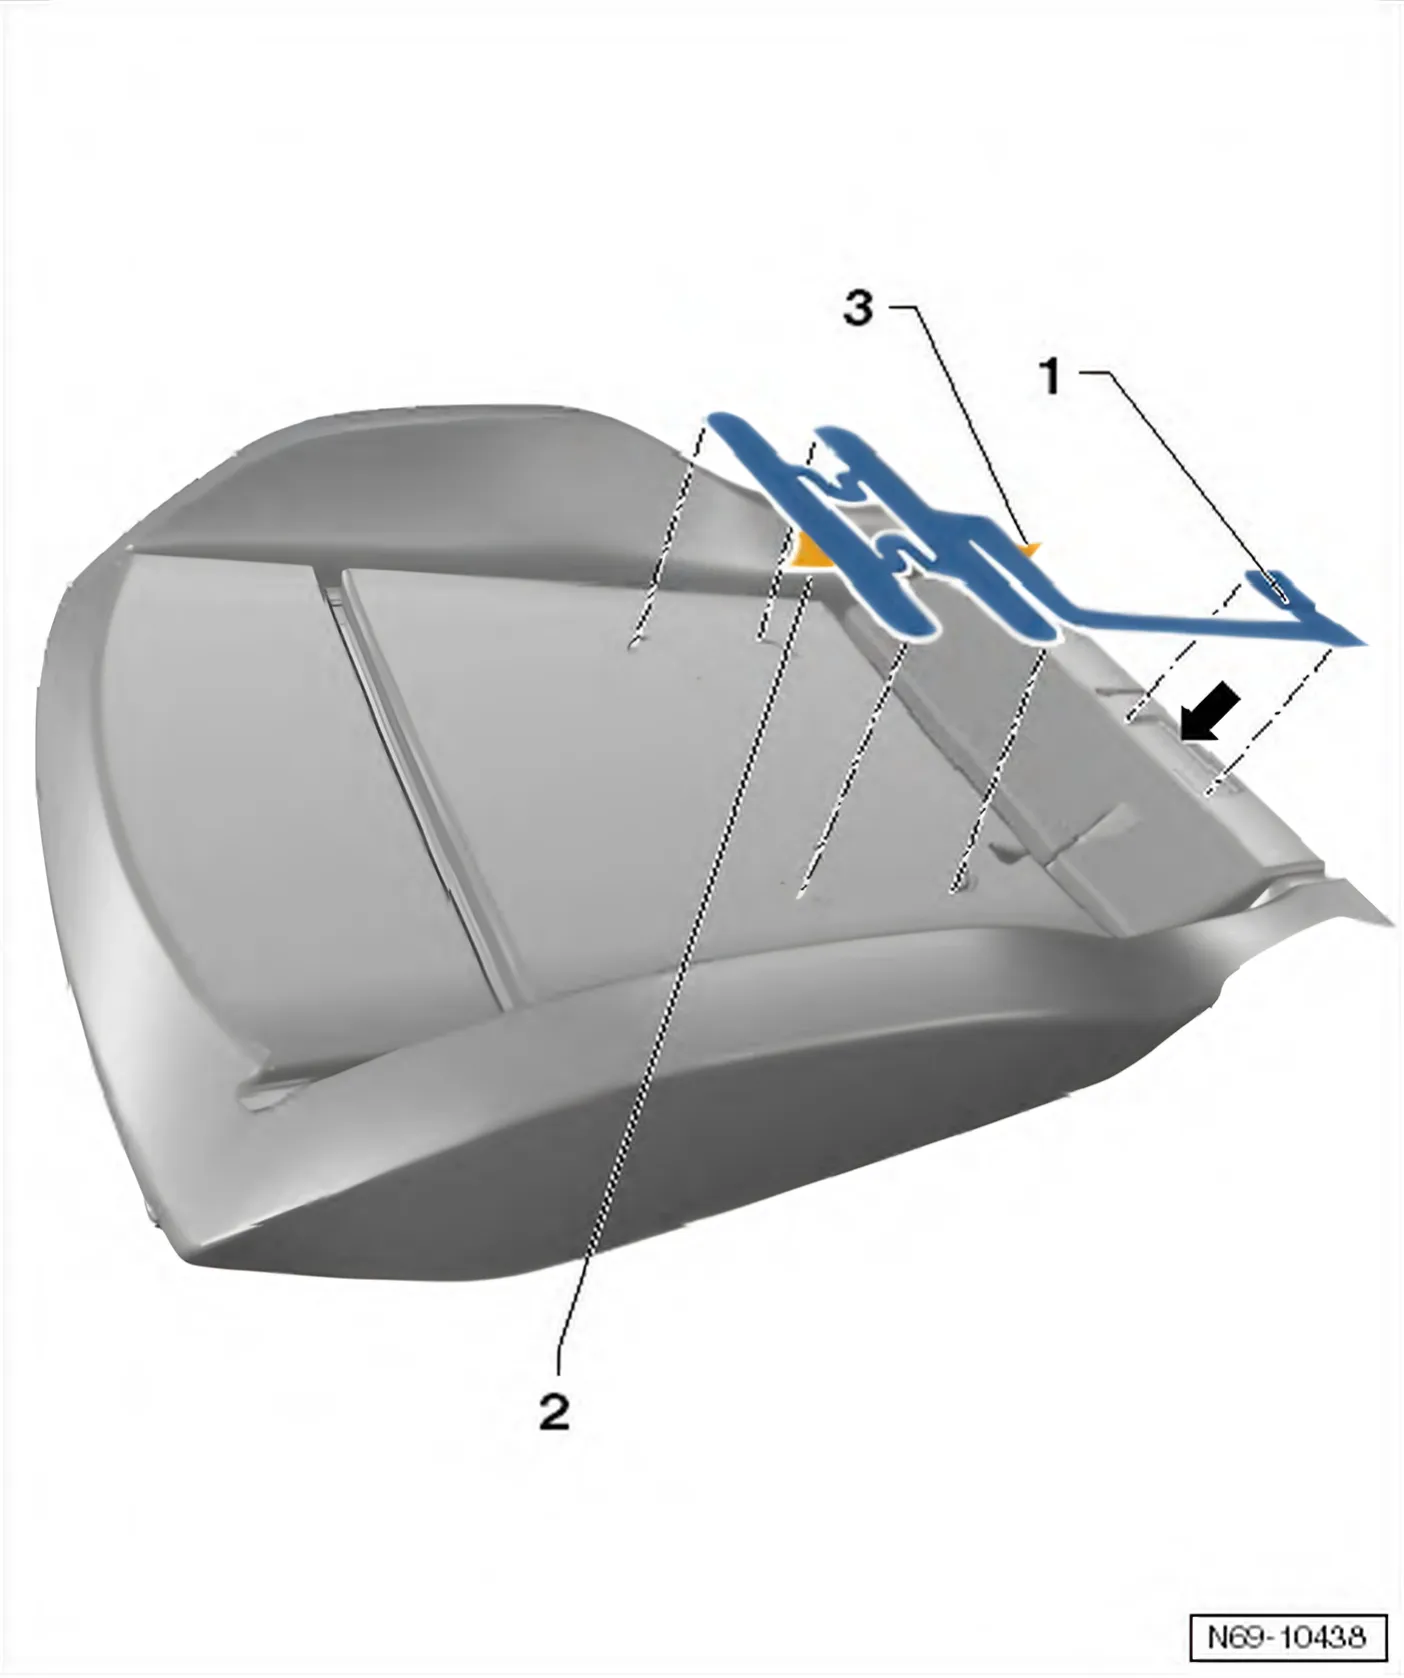
Installing
- Push wiring harness into recess -arrow- in padding.
- Align sensor -1- to positioning aid of padding.
- Hold aligned sensor with right hand, pull films -2- and -3- off and bond sensor onto padding.
- Connect the wiring harness to the vehicle electrics.
Installation of the other components is carried out in reverse order of removal.
- After installation, carry out a function check with ignition switched on.