
Running gear, axles, steering · Steering · Steering rack
Removing and installing track rod
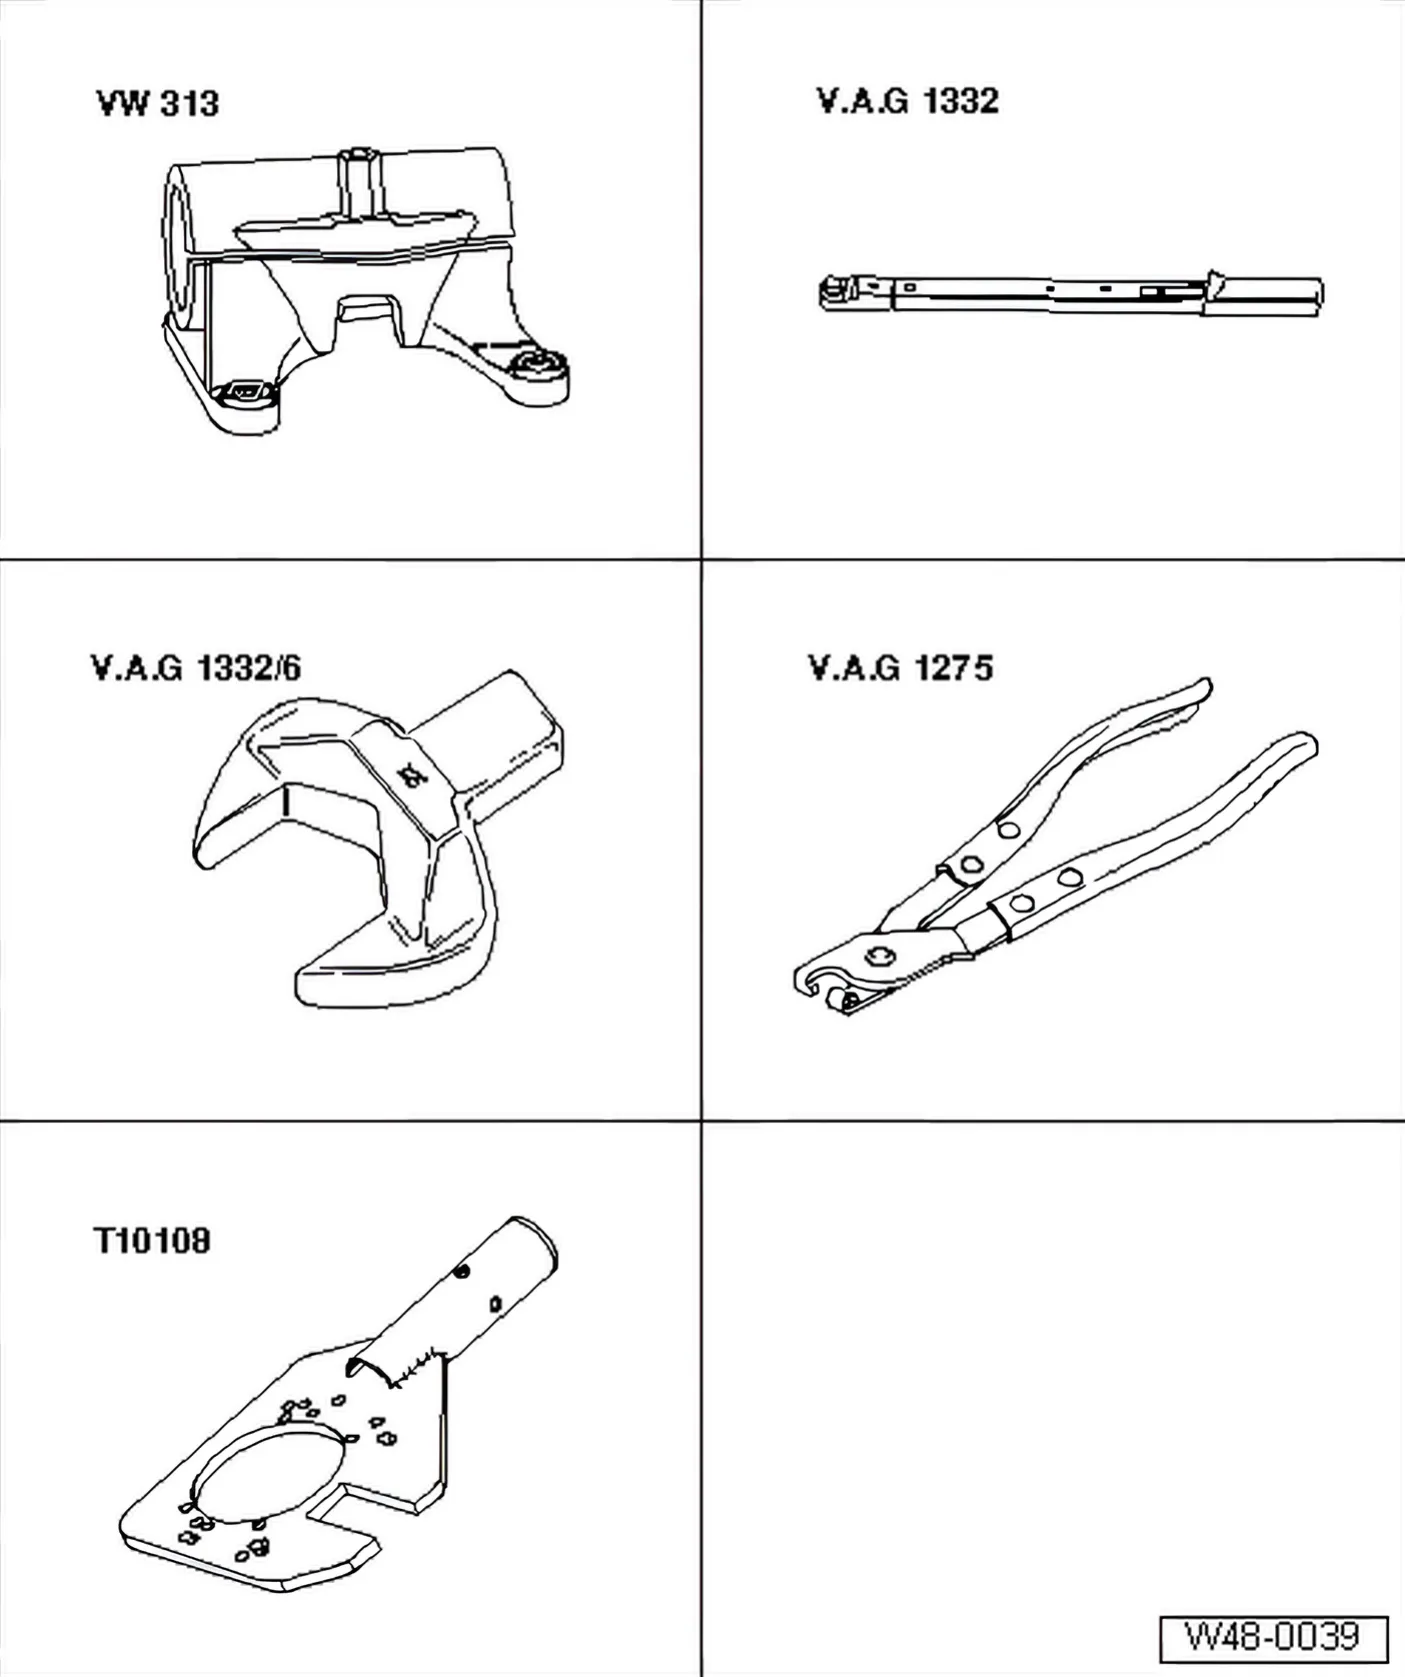
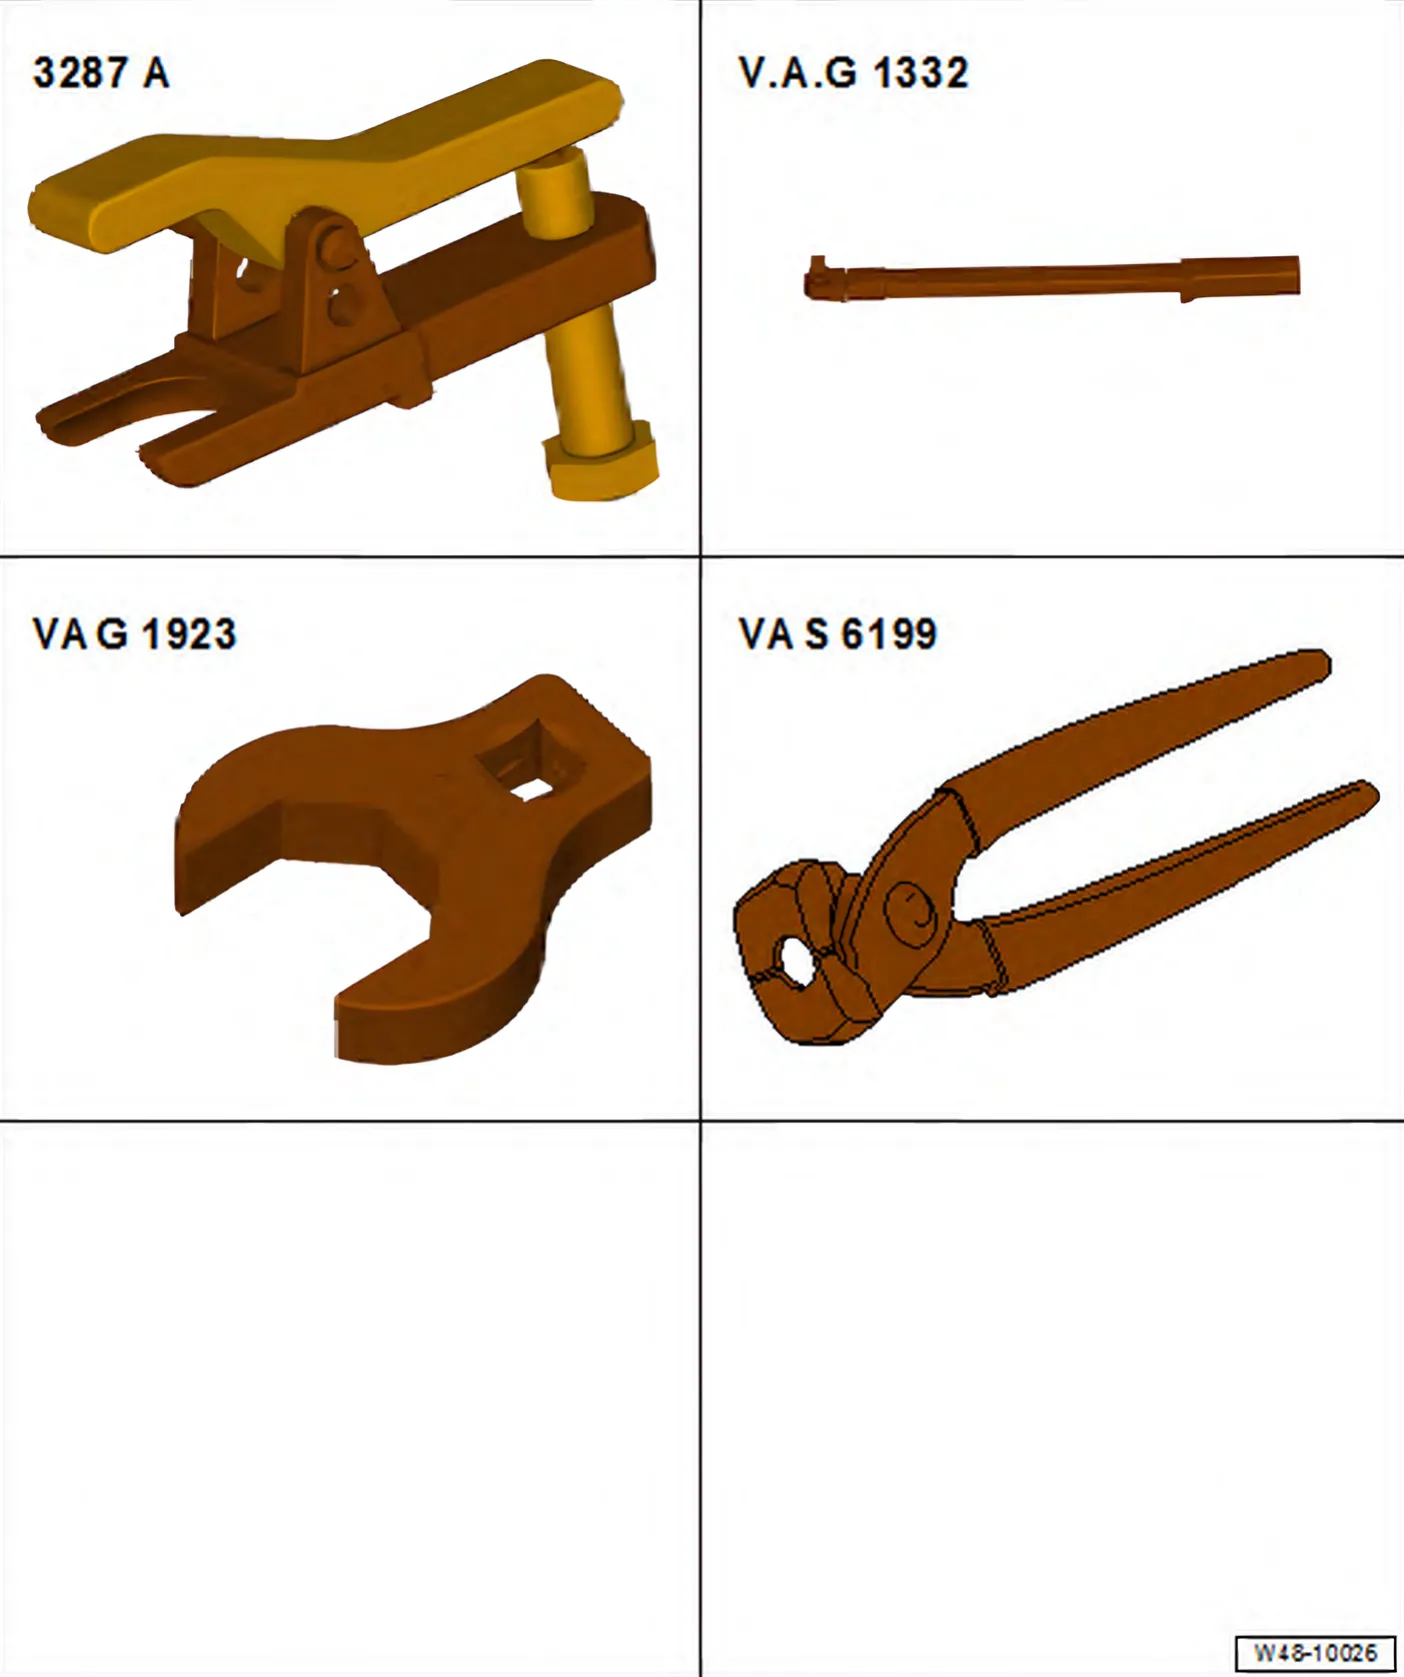
Special tools and workshop equipment required
- 6R 2009–2014 Support clamp - VW 313-
- 6C 2014–2017 Ball joint puller - 3287 A-
- Torque wrench - V.A.G 1332-
- 6R 2009–2014 Open end spanner insert, AF 32 mm - V.A.G 1332/6-
- Hose clip pliers - V.A.G 1275-
- Gearbox support - T10108-
- 6C 2014–2017 Open-end spanner attachment AF 38 - V.A.G 1923-
- Locking pliers for Phaeton steering rack - VAS 6199-
Removing
6R 2009–2014 The track rods can only be removed/installed with the steering rack removed.
- Seal line connections on power steering rack if not already done.
Clamp and hose clamp of left boot must be opened and boot must be pushed back to remove right track rod. Counterhold at left steering rack to release right track rod.
- Open clamp and spring-type clip and slide boot back.
- Clamp steering rack to gearbox bracket - T10108- and unscrew track rod -1- from steering rack -2-.
To mount steering rack, use bore “5” and matching opposite bore on gearbox bracket.
6C 2014–2017
- Turn steering wheel to straight-ahead position.
- Loosen wheel bolts.
- Raise vehicle.
- Remove wheel.
- Clean outside of steering rack in vicinity of boot.
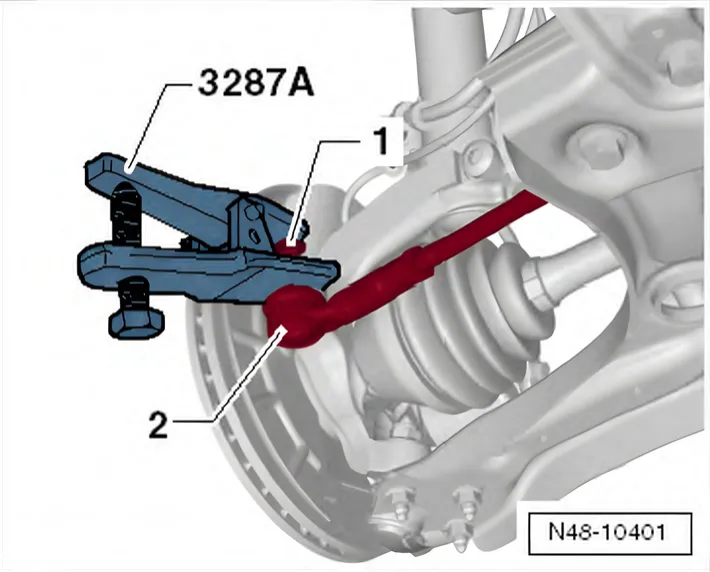
- Loosen nut -1- on track rod end -2- but do not remove completely.
- Press track rod ball joint -2- off steering arm.
- Remove lower suspension link ⇒ 4.1 Removing and installing lower suspension link.
- Open clips and push boot back.
- Turn steering as follows:
- For left track rod, turn steering to full right lock
- For right track rod, turn steering to full left lock.
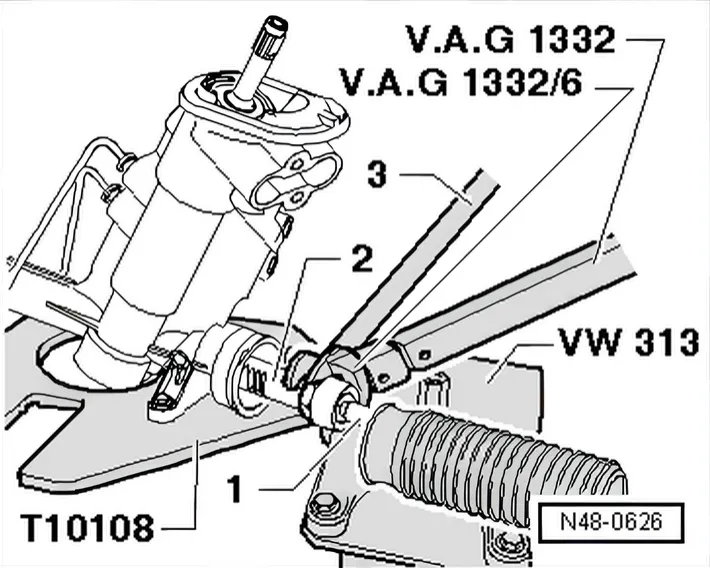
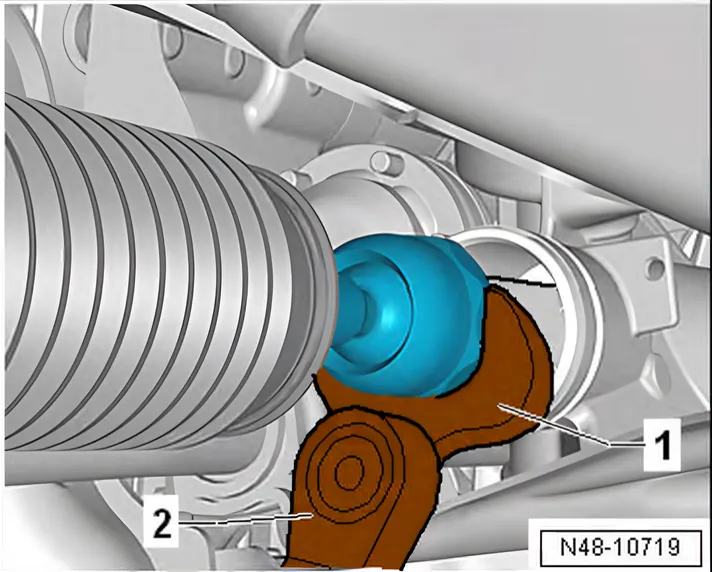
- Unscrew track rod.
- 1 Open-end spanner attachment - V.A.G 1923-
- 2 Torque wrench - V.A.G 1332-
Installing
Install in reverse order. During this procedure, observe the following:
6C 2014–2017
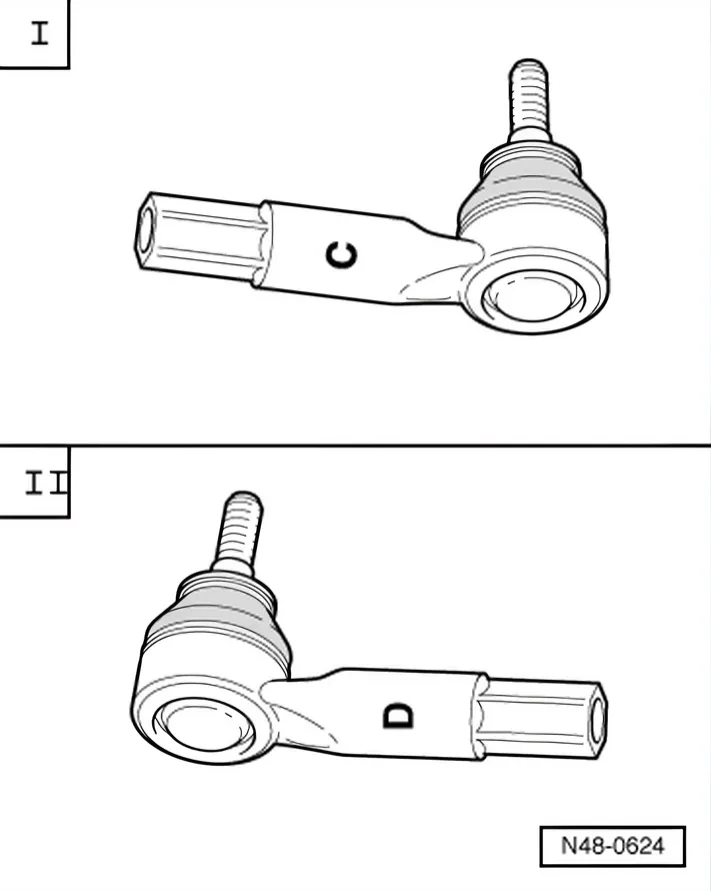
- Make sure that correct track rod ball joint is installed on each side.
I - Track rod ball joint on right marked “C”
II - Track rod ball joint on left marked “D”
- Turn steering wheel to straight-ahead position.
- Thread new clamps and rubber boot onto track rod.
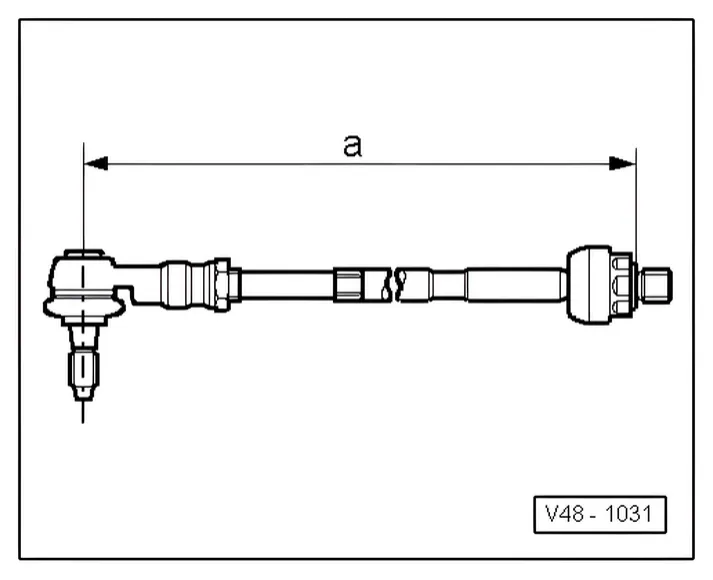
- Screw track rod into track rod ball joint until dimension -a- is attained.
Dimension -a- = 373 ± 1 mm
- Tighten track rod.
- 1 Open-end spanner attachment - V.A.G 1923-
- 2 Torque wrench - V.A.G 1332-
- Lightly grease sealing surface between boot and track rod with grease from repair kit.
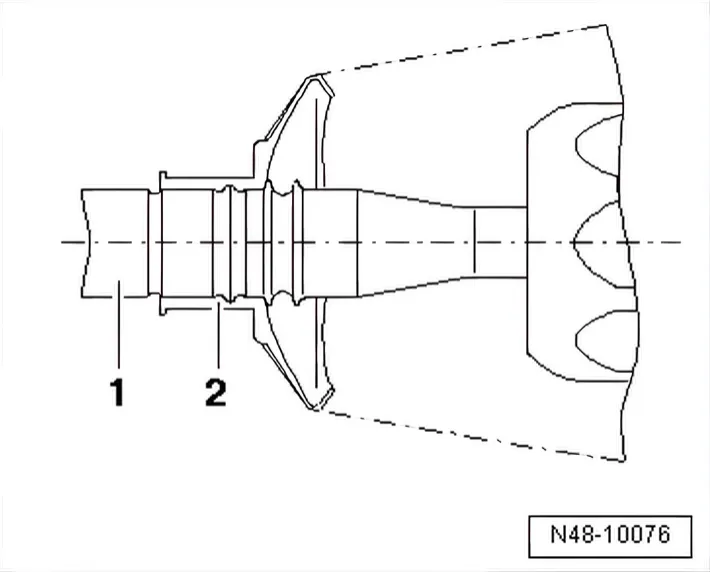
- Push rubber boot -2- onto track rod -1-, making sure that boot is correctly positioned.
- Secure spring-type clip on rubber boot using hose clip pliers - V.A.G 1275-.
- Lightly grease sealing surface between boot and steering rack housing with grease from repair kit.
- Push rubber boot onto steering rack housing as far as it will go.
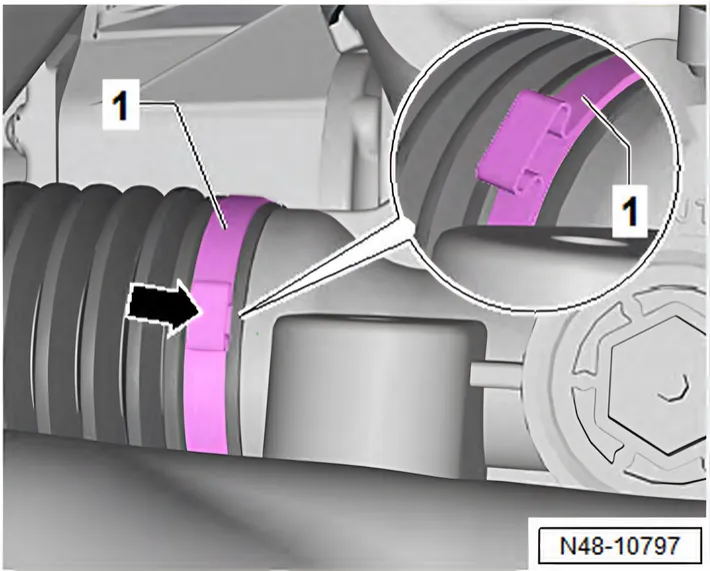
- Install new clamp -1- using locking pliers for Phaeton steering rack - VAS 6199-.
- Tighten clamp so that its ear -arrow- is positioned as shown in illustration.
- Install wheel and tighten.
- Check wheel alignment ⇒ 3.5 Wheel alignment procedure.
- If both track rods have been exchanged, basic setting must be carried out for steering angle sender - G85- ⇒ Vehicle diagnostic tester.
- Then carry out basic setting of steering ⇒ Vehicle diagnostic tester.
Specified torques
| Component | Specified torque |
|---|---|
| Track rod to steering rack | 80 Nm |
6C 2014–2017