
Running gear, axles, steering · Steering · Steering rack
Removing and installing motor/pump unit
Only 6R 2009–2014
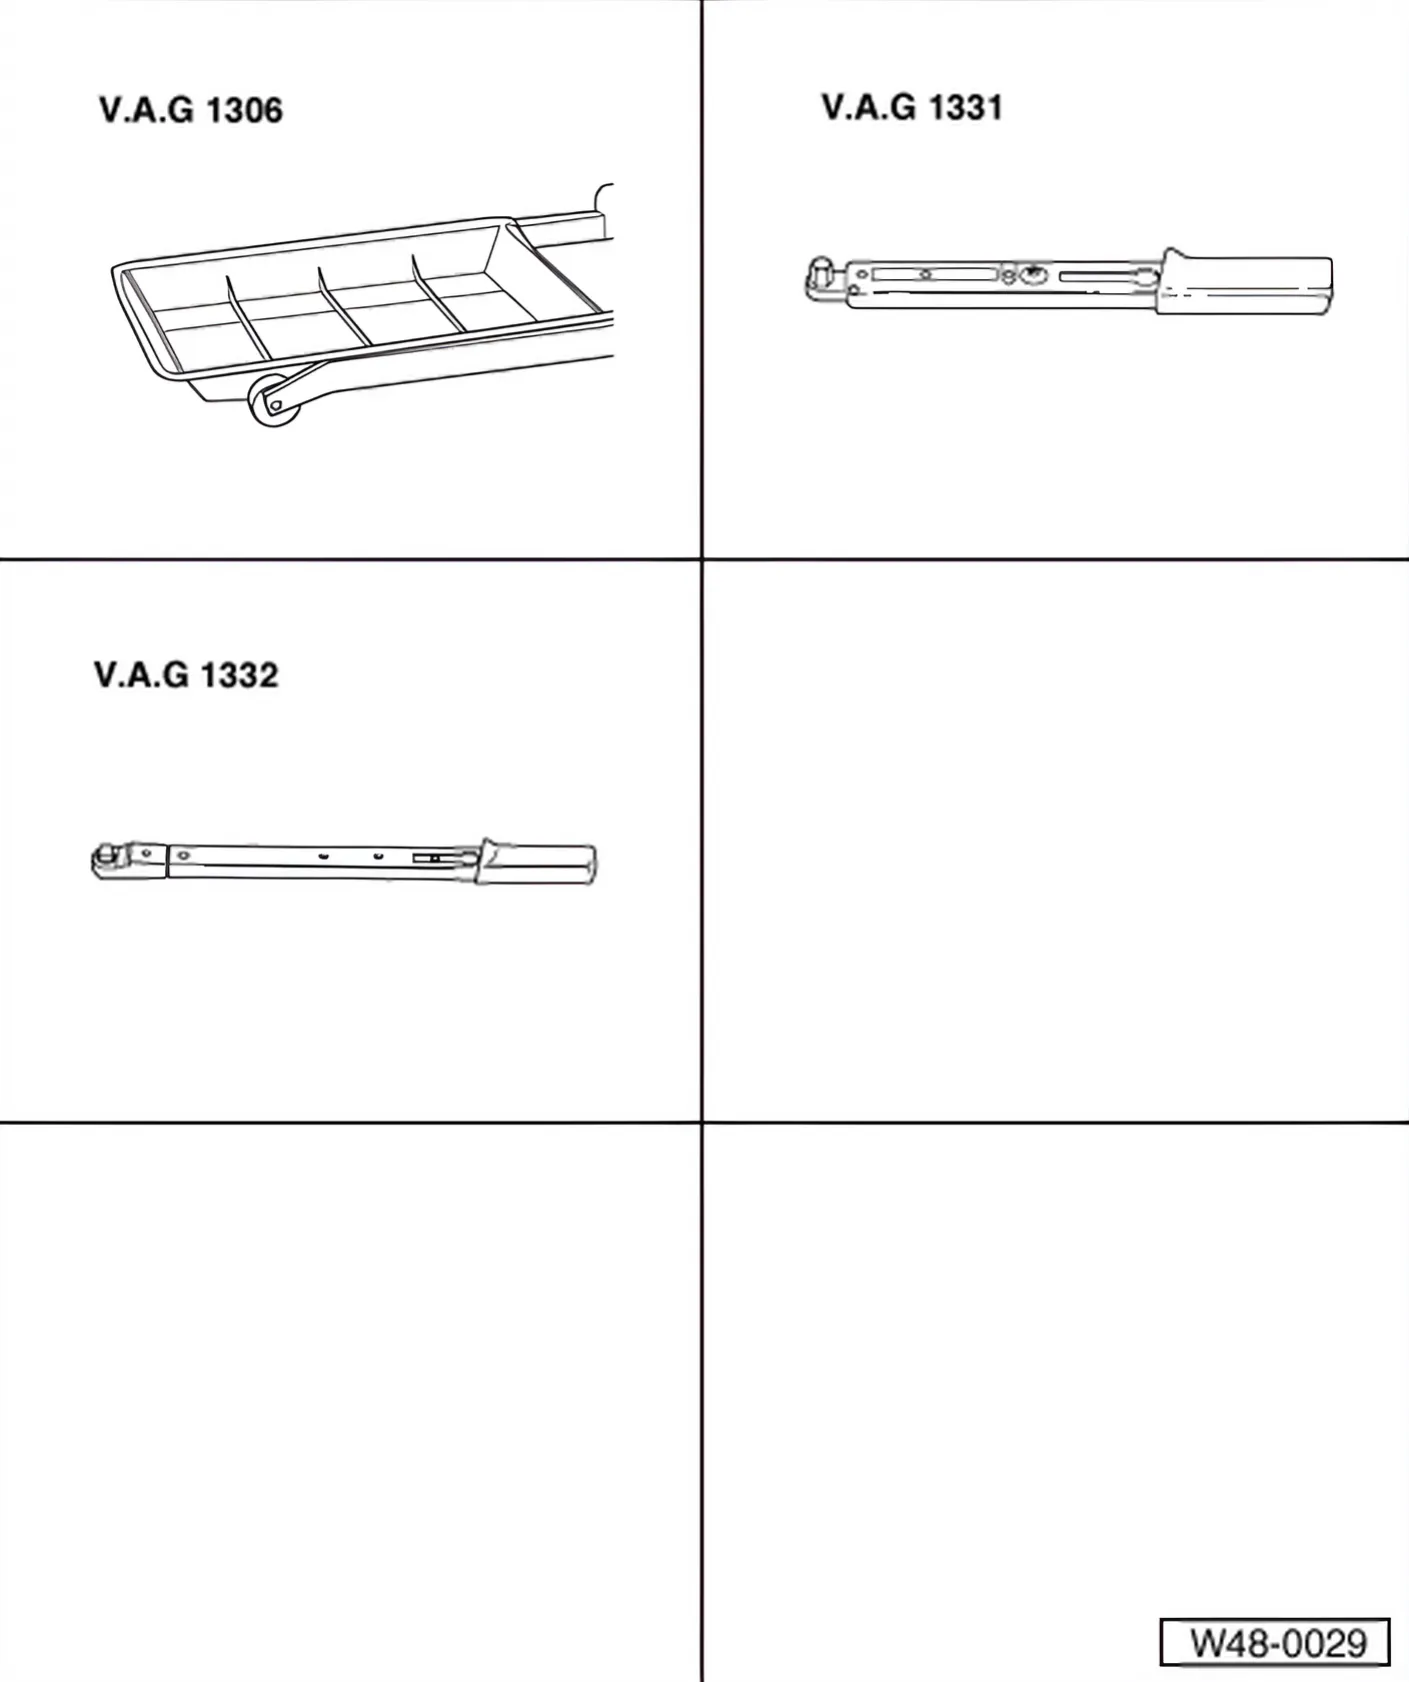
Special tools and workshop equipment required
- Drip tray - V.A.G 1306-
- Torque wrench - V.A.G 1331-
- Torque wrench - V.A.G 1332-
- Repairs must not be performed on the motor/pump unit
- If problems are reported, determine the cause by means of a function test, pressure test, leakage test and self-diagnosis.
- If a fault is found, the motor/pump unit must be renewed.
- Residual quantities of hydraulic fluid remain in the motor/pump unit and in the return and pressure lines after extracting.
- Do not re-use hydraulic fluid which has been drained off.
- Pressure and return lines must not be clamped off with hose clamps, e.g. -3094-, or other tools. Clamping can cause damage to the pressure line or return line.
- When bending or repositioning the pressure line or return line, make sure that the bending radius is not less than 100 mm to prevent damaging the lines.
Removing
- With ignition switched off, disconnect battery earth strap ⇒ Electrical system; Rep. gr. 27; Battery; Removing and installing battery.
Vehicles with air filter on left in engine compartment
- Remove battery and battery tray ⇒ Electrical system; Rep. gr. 27; Battery; Removing and installing battery.
Continued for all vehicles
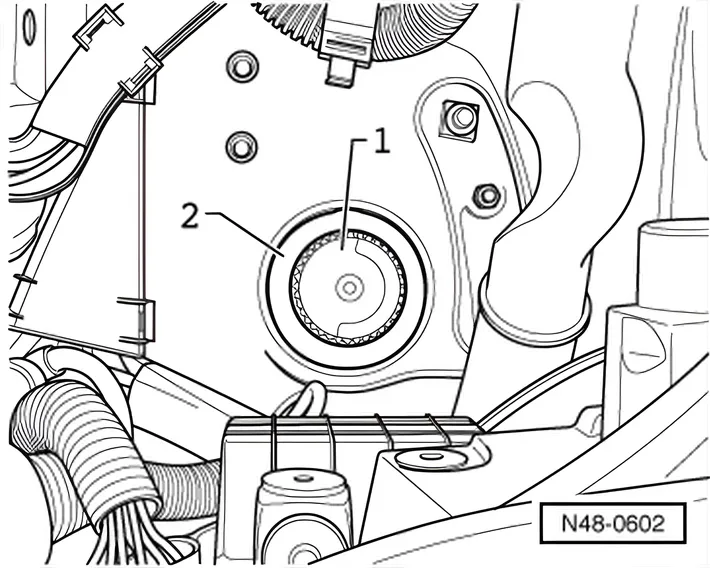
- Unscrew cap -1- from motor/pump unit -2-.
- Draw off as much hydraulic fluid as possible from motor/pump unit using a suction bottle.
- Remove left front wheel.
- Remove front left wheel housing liner ⇒ General body repairs, exterior; Rep. gr. 66; Wheel housing liner; Removing and installing front wheel housing liner.
- Remove noise insulation.

- Open spacer -arrow A-.
- Remove pressure and return line -1- and -2- from spacer.
- Take out line -3- for power steering sensor - G250- from spacer.
Vehicles with air conditioning system
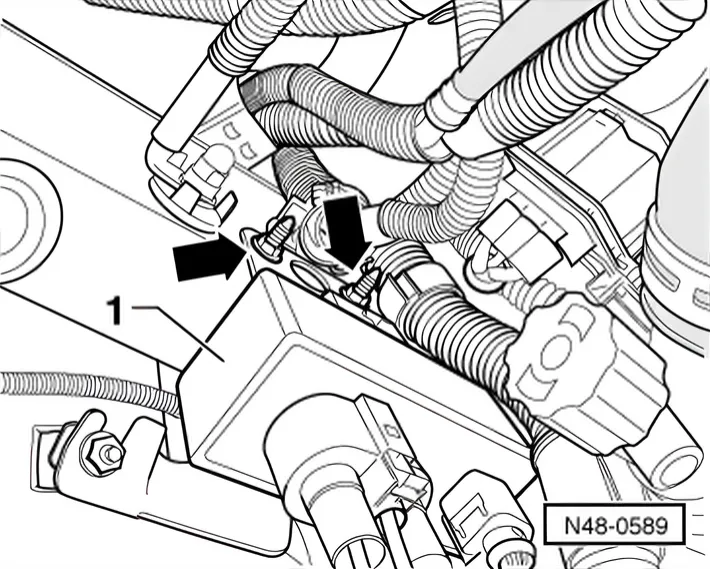
- Remove radiator fan control unit - J293- -1- from longitudinal member -arrows-.
Continued for all vehicles
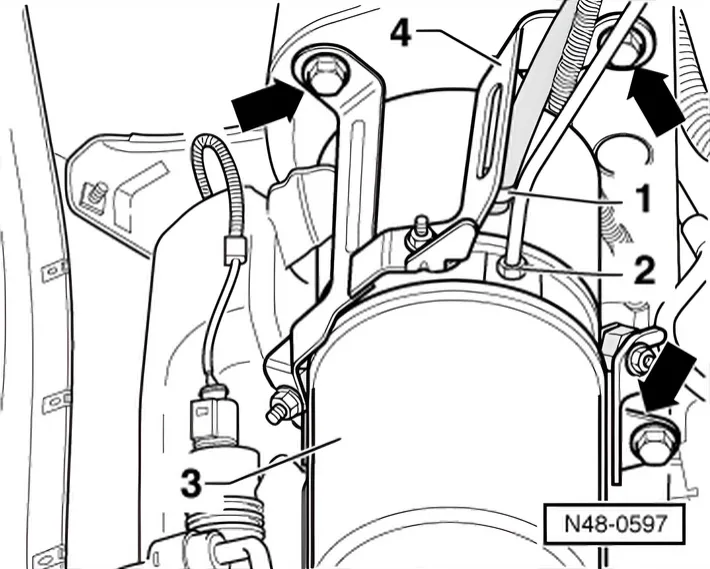
- Open spring-type clip on return line -1-, and pull return line off fitting on motor/pump unit.
- Unscrew pressure line -2- from motor/pump unit -3-.
- Close off threaded bore on motor/pump unit e.g. with plastic sealing plug.
- Close off pressure line, return line and connection piece on motor/pump unit with a plastic bag and adhesive tape.
- Unscrew bolts -arrows -, and slightly lower motor/pump unit with bracket.
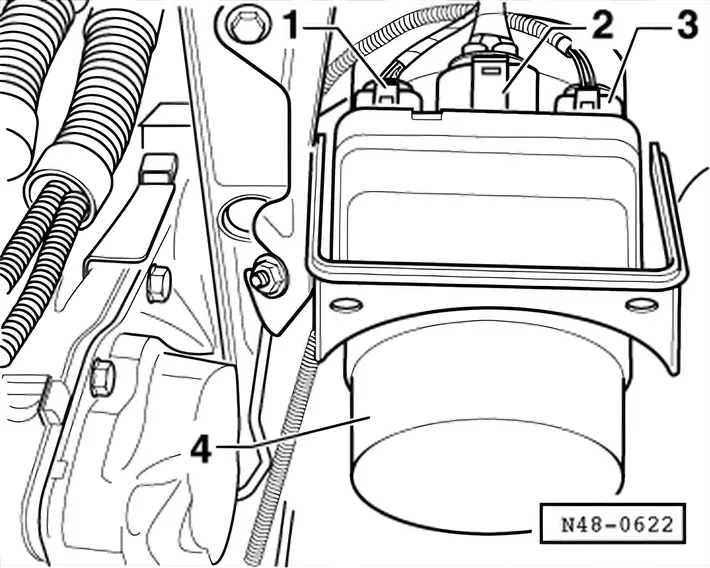
- Pull connectors -1-, -2- and -3- off motor/pump unit -4-.
- Remove motor/pump unit with bracket.
Installing
- Use new sealing rings for hose/line connections.
- Ensure sealing surfaces are clean.
Install in reverse order.
Vehicles with air filter on left in engine compartment
- Install battery and battery tray ⇒ Electrical system; Rep. gr. 27; Battery; Removing and installing battery.
Continued for all vehicles
- Connect earth strap of battery ⇒ Electrical system; Rep. gr. 27; Battery; Removing and installing battery.
- Use a hose (approx. 400…500 mm long) and a funnel to fill up with fresh hydraulic fluid.
- Use hydraulic fluid - G 004 000 M2-.
- Bleed steering system ⇒ 7 Bleeding steering system, checking for leaks and checking fluid level.
- Check hydraulic fluid level ⇒ 7.3 Checking hydraulic fluid level of power steering.
- Install front left wheel and tighten bolts or nuts ⇒ 2 Specified torques for wheel bolts.
Specified torques
| Component | Specified torque |
|---|---|
| Bracket for motor/pump unit to body ♦Use new bolts | 20 Nm + 90° |
| Pressure line to motor/pump unit ♦Use new oil seal | 30 Nm |