
1.4 TSI engine (EA211) · Lubrication · Crankcase ventilation
Crankcase ventilation
3.1 Assembly overview - crankcase breather system
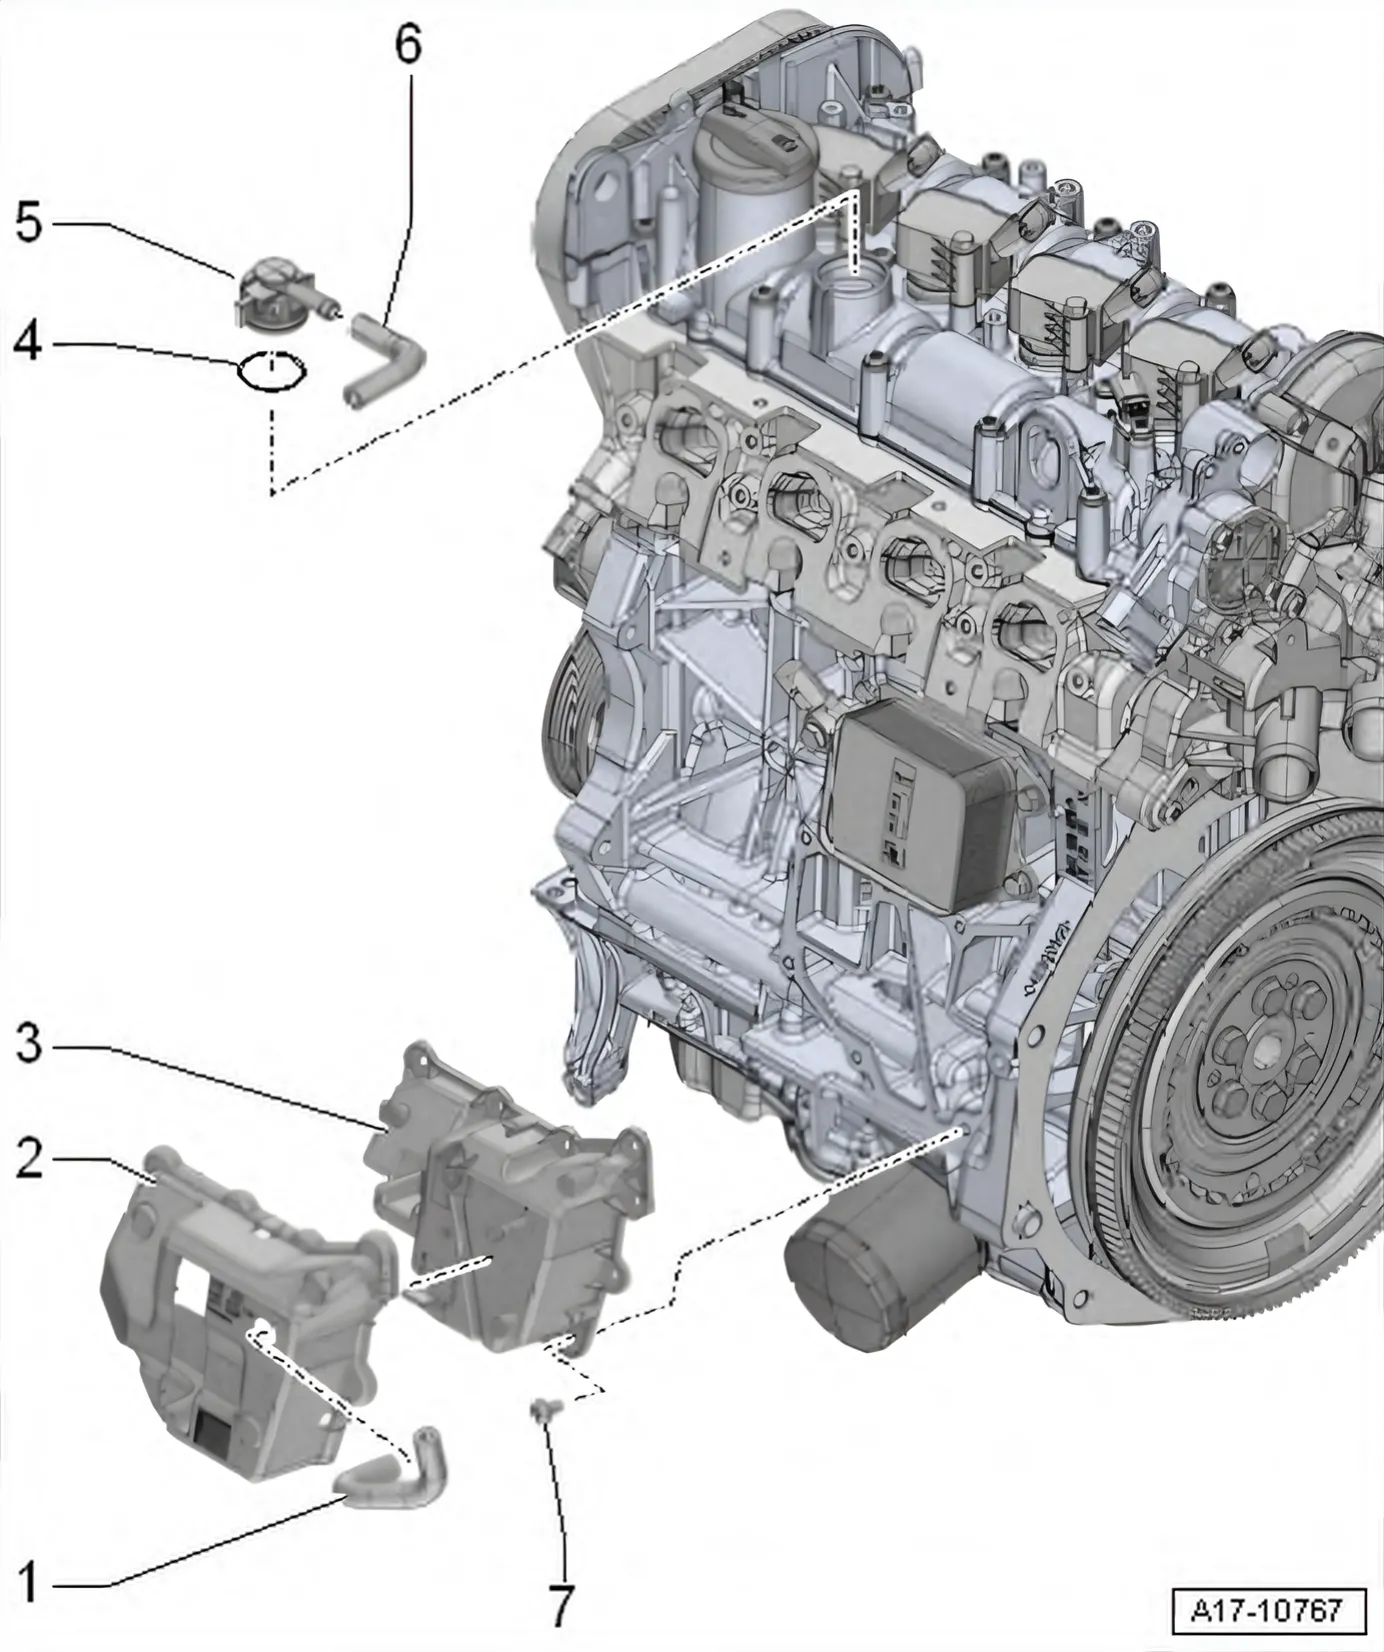
- 1 Hose
- For crankcase ventilation.
- 2 Cover
- For oil separator
- 3 Oil separator
- Removing and installing ⇒ 3.2 Removing and installing oil separator
- Renew if damaged
- 4 O-ring
- Renew after removal
- 5 Union
- 6 Hose
- For crankcase ventilation.
- 7 Bolt
- Self-locking
- Renew after removal
- 9 Nm
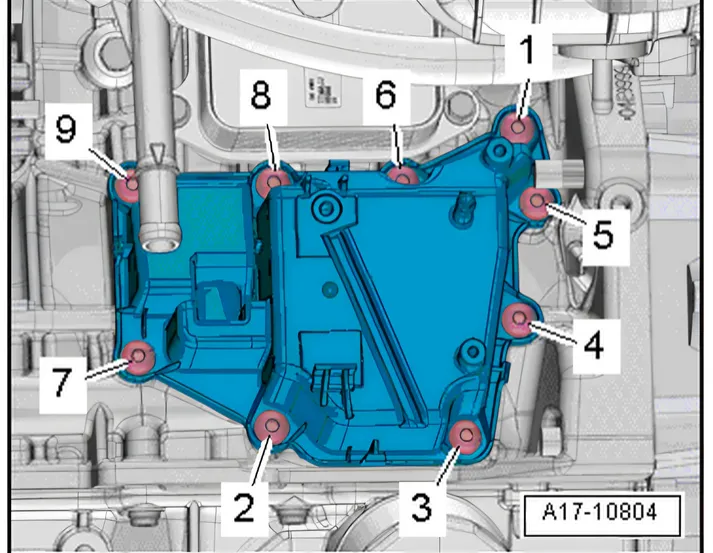
Oil separator - specified torque and sequence
- Tighten bolts in the sequence -1 … 9- to 9 Nm.
3.2 Removing and installing oil separator
Special tools and workshop equipment required
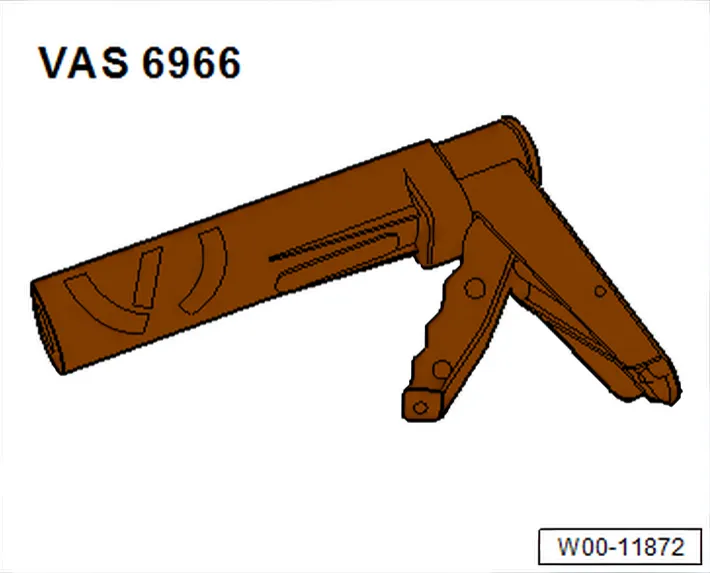
- Applicator gun - VAS 6966-
- Scraper
- Commercially available studs, M6x20 mm, qty. 2
- Sealant remover
- Sealant ⇒ Electronic Parts Catalogue
Removing
- Remove noise insulation ⇒ General body repairs, exterior; Rep. gr. 66; Noise insulation.
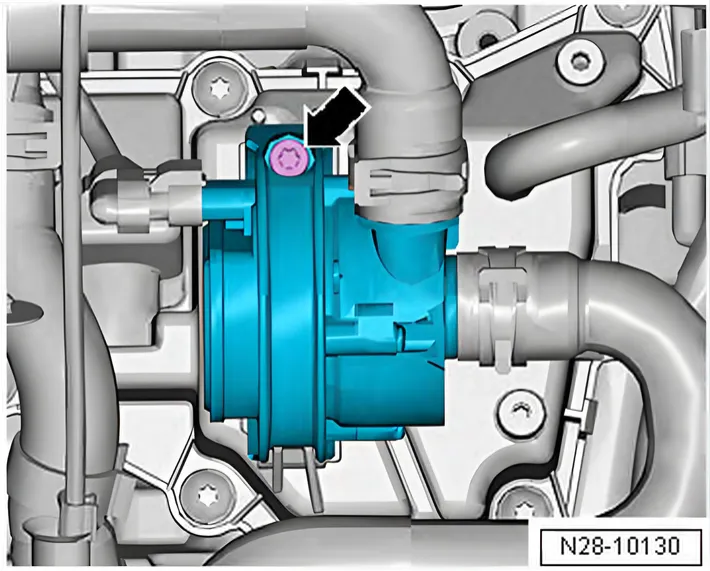
- Unscrew bolts -arrow- and push charge air cooling pump - V188- to one side.
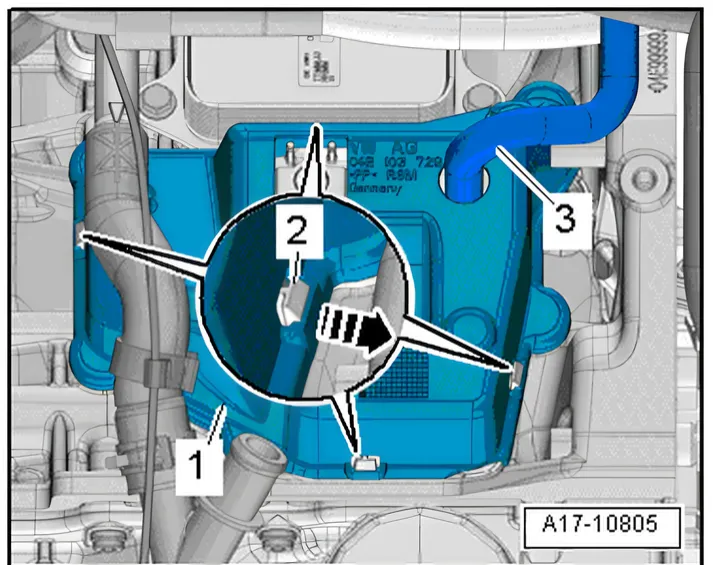
- Pull off crankcase breather hose -3-.
- Release fasteners -2- -arrow- on cover -1- for oil separator and detach cover.
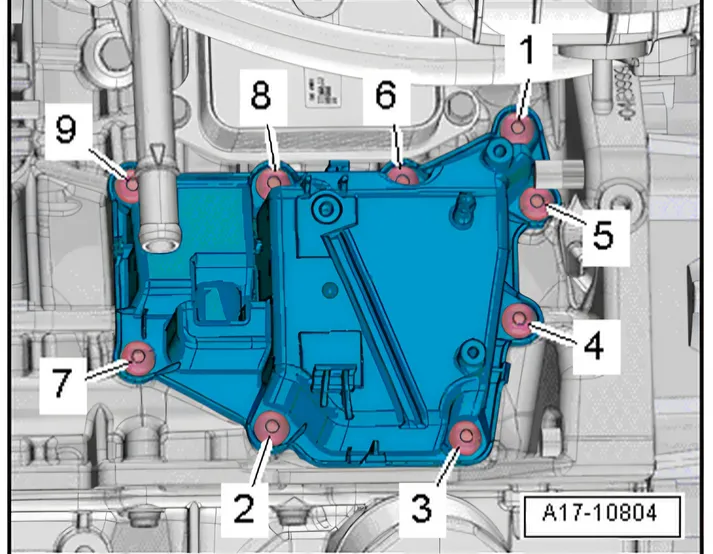
- Loosen and unscrew bolts in the sequence -9 to 1-.
- Carefully release oil separator from bonded joint.
Installing
Install in reverse order of removal. The following should be observed:
- Cover open parts of engine so that lubrication system does not become contaminated.
- Remove sealant residues from cylinder block with a flat scraper.
- Remove any oil and grease from sealing surfaces.
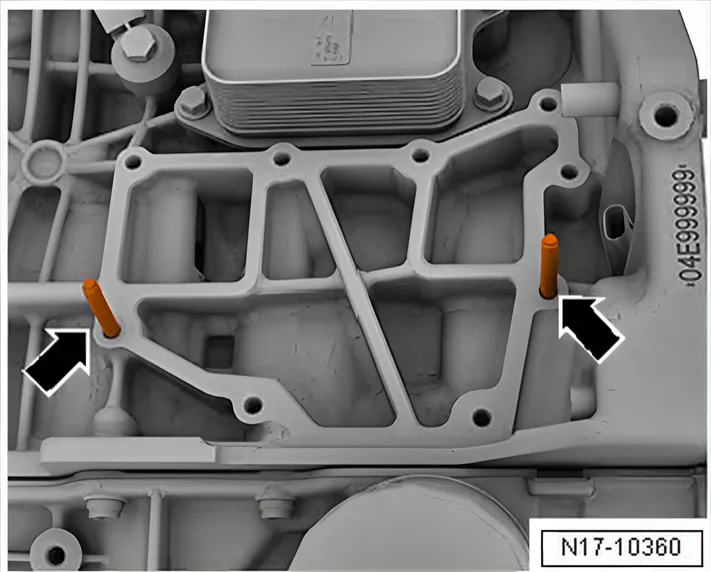
- Screw 2 M6x20 mm studs a few turns into holes -arrows-.
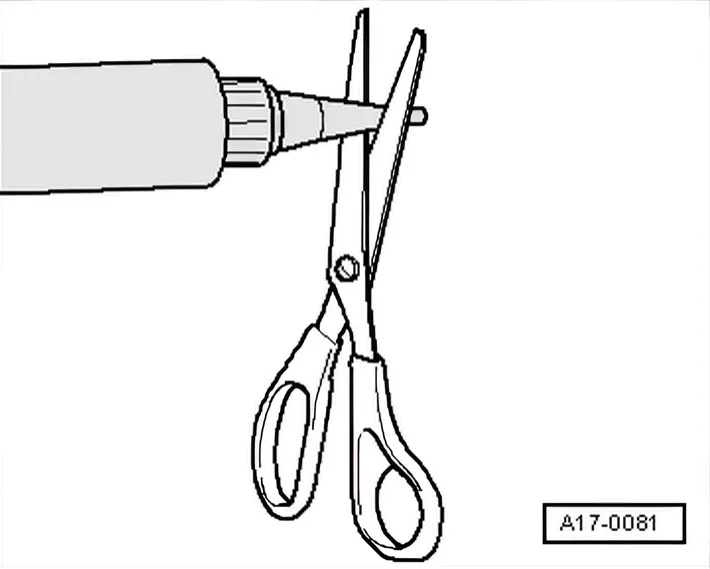
- Observe use-by date of sealant.
- Cut off nozzle on tube at front marking (∅ of nozzle approx. 2.0 mm).
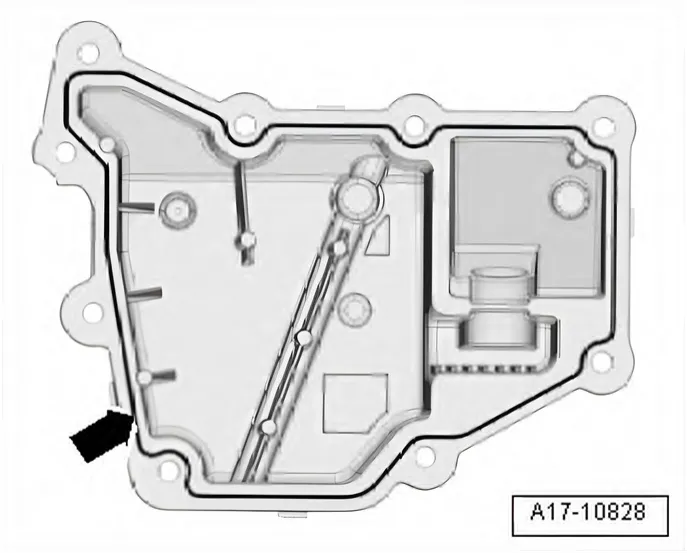
- Apply bead of sealant -arrow- onto clean sealing surface of oil separator using applicator gun - VAS 6966- as illustrated.
- Do not make sealant bead thicker than specified.
- Apply bead of sealant -arrow- onto clean sealing surface of oil separator as shown in illustration.
- Width of sealant bead: 2.0 mm.
The oil separator must be installed within 5 minutes of sealant being applied.
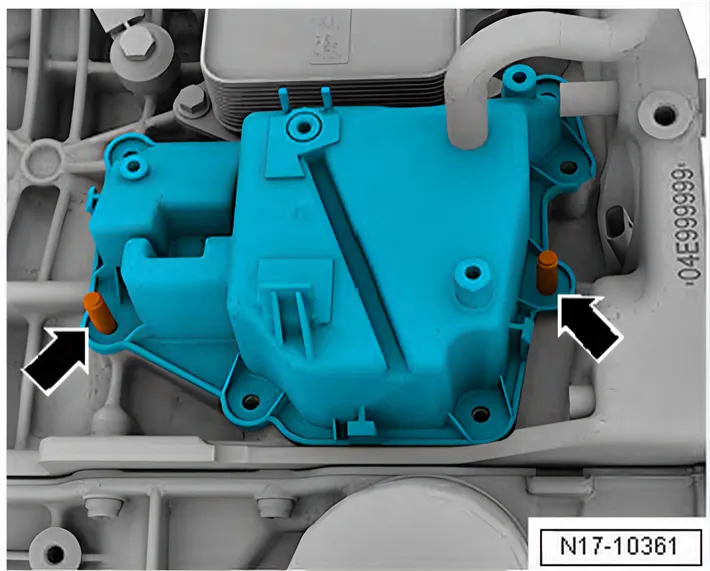
- Fit oil separator onto studs -arrows- and push onto crankcase.
- Start securing bolts.
- Unscrew studs.
- Oil separator – specified torque and tightening sequence ⇒ 3.1 Assembly overview - crankcase breather system.
Further installation is carried out in reverse order of removal. Observe the following:
- Install noise insulation ⇒ General body repairs, exterior; Rep. gr. 66; Noise insulation.
Torque settings