
1.4 TSI engine (EA211) · Lubrication · Sump, oil pump
Removing and installing lower part of sump
Special tools and workshop equipment required
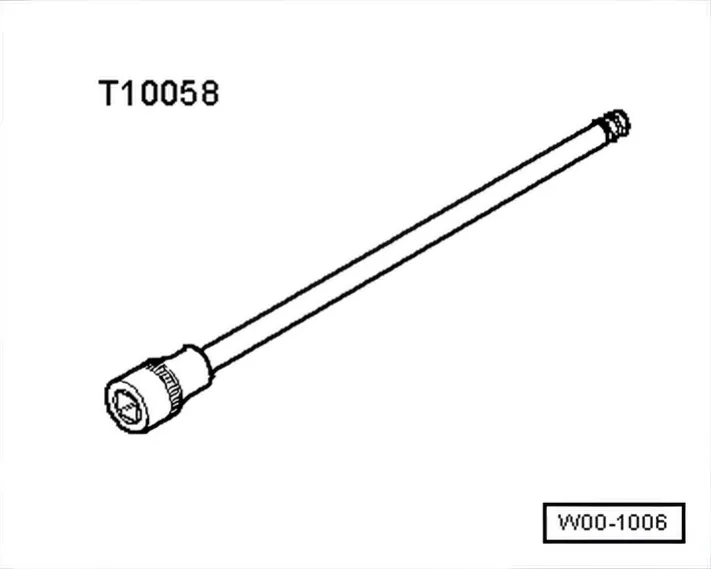
- Torx bit - T10058-
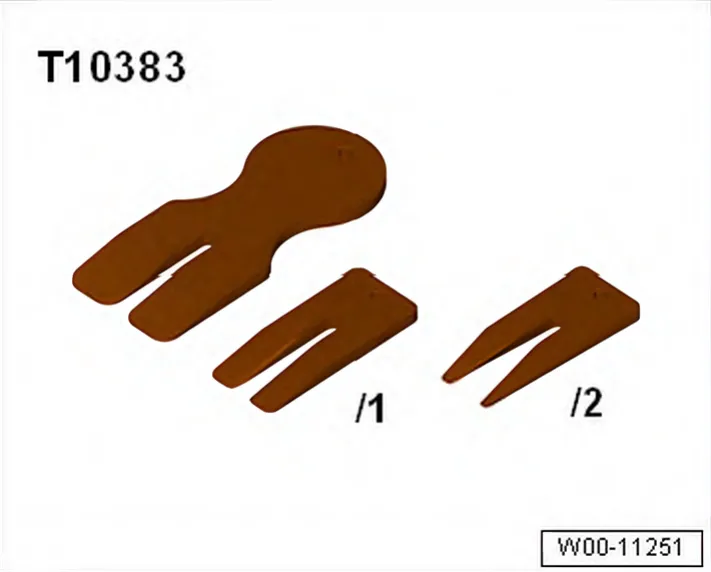
- Wedge - T10383/2-
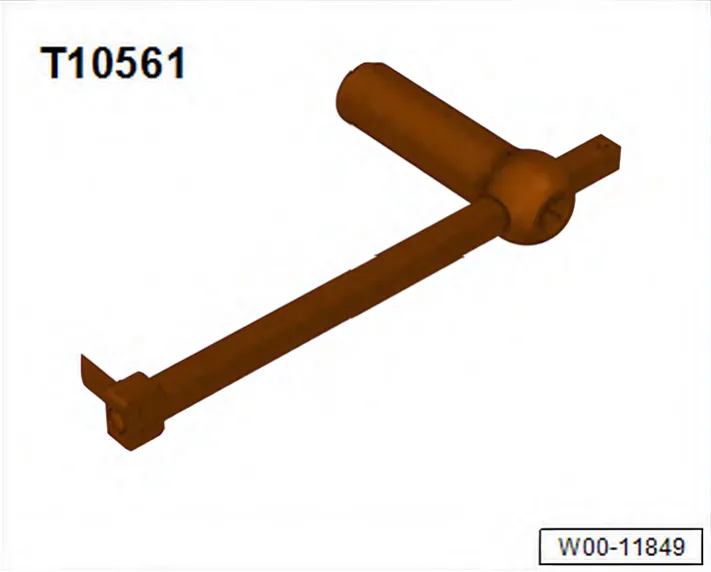
- Cutting tool - T10561-
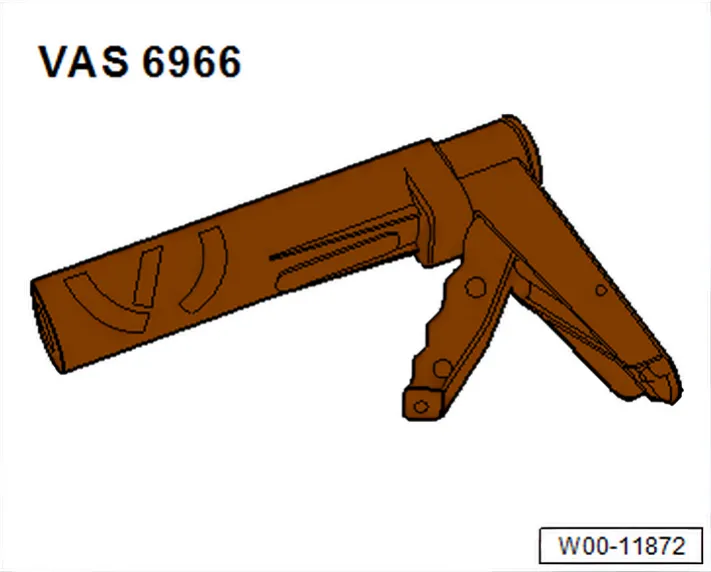
- Applicator gun - VAS 6966-
- Protective mat - VAS 531003-
- Scraper
- Sealant remover
- Hand drill with plastic brush
- Safety glasses
- Commercially available scraper
- Sealant ⇒ Electronic Parts Catalogue
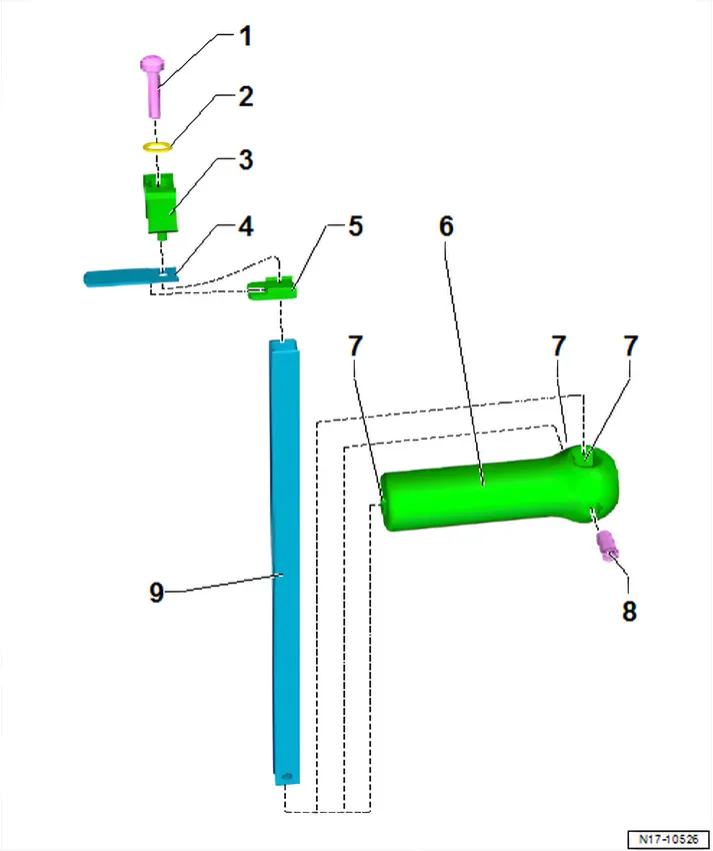
Cutting tool - T10561-
- 1 Bolt
- 2 Washer
- 3 Bracket
- 4 Knife
- 5 Guide
- 6 Handle
- 7 Inserts for support
(rod) for conversion of handle
- 8 Bolt
- 9 Support bearing
Removing
- Drain engine oil.
- Remove noise insulation ⇒ General body repairs, exterior; Rep. gr. 66; Noise insulation; Assembly overview - noise insulation.
- If necessary, remove front right wheel housing liner ⇒ General body repairs, exterior; Rep. gr. 66; Wheel housing liner; Assembly overview - front wheel housing liner.
- If necessary, remove radiator cowl ⇒ 4 Radiator, radiator fan.
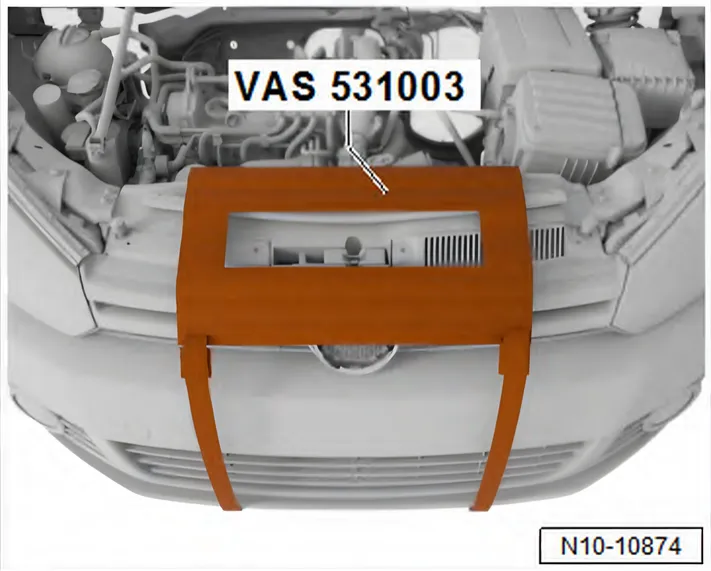
- After radiator cowl has been removed, fit protective mat - VAS 531003- to vehicle as shown in illustration.
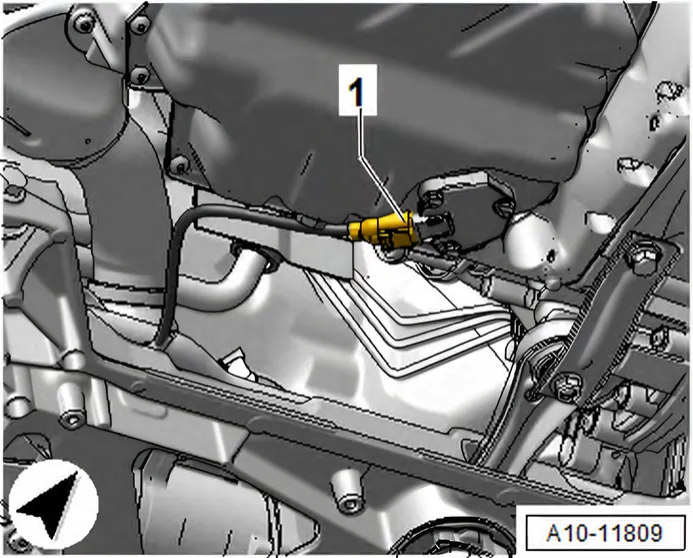
- Disconnect electrical connector -1- on oil level and oil temperature sender - G266-.
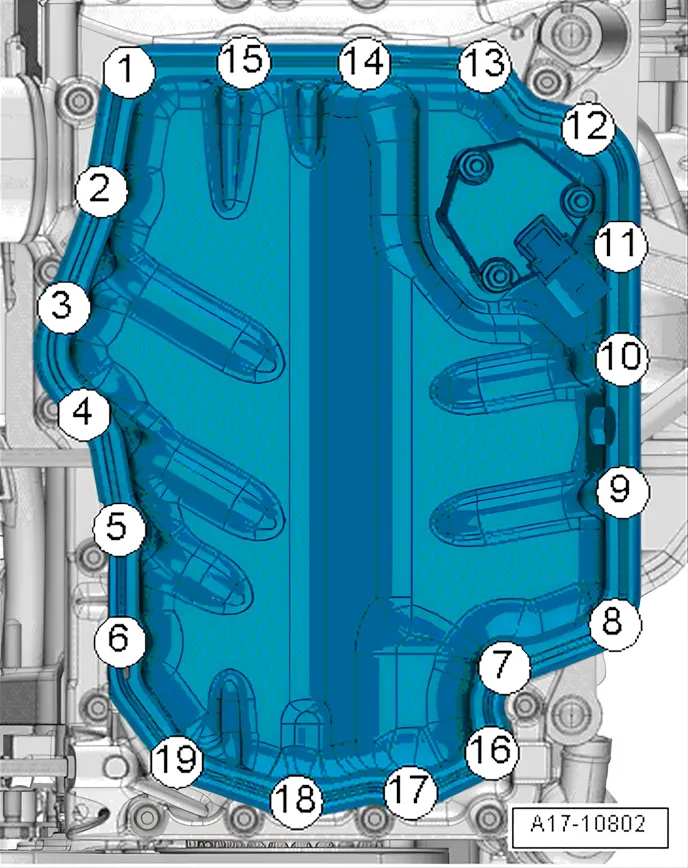
- Loosen and unscrew bolts in the sequence -19 to 1-.
- Loosen 2 bolts on oil sump, but do not unscrew completely.
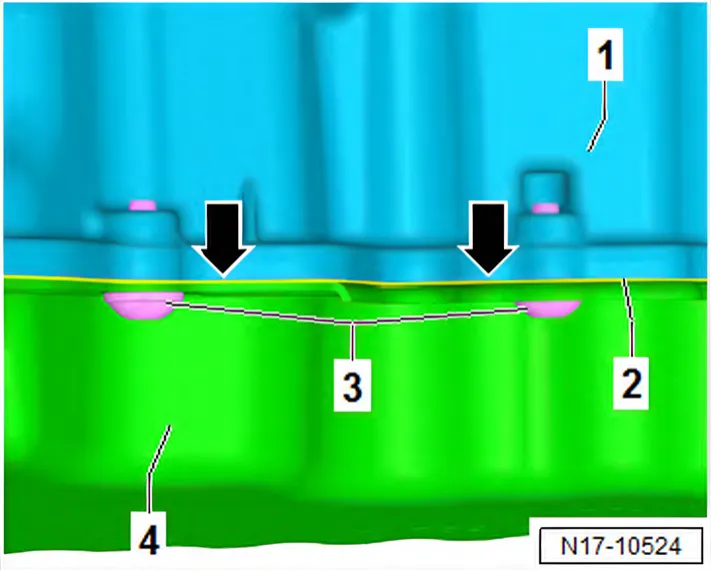
- Cut through seal between oil sump -4- and engine -1-.
- Use cutting tool - T10561- to do this.
- Separation is made centrally between bolts -3-.
- Position cutting tool - T10561- on seal -arrows- without it canting.
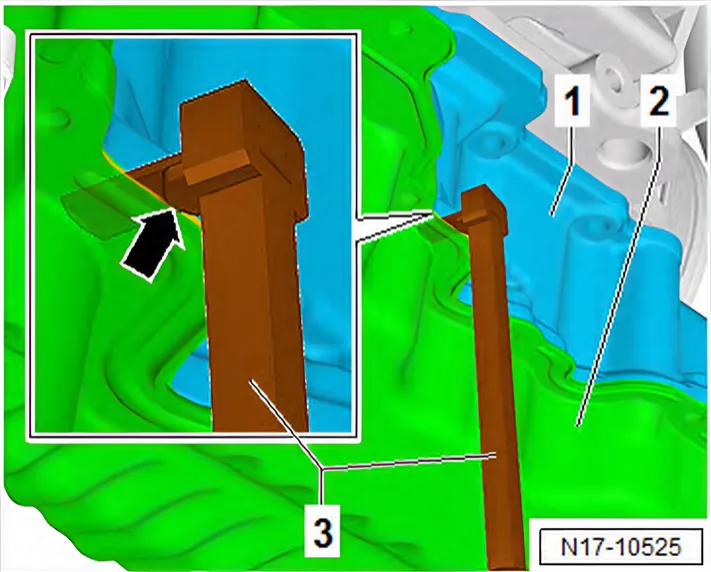
- Drive in cutting tool - T10561- -3- using a hammer as far as it will go -arrow-.
- Do not cant cutting tool - T10561- when doing this.
- Do not cutting tool - T10561- sideways.
- Do not lever with cutting tool - T10561-.
- Perform procedure at other points as described until sump is detached.
- Use wedge - T10383/2- to further loosen detached positions.
- Using a plastic hammer carefully drive in wedge.
- Drive in wedge - T10383/2- only to same depth as sealing surface.
- Carefully detach sump (bottom section) from adhesive bond.
- Fit wedge - T10383/2- at another position and detach the bonded joint in the same way.
- Carefully detach lower part of sump from adhesive bond using a commercially available scraper.
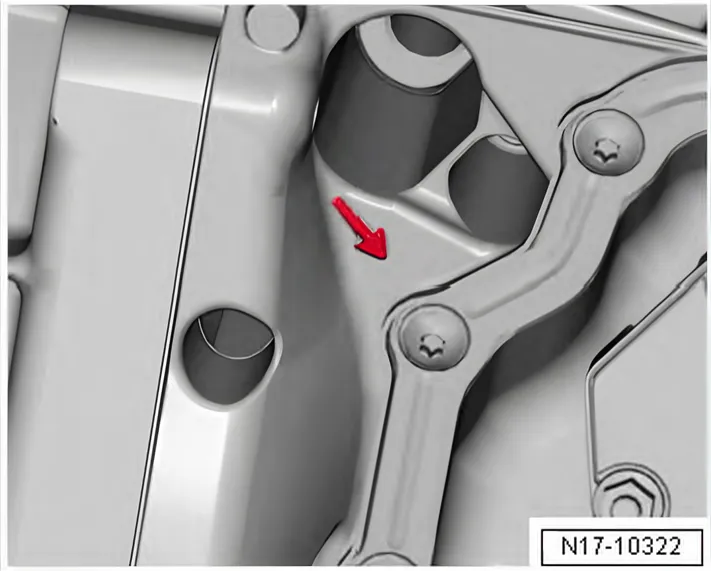
- Carefully lever off lower part of sump using a suitable assembly lever or screwdriver at position marked with an -arrow-.
Installing
- Cover open parts of engine so that lubrication system does not become contaminated.
- Spray sealing surface with sealant remover and leave to act.
- Remove sealant residues from sump upper part with a flat scraper.
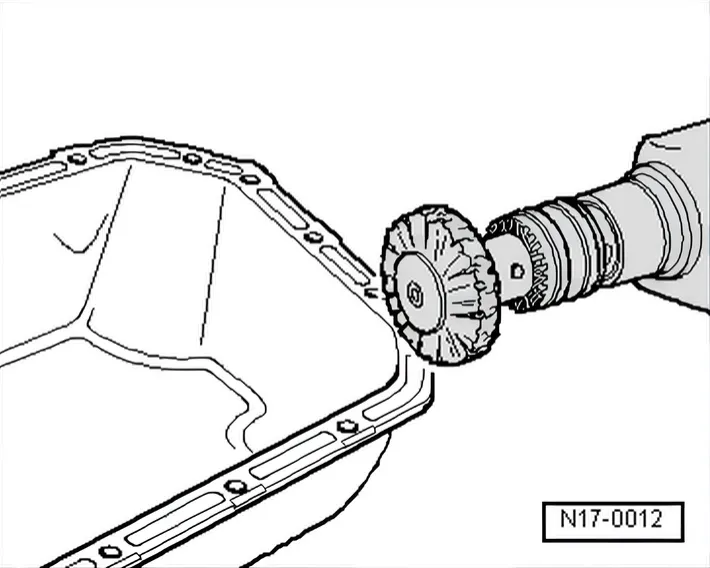
- Remove sealant residue from sump (bottom section) using a rotating plastic brush, for example.
- Remove any oil and grease from sealing surfaces.
- Observe use-by date of sealant.
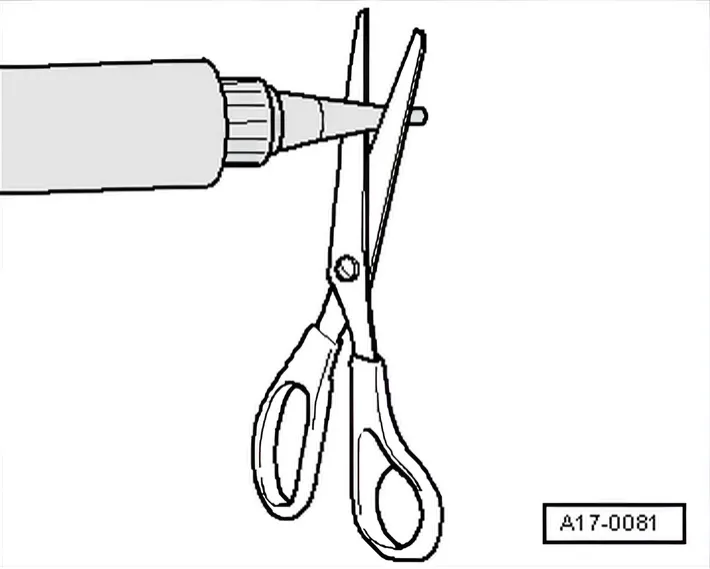
- Cut off nozzle on tube at front marking (∅ of nozzle approx. 2 mm).
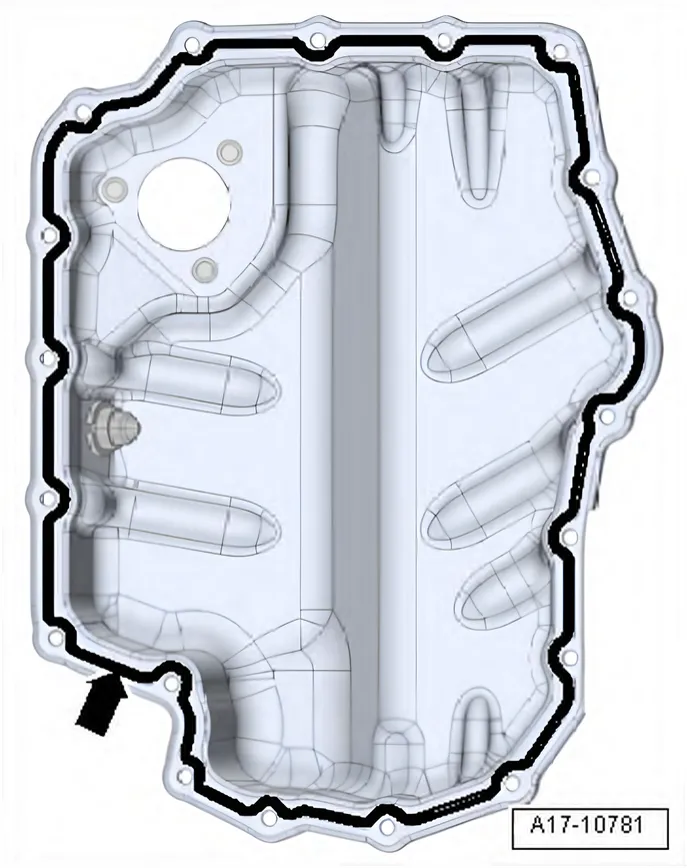
- Apply sealant in a bead -arrow- to clean sealing surface of bottom section of sump using applicator gun - VAS 6966-.
- Do not make sealant bead thicker than specified.
- Thickness of sealant bead: 2 to 3 mm.
- Apply sealant bead as shown.
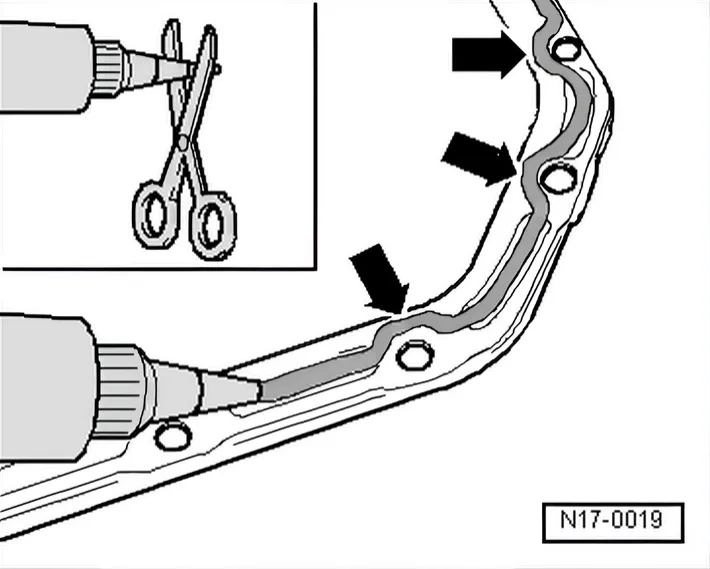
- Run bead along inner side of bolt holes -arrows-.
- Take particular care when applying sealant bead in area of the sealing flange.
- Position bottom section of sump and tighten bolts ⇒ 1.1 Assembly overview - sump/oil pump.
- Replenish engine oil, and check oil level ⇒ Maintenance; Booklet.