
1.2 TDI CR engine (EA189) · Cylinder head, valve gear · Toothed belt drive
Toothed belt drive – assembly overview and fastening
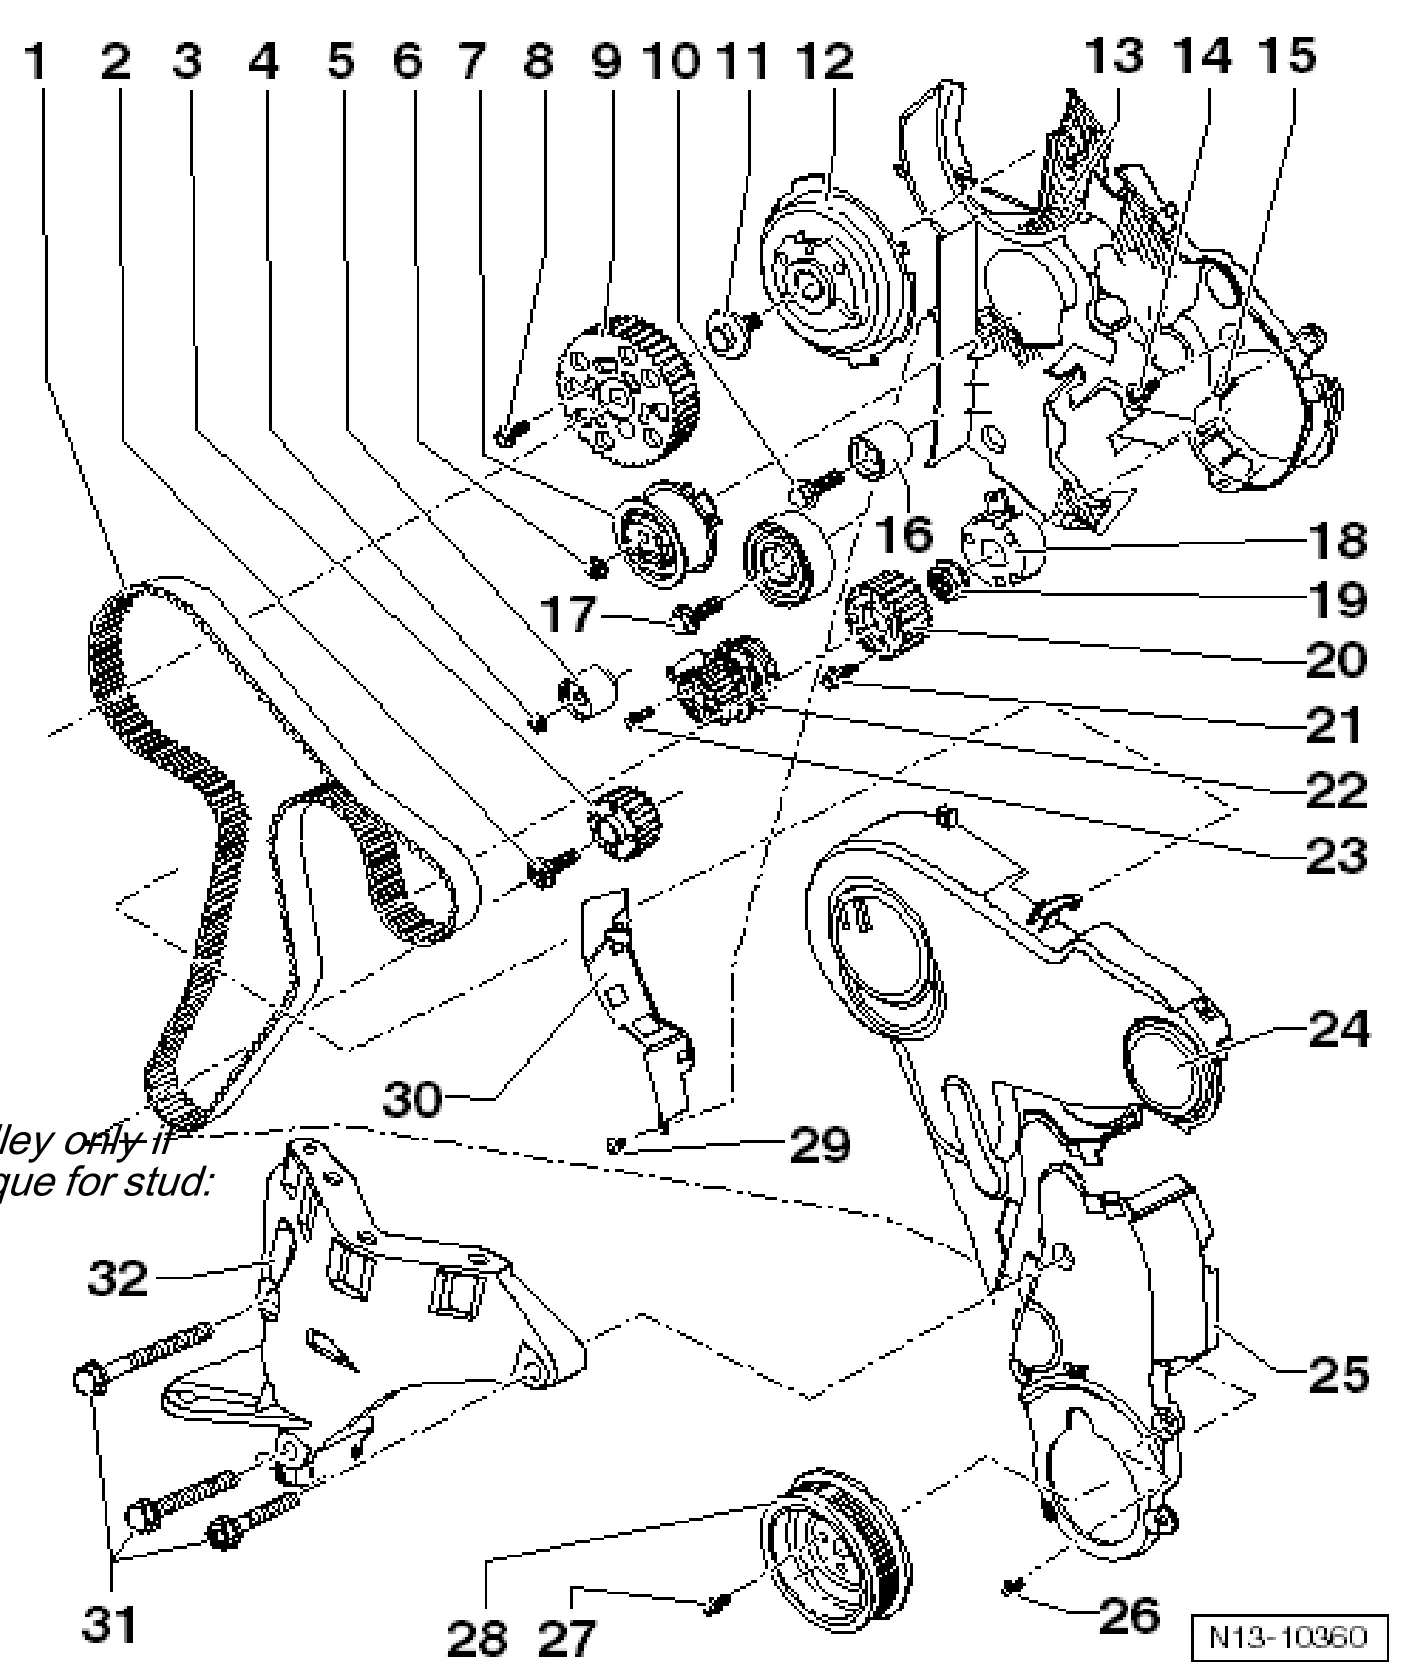
- 1 Toothed belt
- Mark direction of rotation before removing
- Check for wear
- Do not kink
- Removing, installing and tensioning ⇒ 2.1.1 Removing and installing engine bracket.
- 2 120 Nm + 90° further
- Renew
- Use counterhold - 3415 - to loosen and tighten.
- Do not additionally oil or grease the threads and shoulder
- 3 Crankshaft pulley
- 4 20 Nm
- 5 Lower idler roller
- 6 20 Nm + 45° further
- 7 Tensioning pulley
- Remove engine bracket to remove and install ⇒ 2.1 Assembly overview - toothed belt drive.
- 8 25 Nm
- 9 Camshaft sprocket
- 10 15 Nm
- 11 100 Nm
- 12 Hub
- Use counterhold - T10051- to loosen and tighten.
- To remove, use puller - T10052-.
- Removing and installing ⇒ 3.5 Removing and installing camshafts
- 13 Rear toothed belt guard
- 14 20 Nm + 90° further
- 15 10 Nm
- Renew
- 16 Upper idler roller
- 17 50 Nm + 90° further
- 18 Hub
- Use counterhold - T10051- to loosen and tighten.
- To remove, use puller - T40064-.
- Removing and installing ⇒ 4.1 Assembly overview - high-pressure pump
- 19 95 Nm
- 20 Toothed belt pulley on high-pressure pump
- 21 20 Nm
- 22 Coolant pump
- Removing and installing ⇒ 2.2 Removing and installing 4/2-way valve with thermostat
- 23 15 Nm
- 24 Toothed belt guard upper part
- 25 Toothed belt guard lower part
- 26 10 Nm
- Renew
- 27 10 Nm + 90° further
- Renew
- 28 Belt pulley and vibration damper
- Can only be installed in one position, holes are offset.
- 29 5 Nm
- 30 Protective plate
- 31 40 Nm + 180° further
- Renew
- Observe tightening sequence ⇒ 2.1.1 Removing and installing engine bracket
- 32 Engine support
- Removing and installing ⇒ 2.1 Assembly overview - toothed belt drive
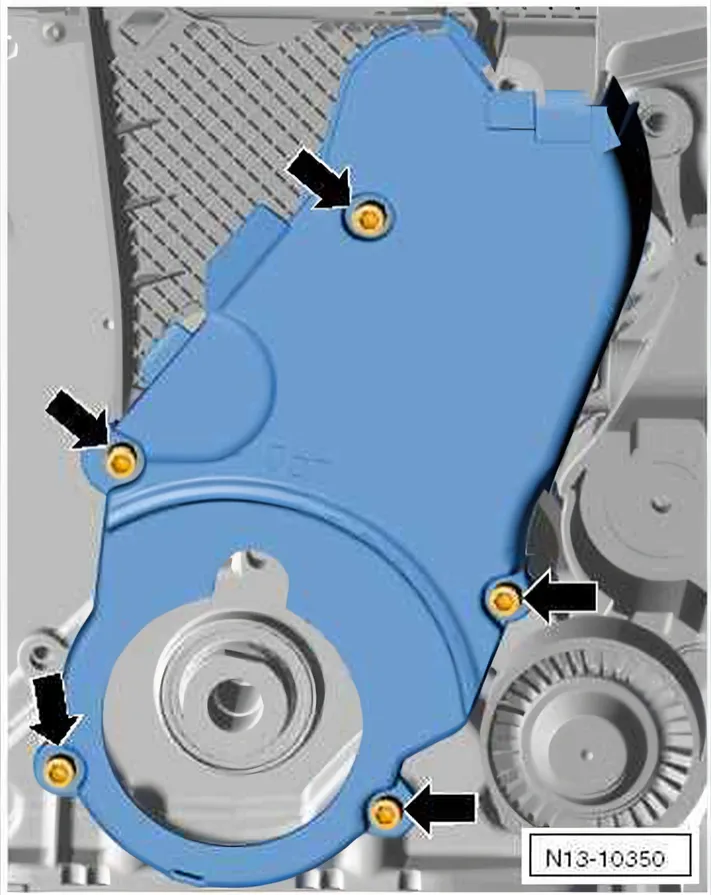
Lower toothed belt guard
- Tighten bolts -arrows- to 9 Nm.
2.1.1 Removing and installing engine bracket
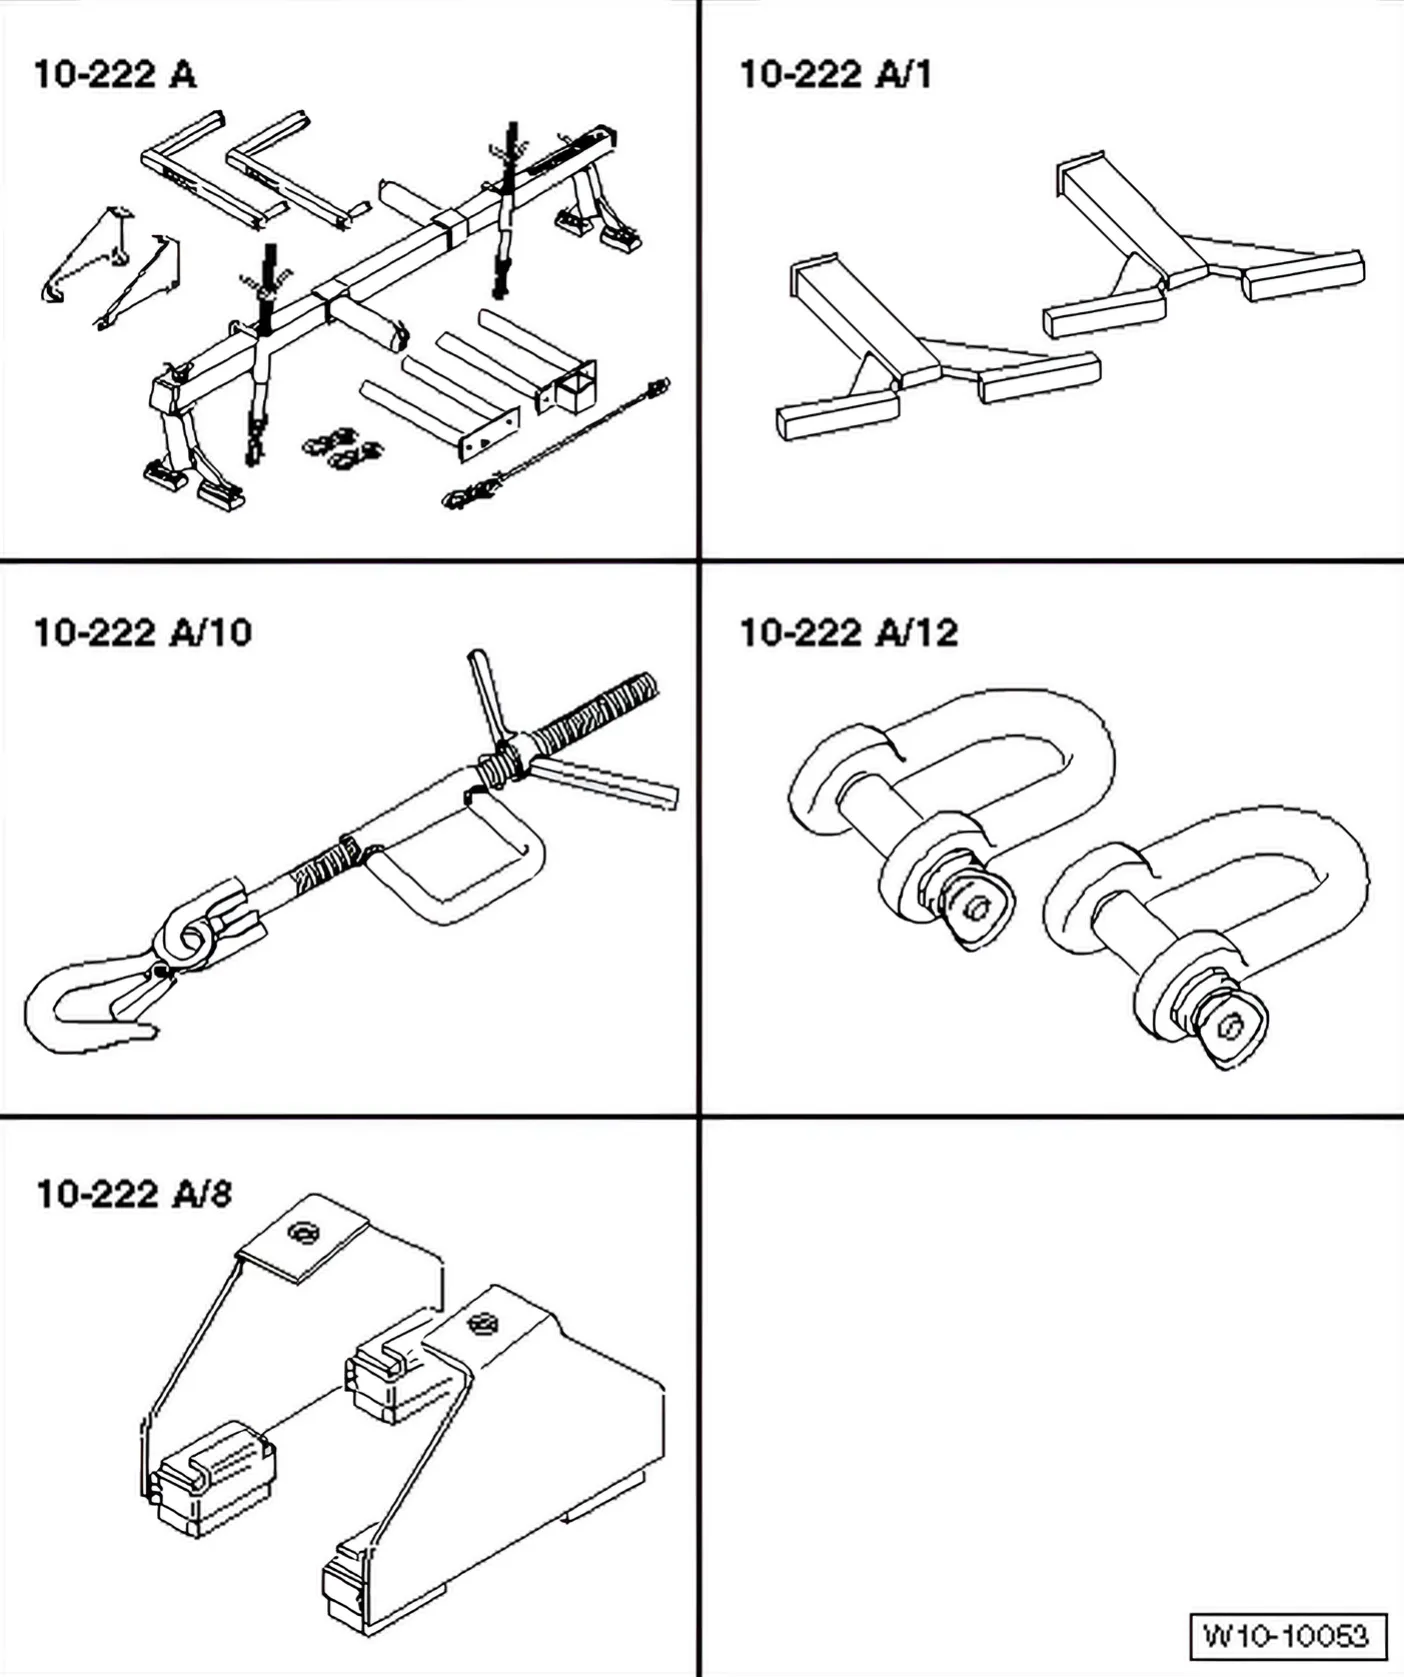
Special tools and workshop equipment required
- Support - 10-222 A-
- Adapter - 10 - 222 A /8-
- Hook - 10-222 A/10-
- Shackle - 10-222 A/12-
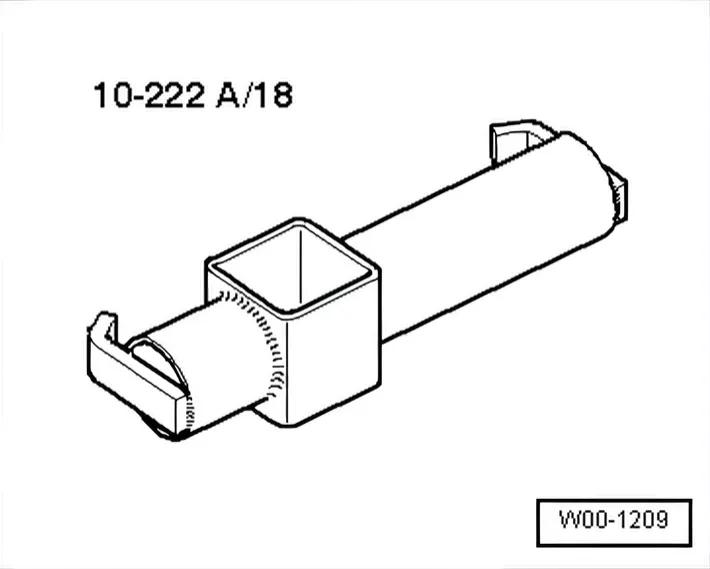
- Adapter - 10-222 A/18-
At a later point, support bracket - 10-222 A- will be fitted onto longitudinal members with adapters - 10 - 222 A /8-.
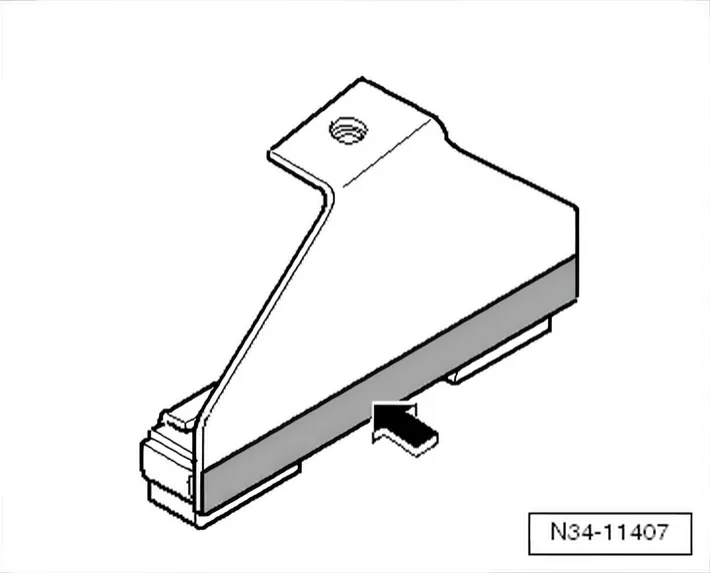
To prevent damage to edges of wings, cover lower areas of both adapters - 10 - 222 A /8- with duct tape -arrow- ⇒ Electronic parts catalogue (ETKA, chemical substances).
»Carry out the following work sequence«
Removing
- Remove engine cover panel ⇒ 3 Engine cover panel.
- Remove noise insulation ⇒ General body repairs, exterior; Rep. gr. 50; Body - front; Assembly overview - noise insulation.
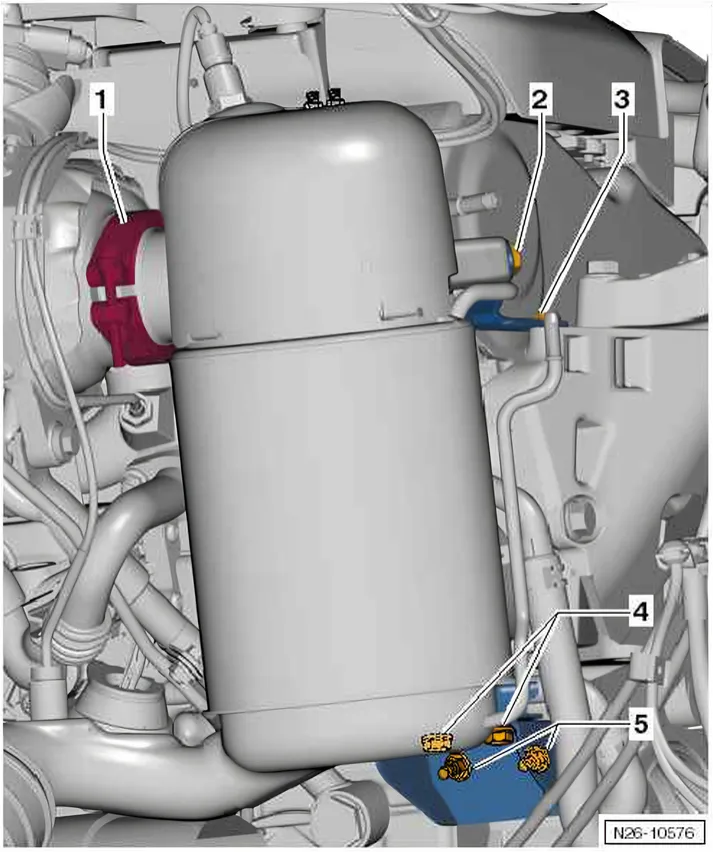
- Remove upper and lower brackets for particulate filter.
| 1) | Unscrew bolts - 2 + 3 - |
|---|---|
| 2) | Remove upper particulate filter bracket |
| 3) | Unscrew bolts + nuts - 4 + 5- |
| 4) | Remove lower particulate filter bracket |
- Removing and installing charge air pipe »cold« side ⇒ 2.3.2 Removing and installing charge air pipe »hot« side.
- Unclip hoses from coolant expansion tank.
- Pull connector off coolant expansion tank.
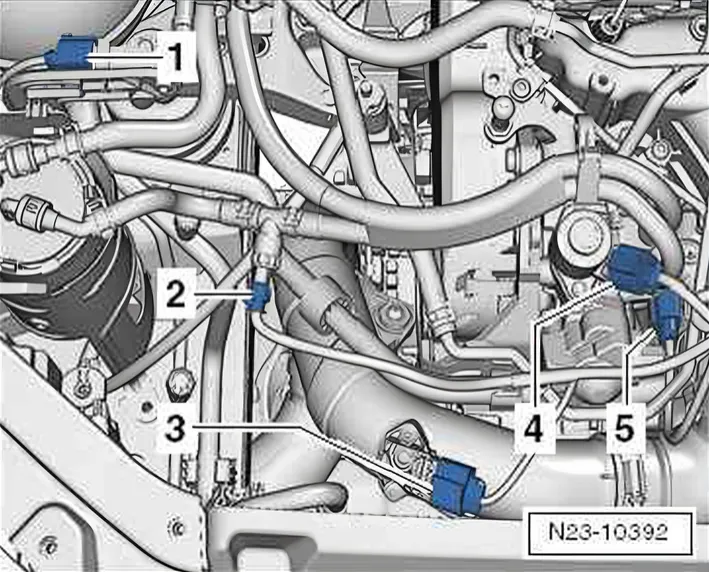
- Pull connector off pressure differential sender - G505 - -1-.
- Loosen coolant expansion tank.
- Lay coolant expansion tank, pressure differential sender - G505- and fuel filter with lines aside.
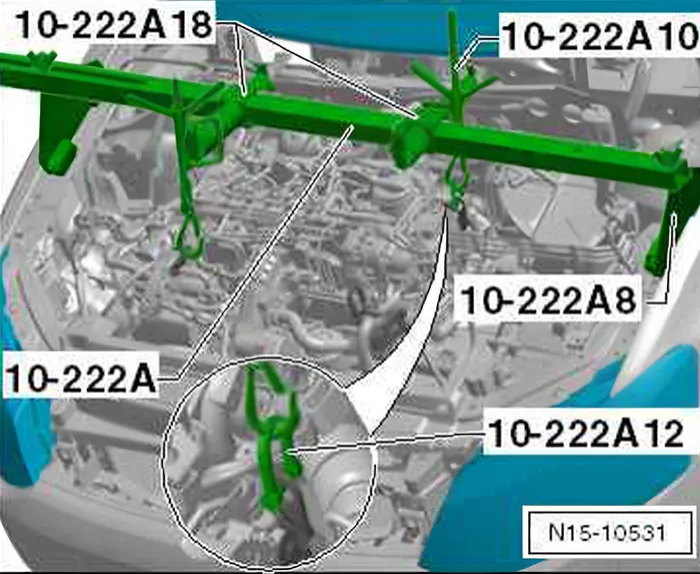
- Fit support bracket - 10 - 222 A- with the necessary adapters as shown and take up weight of engine in installation position.
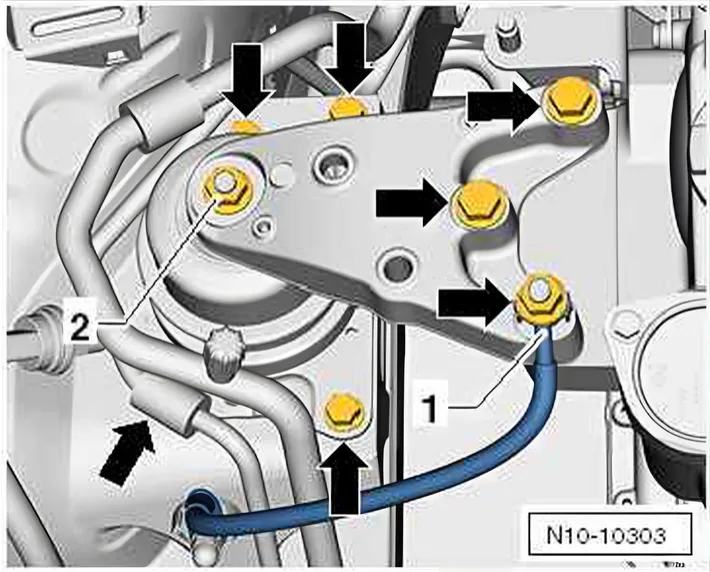
- Unscrew securing bolts -arrows-.
- Remove entire engine mounting upwards.
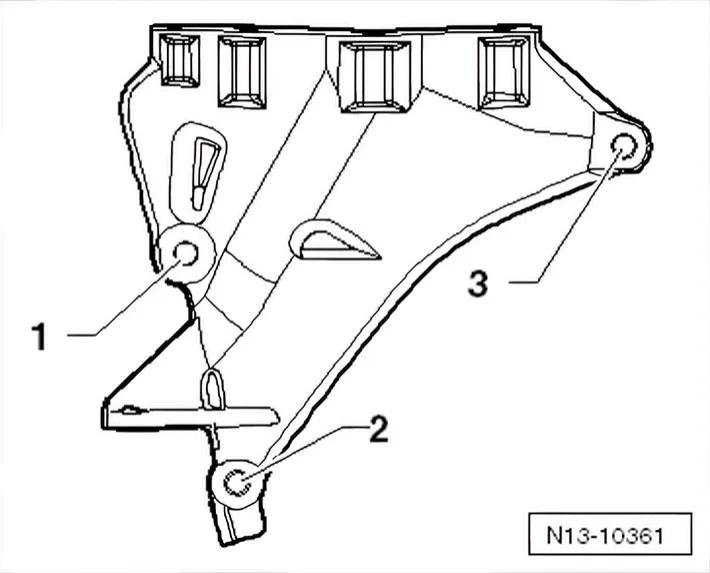
- Unscrew securing bolts of engine bracket in sequence -3…1-.
- Remove engine bracket out upwards.
Installing
Prescribed torque and tightening sequence for assembly mounting ⇒ 2 Assembly mountings
Install in reverse order. During this procedure, observe the following:
- Insert engine bracket from above.
- First, tighten new securing bolts hand-tight in sequence -1 … 3-.
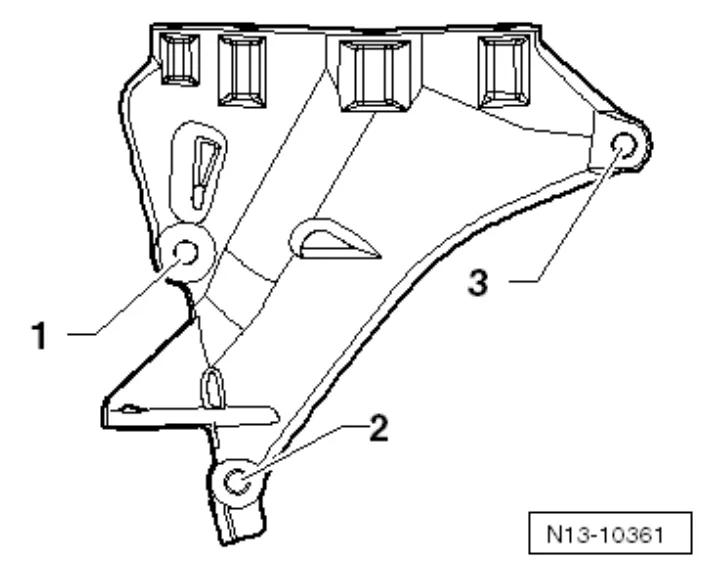
Tightening sequence for engine bracket
- Tighten securing bolts in the specified sequence to the prescribed torque.
- Then use the spindle to bring the engine bracket to rest on the engine carrier.
Further assembly is performed in the reverse order of removal.