
1.2 TDI CR engine (EA189) · Turbocharging/supercharging · Charge air system
Fitting charge air system hose connections
⇒ 2.3.1 Installing hose connections with corrugated pipe connection
⇒ 2.3.2 Removing and installing charge air pipe hot side
⇒ 2.3.3 Removing and installing charge air pipe cold side
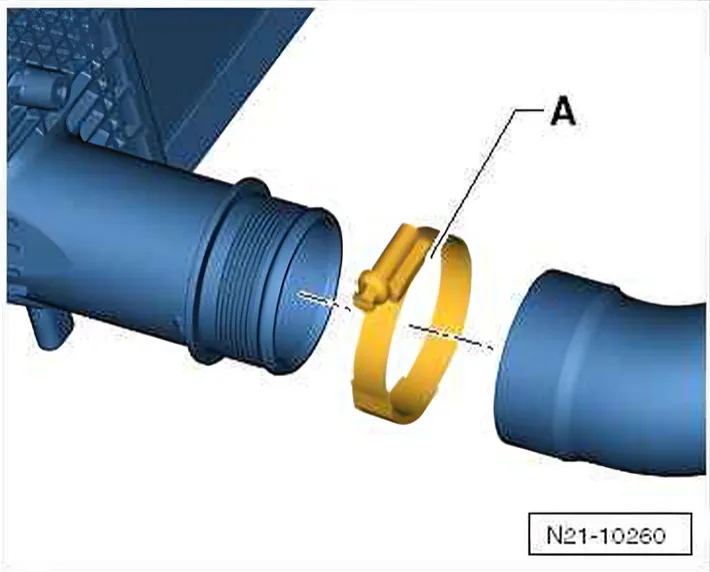
2.3.1 Installing hose connections with corrugated pipe connection
2.3.2 Removing and installing charge air pipe »hot« side
»Carry out the following work sequence«
Removing
- Remove engine cover panel ⇒ 3 Engine cover panel.
- With ignition switched off, disconnect battery earth strap. ⇒ Electrical system; Rep. gr. 27; Disconnecting and reconnecting batteries.
- Remove battery and battery tray ⇒ Electrical system; Rep. gr. 27; Removing and installing battery.
- Remove air filter housing with air mass meter and connecting pipe ⇒ 7.1 Assembly overview - air filter.
- Remove noise insulation ⇒ General body repairs, exterior; Rep. gr. 50; Body - front; Assembly overview - noise insulation
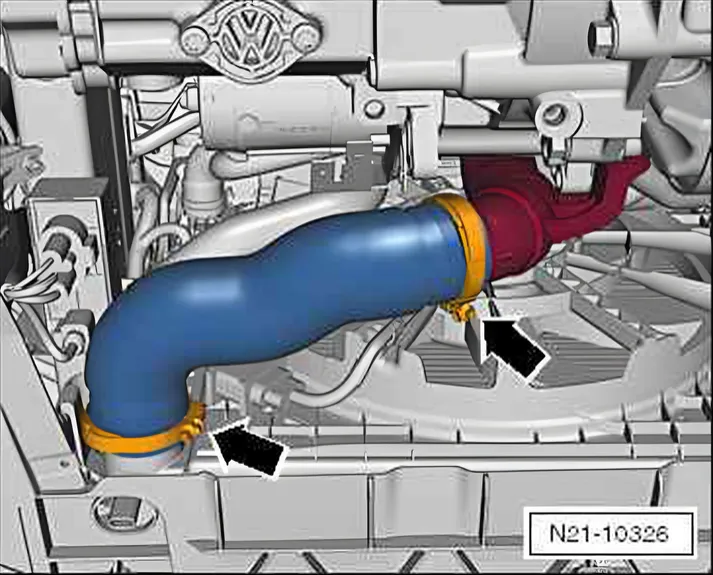
- Remove connecting hose »hot« side; loosen clips -arrows- to do this.
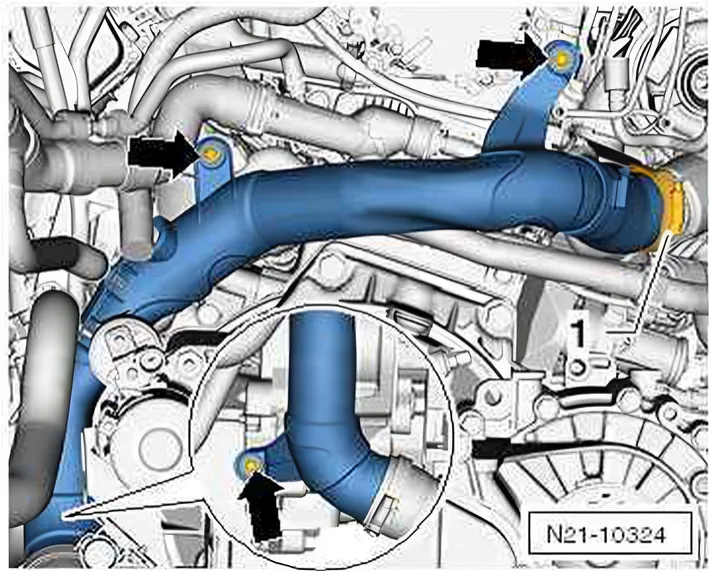
- Release clip -1- from connecting hose to pulsation damper. Unscrew securing bolts -arrows- from charge air pipe.
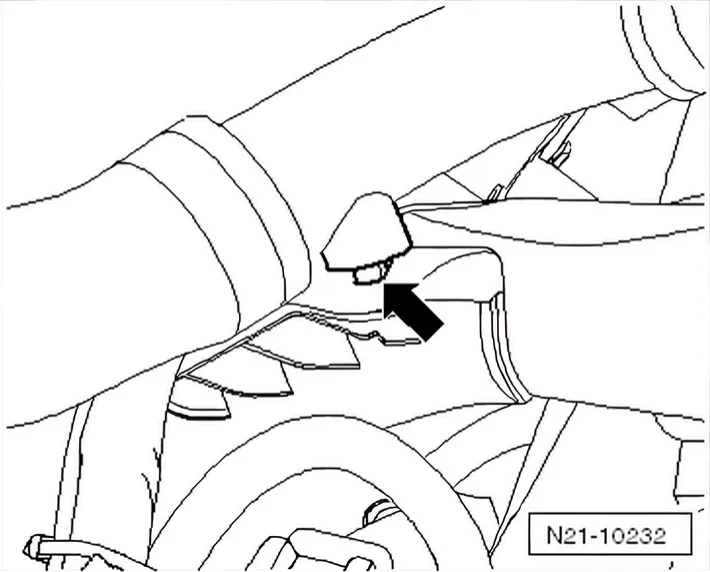
- Unclip top coolant hose on charge air pipe -arrow-.
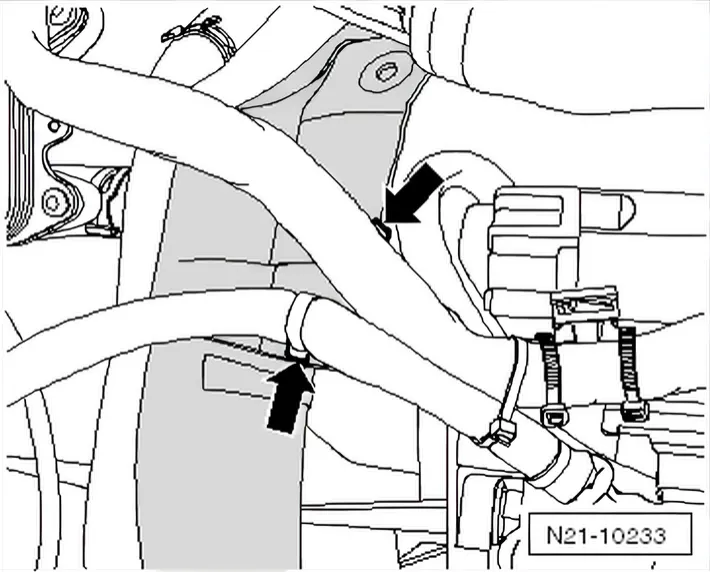
- Unclip wiring harness on charge air pipe -arrows-.
- Take out charge air pipe.
Installing
- Install in reverse order. When doing this, observe the following:
- First start off all charge air pipe securing bolts. Then tighten. Specified torque: ⇒ 2 Charge air system.
Renew any damaged cable ties and clips.
2.3.3 Removing and installing charge air pipe »cold« side
»Carry out the following work sequence«
Removing
- Remove engine cover panel ⇒ 3 Engine cover panel.
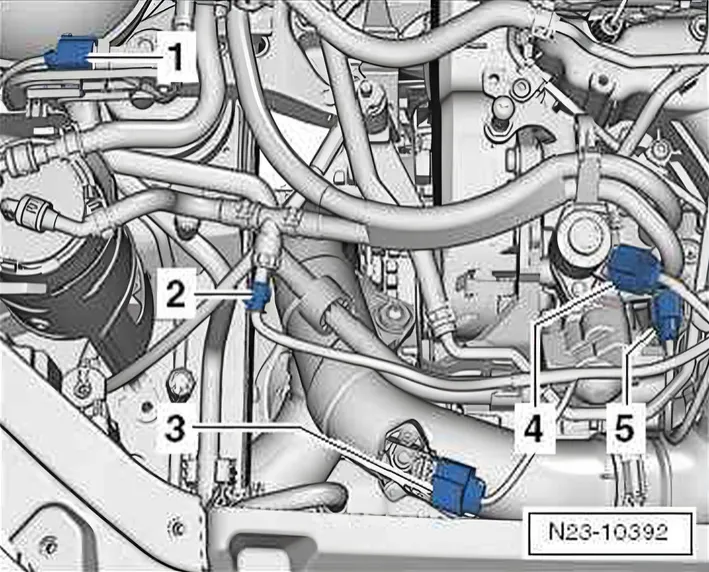
- Pull connector from intake air temperature sender - G42- -3-.
- Remove noise insulation ⇒ General body repairs, exterior; Rep. gr. 50; Body - front; Assembly overview - noise insulation
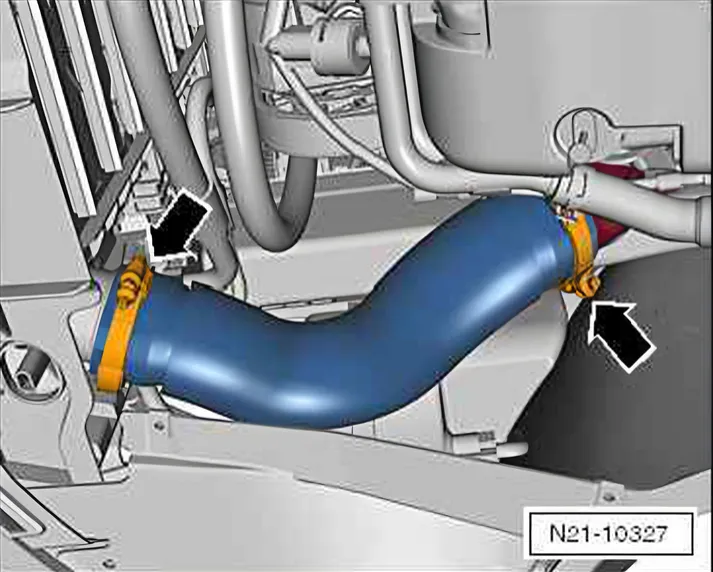
- Remove connecting hose -arrows-.
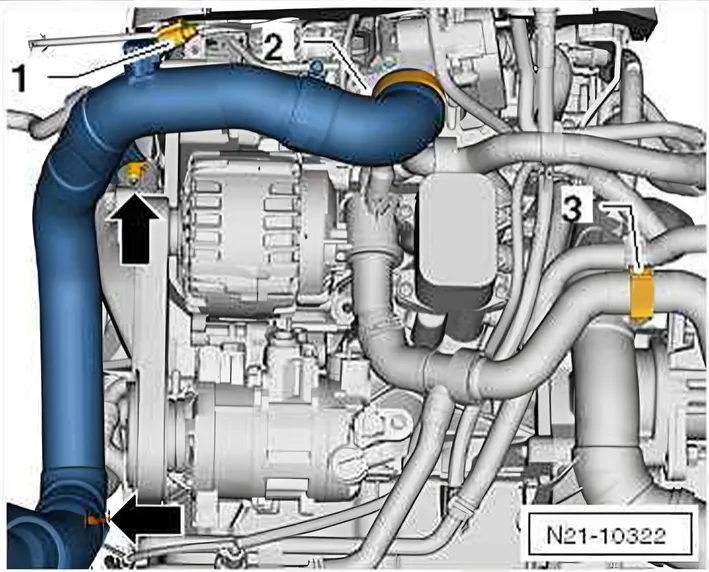
- Open clamp -2-.
- Unscrew securing bolts -arrows- from charge air pipe.
- Take out charge air pipe.
Installing
- Install in reverse order. When doing this, observe the following:
Renew any damaged cable ties and clips.