
1.2 TDI CR engine (EA189) · Cylinder head, valve gear · Cylinder head
Removing and installing cylinder head cover
⇒ 1.1 Assembly overview - cylinder head cover
⇒ 1.2.2 Fitting the cylinder head cover
1.2.1 Removing cylinder head cover
Observe the.
Special tools and workshop equipment required
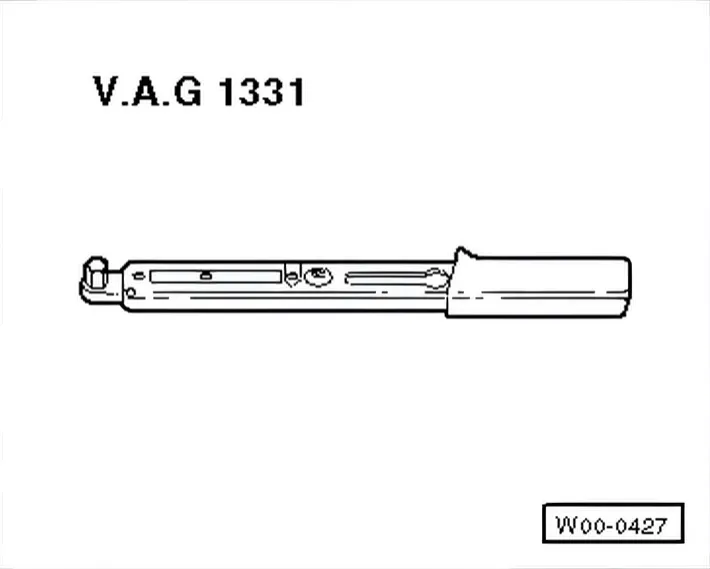
- Torque wrench - V.A.G 1331-
»Carry out the following work sequence«
- Remove engine cover panel ⇒ 3 Engine cover panel
- Remove injectors ⇒ 3.3 Checking return flow rate of injectors with engine running.
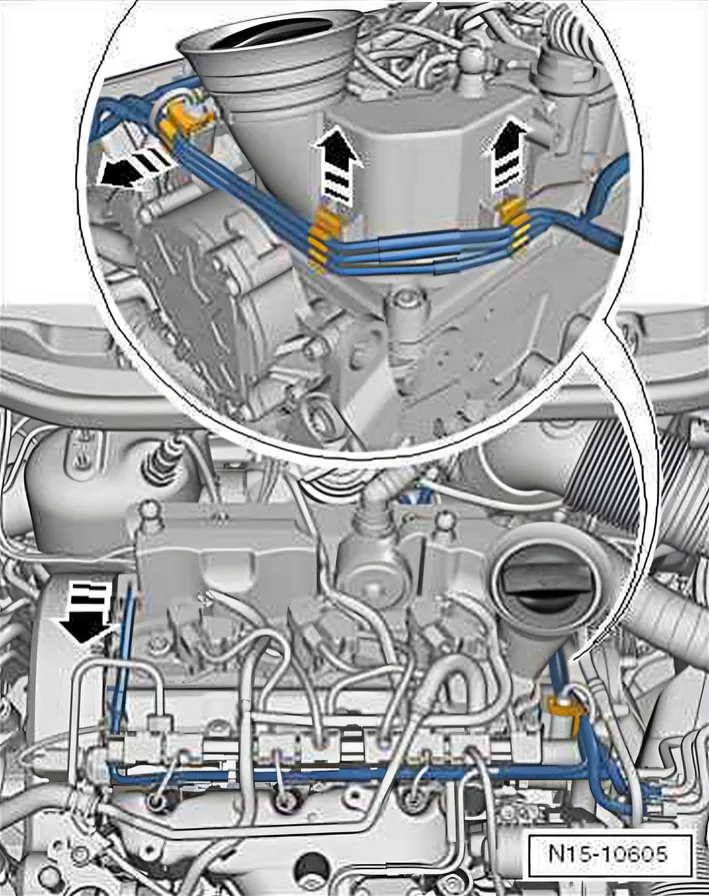
- Pull vacuum hose off cylinder head cover.
- Remove vacuum hoses with bracket from cylinder head cover.
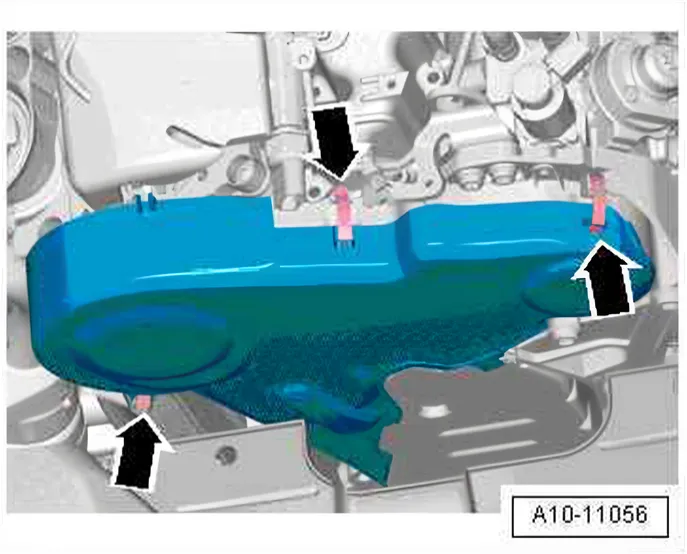
- Remove upper timing belt guard by detaching clips -arrows-.
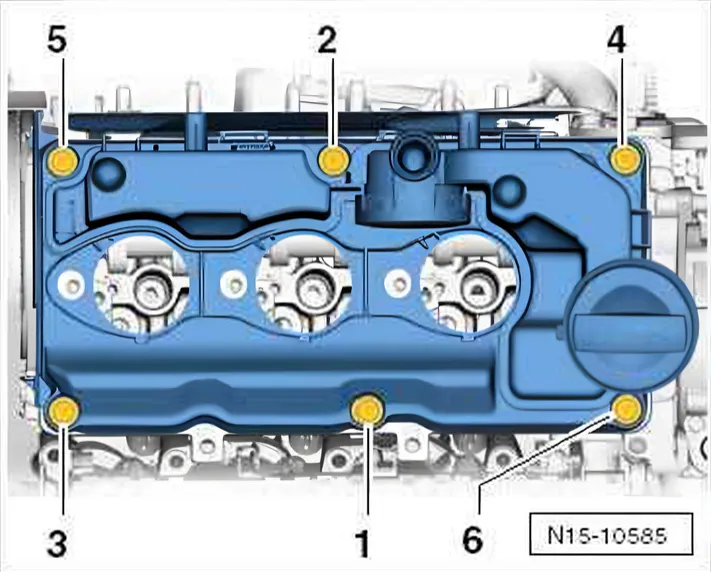
- Unscrew securing bolts of cylinder head cover in sequence -6 … 1-.
- Remove cylinder head cover.
1.2.2 Fitting the cylinder head cover
Special tools and workshop equipment required
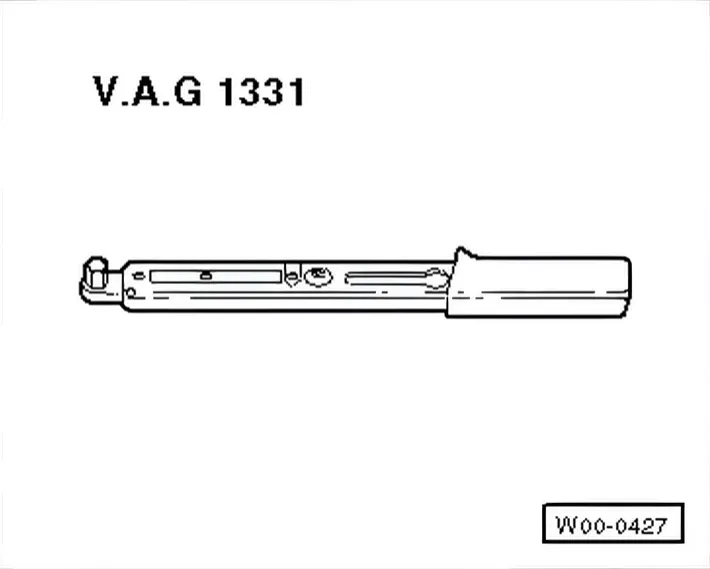
- Torque wrench - V.A.G 1331-
Install in reverse order of removal. During this procedure, observe the following:
- Tighten cylinder head cover bolts hand-tight in the sequence -1 … 6-.
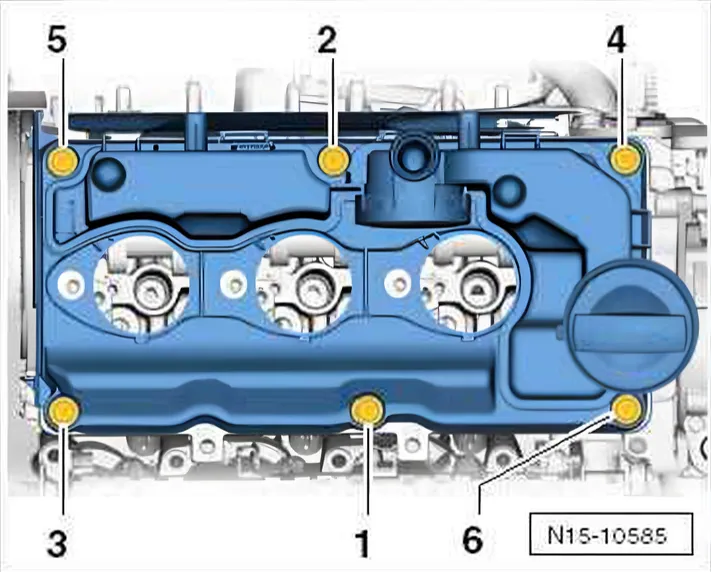
- Tighten bolts in the sequence -1 … 6- ⇒ Item 7 (page 62).
After any work on the fuel system
Connect a ⇒ Vehicle diagnostic tester.
Perform the function “Fuel pump activation (filling/bleeding fuel system)” in “Guided functions” ⇒ 1.3 Filling/bleeding fuel system.
1.2.3 Removing and installing injector seal in cylinder head cover
Special tools and workshop equipment required
- Lambda probe open ring spanner set - 3337-
- Tool set - T10055-
- Assembly tool - T10208/2-
- Torque wrench - V.A.G 1331-
»Carry out the following work sequence«
Removing
- Engine cover panel ⇒ 3 Engine cover panel.
- Remove noise insulation at injectors.
- Injectors (piezo injectors) where the injector seal is to be renewed ⇒ 3.3 Checking return flow rate of injectors with engine running
- Move affected return lines aside slightly.
Maintain cleanliness. No dirt may get into the injector holes and the cylinder head cover.
First remove leaked oil or fuel with workshop equipment.
Remove affected seal ⇒ Item 5 (page 62).
- After removal, check whether the spring washer is still on the old seal.
If this is not the case, make sure that spring washer does not remain behind.
Installing
Remember that the cylinder head cover is made of plastic.
A plastic cylinder head cover is damaged easily during repairs.
Check cylinder head cover for damage.
- Insert new seal by hand ⇒ Item 5 (page 62).
Note installation position of seal lugs.
Further assembly is carried out in the reverse order of removal.