
1.4 TSI engine (EA111) · Cylinder head, valve gear · Chain drive
Adjusting valve timing
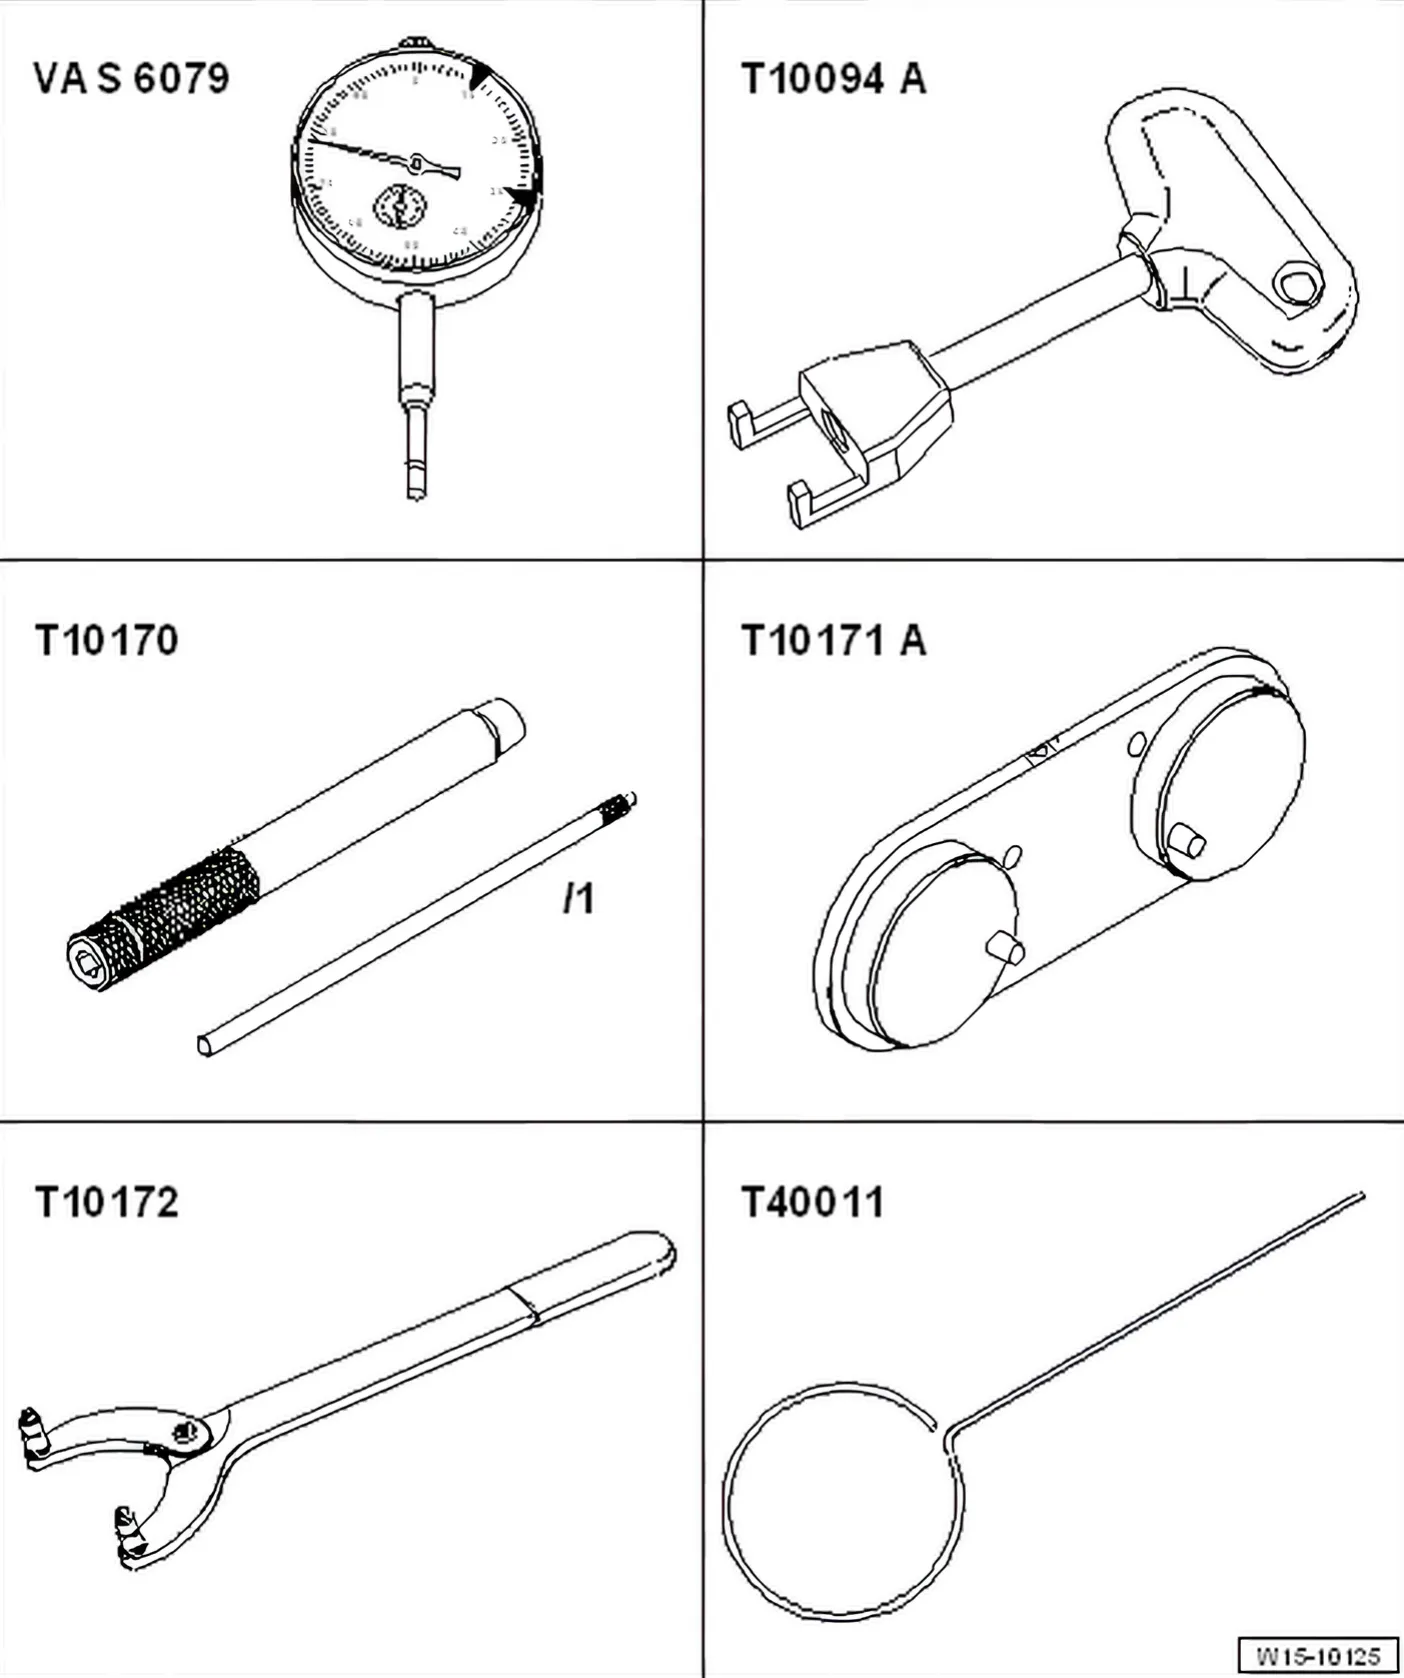
Special tools and workshop equipment required
- Dial gauge - VAS 6079-
- Puller - T10094 A-
- Dial gauge adapter - T10170- or dial gauge adapter - T10170 A- (observe note ⇒ 4.2 Adjusting valve timing ).
- Camshaft clamp - T10171 A-
- Counter-hold tool - T10172-
- Pin - T40011-
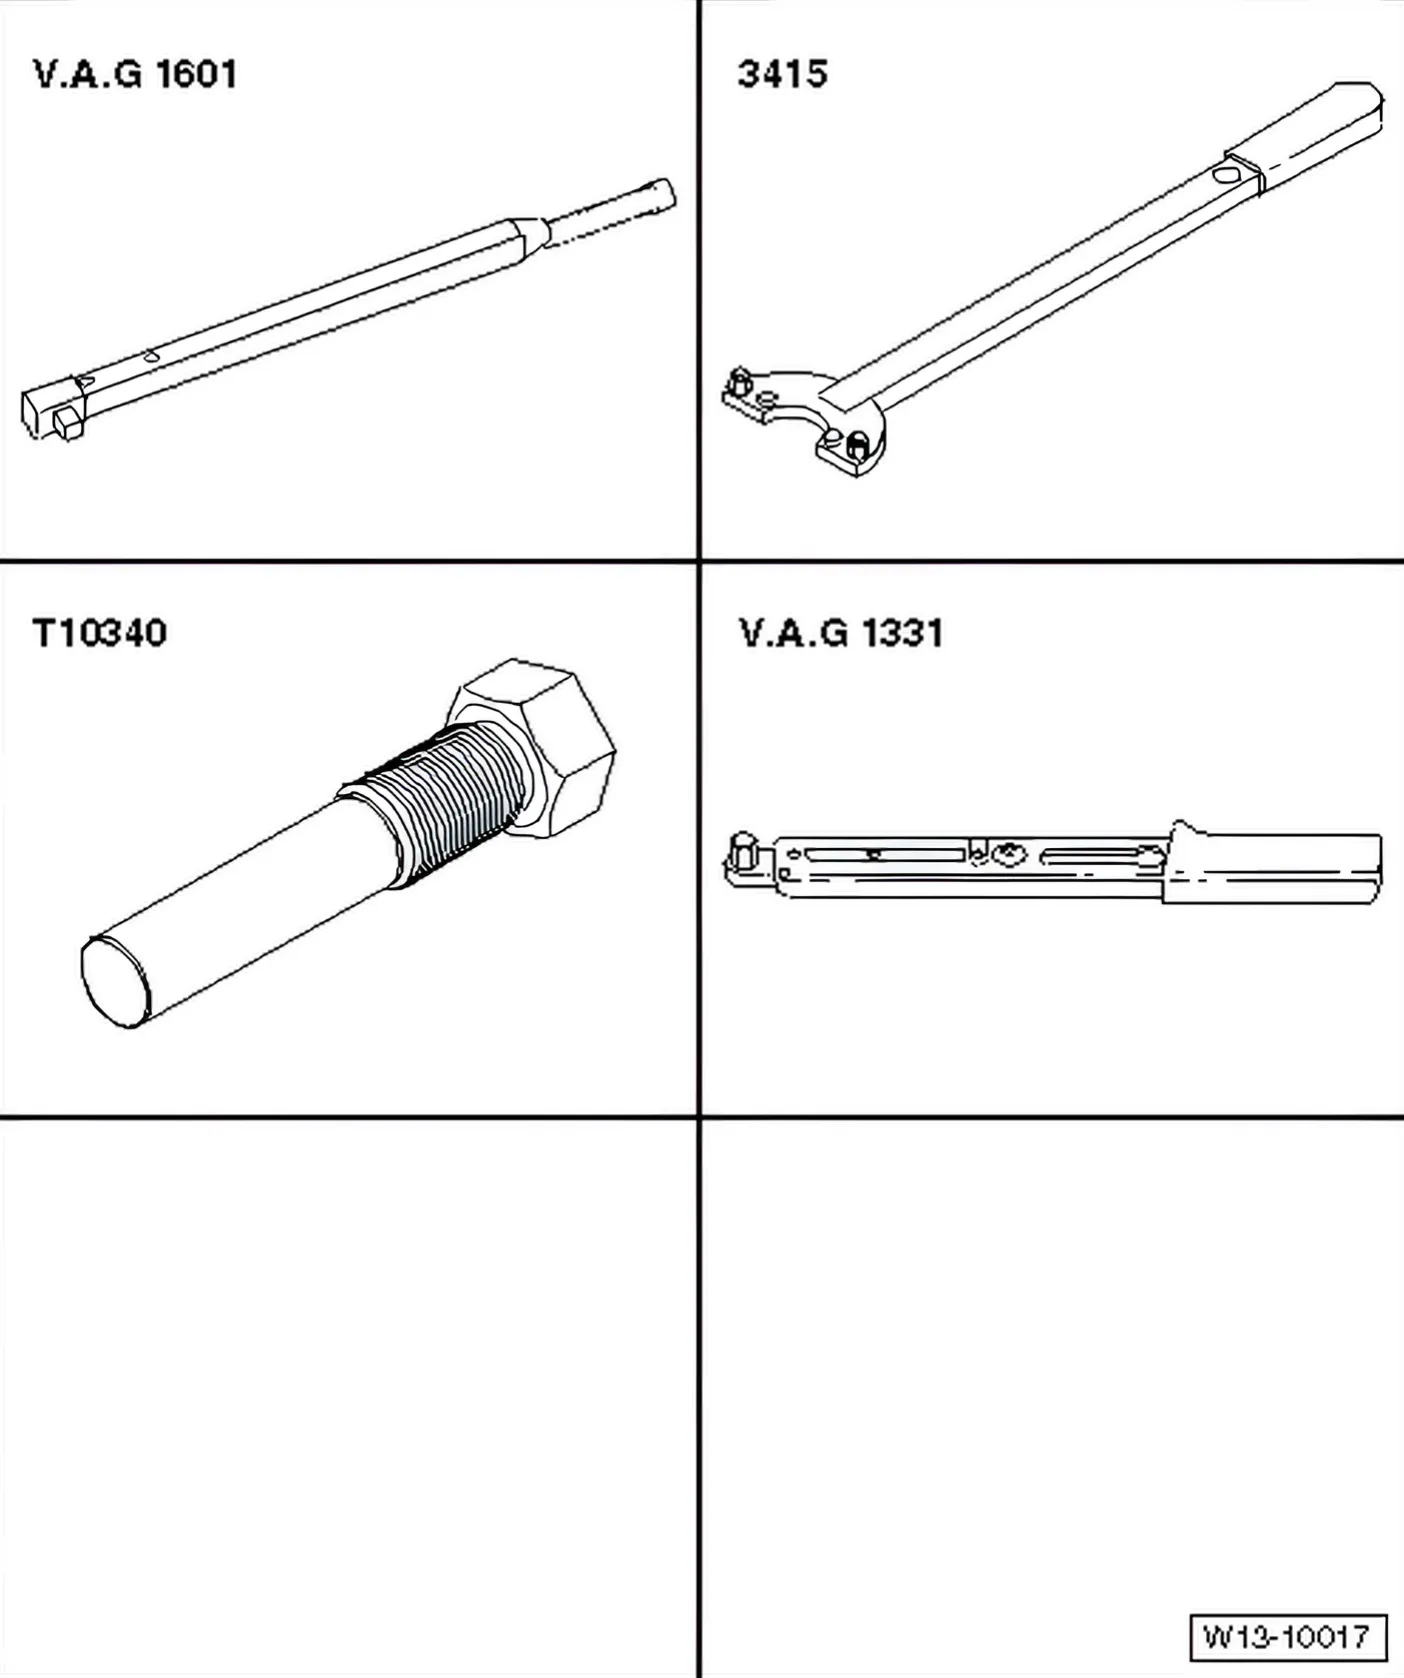
- Torque wrench - V.A.G 1601-
- Counter-hold tool - 3415-
- Locating bolt - T10340-
- Torque wrench - V.A.G 1331-
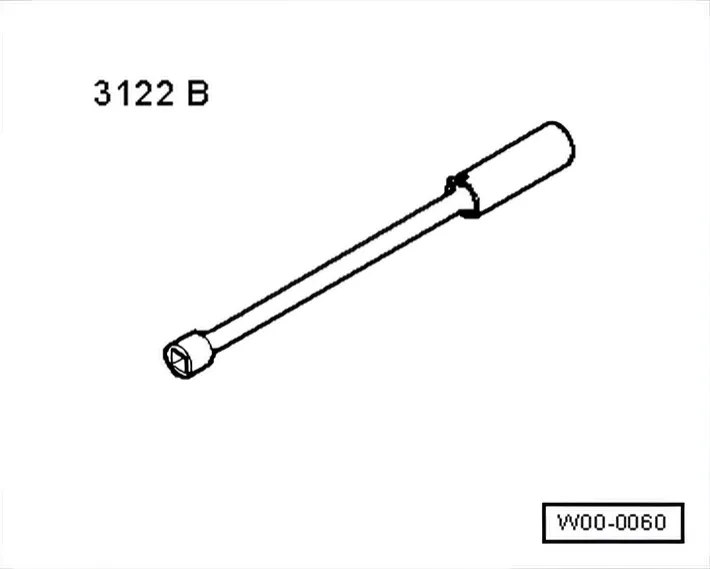
- Spark plug socket - 3122 B-
Procedure
- Remove valve timing housing (Eos, Golf Plus, Scirocco, Golf, Polo, Sharan, Golf Cabriolet) ⇒ 3.1 Removing and installing valve timing housing (Eos, Golf Plus, Scirocco, Golf, Polo, Sharan, Golf Cabriolet).
- Remove valve timing housing (Tiguan, Touran).
- Remove valve timing housing (Passat, Passat CC)
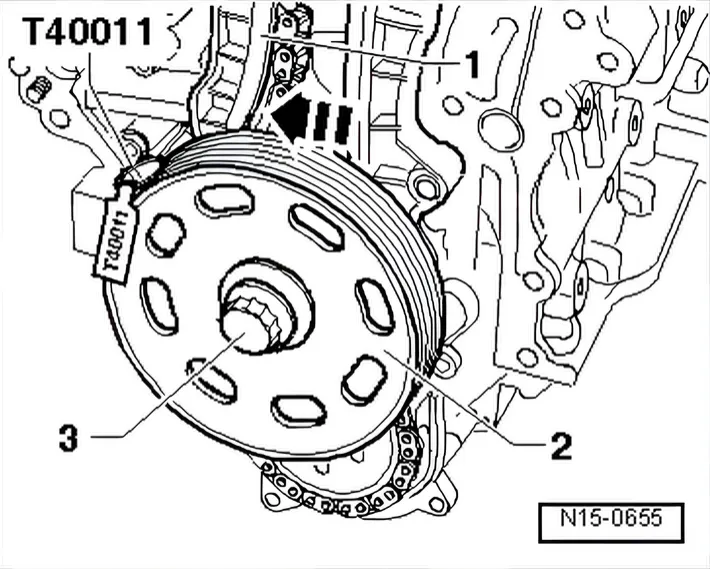
- To turn crankshaft, reinstall bearing bush, crankshaft pulley -2- and crankshaft bolt -3- and securely tighten crankshaft bolt (use counterhold - 3415- ).
- Remove spark plug from No. 1 cylinder. To do this, use puller
- T10094 A- and spark plug socket and extension - 3122 B- ⇒ 1.2 Removing and installing ignition coils with output stage.
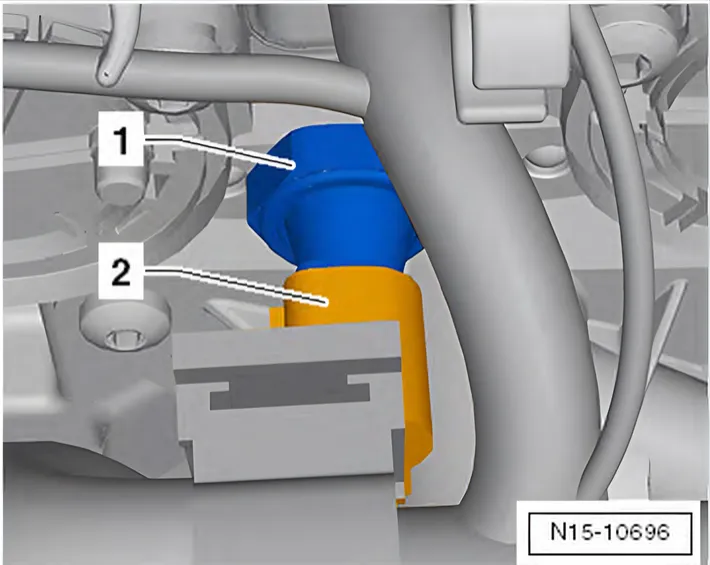
- Release connector -2- and pull off.
- Remove oil pressure switch - F1- -1-.
- Then remove bolts for both camshaft covers -3-.
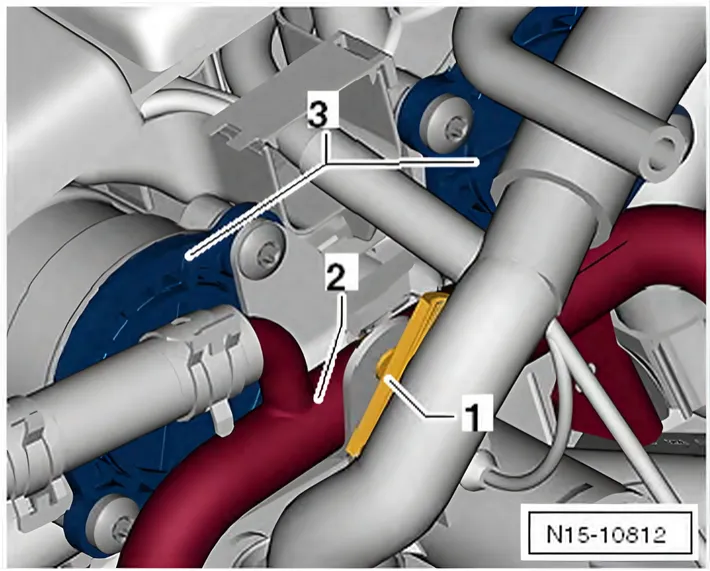
- Unclip engine pre-wiring harness -1-.
- Pull coolant pipe -2- and engine pre-wiring harness -1- away from cylinder head.
- Remove both bolts -3- from cylinder head.
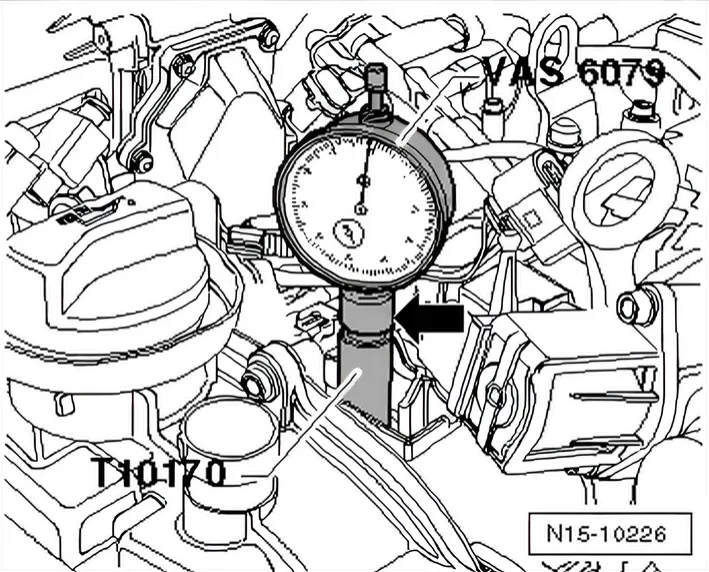
- Screw dial gauge adapter - T10170- into spark plug hole to stop.
- Screw dial gauge - VAS 6079- and extension -T10170/1- in to stop and lock in position with lock nut -arrow-.
- Turn crankshaft in direction of engine rotation, to TDC for No. 1 cylinder. Note position of small needle on dial gauge.
- Then turn crankshaft 2 revolutions in engine direction of rotation.
- Press tensioning rail -1- in direction of -arrow-, and lock piston with locking pin - T40011-.
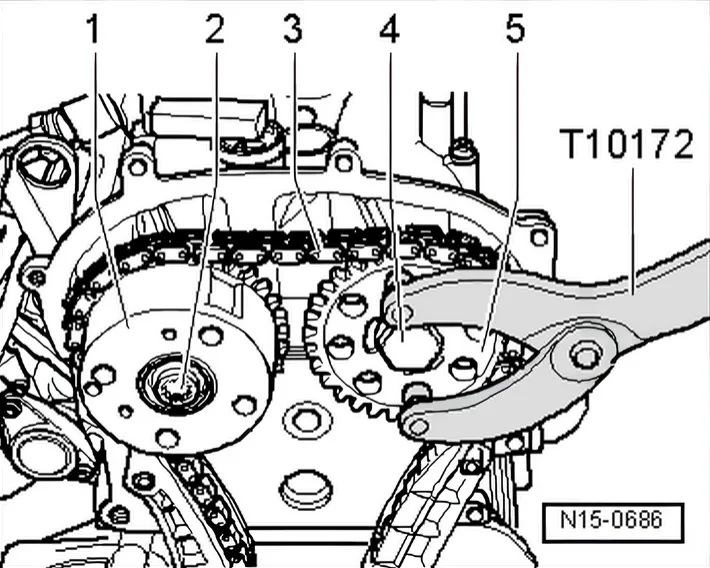
- Mark direction of rotation of timing chain -3- using coloured felt tip marker pen.
- Remove bolts -2- and -4- and remove camshaft adjuster -1- with timing chain -3-. Counterhold using counterhold - T10172-.
- Install camshaft adjuster -1- again.
- Renew bolts -2- and -4-. Tighten bolt -2- to 40 Nm and bolt -4- to 50 Nm (use counterhold - T10172- ).
If this is not the case, the camshaft clamp is defective and must be renewed.
Do not use any kind of hammer to position the camshaft clamp.
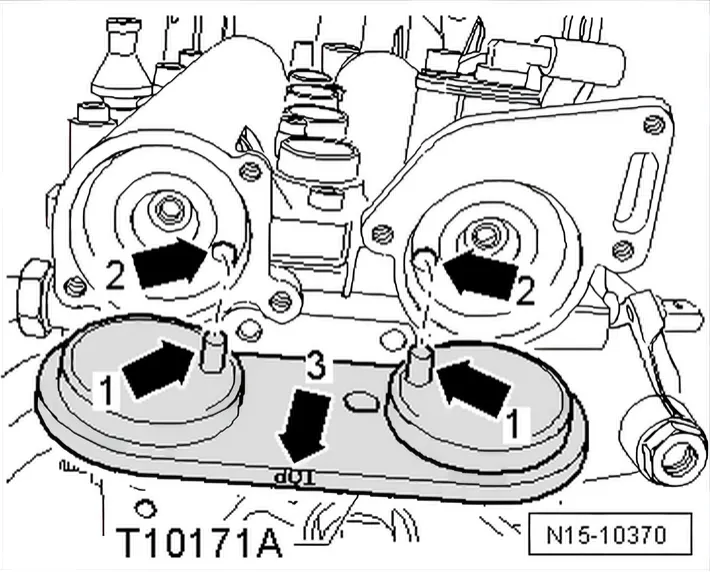
- Turn inlet and exhaust camshafts until camshaft clamp - T10171 A- can be inserted into holes in camshaft to stop.
Locking pins -arrows 1- must engage in holes -arrows 2-. Inscription “TOP” -arrow 3- must be readable from above.
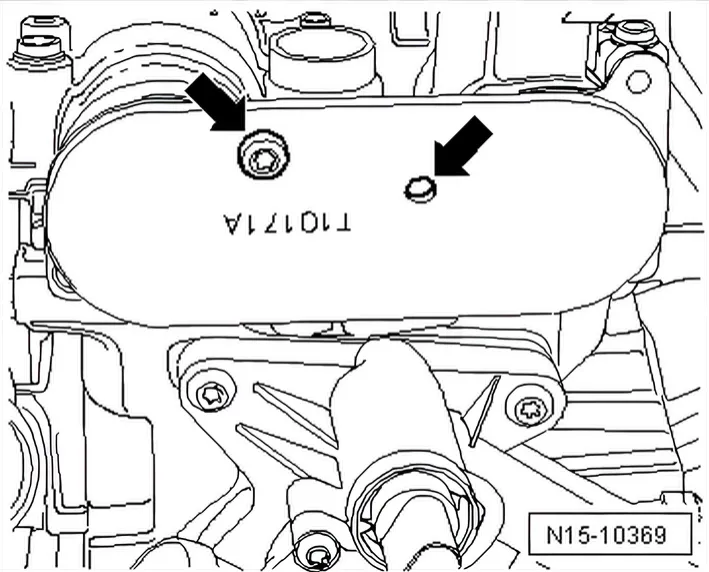
- Screw M6 bolt hand-tight into corresponding bore -arrows- (do not tighten) to secure camshaft clamp - T10171 A-.
- Remove camshaft sprocket bolts. It is absolutely necessary to use counterhold - T10172- for this.
- Remove one camshaft sprocket.
- Place timing chain over camshaft sprockets, observing chain direction of rotation, and install camshaft sprocket again.
- Tighten camshaft bolts until camshaft sprockets can still just be turned on camshafts.
- Tension timing chain by removing locking pin - T40011-.
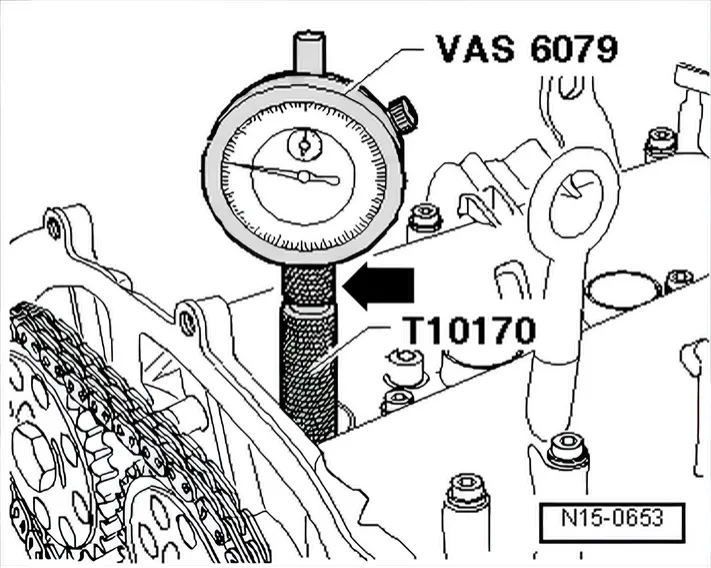
- Turn crankshaft in direction of engine rotation to TDC No. 1 cylinder. Permissible deviation from TDC No. 1 cylinder: ±0.01 mm.
Only Tiguan with all-wheel drive
- Remove right drive shaft ⇒ Running gear, axles, steering; Rep. gr. 40; Repairing drive shafts; Removing and installing drive shafts.
Continued for all vehicles
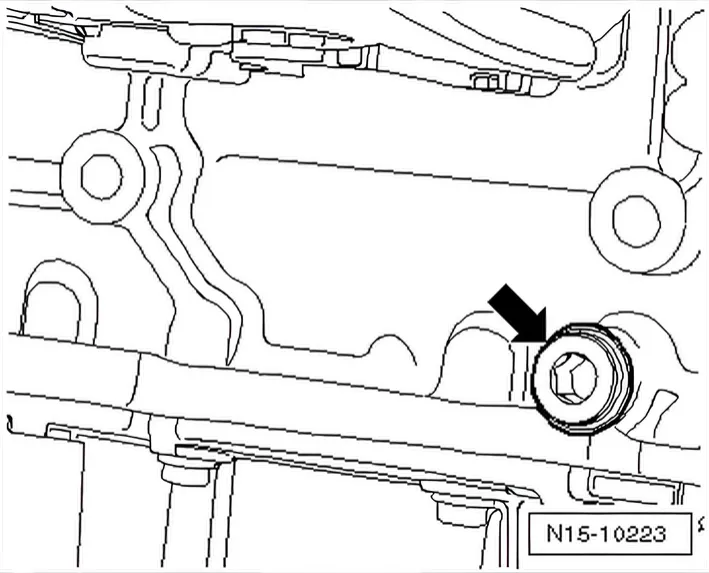
- Unscrew plug -arrow- from crankcase.
- Screw locking pin - T10340- to stop into crankcase.
- Tighten locking pin - T10340- to 30 Nm.
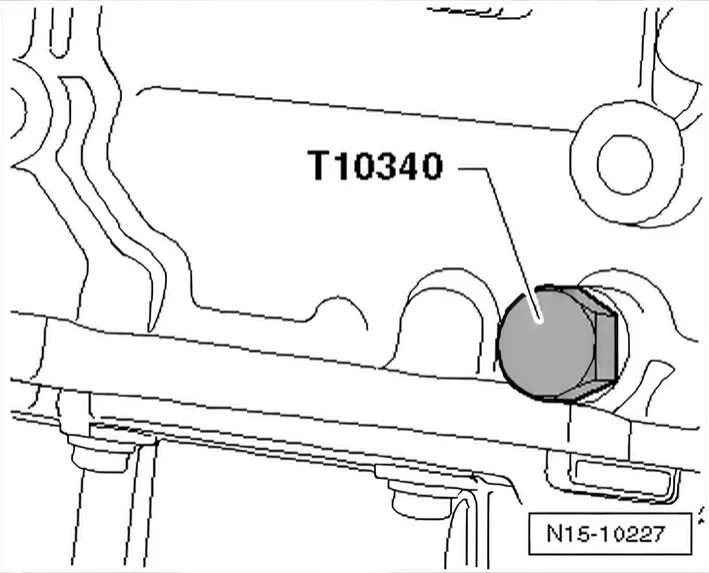
Locking pin - T10340- locks crankshaft in direction of engine rotation.
- Hold camshaft sprockets -1- and -5- in this position with counterhold - T10172- and tighten bolt -2- (left-hand thread) to 40 Nm and bolt -4- to 50 Nm.
- Remove camshaft clamp - T10171 A-.
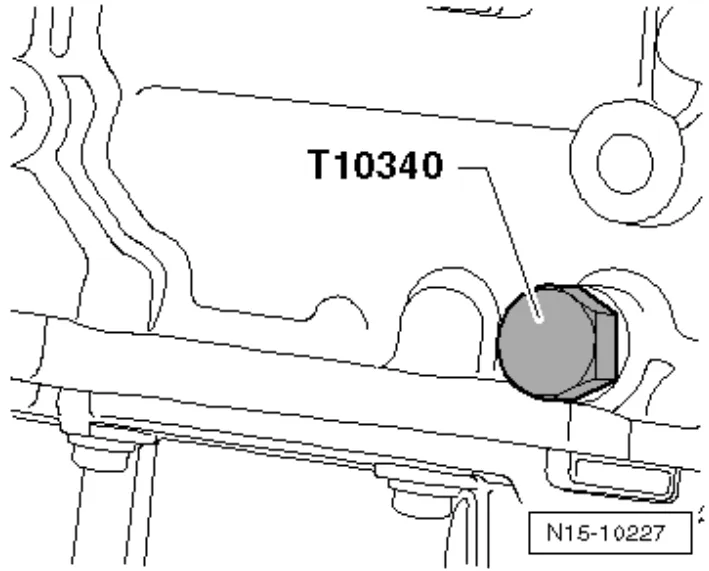
- Unscrew locking pin - T10340- from crankcase.
- Rotate crankshaft two full turns in direction of engine rotation to TDC No. 1 cylinder. Permissible deviation from TDC No. 1 cylinder: ± 0.01 mm.
If this is not the case, the camshaft clamp is defective and must be renewed.
Do not use any kind of hammer to position the camshaft clamp.
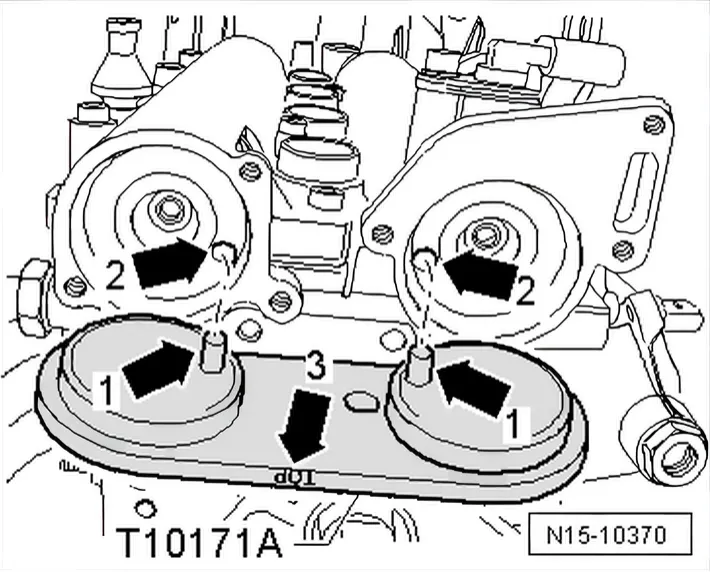
- Insert camshaft clamp - T10171 A- to stop in camshaft openings.
If camshaft clamp - T10171 A- cannot be fitted:
- Repeat adjustment.
If camshaft clamp - T10171 A- can be inserted:
- Screw locking pin - T10340- to stop into crankcase.
- Tighten locking pin - T10340- to 30 Nm.
- Remove camshaft clamp - T10171 A-, hold camshaft sprockets with counterhold - T10172- and tighten bolts -2- (left-hand thread) and -4- 1/4 turn (90°) further with a rigid wrench.
Further assembly is basically a reverse of the dismantling sequence. During this procedure, observe the following:
Specified torque
| Component | Specified torque |
|---|---|
| Oil pressure switch - F1- | 20 Nm |