
1.2 TDI CR engine (EA189) · Mixture preparation – injection · Injectors, fuel rail
Removing and installing injectors
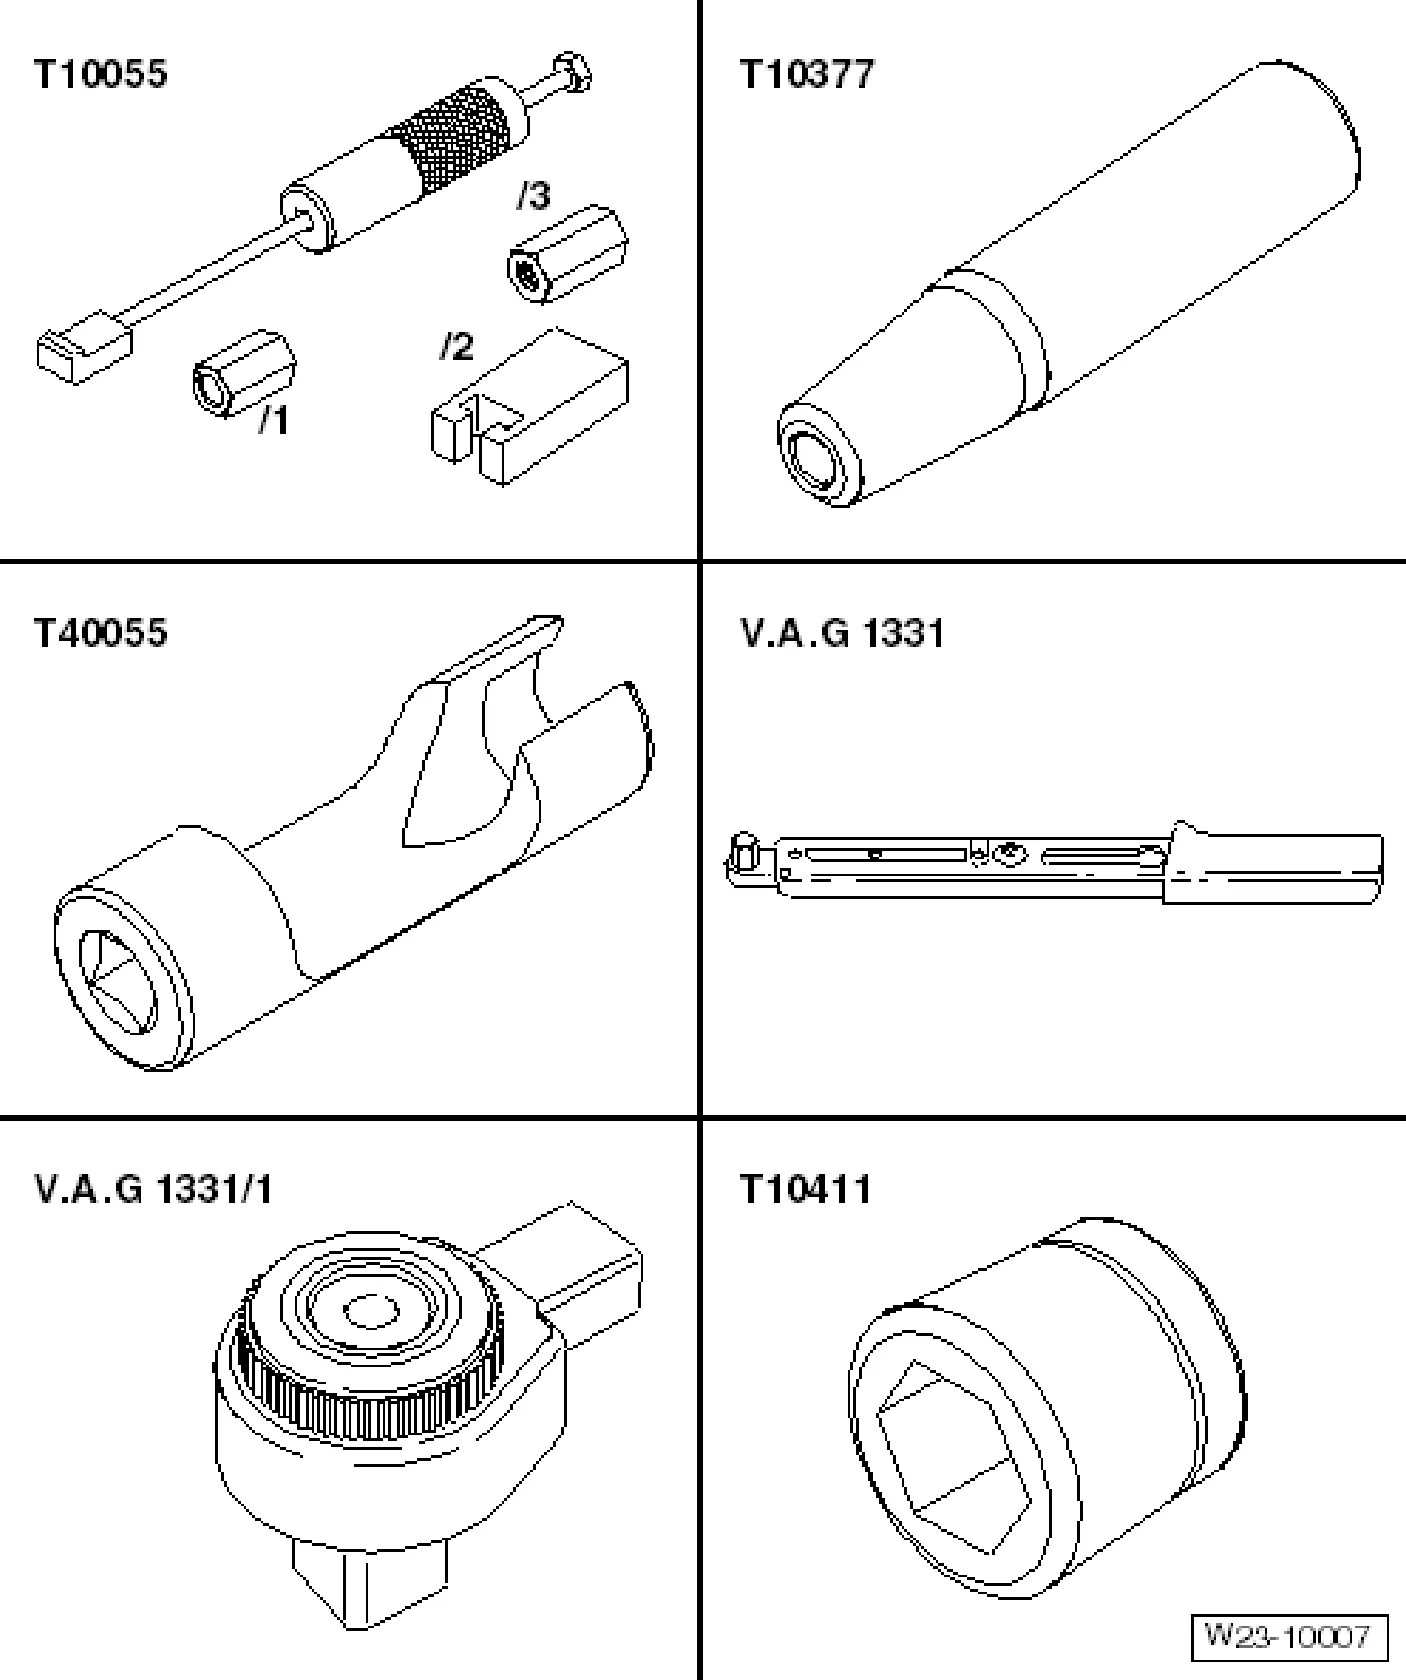
Special tools and workshop equipment required
- Puller - T10055-
- Assembly sleeve - T10377-
- Socket - T40055-
- Torque wrench - V.A.G 1331-
- Ratchet wrench - V.A.G 1331/1-
- Support sleeve - T10411-
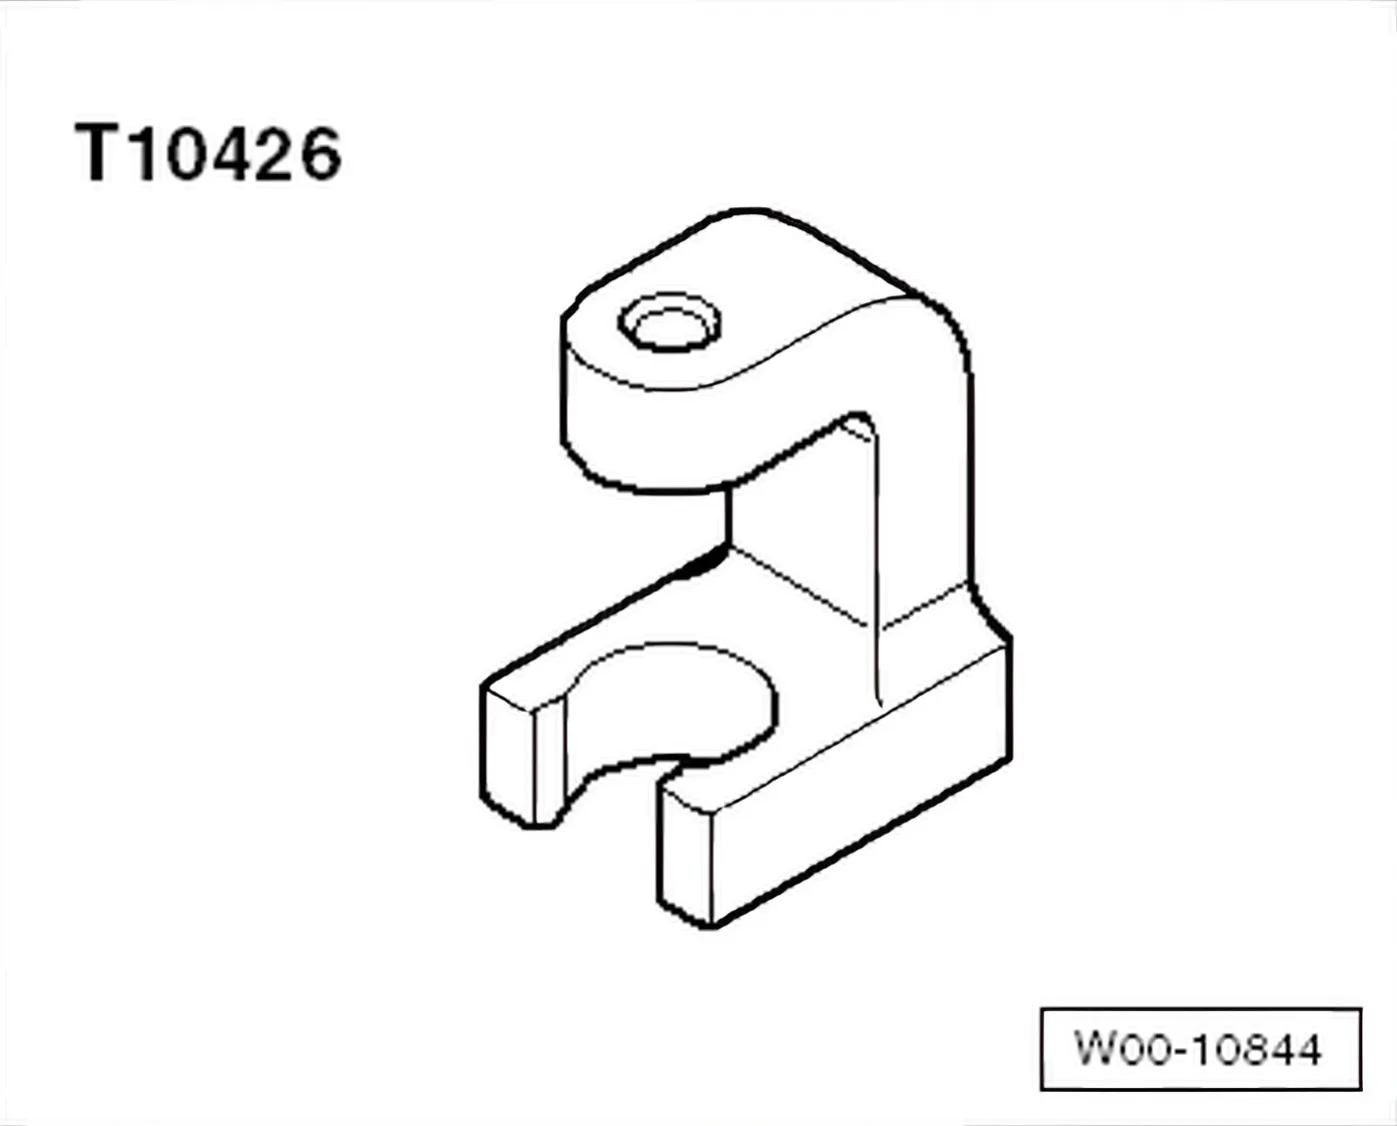
- Injector remover - T10426-
3.4.1 Removing
»Carry out the following work sequence«
- Remove engine cover panel ⇒ 3 Engine cover panel.
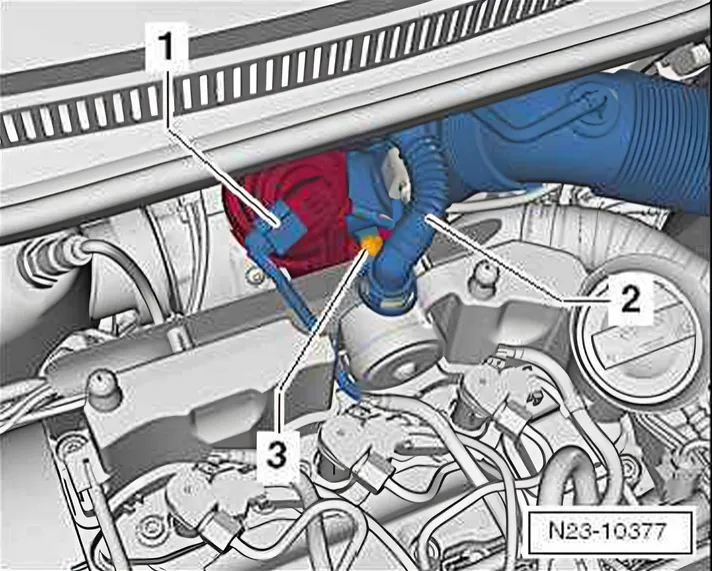
- Pull charge pressure positioner connector -1- off turbocharger.
- Remove breather line between cylinder head cover -2- and intake hose. Press plug-in connectors together to do this.
Protect open fuel connections from dirt entrainment using suitable methods under all circumstances.
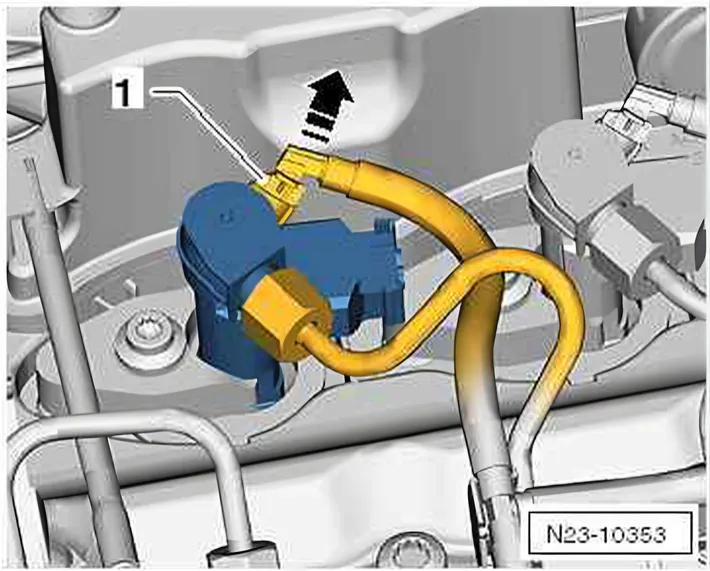
- Open return line connection. Release catch -1- to do this.
- Pull fuel return line connection off injector in direction of arrow.
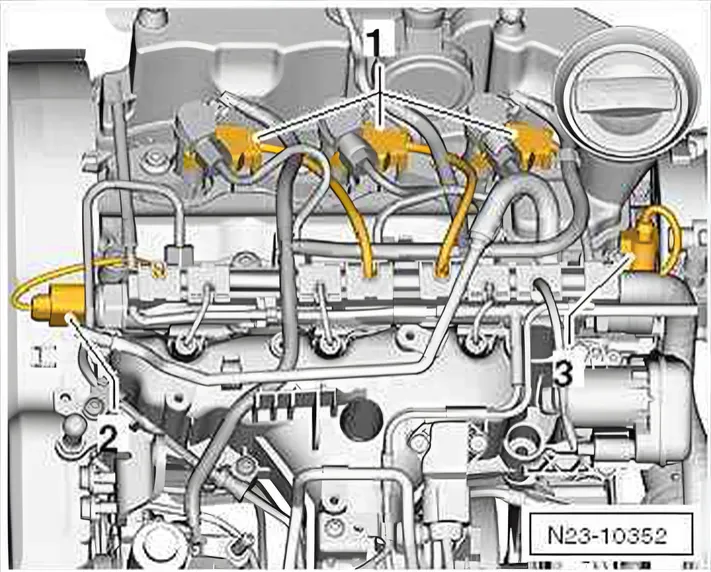
- Pull connector -1- off at the injectors to be removed.
Renew connector seal of connector -1- ⇒ Item 5 (page 194) ⇒ ETKA (Electronic Parts Catalogue).
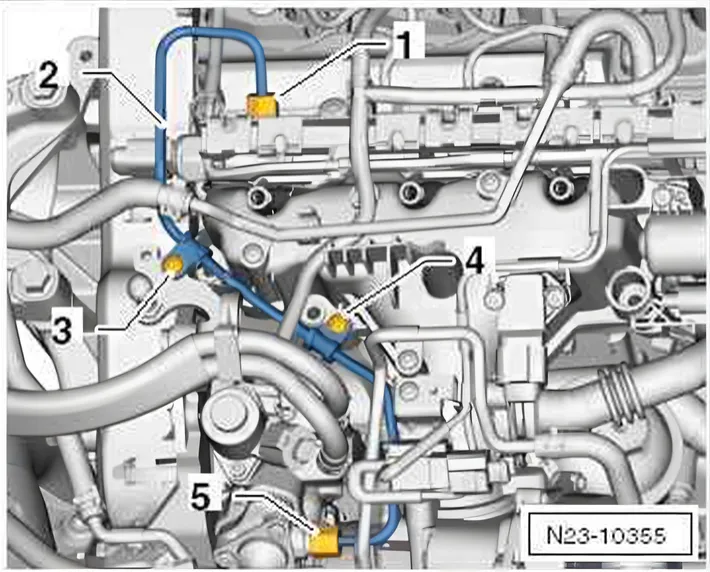
- Detach high-pressure line -2- between fuel rail and high-pressure pump.
- Removing high-pressure lines between fuel rail and injectors.
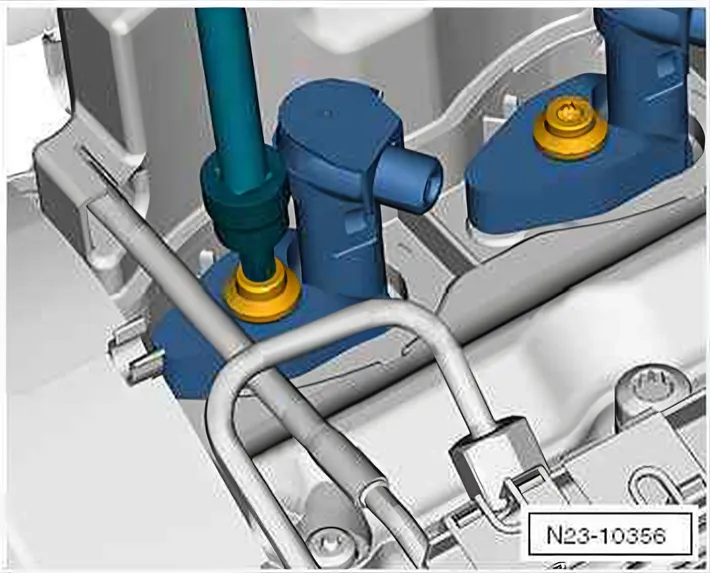
- Unscrew securing bolt of clamping piece for injector to be removed.
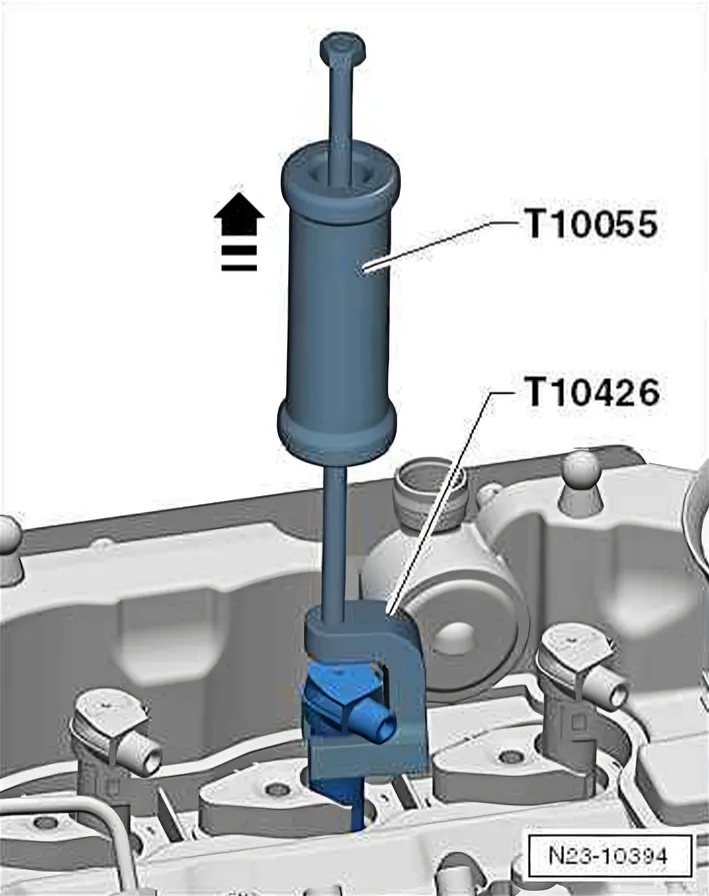
- Position puller - T10055- with injector puller - T10426- as shown.
- Using tapping movements, always pull injectors out upwards together with clamping piece.
3.4.2 Installing
Important instructions for installing injectors
- Clean empty injector bores and sealing surfaces in cylinder head using cleaning set - VAS 6811- before fitting injectors ⇒ Instructions
- When removing and installing, always renew the following components and seals/O-rings: “bolt for clamping piece”, “copper seal”, “O-ring for injector bore”.
- Used injectors may only be re-installed on the same cylinder.
- High-pressure lines may only be re-installed on the same cylinder.
- Check injectors and installation area for cleanliness before installing.
- The injectors must be completely undamaged.
- Lubricate all O-rings with engine oil or assembly oil before installing.
If a used injector is being re-installed:
- Spray tip of injector with a rust removal spray. Wait approx. 5 minutes, then wipe off soot and oil particles with a cloth.
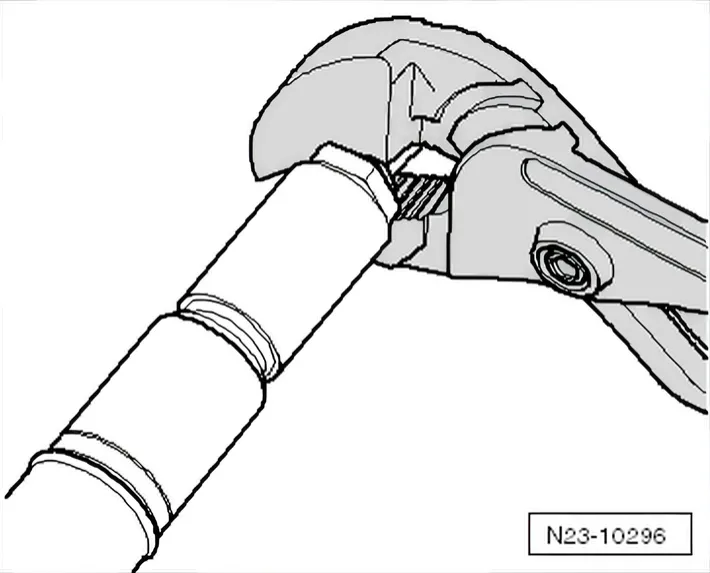
- To remove the old copper seal from the injector, carefully clamp the copper seal in a pair of pliers so the copper seal is just prevented from spinning. Then carefully pull and twist the injector out of the copper seal by hand.
- Use a plastic socket to mount the new copper seal.
Use a cloth soaked in engine oil or rust remover to remove soot particles on sealing surface of injectors and sealing surface in cylinder head.
- Clean injector bore using a cloth soaked in engine oil or rust remover. Do not damage sealing surface.
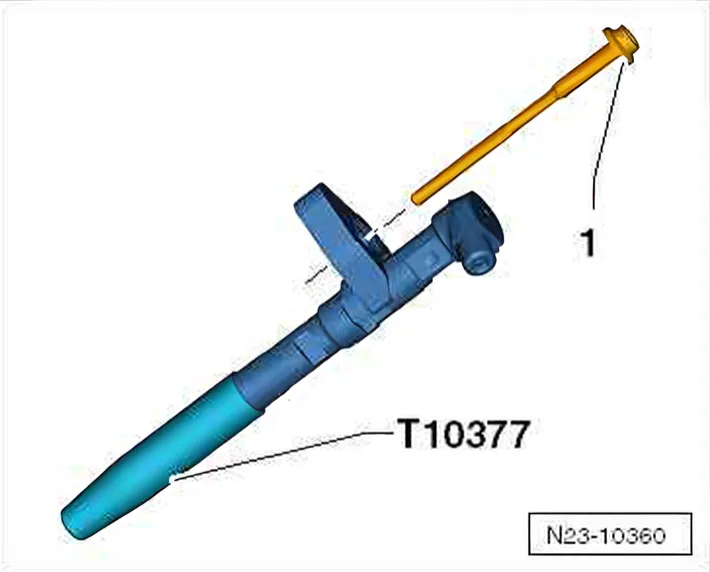
- Renew seal for injector bore using assembly sleeve - T10377-.
- Ensure that the injector bore is clean before fitting.
- Push the clamping piece onto the injector.
- Carefully insert injectors together with the clamping piece into injector bores in cylinder head.
Avoid damage to the injectors and prevent them coming into contact with the cylinder head.
- Initially tighten securing bolts only to 1 - 2 Nm.
It should be possible to align the injectors while fitting the highpressure lines by hand.
- Install high-pressure lines ⇒ 3.4.2 Installing.
- Tightening injectors ⇒ Item 9 (page 194)
Further assembly in reverse order of removal.
After renewing one or more injectors:
- Write adapted correction values for new injectors into engine control unit ⇒ 3.1 Assembly overview - injectors.
- Reset learnt values of fuel pressure regulating valve - N276-.
- 01 - Engine electronics
- 01 - Engine electronics functions
- 01 - Reset adaptation values of engine ctrl. module
| Selection: Reset learnt values of dosing unit and |
| pressure regulating valve |