
1.2 TDI CR engine (EA189) · Lubrication · Sump
Removing and installing sump
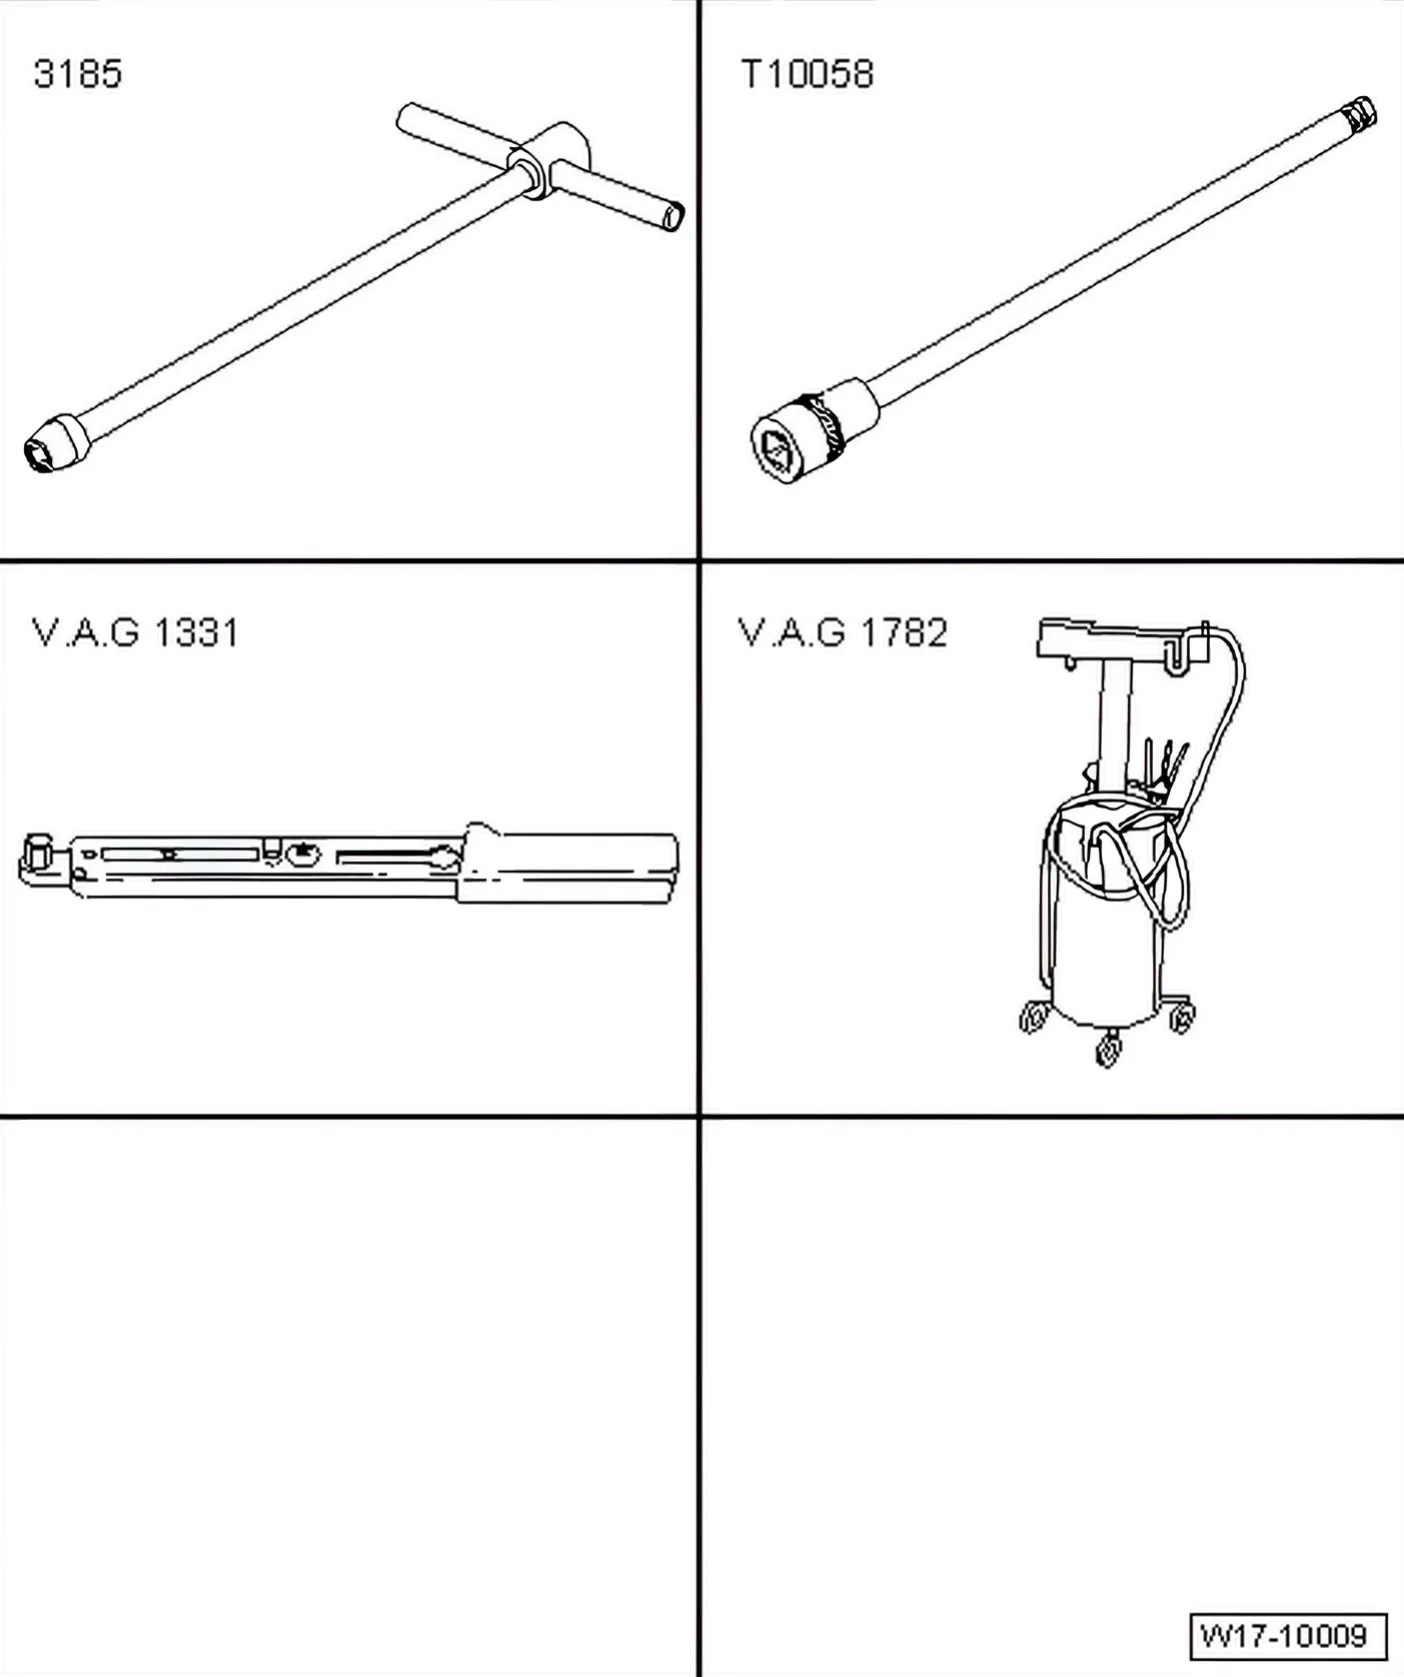
Special tools and workshop equipment required
- 10 mm jointed spanner - VAS 3185-
- Multi-point bit - T10058-
- Torque wrench (5 … 50 Nm) - V.A.G 1331-
- Used oil collection and extraction unit - V.A.G 1782-
- Sealant as per ⇒ ETKA (Electronic Parts Catalogue)
- Hand drill with plastic brush attachment
- Safety glasses
- Scraper
»Carry out the following work sequence«
Removing
- Remove noise insulation ⇒ General body repairs, exterior; Rep. gr. 50; Body - front; Assembly overview - noise insulation.
- Place used oil collection and extraction unit - V.A.G 1782- under engine. Drain engine oil.
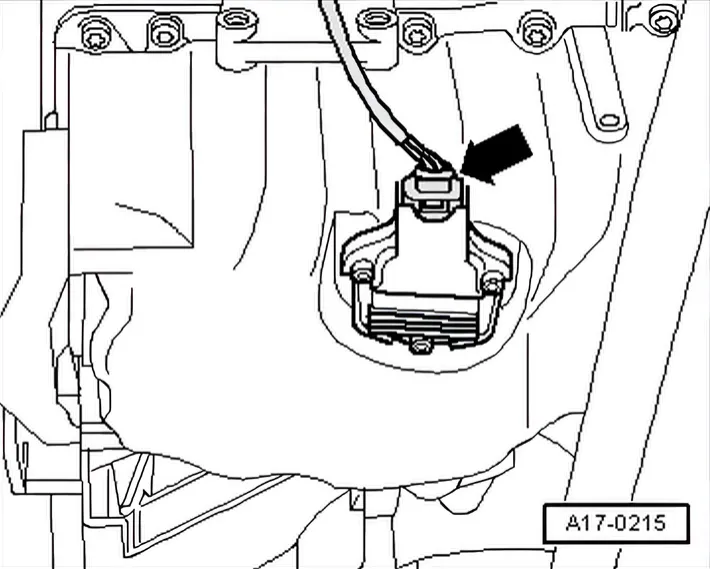
- Disconnect electrical connector -arrow- on oil level and oil temperature sender - G266-.
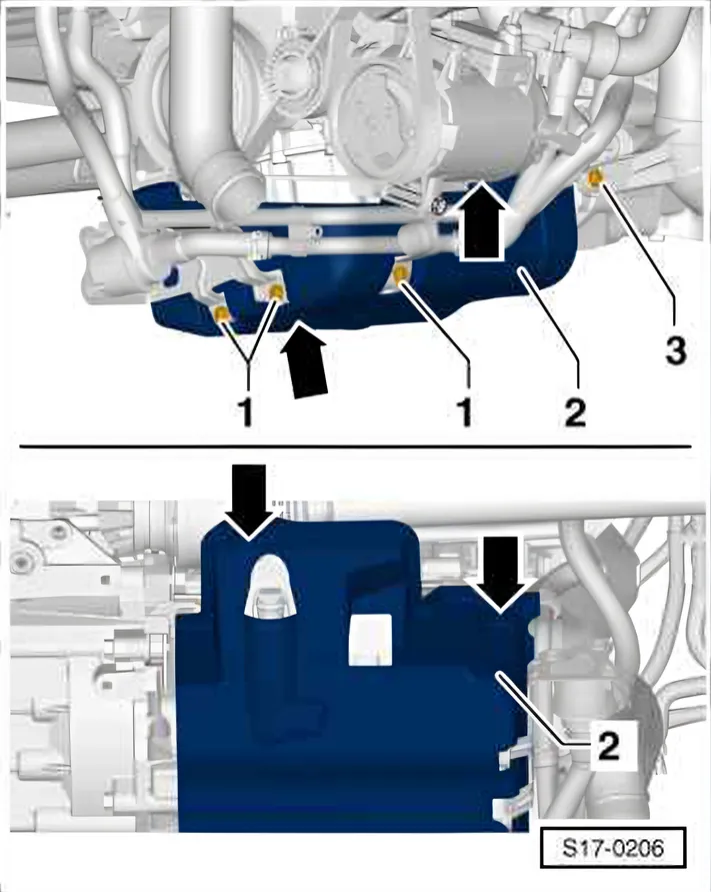
- Remove noise insulation -2- for oil sump. To do this:
- Undo bolts -1-.
- Remove 2-section clips -arrows-.
- Detach pipe fastenings at noise insulation element.
- Loosen bolt -3-.
- Move coolant lines aside slightly.
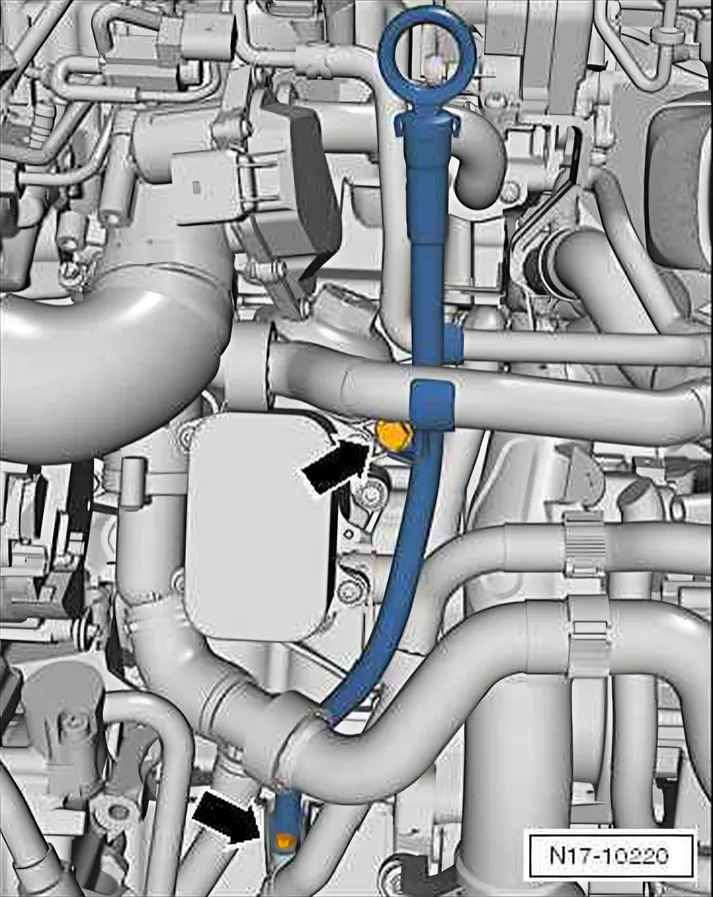
- Unscrew bolts -arrows- of oil dipstick connections.
- Remove oil dipstick upwards.
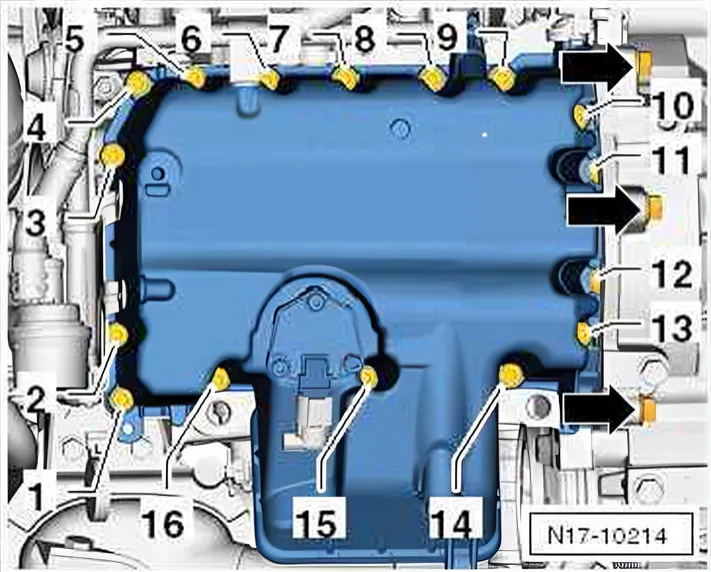
- Unscrew connecting bolts -arrows- for sump/gearbox.
- Unscrew sump securing bolts diagonally using Allen key, long reach 5 mm - T10058-.
- Release sump carefully from adhesive.
- Loosen sump with light blows of a rubber headed hammer if necessary.
- Remove sealant residues from crankcase.
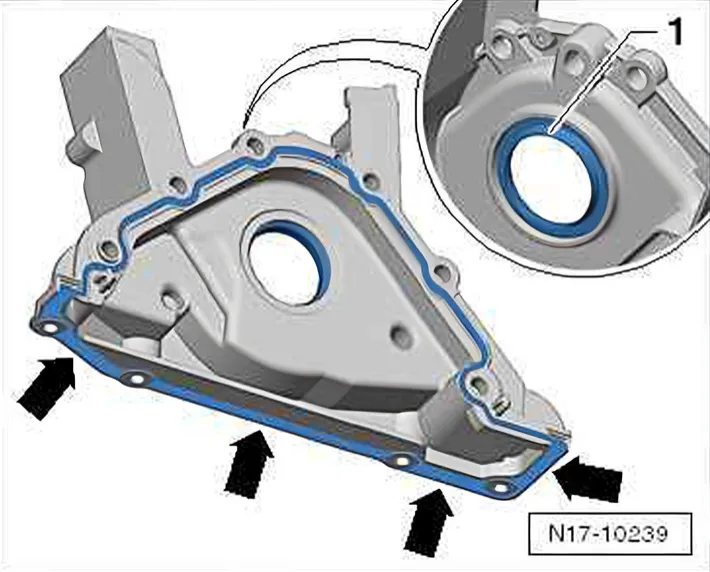
- Remove sealant residue and rubber gasket from sealing flange on belt pulley side -arrows-.
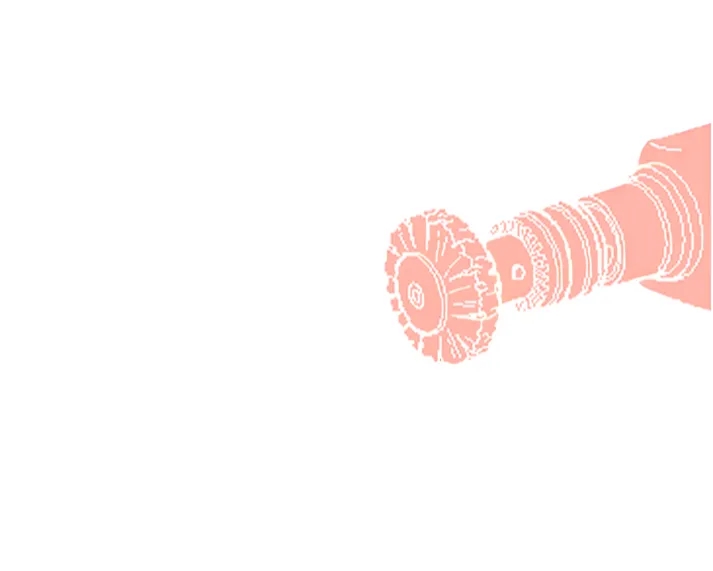
- Remove sealant residues on sump with a rotating brush, e.g. a hand drill with a plastic brush insert.
- Clean sealing surfaces. They must be oil and grease free.
Installing
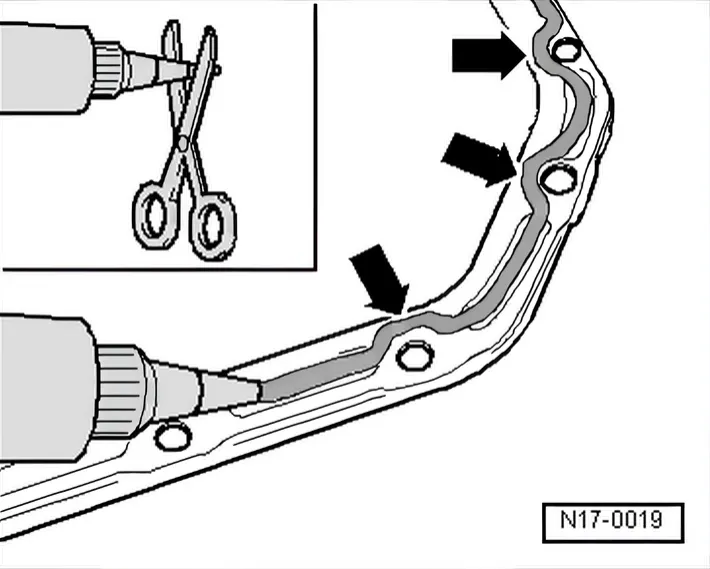
- Cut off tube nozzle at front marking (∅ of nozzle approx. 3 mm).
- Apply sealant as per ⇒ ETKA (Electronic Parts Catalogue) on clean sealing surface of sump as shown in illustration. Sealant bead must be:
- Run bead along inner side of bolt holes -arrows-.
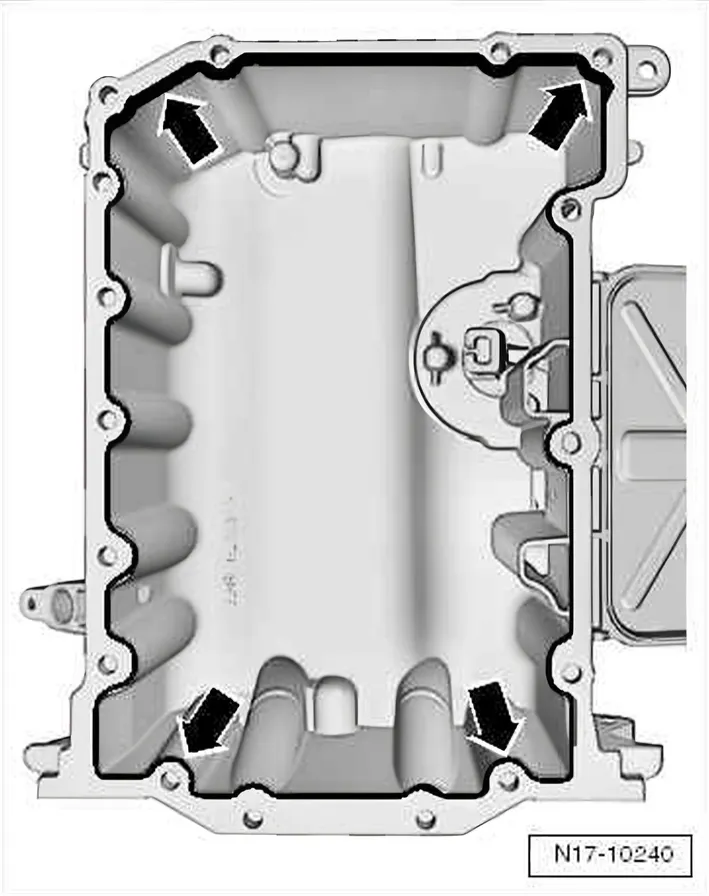
Thickness of sealant bead on sump:
- In area of sealing surface of sealing flange on pulley side -arrows pointing upwards-: 3 … 4 mm
- In area of sealing surface of cylinder block and sealing flange on gearbox side -arrows pointing downwards-: 2 … 3 mm
- Sealant bead in area of sealing flange on belt pulley side must be able to substitute the no longer existent rubber gasket of sealing flange on belt pulley side in terms of height and width.
- Mount oil sump.
- Tighten bolts of oil sump in 3 stages as follows:
| Stage | Bolts | Specified torque |
|---|---|---|
| 1 | -1 … 16- | In diagonal sequence to 5 Nm |
| 2 | -Arrows- | 40 Nm |
| 3 | -1 … 16- | in diagonal sequence and in stages to 15 Nm |
Further assembly is carried out in the reverse order, note the following:
- Let sealing compound dry for approx. 30 minutes after installing oil sump. Only then fill with engine oil.
- Replenish engine oil and check oil level ⇒ 1.3 Removing and installing sump.