
Body repairs – exterior · Body – front · Wings
Removing and installing wing
Special tools and workshop equipment required
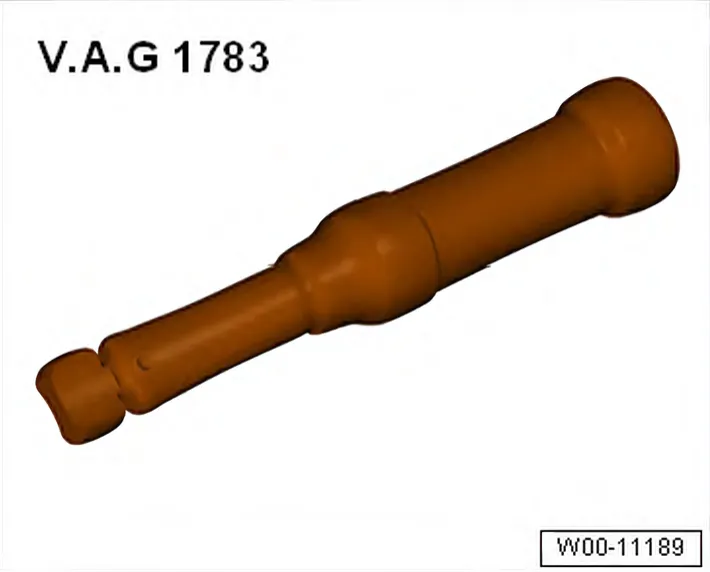
- Torque wrench - V.A.G 1783-
Removing
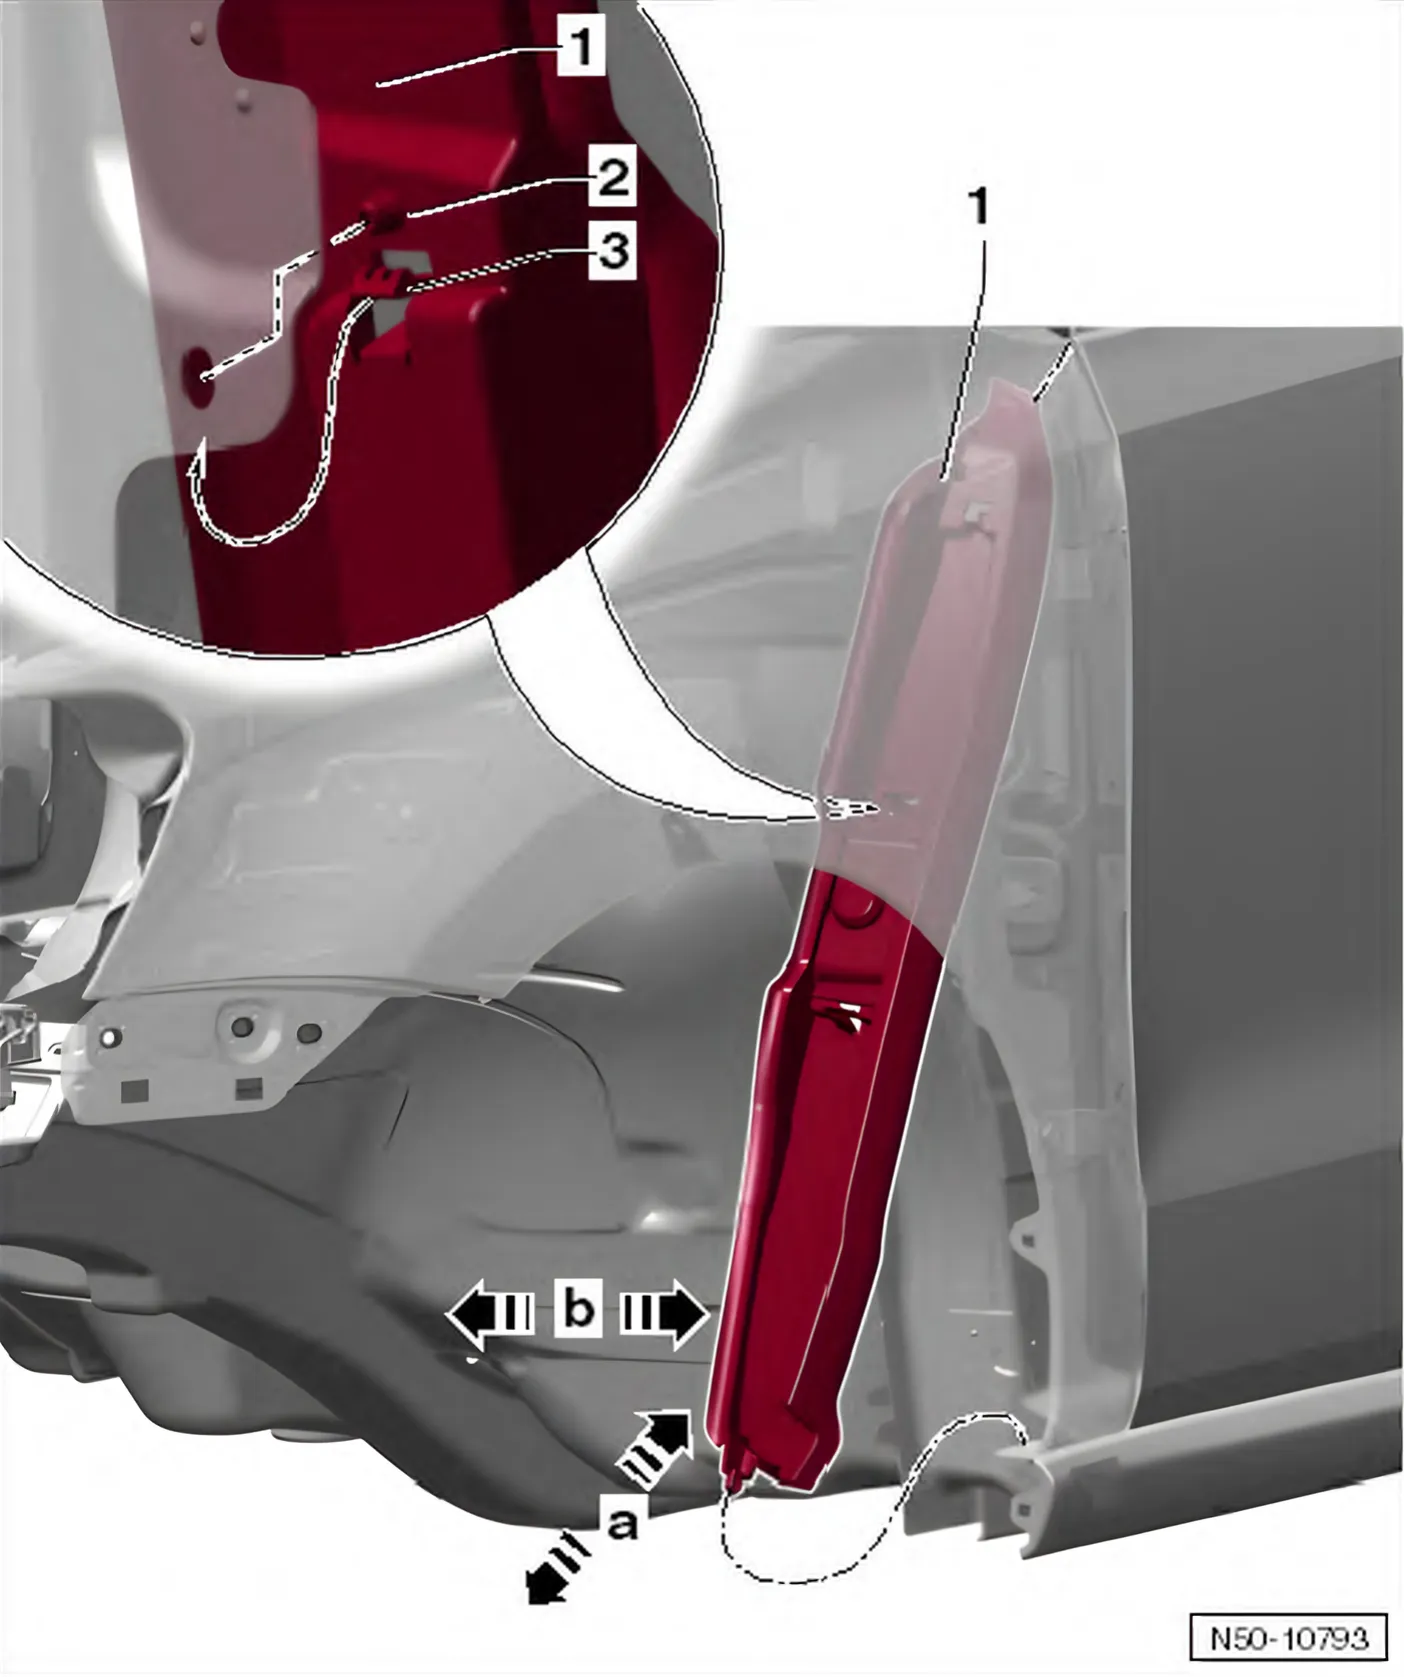
- Remove front wheel housing liner ⇒ 8.3 Removing and installing front wheel housing liner.
- In vehicles with insulation, first remove the insulation ⇒ 2.2 Assembly overview – insulation and foam elements.
- Release locking hooks -3-.
- Pull out lower end of cover a little -arrow b- and then remove downwards -arrow a-.
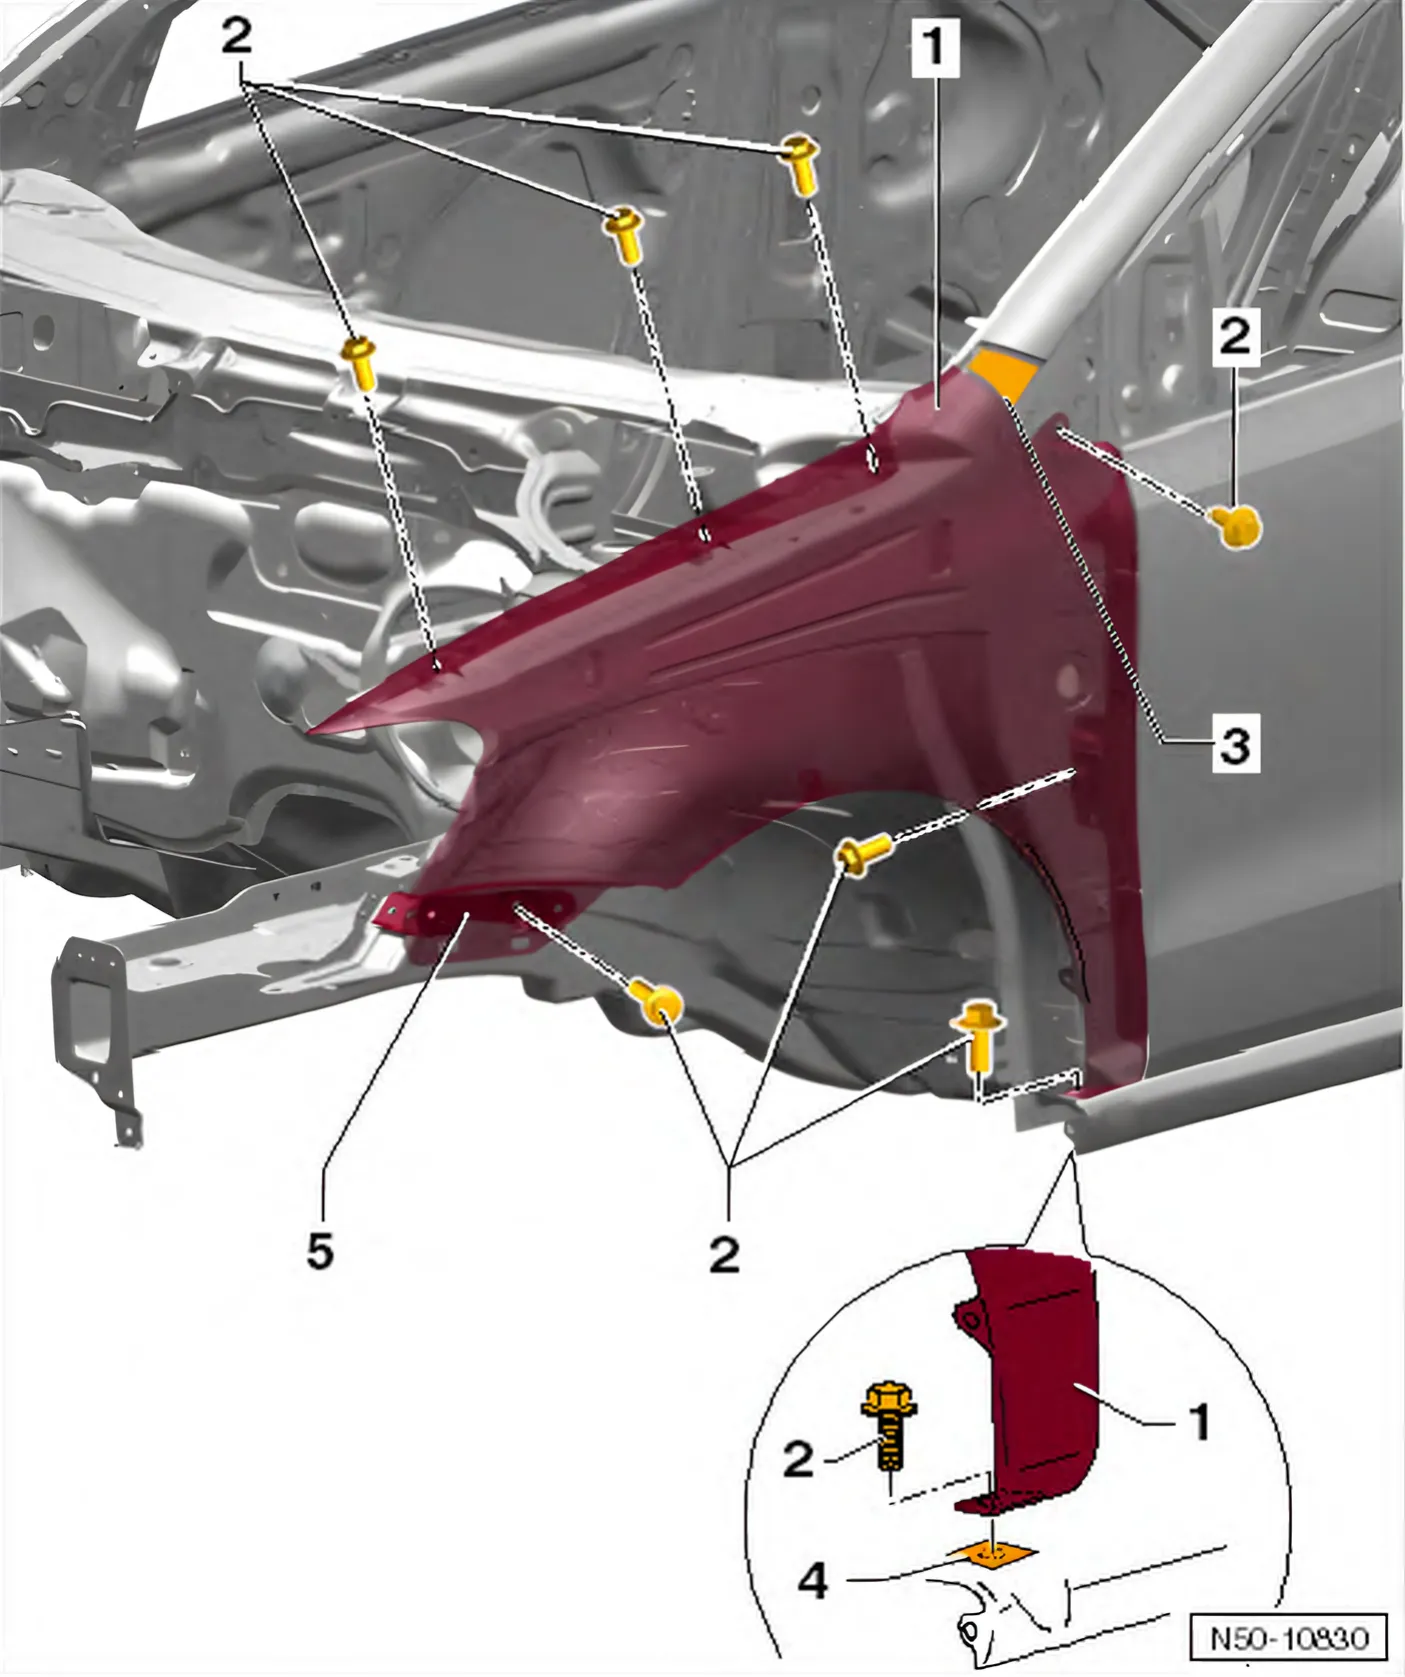
- Remove A-pillar trim ⇒ 3.12 Removing and installing A-pillar trim.
- Remove front bumper ⇒ 1.4 Removing and installing bumper cover.
- Pull out foam between wing and longitudinal member ⇒ 2.2 Assembly overview – insulation and foam elements
- Pull web plate insulation out of wheel housing ⇒ 2.2 Assembly overview – insulation and foam elements
- Unscrew bolts -2-.
- Rear bolt -2- can be reached with bonnet closed. Mask off bonnet in this area to prevent damage.
- If an adhesive bead is located in area -3- between wing and A-pillar, this is to be cut through using the cutting cord - 357 853 999 A-.
- Remove wing -1- carefully.
Installing
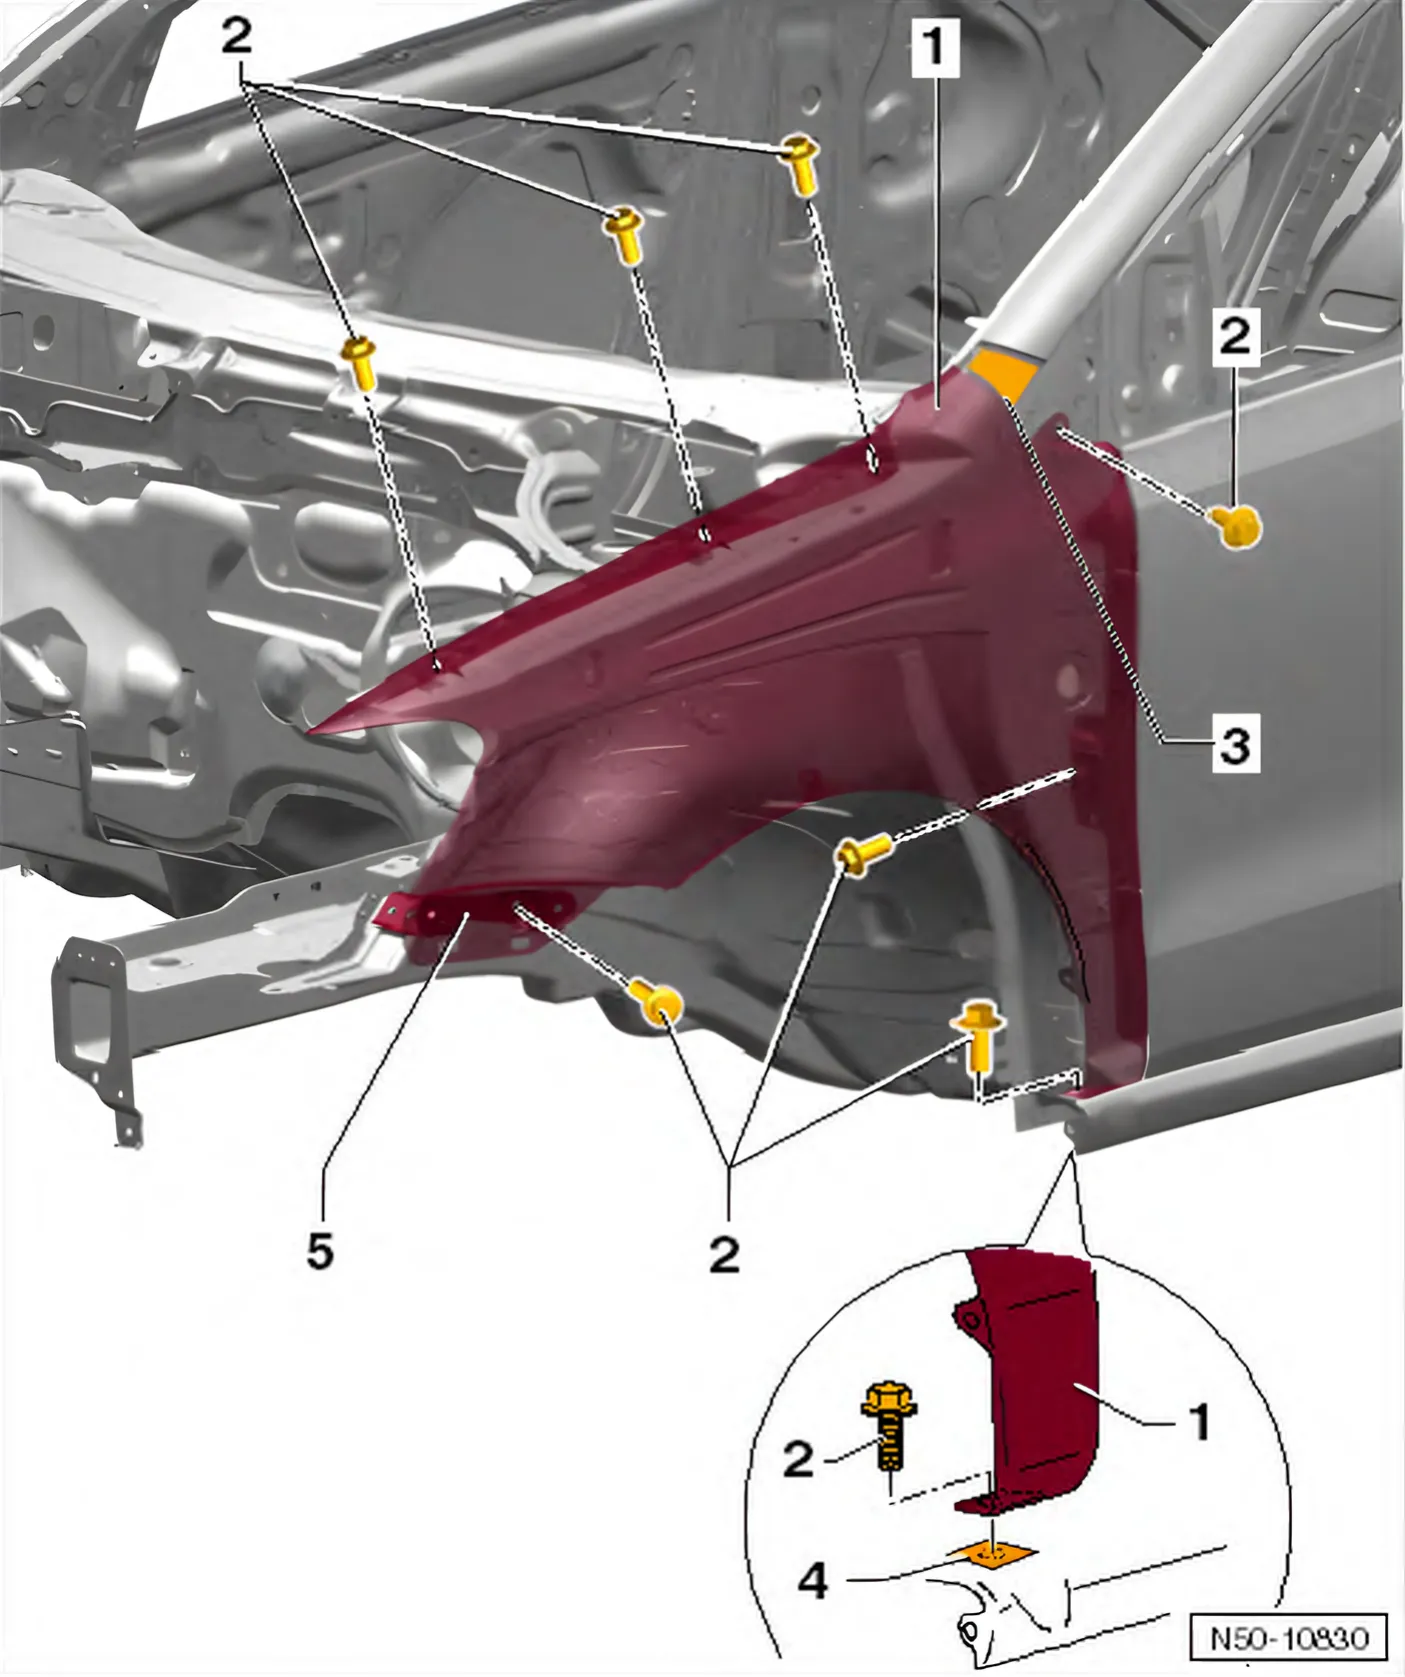
Installation of the wing -1- is carried out in reverse order of removal.
- Insert a layer -3- of butyl adhesive sealing cord - D 450 273 A2- between A-pillar and wing. This allows wing to be adjusted in height to A-pillar.
- Always insert zinc intermediate piece - AKL 381 035 50- between wing and side member.
- Fit wing in position with bolts.
- Tighten bolts, beginning with the rear bolt in the top longitudinal member.
- Specified torque for bolts -2-: 6 Nm.
- Ensure joints are parallel and shut lines are equal ⇒ Body Repairs; Rep. gr. 00; Technical data; Body gaps; Body, front.
Fitting is carried out with wing strut -5- removed.