
1.4 TSI engine (EA111) · Crankshaft group · Pistons and conrods
Pistons and conrods – assembly overview and fastening
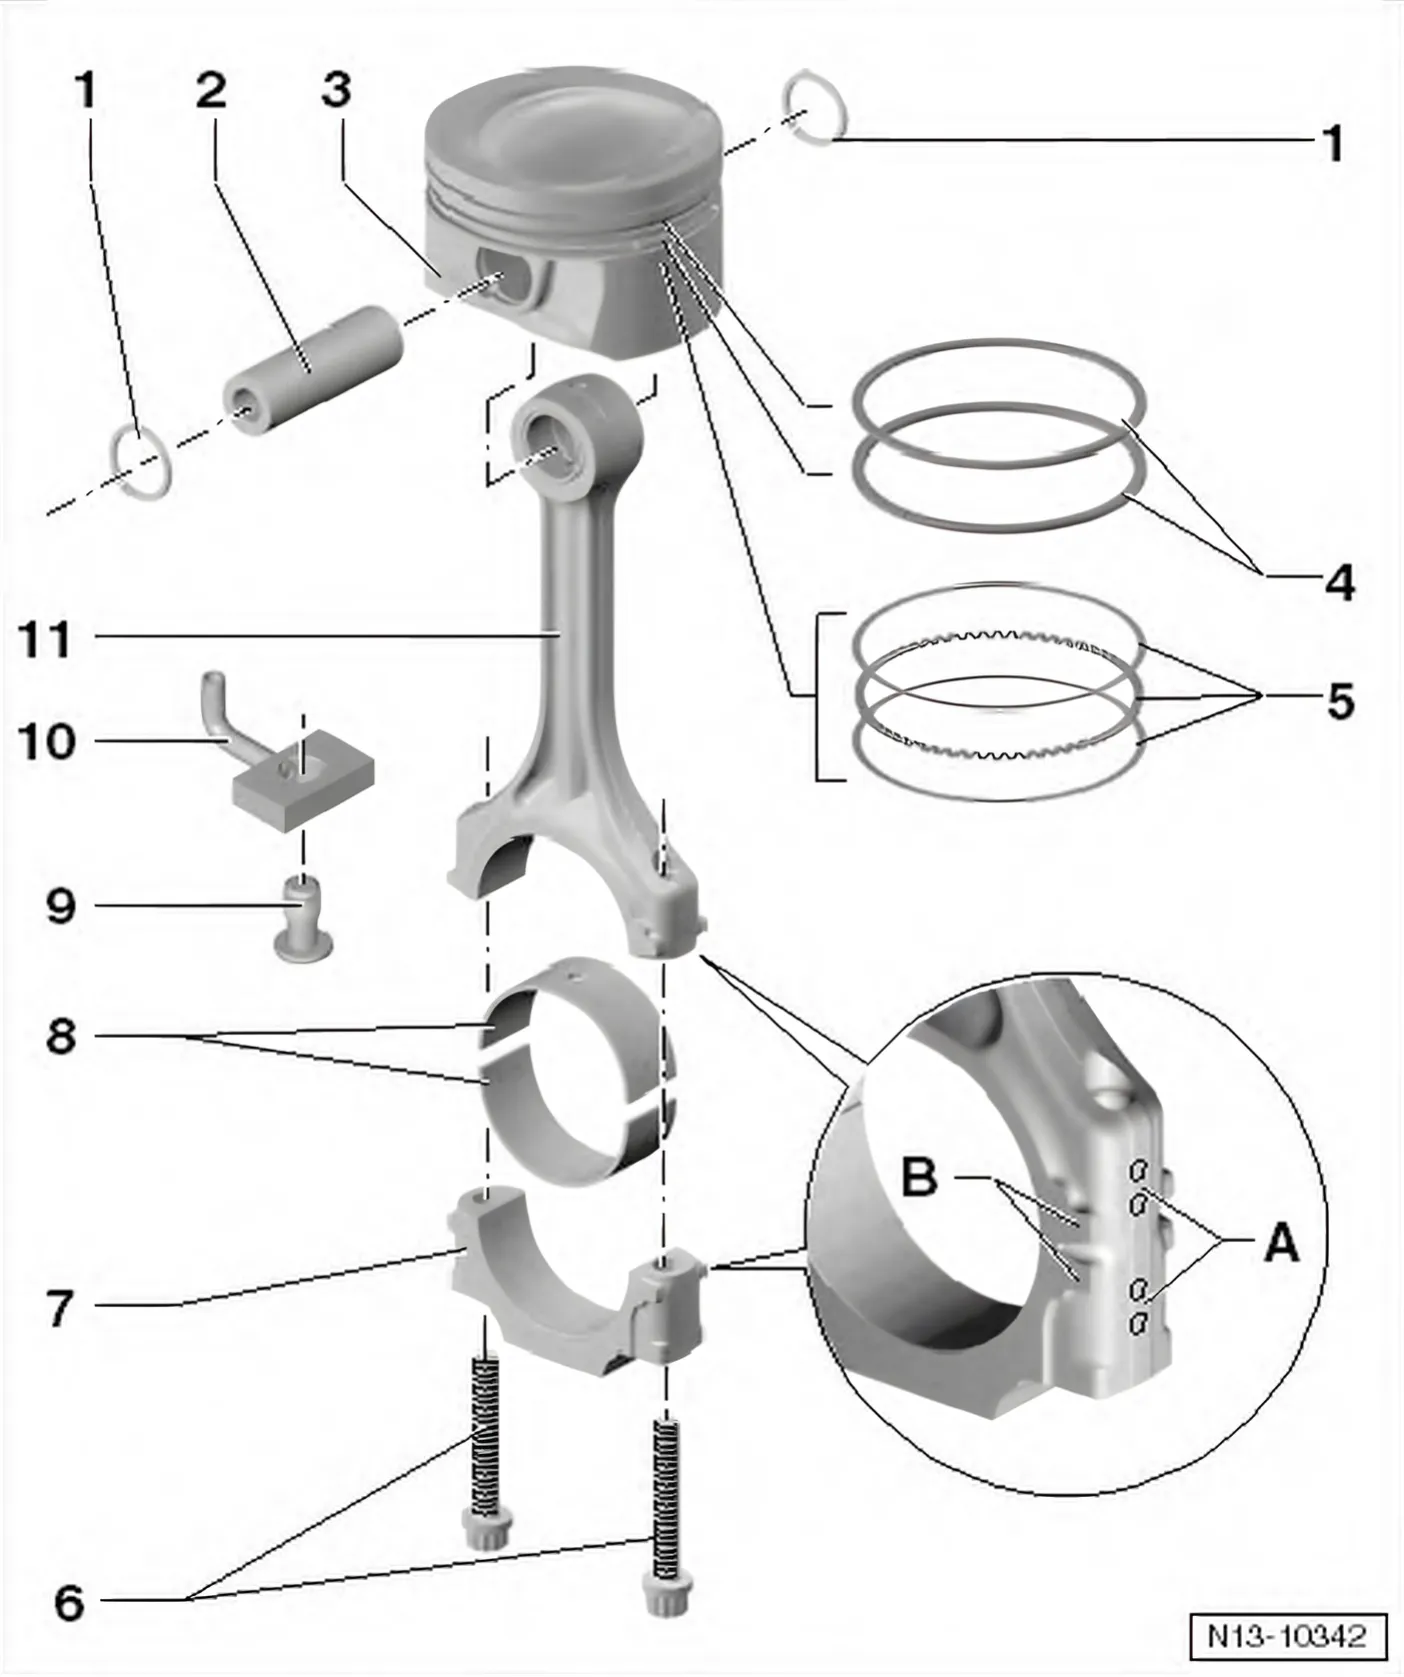
- 1 Retaining ring
- 2 Piston pin
- If difficult to remove, heat piston to 60°C.
- Remove and install using drift - 10 - 14-.
- 3 Piston
- Checking ⇒ 4.2 Checking piston
- Mark installation position and cylinder number.
- 4 Compression rings
- Offset gaps by 120°
- Remove and install compression rings with piston ring pliers.
- “TOP” faces towards piston crown.
- Checking ring gap ⇒ 4.2 Checking piston.
- Checking ring-to-groove clearance ⇒ 4.2 Checking piston.
- 5 Oil scraper rings
- Carefully remove and install 3-part oil scraper rings by hand.
- Checking ring gap ⇒ 4.2 Checking piston.
- Ring-to-groove clearance not measurable.
- 6 Conrod bolt
- M7×0.75: 20 Nm + 1/4 turn (90°) further.
- M8×1: 30 Nm + 1/4 turn (90°) further.
- Renew
- Oil threads and contact surface
- To measure radial clearance, tighten to corresponding specified torque but not further.
- 7 Conrod bearing cap
- The caps only fit in one position and only on the appropriate conrod due to the breaking procedure (cracking) separating the cap from the conrod.
- Markings -A-: mark with cylinder number
- Markings -B-: mark paired conrods and conrod bearing caps
- 8 Bearing shell
- Do not interchange used bearing shells.
- Insert bearing shells centrally.
Checking radial clearance with Plastigage:
- New: 0.020…0.060 mm
- Wear limit: 0.090 mm
- Do not rotate crankshaft when checking radial clearance.
- 9 27 Nm
- Opening pressure of pressure relief valve: 1.8…2.2 bar
- 10 Oil spray jet
- For piston cooling.
- 11 Connecting rod
- Renew as set only.
- Markings -A-: mark with cylinder number
- Markings -B-: mark paired conrods and conrod bearing caps
- Separating new conrod ⇒ 4.4 Separating new conrod.
If new conrods are fitted, then the choice of position is arbitrary.
- Guided axially by piston.