
Body interior · Trim, insulation · Interior trims
Removing and installing A-pillar trim
6R 2009–2014 Removing
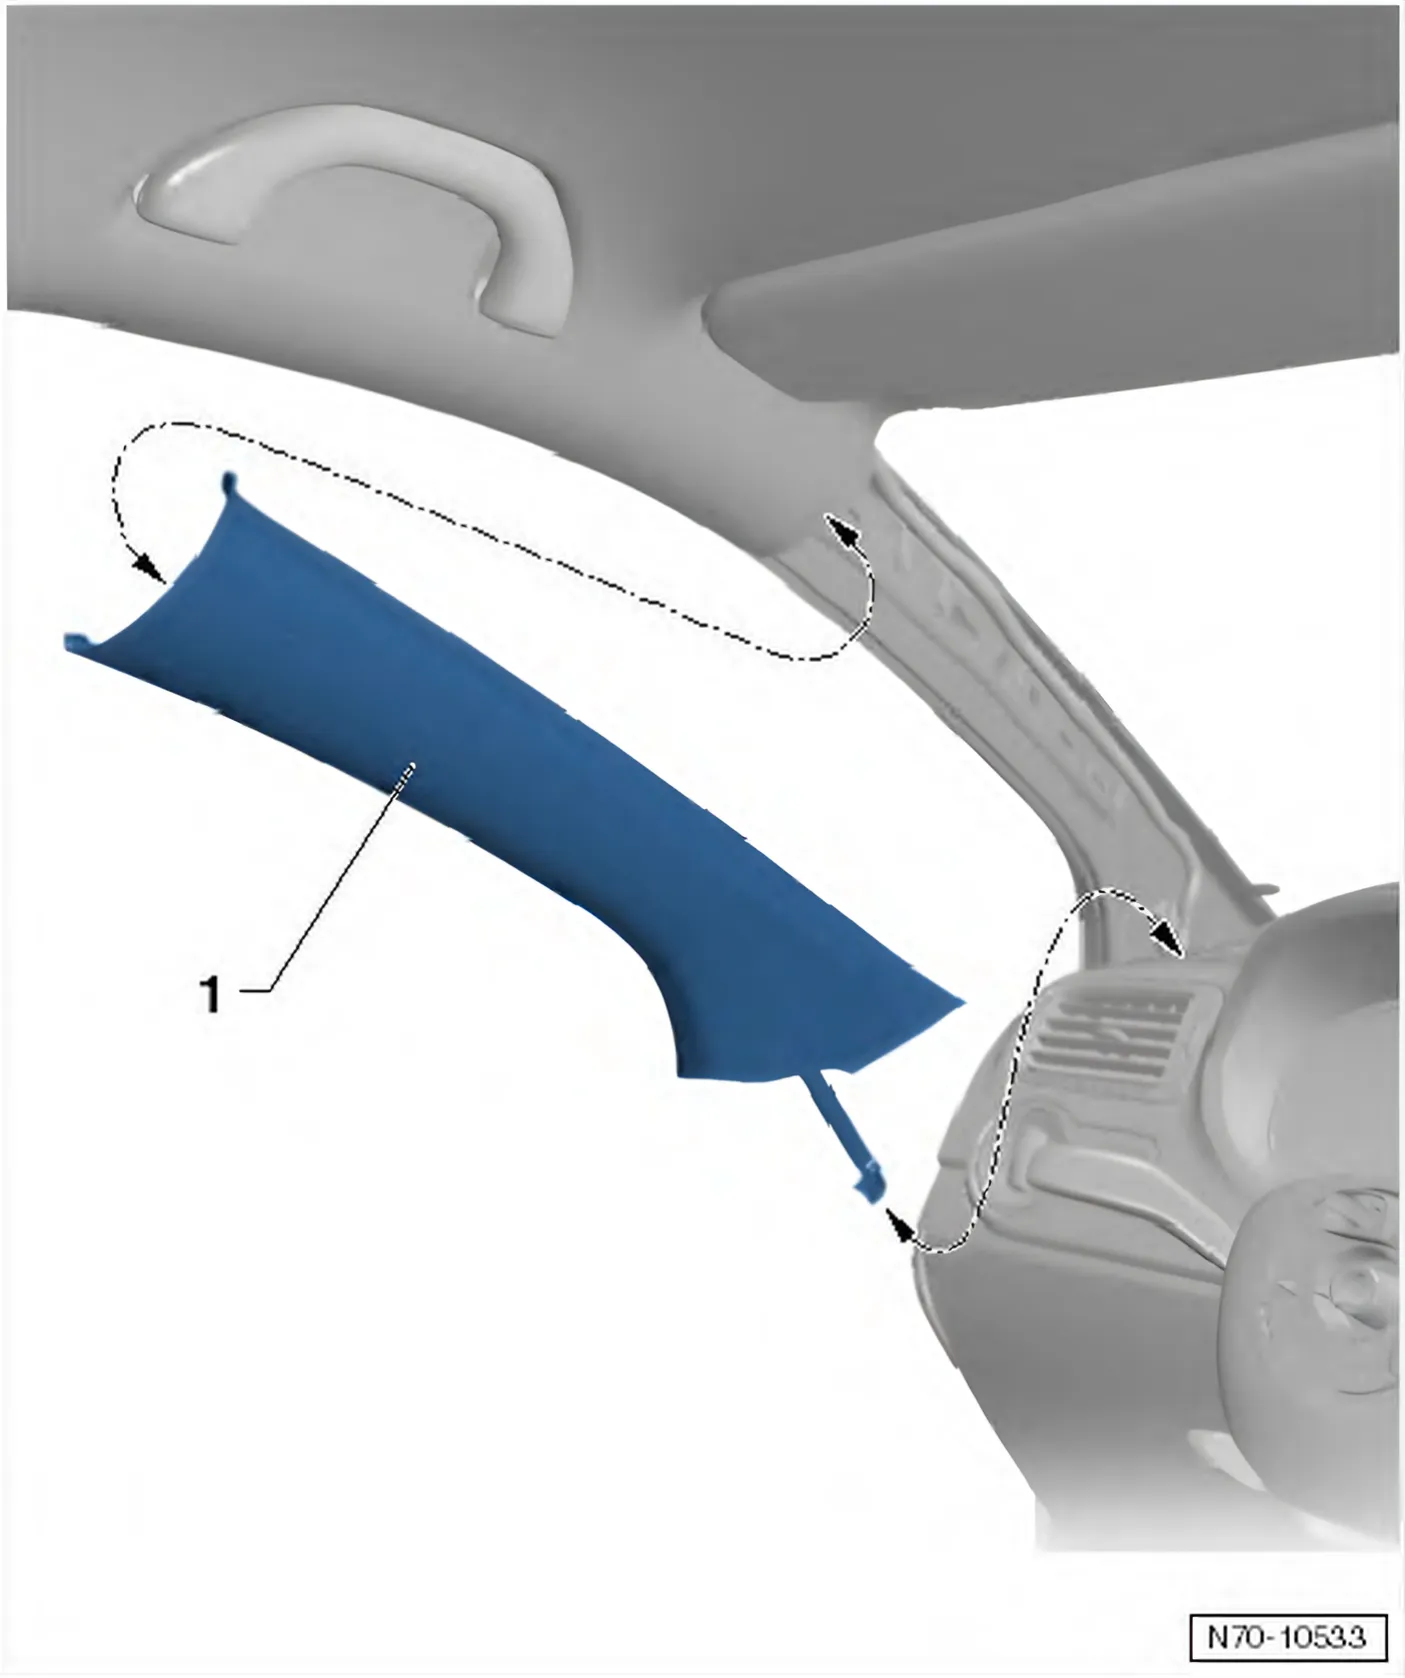
6C 2014–2017 Upper A-pillar trim ⇒ 5.2 Removing and installing A-pillar trim
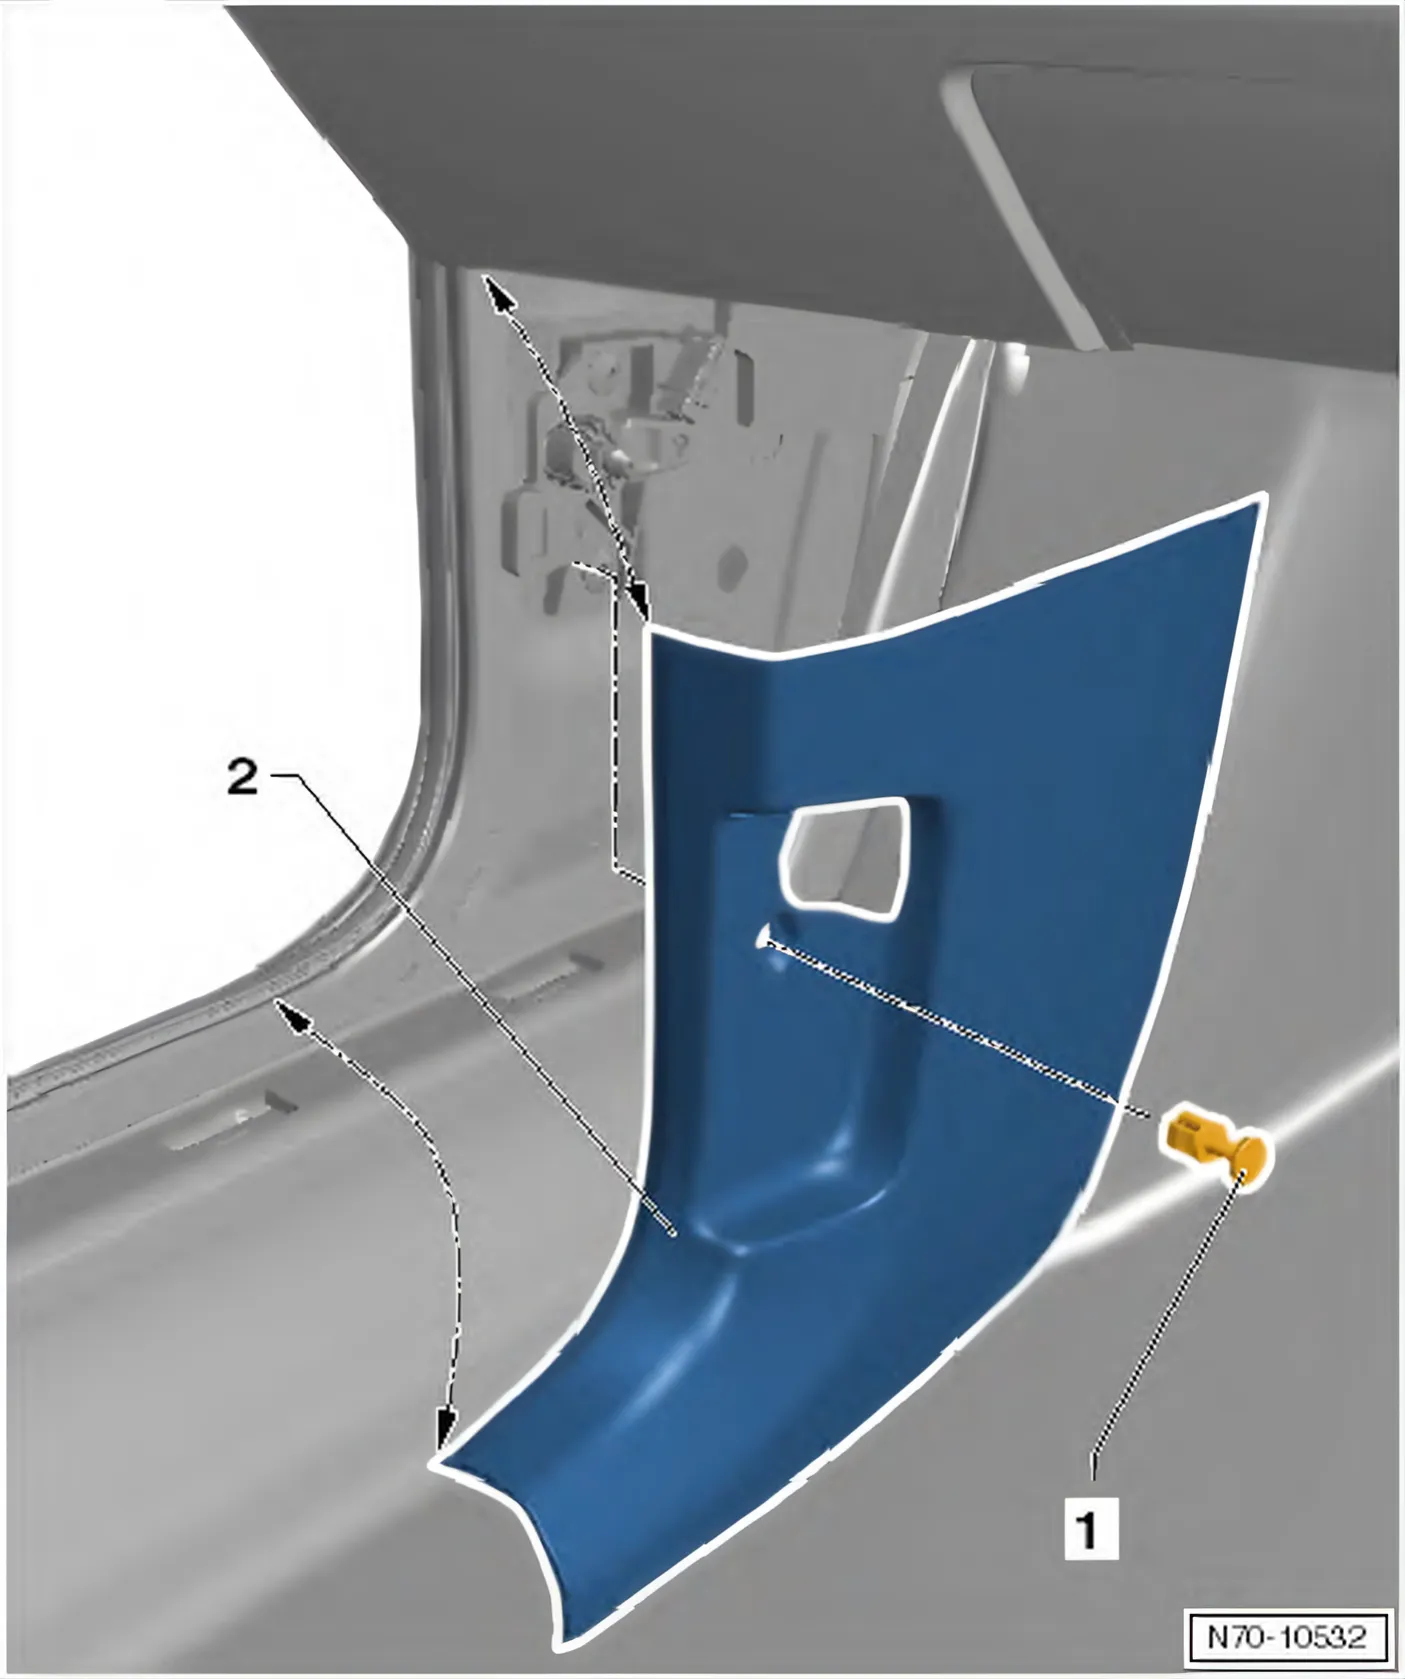
Lower A-pillar trim, driver side ⇒ 5.2 Removing and installing A-pillar trim
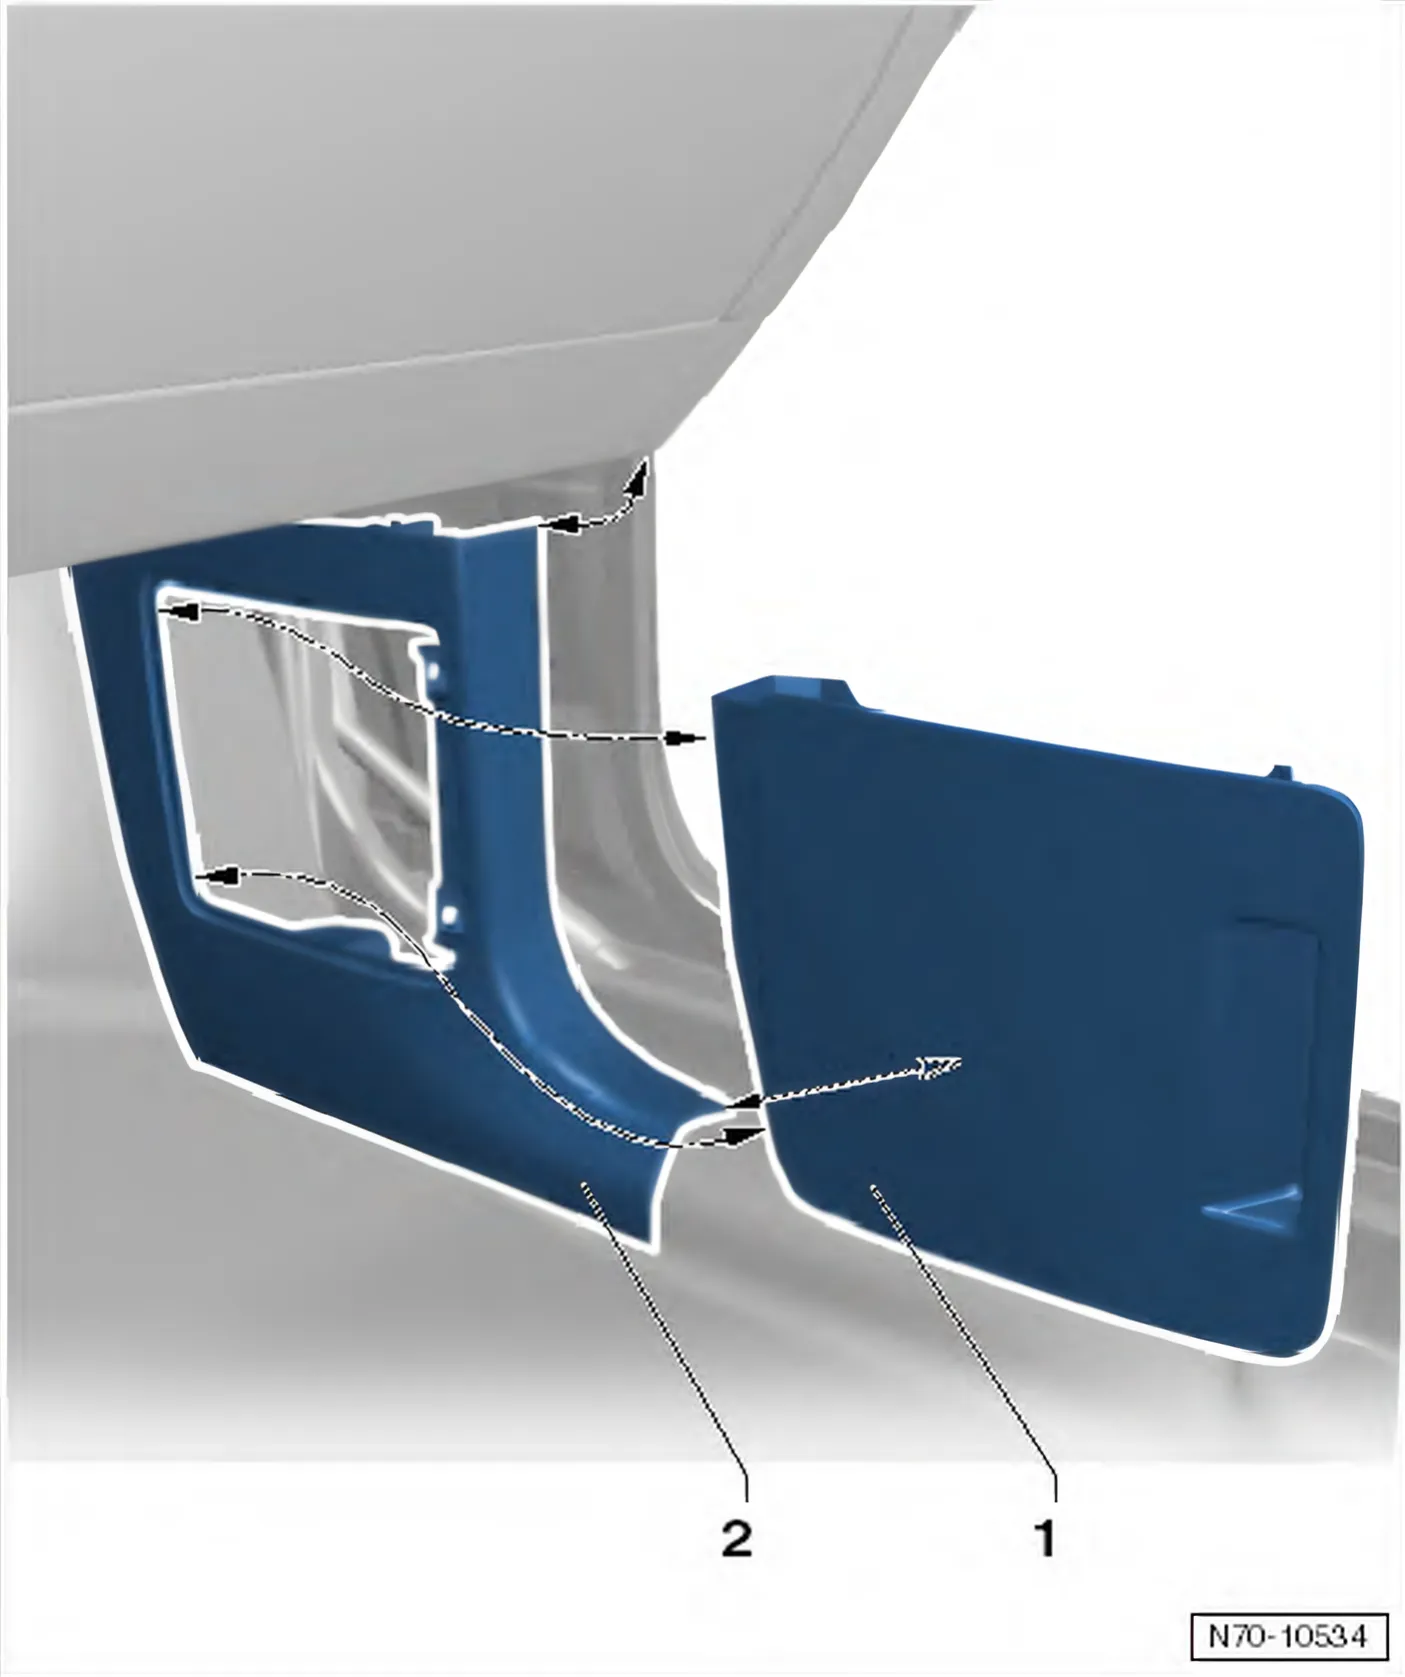
Lower A-pillar trim, front passenger side ⇒ 5.2 Removing and installing A-pillar trim
Upper A-pillar trim
6C 2014–2017 Removing
- Pull A-pillar trim -1- out of mountings in A-pillar, starting at top.
- In trims with speaker, separate connector.
Installing
- Install in reverse order of removal.
6C 2014–2017 Lower A-pillar trim, driver side
Removing
- On driver side, remove operating lever for bonnet ⇒ General body repairs, exterior; Rep. gr. 55; Bonnet; Removing and installing bonnet release lever.
- Pull out sill panel moulding from mountings in vehicle body in transitional area to A-pillar trim.
- Remove spreader clip -1-.
- Pull trim -2- inwards and out of mountings in body.
Installing
- Install in reverse order of removal.
6C 2014–2017 Lower A-pillar trim, front passenger side
Removing
- Pull out sill panel moulding from mountings in vehicle body in transitional area to A-pillar trim.
- Remove compartment -1-.
- Pull trim -2- inwards and out of mountings in body.
Installing
- Install in reverse order of removal.