
Body repairs – exterior · Bumpers · Bumper, front
Installing brackets for parking aid system
Special tools and workshop equipment required
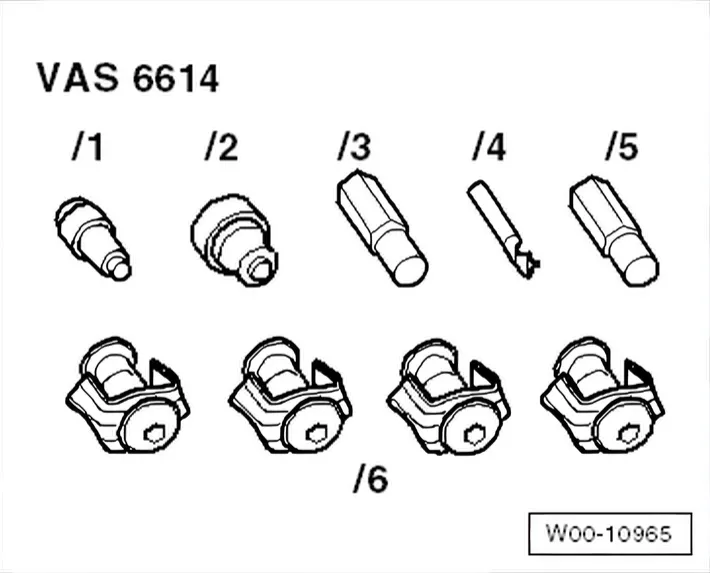
- Installation tool for PDC bracket - VAS 6614-
Materials
- Cleaning solution - D 009
11) 6
401 04-
11) Observe manufacturer's instructions enclosed in the packaging.
Installing brackets
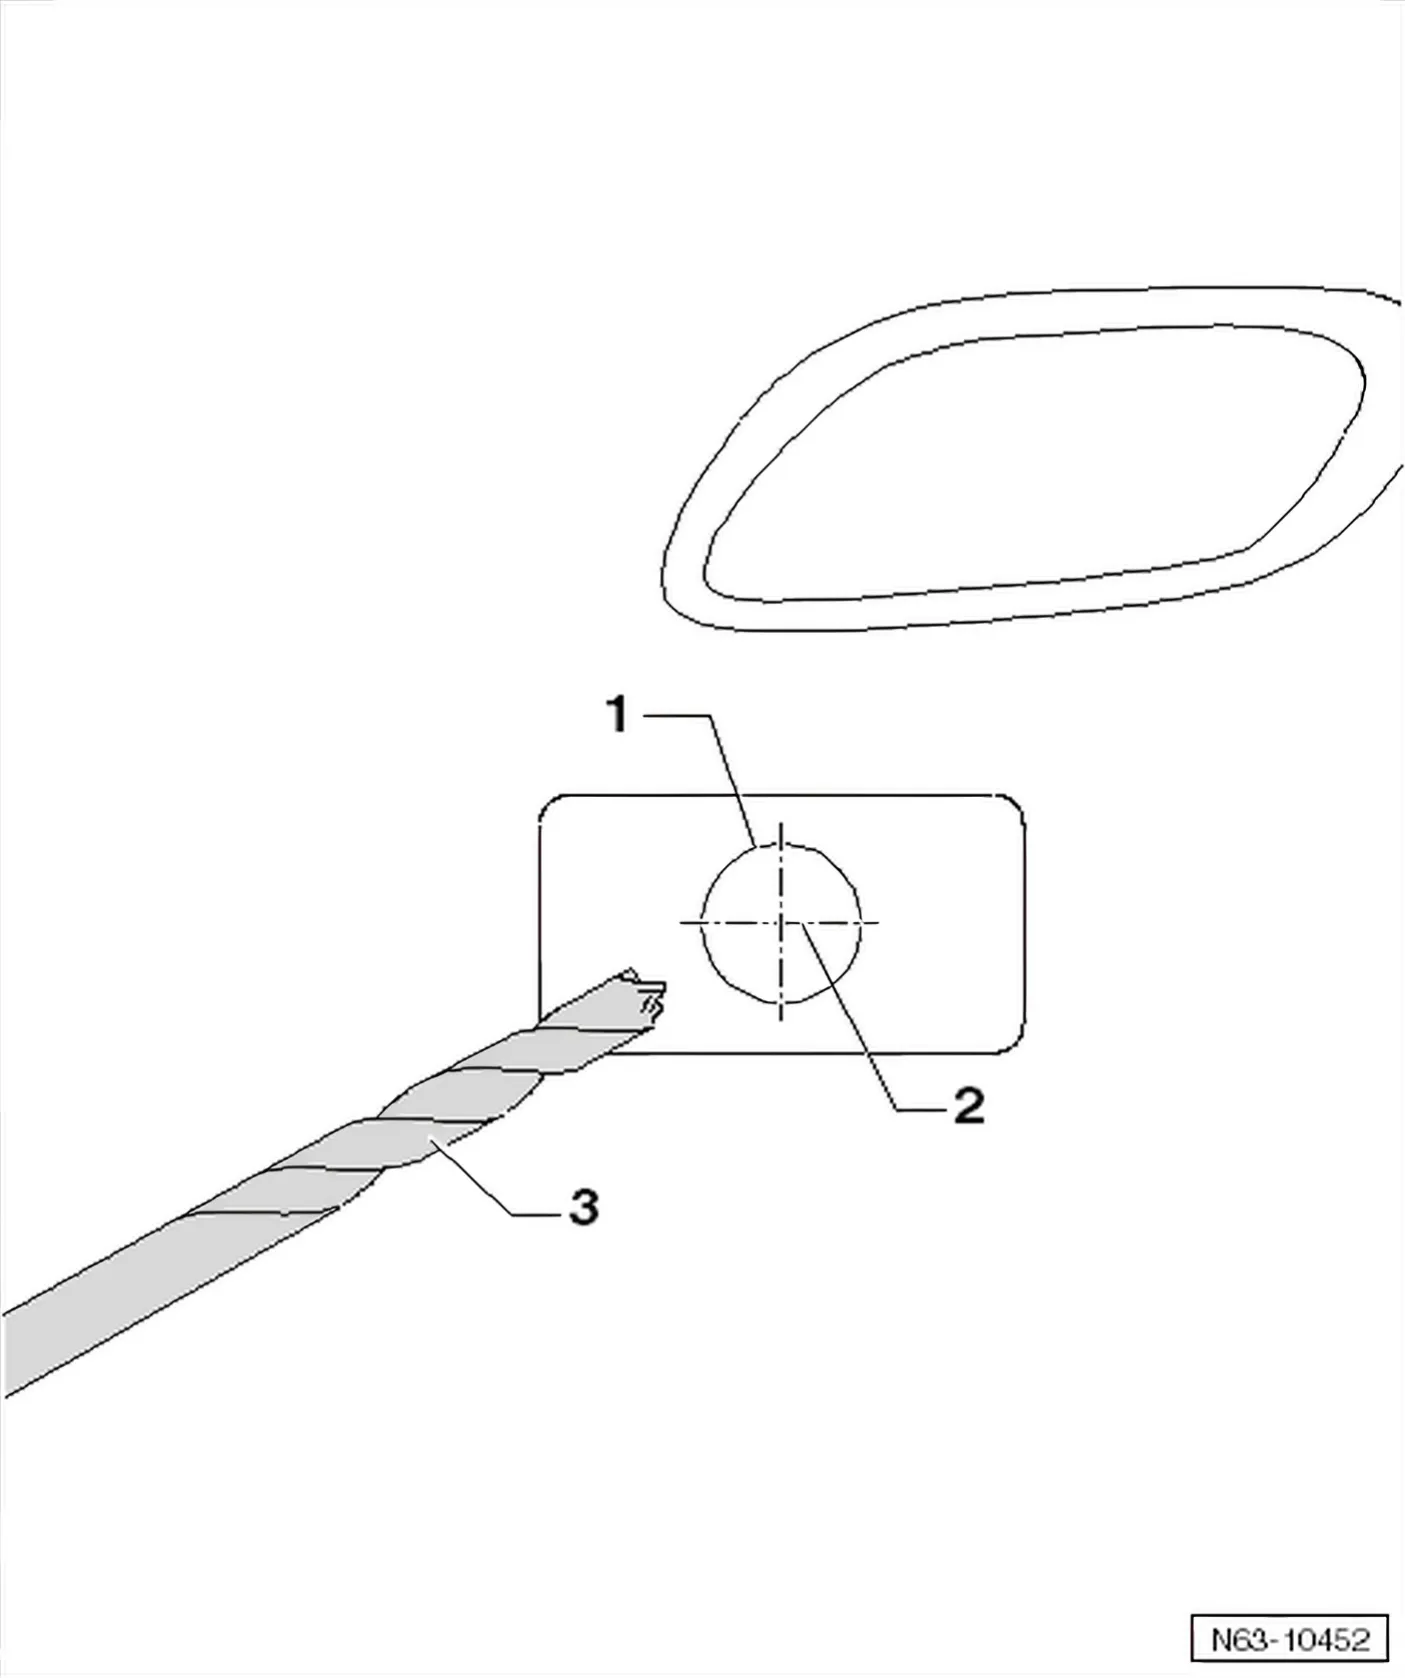
The 4 markings for brackets -1- can be found on the inside of the bumper cover.
- If there are no markings, the centre point -2- must be determined.
- Holes must be drilled from inside out using drill bit - VAS 6614/4- -3- from tool kit supplied.
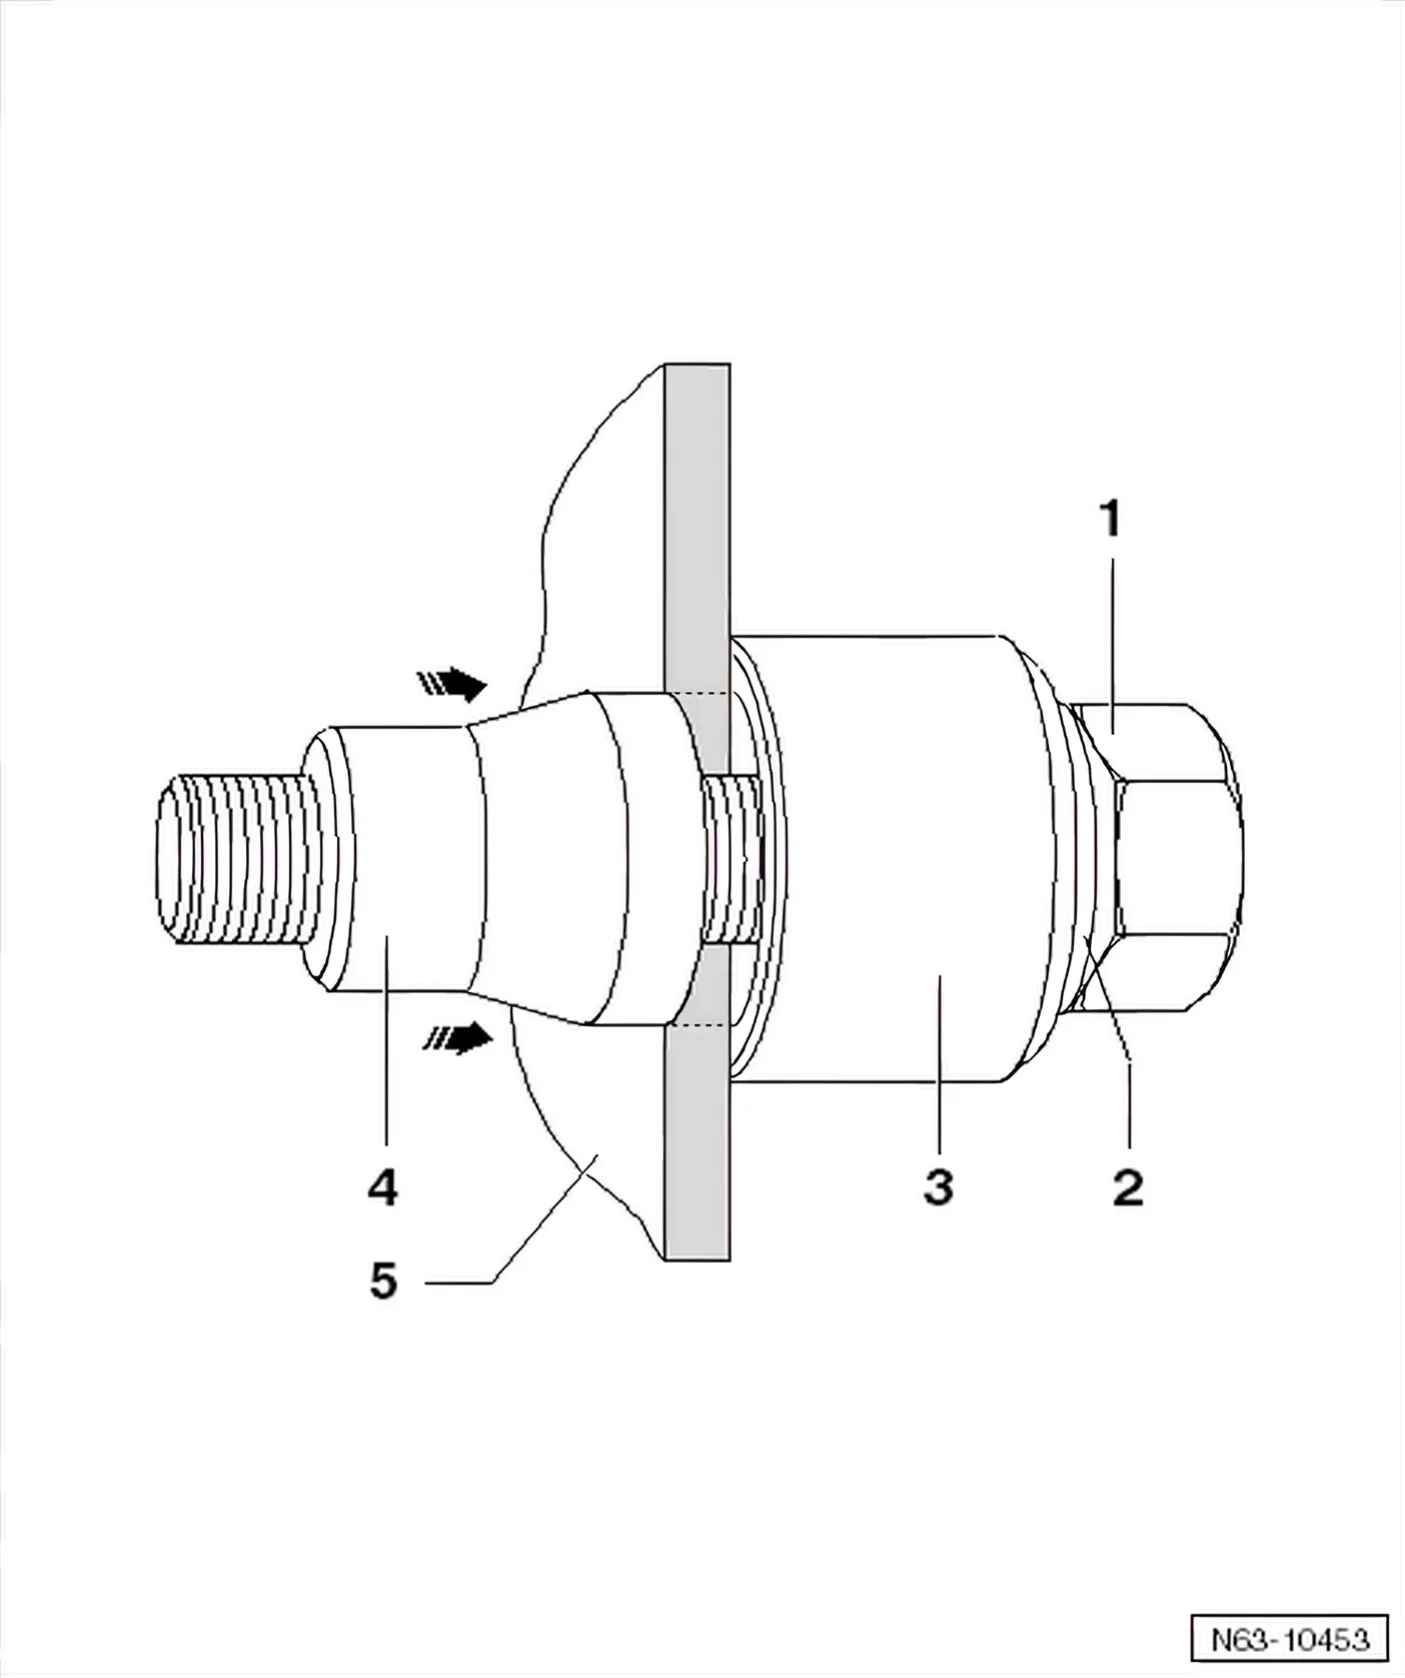
- Fit screw-hole punch - VAS 6614/1- with bolt head -1-, washer -2- and counter-support -3- from inside of bumper cover -5-.
- Screw on punch -4-, not quite as far as bumper cover.
- Press punch -4- against bumper cover.
- Tighten hole puncher -1-.
- Pull punch -4- through material of bumper cover -5- -arrowsby turning bolt head -1-.
- Remove hole punch and make next holes.
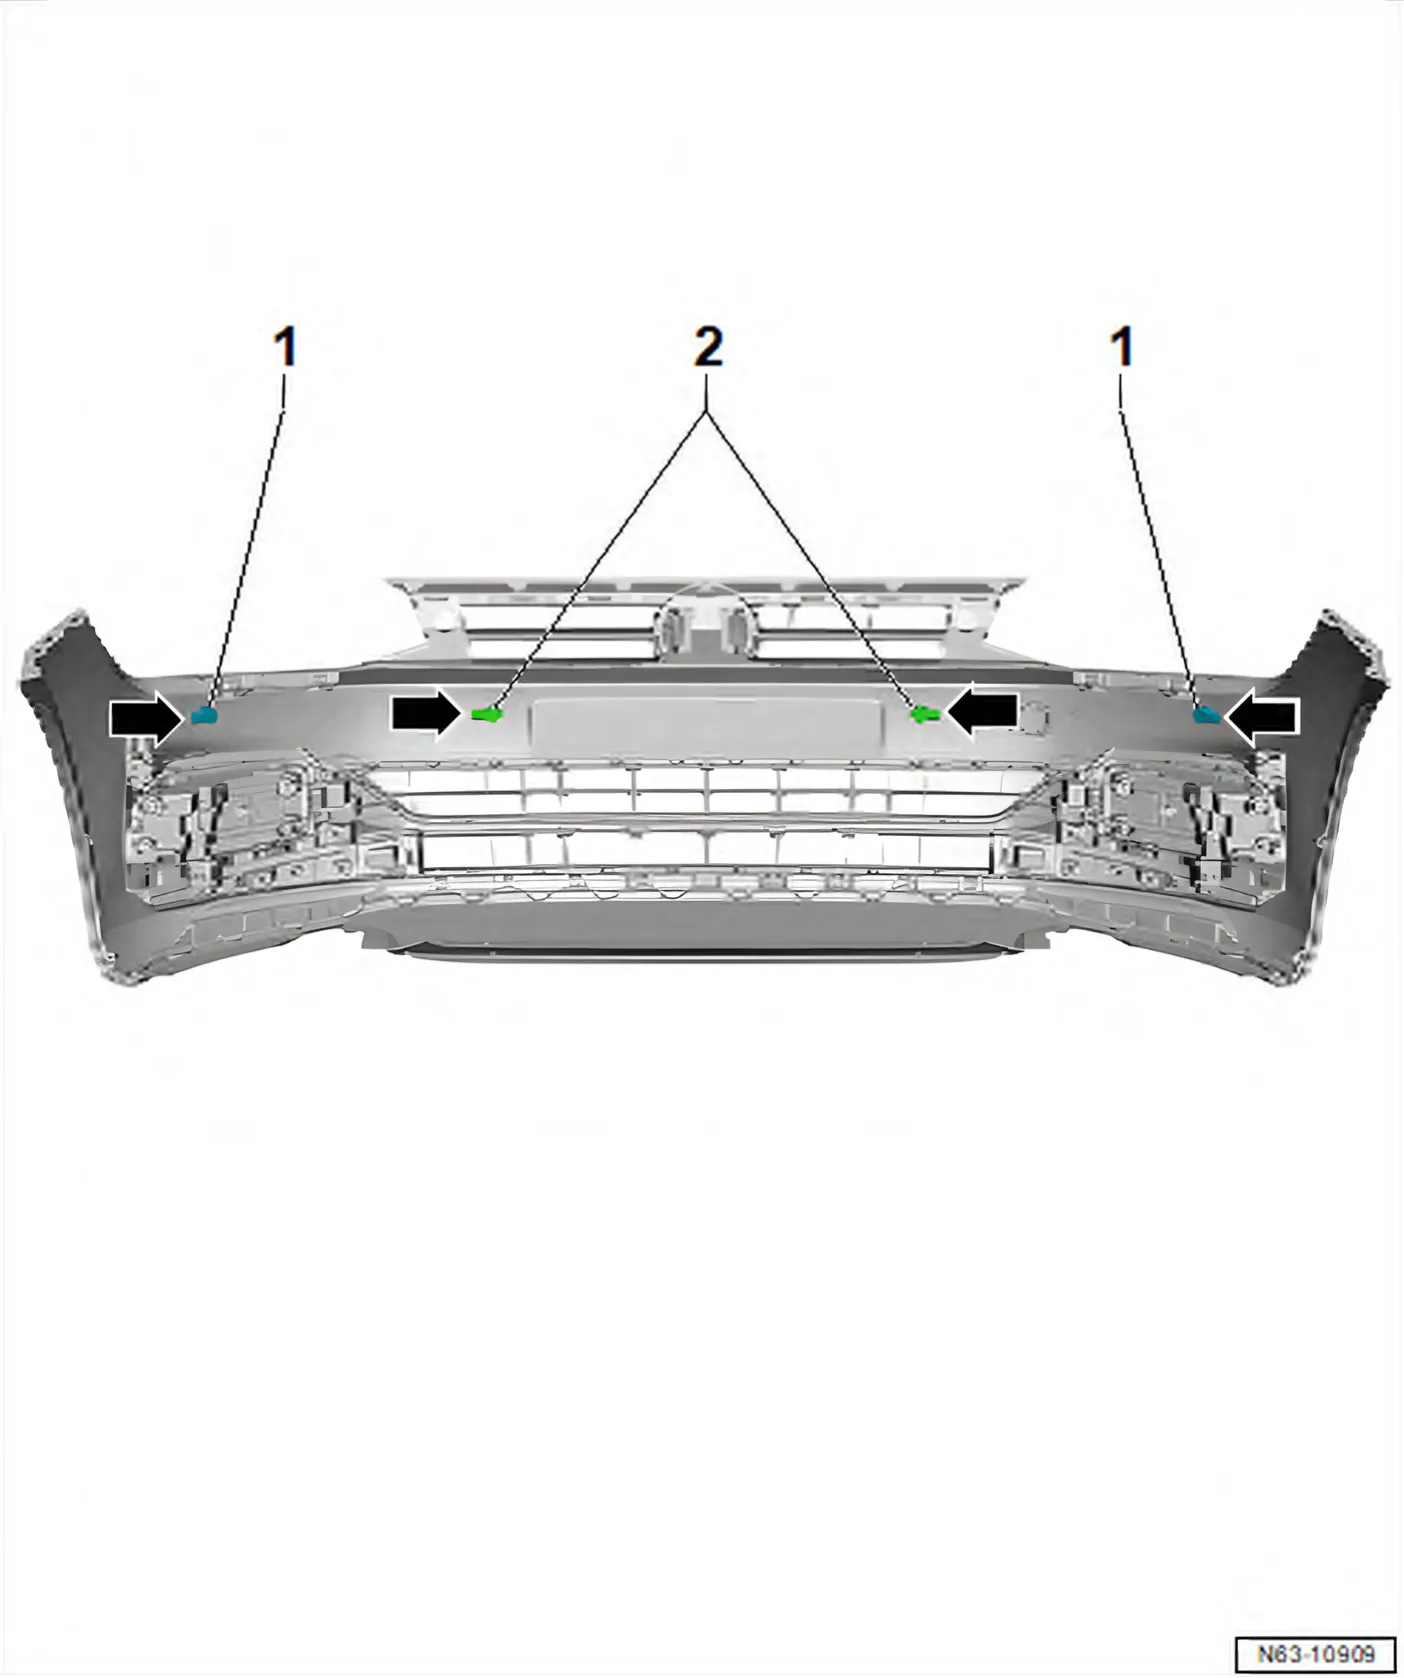
- Note alignment of brackets after aligning sensors -arrows-.
- Connections of outer sensors -1- point towards outside -arrows-.
- Connections of inner sensors -2- point towards outside -arrows-.
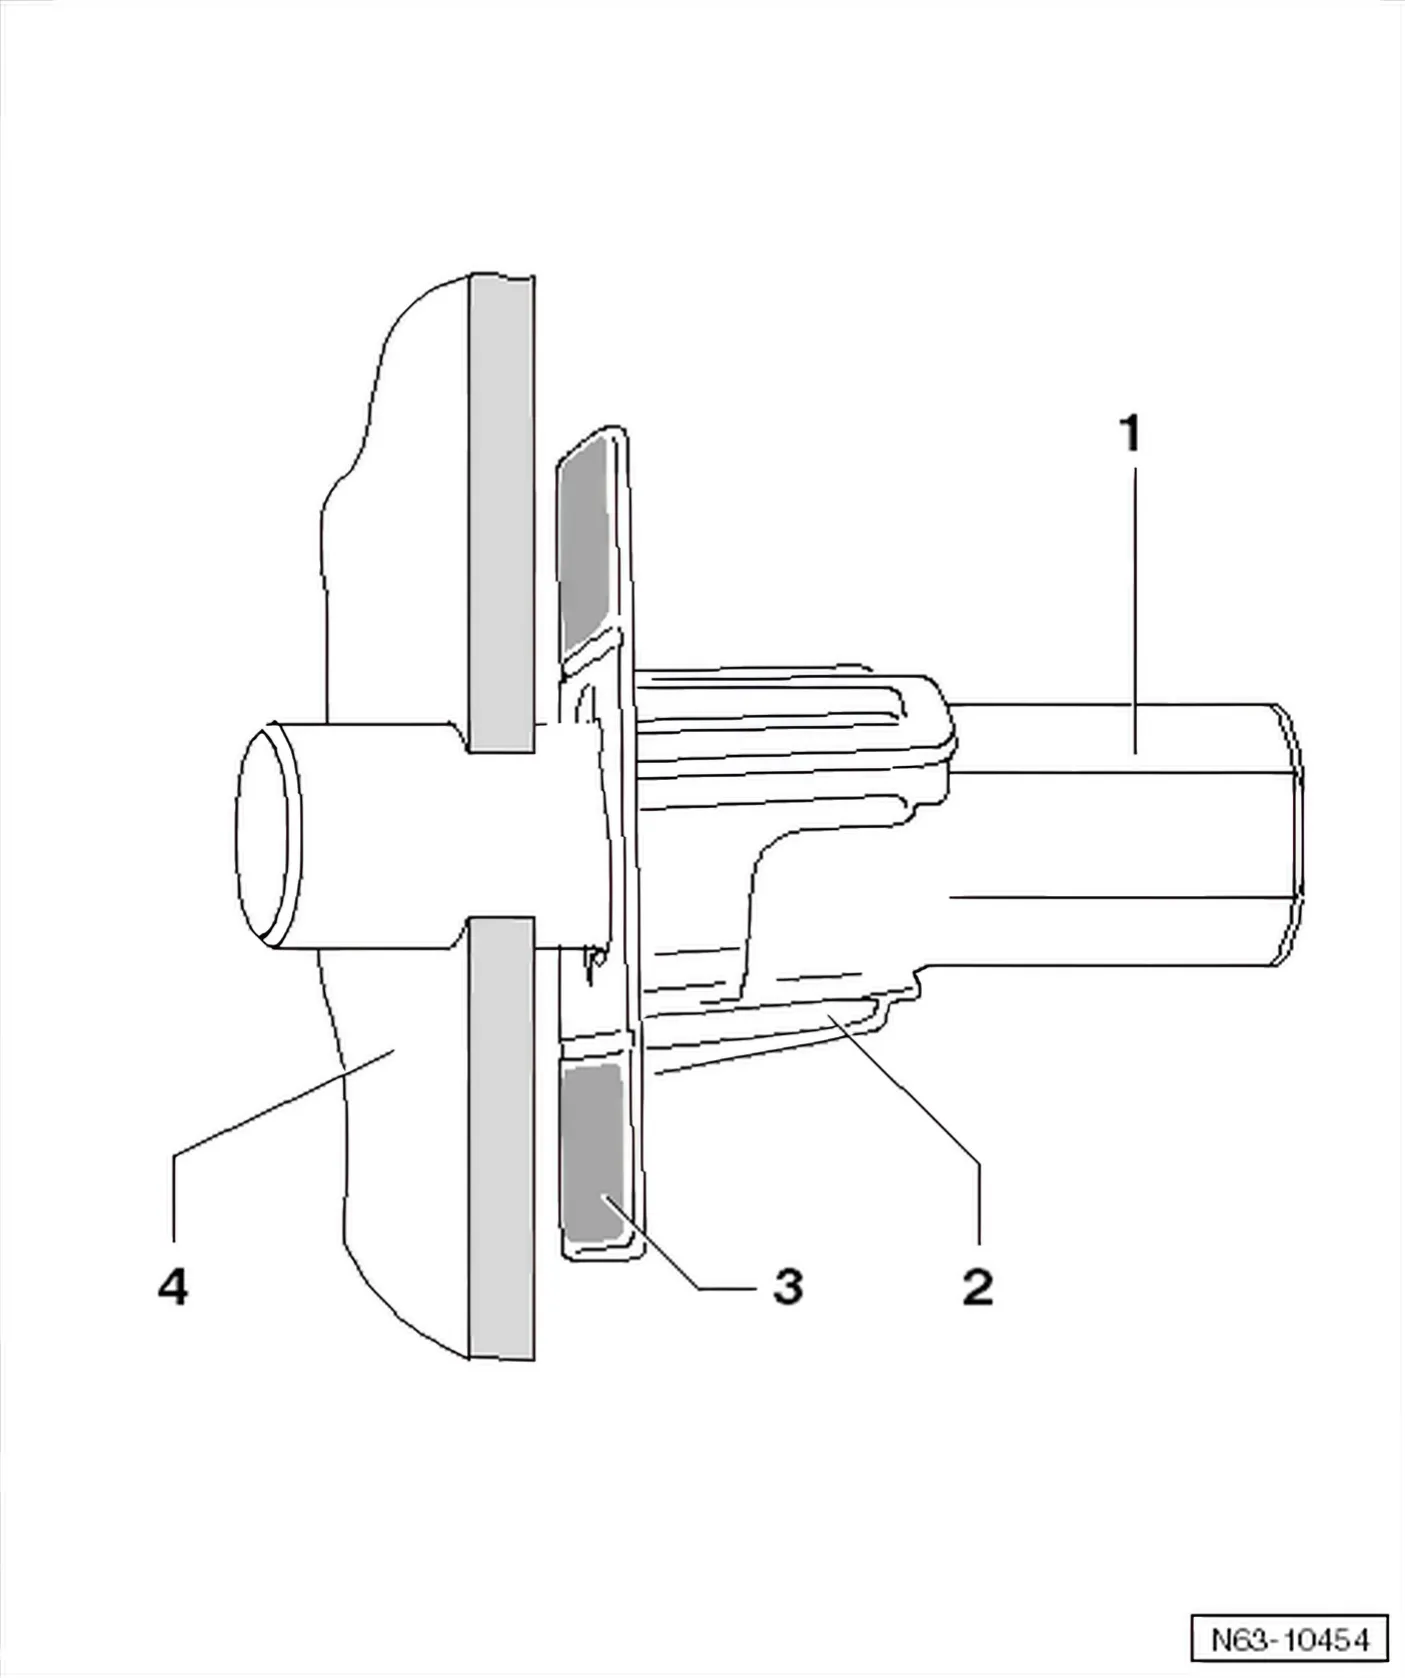
- Thoroughly clean bonding surfaces on bumper cover -4-.
- Push bracket -2- onto centring pin - 6614/3- -1-.
- Pull off backing from double-sided adhesive tape -3- on retainer.
- Insert centring pin -1- into hole until the bracket is touching the bumper cover -4-.
- Press bracket forcefully against bonding surface -3-.
- Removing centring pin and repeat the procedure for all brackets.
- Further work can carried out on bumper cover only after minimum curing period ⇒ 1.7 Installing brackets for parking aid system.
Minimum curing period
Do not carry out any further work on the bumper cover or brackets until the minimum curing period of 2 hours has expired.
The minimum curing period must be observed so that the adhesive tape can develop its full adhesive strength.
In this time, the bumper cover must remain where it is. Do not move it.