
1.4 TSI engine (EA111) · Turbocharging/supercharging · Compressor
Removing and installing supercharger
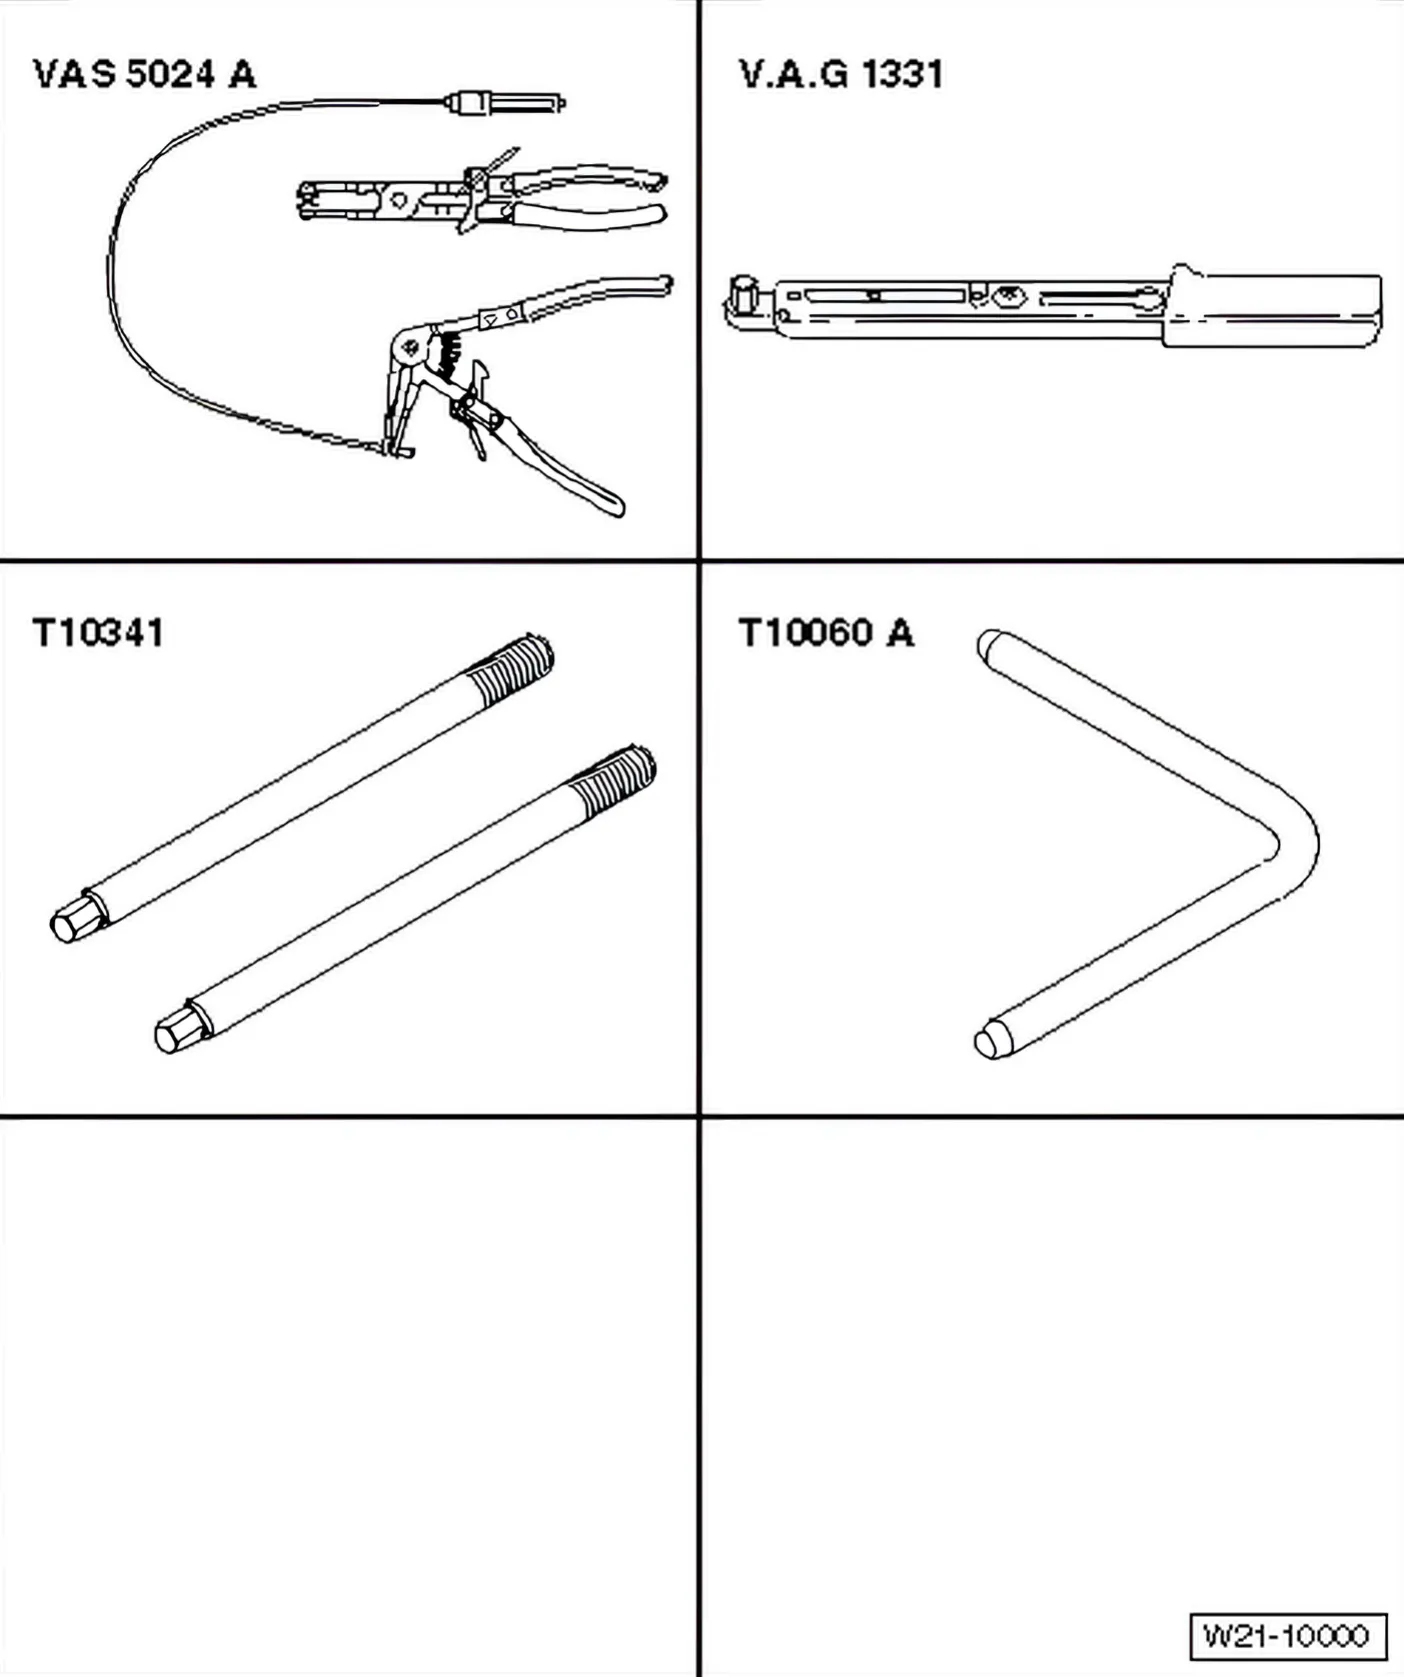
Special tools and workshop equipment required
- Pliers for spring-type clips - VAS 5024A-
- Torque wrench (5 to 50 Nm) - V.A.G 1331-
- Guide pin - T10341-
- Locking pin - T10060 A-
Removing
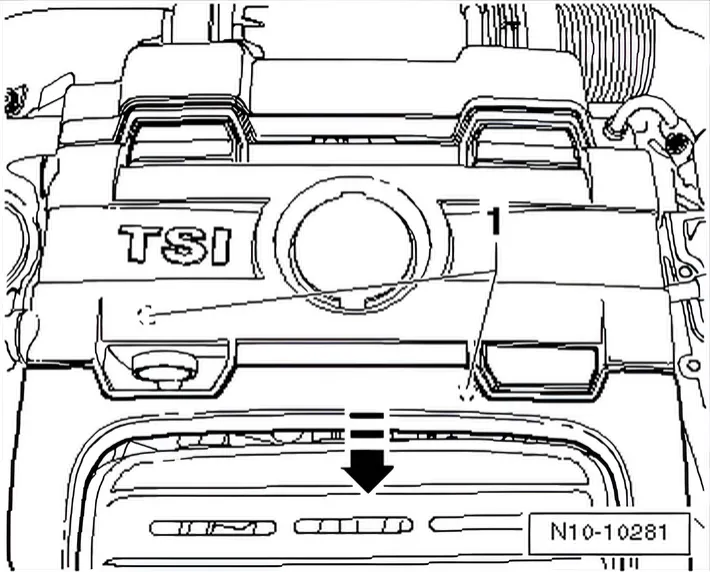
- Lift engine cover panel at points -1- and pull it forwards in direction of -arrow-.
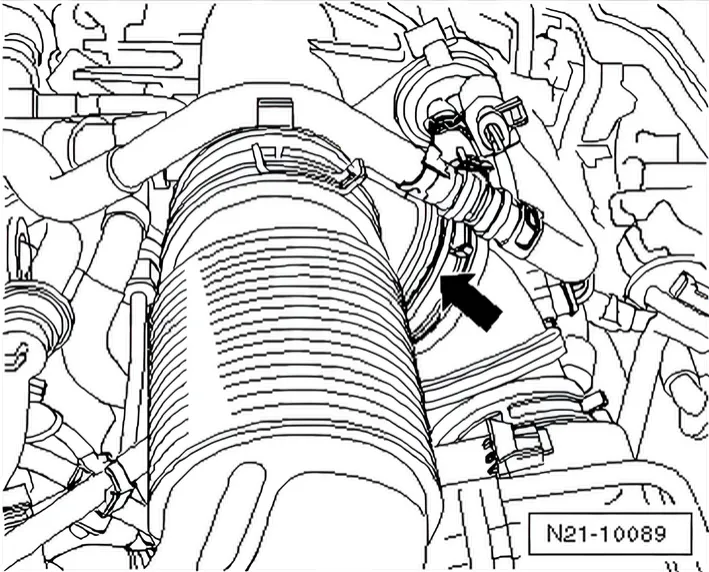
- Detach spring-type clip from intake hose -arrow-.
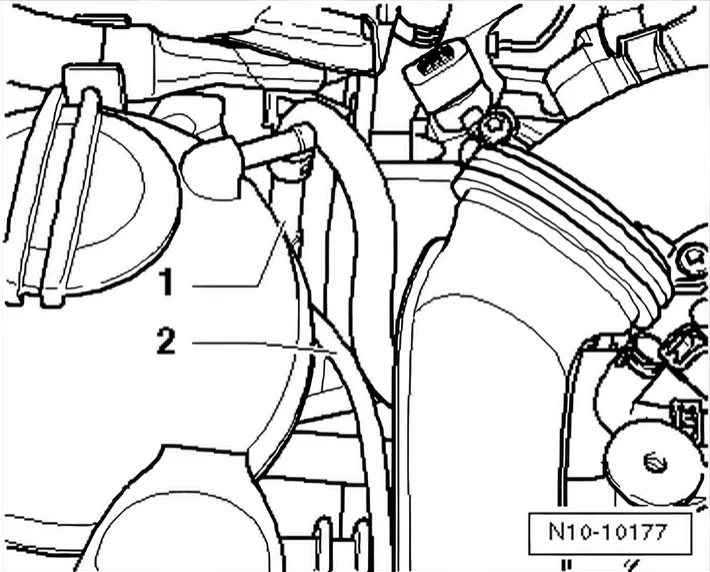
- Separate fuel supply line -1- and line to activated charcoal filter -2-. Press release tabs to do this.
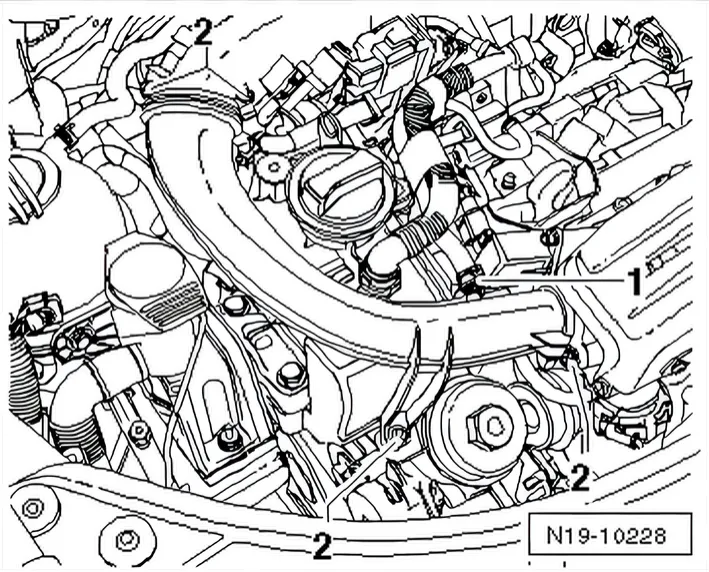
- Pull off hose -1- from pressure pipe.
- Unscrew securing bolts -2- from pressure pipe and remove pressure pipe.
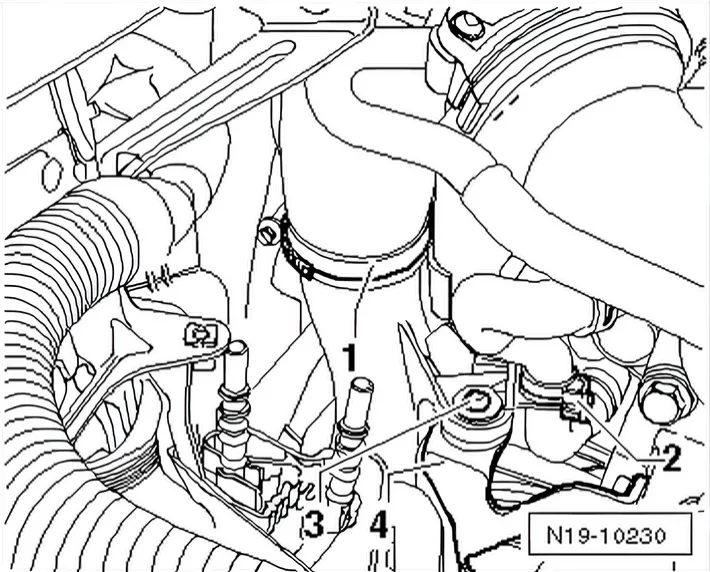
- Unscrew hose clip -1- on charge air pipe.
- Open hose clip -2- and pull out hose.
- Unscrew securing bolt for charge air pipe -3-.
- Remove bracket -4-.
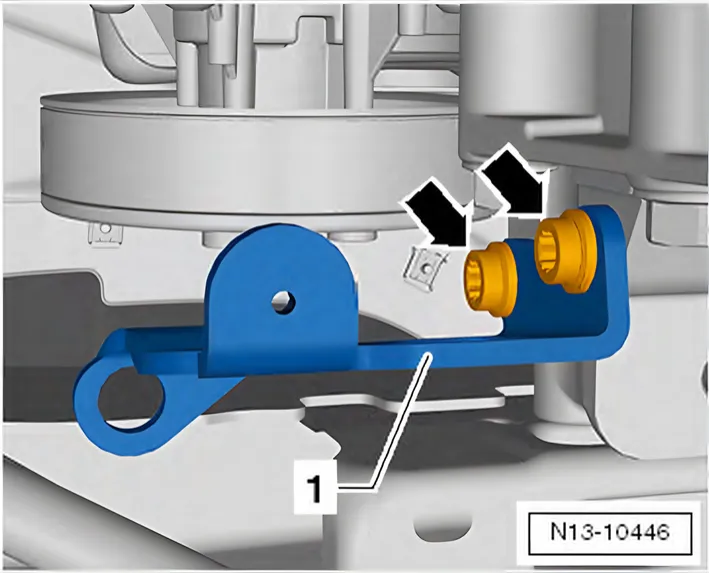
- To do so, remove bolts -arrows-.
- Remove bracket -1-.
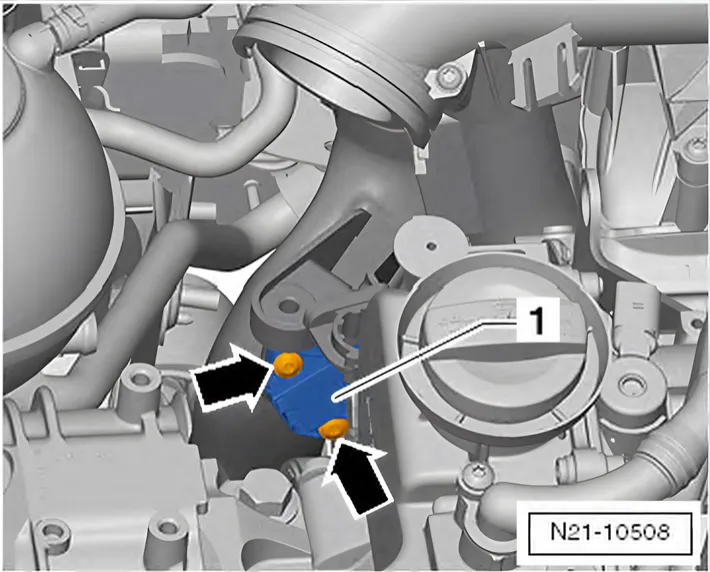
- Unscrew bolts -arrows- and remove charge pressure sender - G31- -1-.
- Remove front right wheel housing liner ⇒ General body repairs; Rep. gr. 66; Wheel housing liner; Removing and installing front wheel housing liner.
Remove poly V-belt (Golf Plus, Eos, Scirocco, Golf, Golf Cabriolet, Touran, Polo, Sharan, Passat, Passat CC) ⇒ 1.3 Removing and installing poly V-belt (Golf Plus, Eos, Scirocco, Golf, Touran, Polo, Sharan, Passat, Passat CC, Golf Cabriolet)
- Remove right drive shaft ⇒ Running gear, axles, steering; Rep. gr. 40; Repairing drive shafts; Removing and installing drive shafts.
Passat, Passat CC
- Remove front exhaust pipe.
Golf Plus, Eos, Scirocco, Golf, Golf Cabriolet, Touran, Polo, Sharan
- Remove Lambda probe after catalytic converter - G130- -1-.
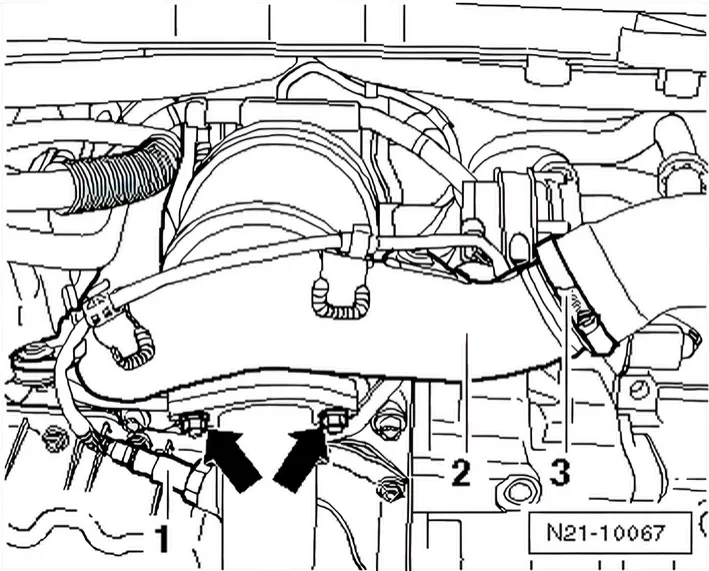
- Unbolt exhaust pipe from catalytic converter -arrows-.
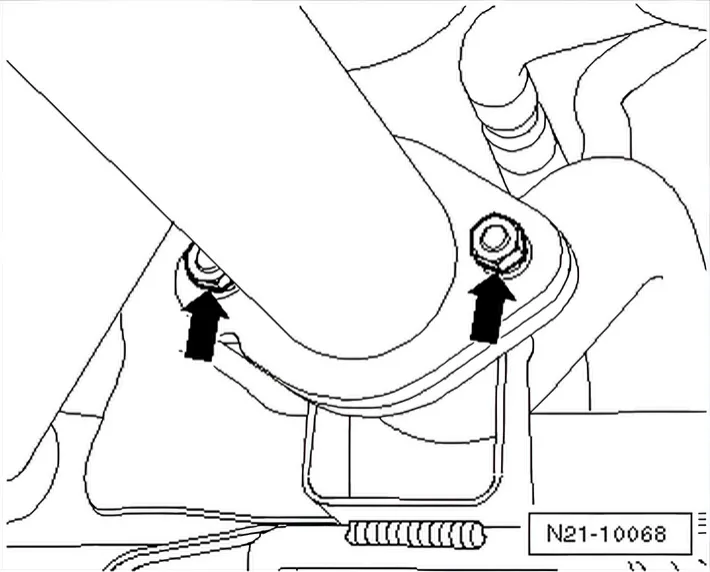
- Unbolt exhaust pipe to front silencer -arrows-.
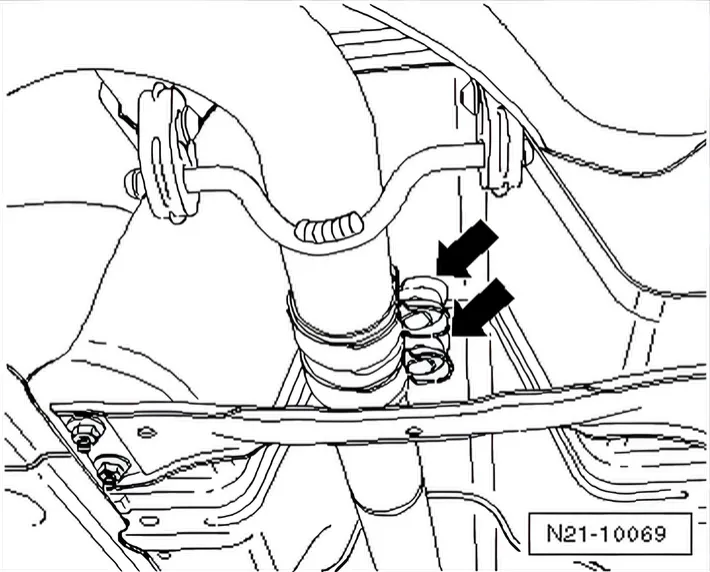
- Loosen securing bolts of clamp -arrows- and pull exhaust pipe to rear.
- Also pull out exhaust pipe together with flexible joint.
Continued for all vehicles
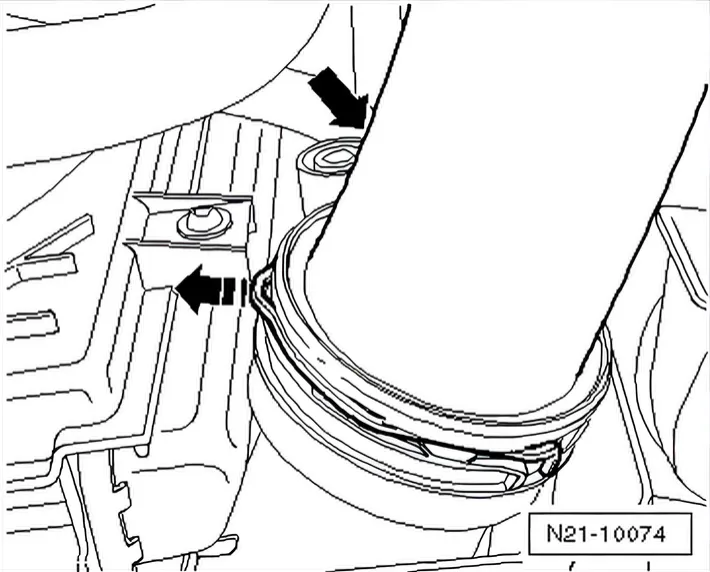
- Push securing clip at charge air cooler in direction of -arrowand pull hose -arrow- off.
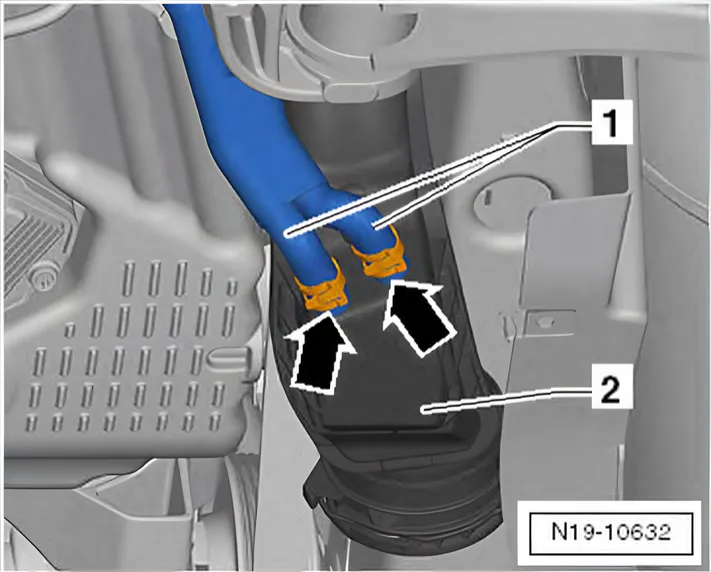
Vehicles with condensate trap on charge air pipe
- Clamp off coolant hoses -1- with hose clips up to 40 mm - 3093-.
- Open clamps -arrows-.
- Pull off coolant hoses -1- on charge air pipe -2-.
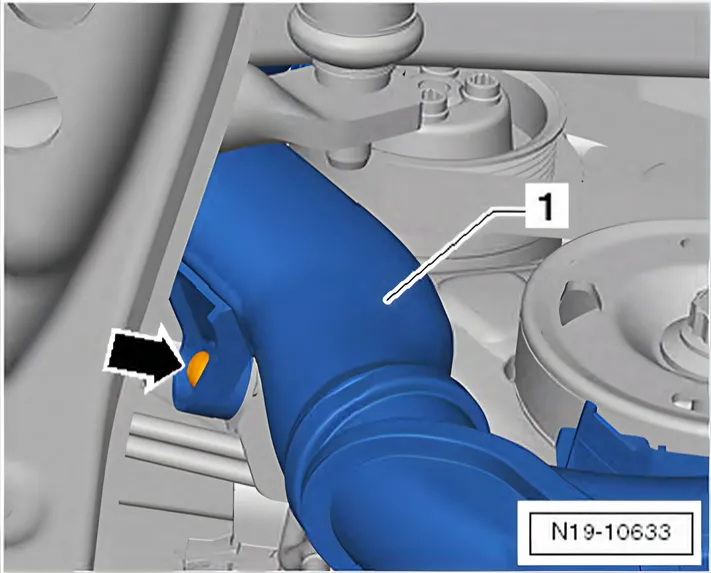
Continued for all vehicles
- Remove securing bolt -arrow- for charge air pipe -1-.
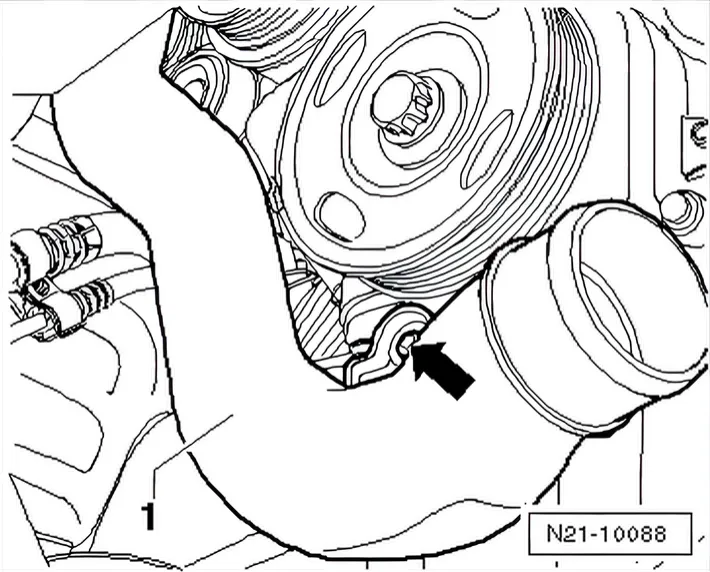
- Remove securing bolt -arrow- from charge air pipe -1-.
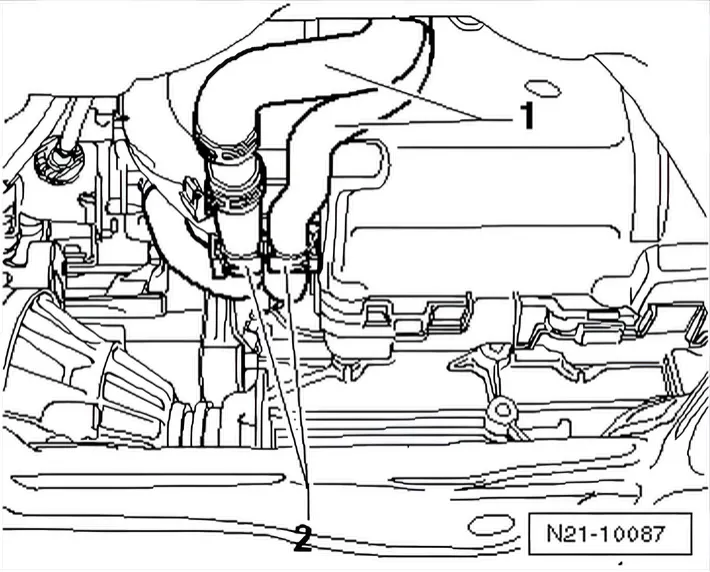
- Opens clips for hose guides -2- and push hoses to one side.
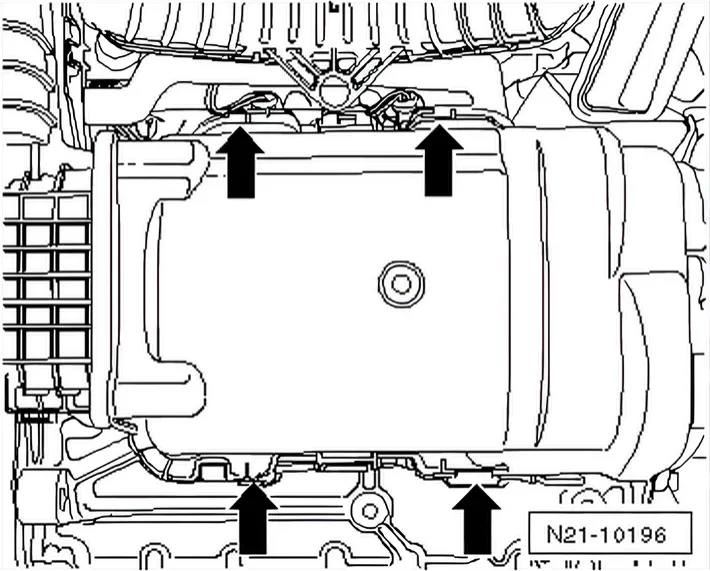
- Carefully press locking lugs on noise insulation housing -arrows- outwards.
- Pull off front housing with noise insulation.
- Remove charge air pipe downwards.
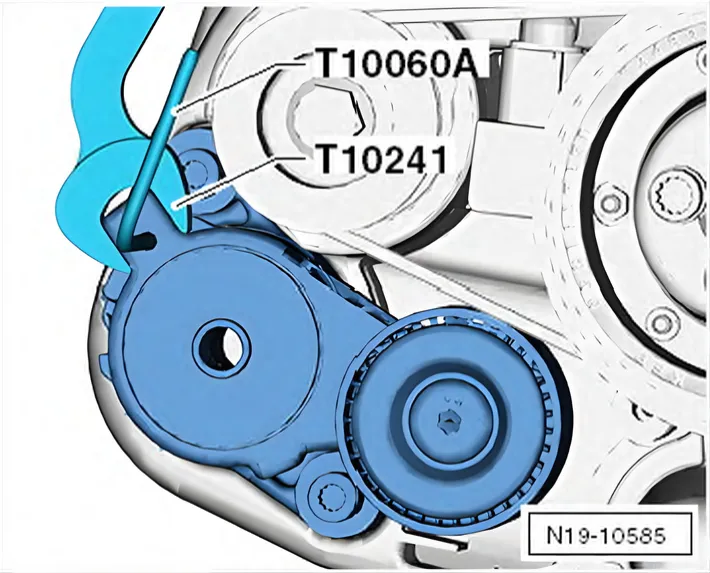
- Release tension from supercharger poly V-belt by swinging tensioning element using open-end spanner, 16 mm - T10241-.
- Lock tensioning element using locking pin - T10060 A-.
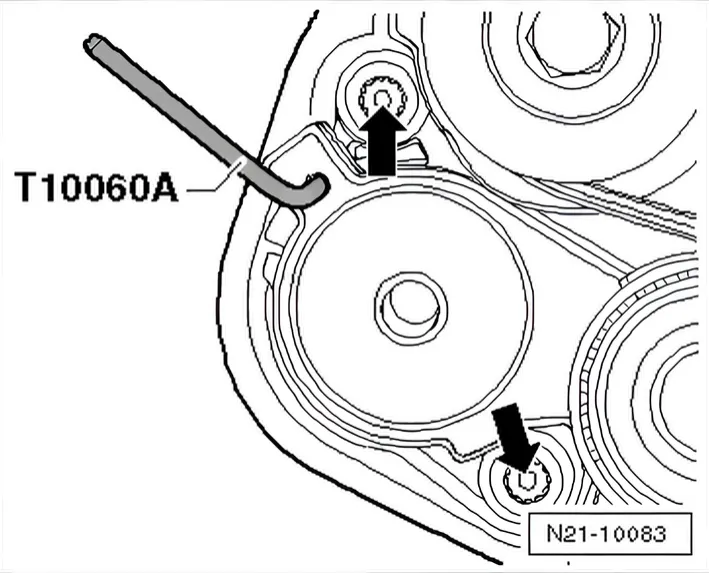
- Unscrew securing bolts -arrows- for tensioning element and remove tensioning element.
- Hold supercharger shaft with 16 mm spanner -1-.
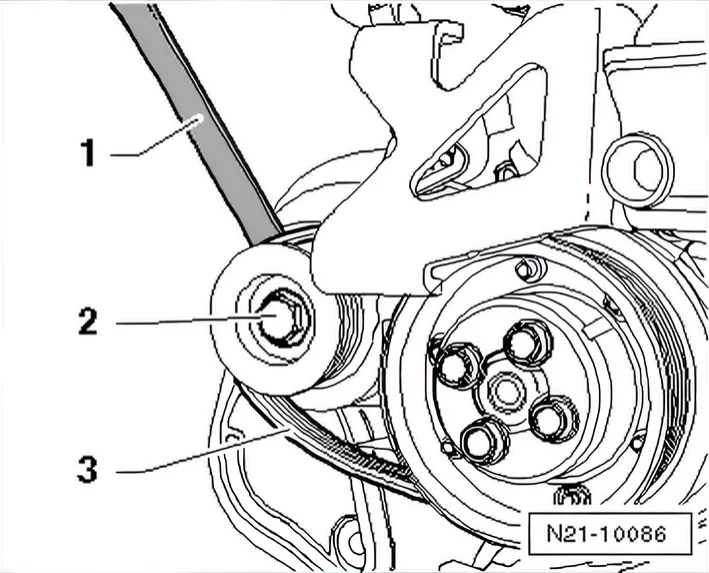
- Remove securing bolt -2- for pulley and remove pulley and supercharger poly V-belt -3-.
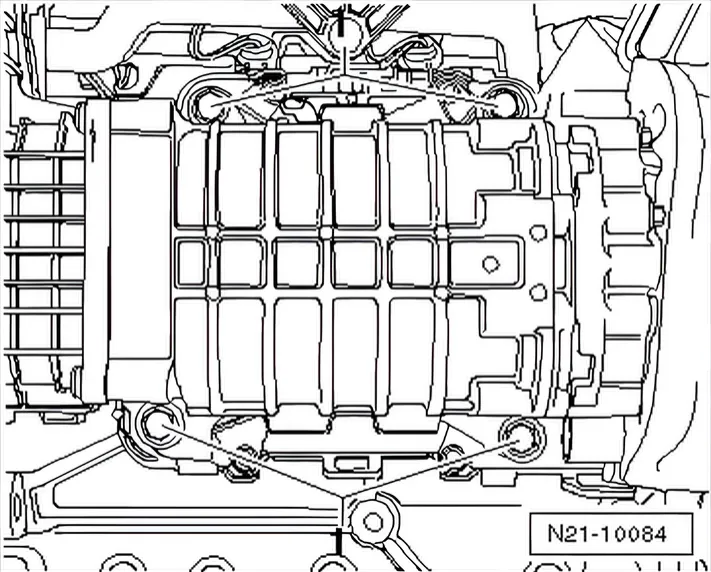
- Unscrew securing bolts -1- for supercharger and remove supercharger together with intake noise insulation.
Removing noise insulation for charge air:
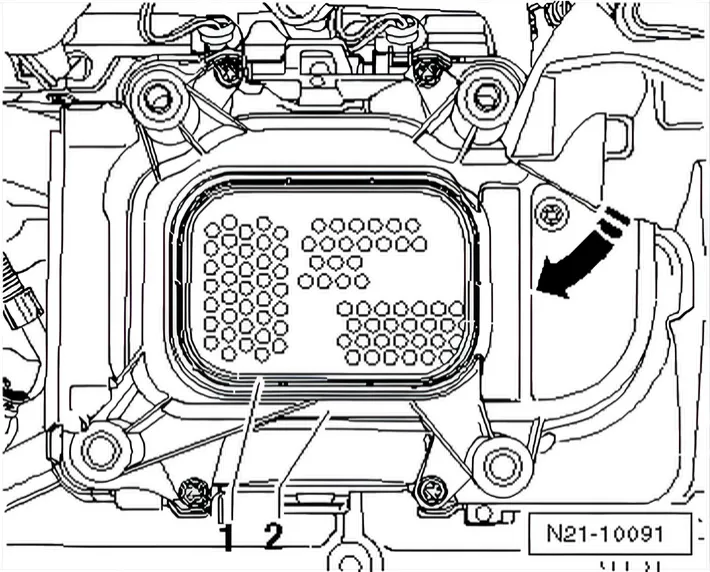
- Pull noise insulation for charge air -2- together with pressure pipe in direction of -arrow-.
Installing
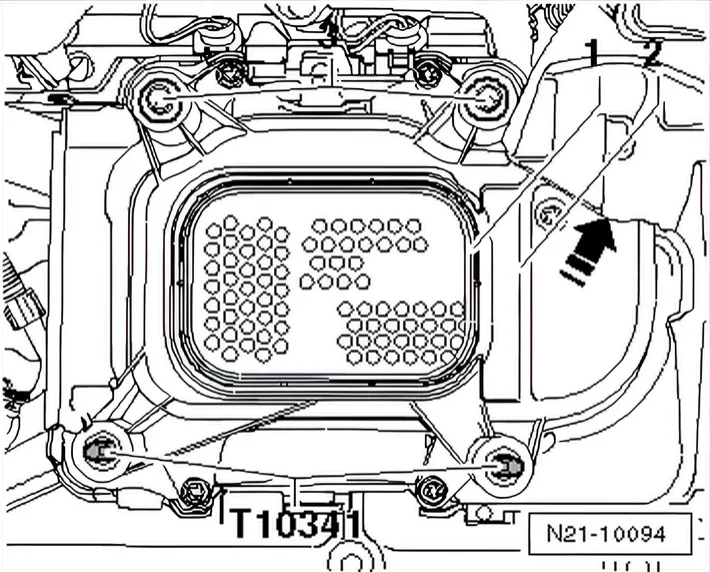
- Push noise insulation for charge air -2- together with pressure pipe in direction of -arrow- into intake connecting pipe.
- Press intake silencer for charge air -2- against crankcase to allow both dowel sleeves -3- to sit in holes.
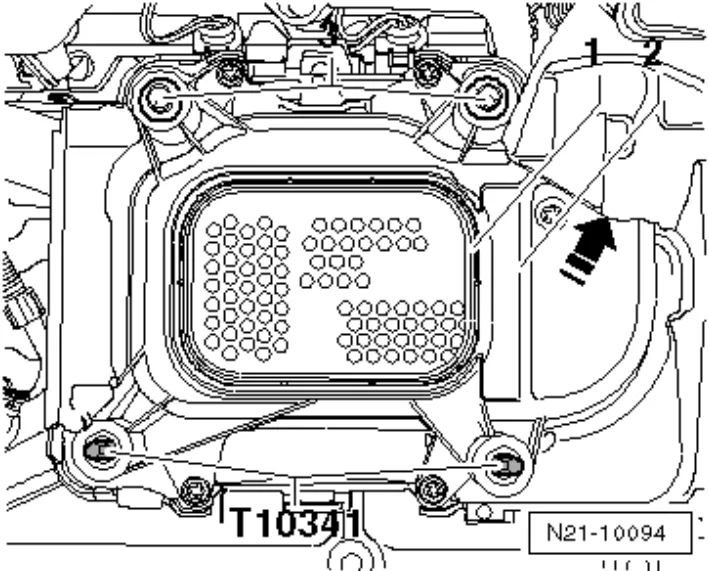
- Turn guide pins - T10341- hand-tight to stop in both lower threaded holes.
- Renew oil seal -1- and ensure it is correctly seated in the groove.
- Push supercharger together with intake silencer onto guide pins - T10341- and tighten upper securing bolts hand-tight.
- Remove guide pins - T10341-.
- Tighten lower securing bolts hand-tight.
- Tighten securing bolts -1- evenly in diagonal sequence.
Specified torque: 25 Nm
- Install supercharger belt pulley with poly V-belt positioned -3-.
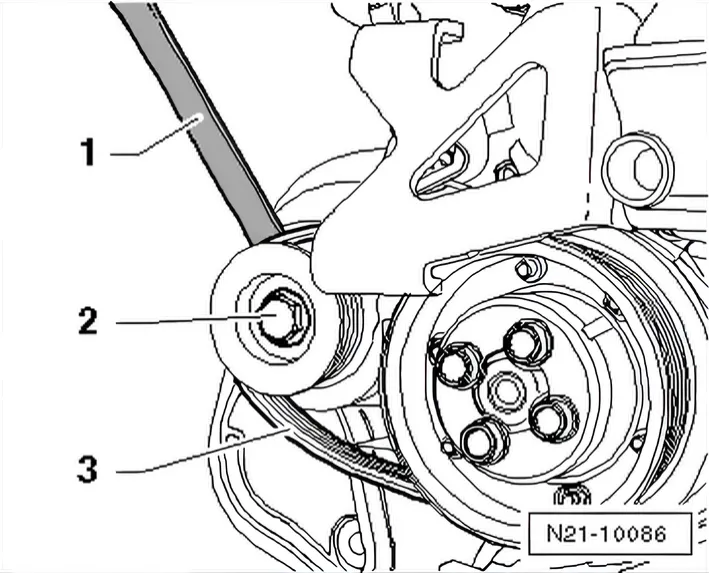
Specified torque for new securing bolt -2-: 40 Nm + 1/4 turn (90°) further.
- Hold supercharger shaft with 16 mm spanner -1-.
- Install tensioner.
- Tighten bolts -arrows- to 23 Nm.
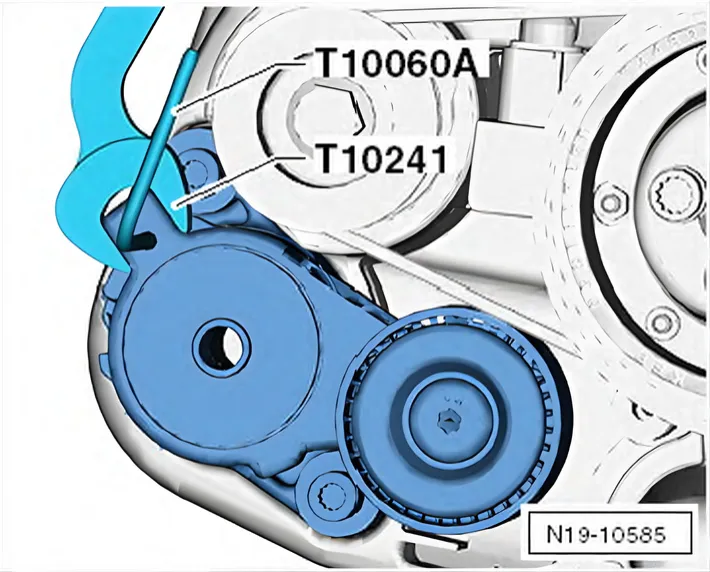
- Hold tensioning element using 16 mm open-end spanner - T10241- and pull out locking pin - T10060 A-.
- Position housing with noise insulation onto supercharger.
- Press housing together with noise insulation against supercharger until locking lugs -arrows- click into place.
Perform further installation in reverse order, paying attention to the following:
- Renew seals, gaskets and self-locking nuts.
- Hose connections and hoses for charge air system must be free of oil and grease before assembly.
- Secure all hose connections with hose clips which conform to production standard.
- Install exhaust system and align it free of stress.
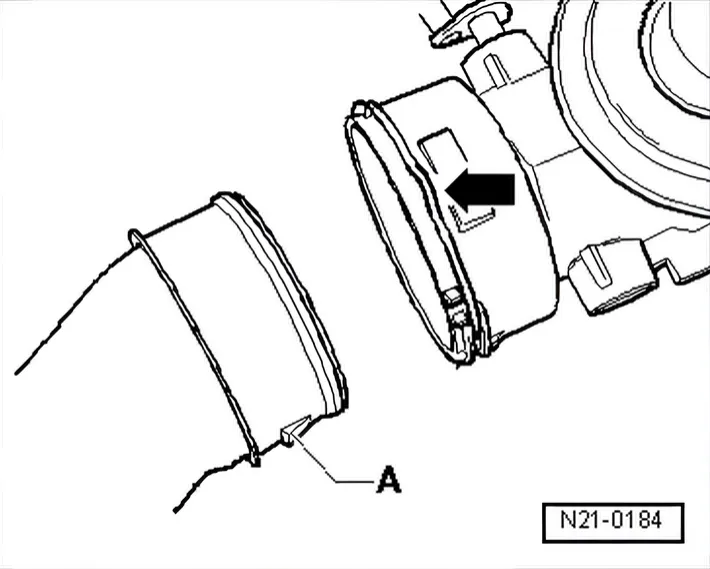
- When installing air pipes with plug-in connector, ensure that securing clip -arrow- audibly engages into retaining lug -A-.
Installing hose connections with plug-in connectors ⇒ 3.4 Fitting hose connections with plug-in connectors.
Specified torques:
Assembly overview - charge air system ⇒ 3 Charge air system
Assembly overview - catalytic converter and add-on parts ⇒ 26 – Exhaust system
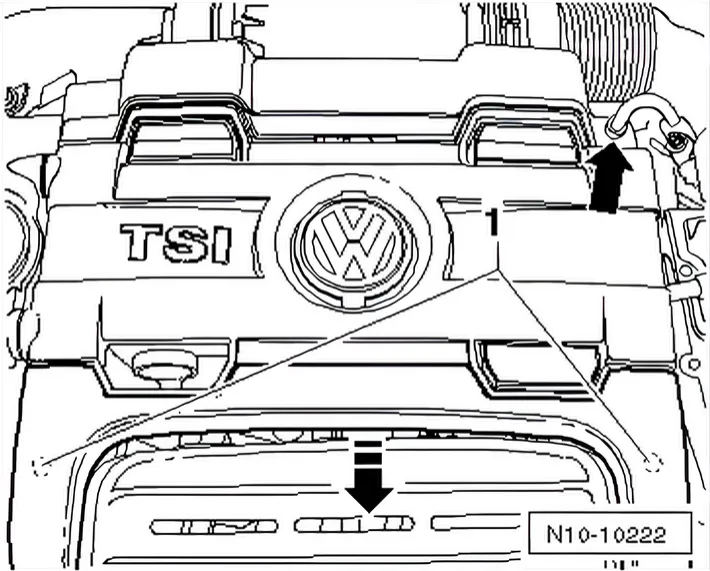
- Push engine cover panel down at points -1- in direction of -arrow- until it engages.
- Fit vacuum hose onto connection -arrow-.
Vehicles with condensate trap on charge air pipe
- Check coolant level and top up if necessary ⇒ 1.6 Draining and filling coolant (Polo).