
1.4 MPI engine (EA111) · Fuel supply system · Parts of fuel supply system
Fuel tank with attachments – assembly overview and fastening
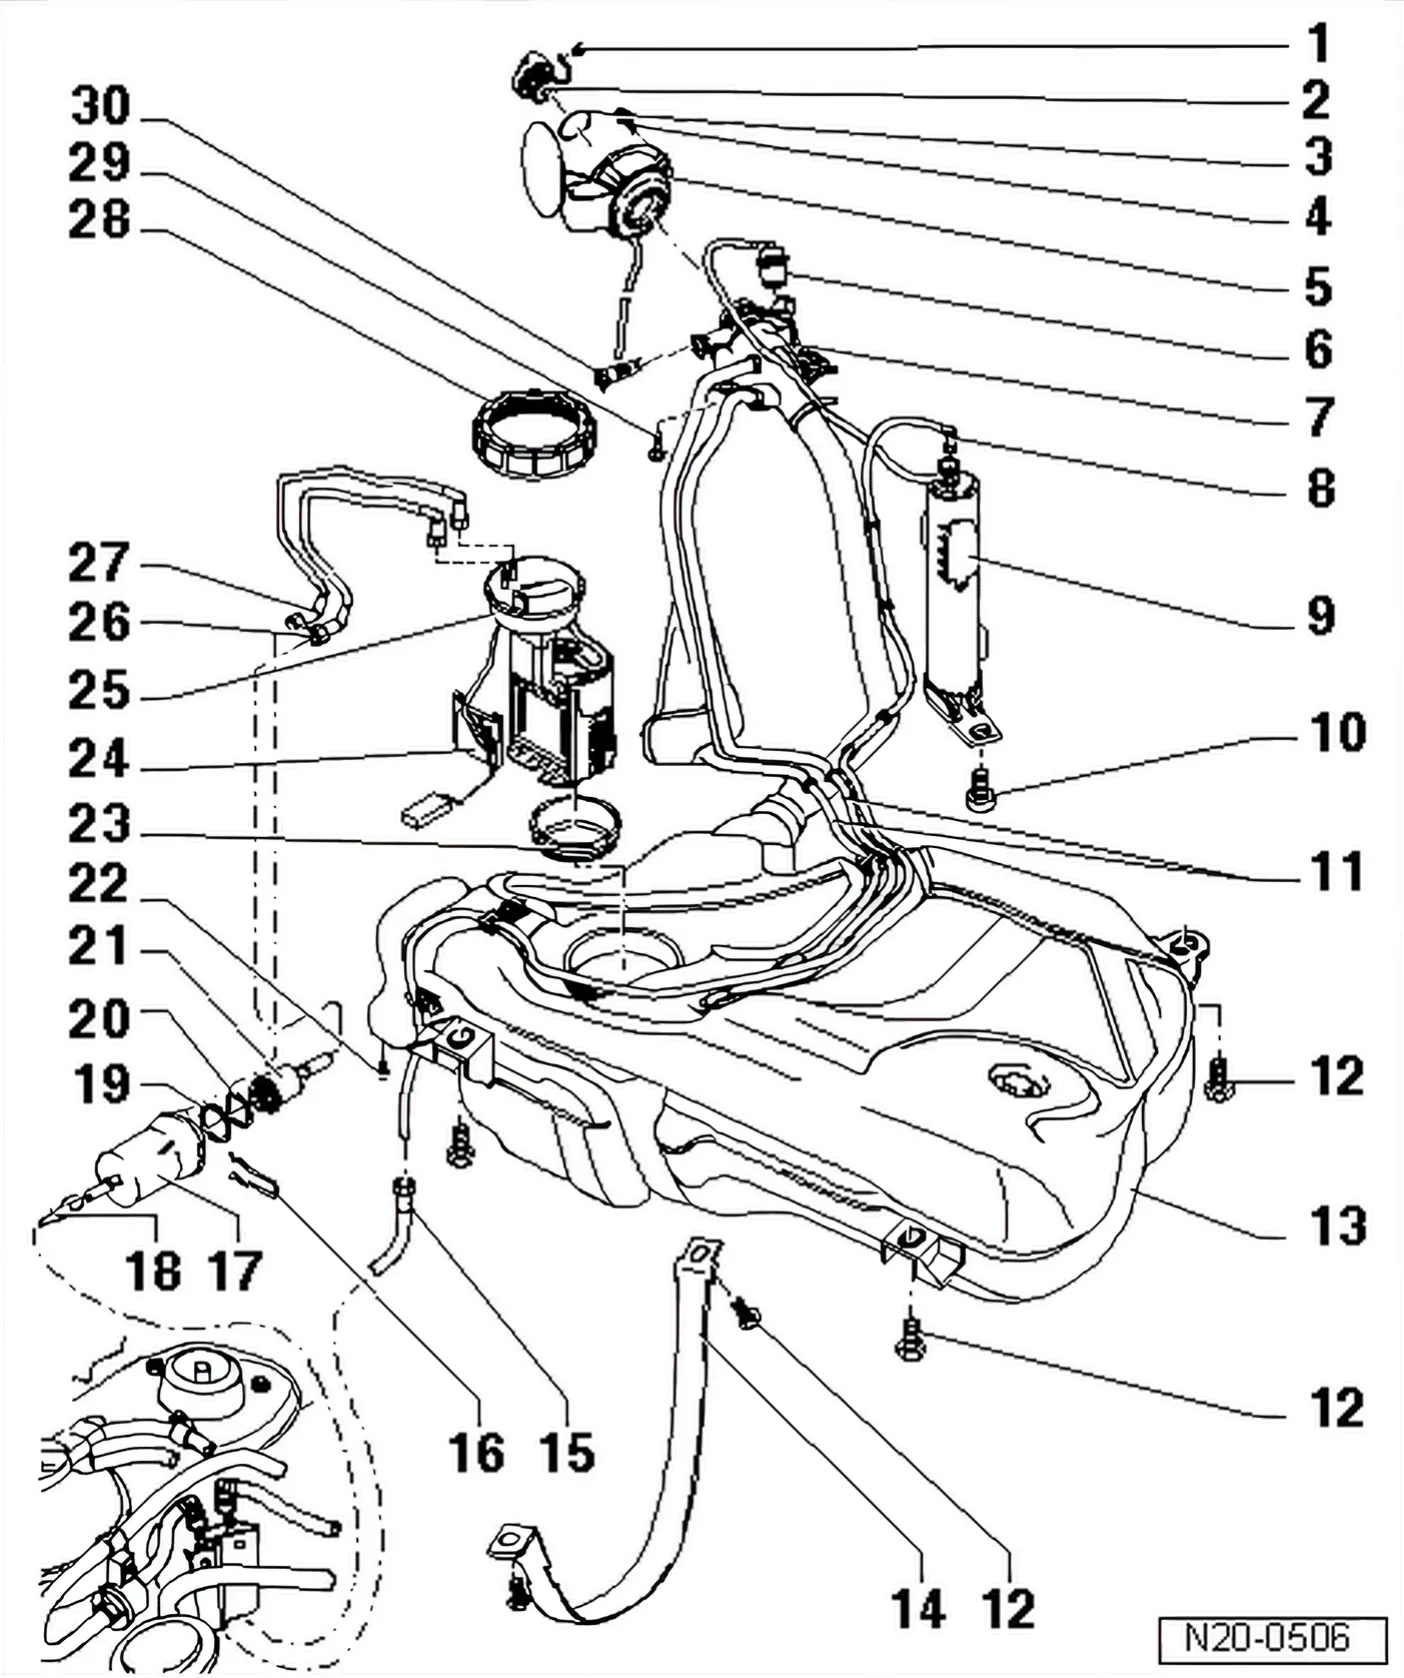
- 1 Fastener
- 2 Cap
- 3 Sealing ring
- Renew if damaged
- 4 Securing bolt
- 5 Tank flap unit
- With rubber cup.
- Removing and installing ⇒ General body repairs, exterior; Rep. gr. 55; Tank flap unit; Removing and installing fuel tank flap unit.
- 6 Gravity valve
- To remove valve unclip upwards out of support.
Check valve for through-flow.
- Valve vertical: open.
- Valve tilted 45°: closed.
- 7 Earth connection
- Ensure firm seating.
- 8 Breather hose
- Ensure firm seating.
- 9 Activated charcoal filter
- Location: in rear right wheel housing.
- 10 10 Nm
- 11 Breather hose
- Clipped onto fuel tank.
- Ensure firm seating.
- 12 25 Nm
- 13 Fuel tank
- When removing, support using engine and gearbox jack - V.A.G 1383 A-.
- Removing and installing ⇒ 1.6 Removing and installing fuel tank
- Fuel system must be bled if fuel tank is renewed ⇒ 1.10 Bleeding fuel system.
- 14 Tensioning strap
- 15 Breather hose
- Ensure firm seating.
- 16 Retaining clip
- Check for firm seating
- 17 Fuel filter
- Installation position: arrow indicates direction of flow.
- Fuel system must be bled if fuel filter is renewed ⇒ 1.10 Bleeding fuel system.
- 18 Supply pipe
- black
- Ensure firm seating.
- To fuel rail
- 19 Sealing ring
- Renew if damaged
- 20 O-ring
- Renew
- 21 Fuel pressure regulator
- 22 5 Nm
- For fuel filter clamp
- 23 Sealing ring
- Renew if damaged
- When installing, fit dry in fuel tank opening.
- Moisten with fuel only when installing flange.
- 24 Fuel gauge sender
- Removing and installing ⇒ 1.5 Removing and installing fuel gauge sender
- Adjusting ⇒ Current flow diagrams, Electrical fault finding and Fitting locations
- 25 Fuel delivery unit
- Removing and installing ⇒ 1.4 Removing and installing fuel delivery unit
- Clean strainer if soiled
- Checking fuel pump ⇒ 1.9 Checking fuel pump.
- Note installation position on fuel tank ⇒ 1.1 Assembly overview - fuel tank with attachments
- Fuel system must be bled if fuel delivery unit is renewed ⇒ 1.10 Bleeding fuel system.
- 26 Return line
- blue
- Clipped onto side of fuel tank.
- Ensure firm seating.
- 27 Supply pipe
- black
- Clipped onto side of fuel tank.
- Ensure firm seating.
- 28 Union nut, 80 Nm
- Remove and install using union nut tool - 3217-.
- 29 10 Nm
- 30 Bleeder valve
- Checking ⇒ 1.1 Assembly overview - fuel tank with attachments
- To remove press locking latch lightly -arrow- and pull valve out.
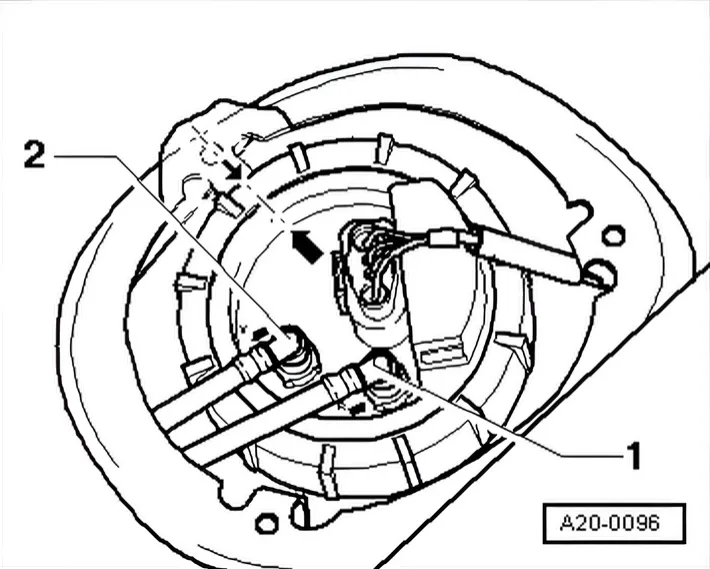
Installation position of fuel delivery unit
Marking on sender must align with the marking on fuel tank -arrows-.
Return line -1- (blue or with blue marking) to connection marked
- R-.
Black supply line -2- to connection marked -V-.
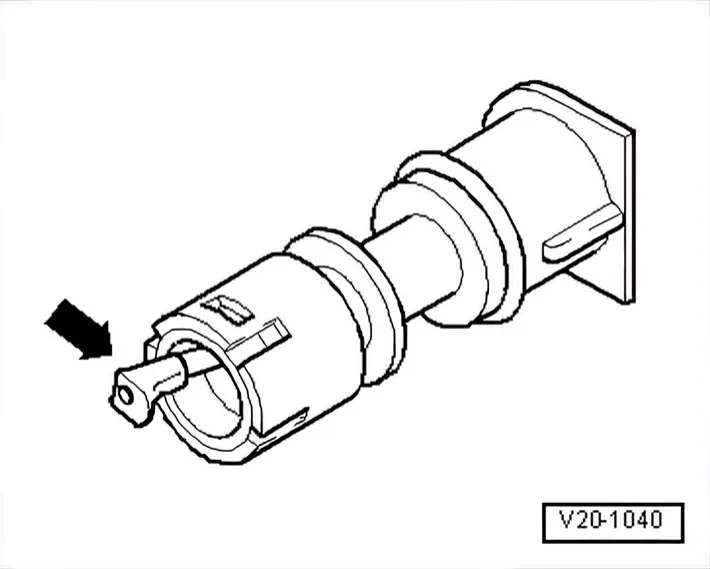
Checking breather valve
Lever in rest position: closed
Lever pushed in direction of arrow: open