
Running gear, axles, steering · Wheels, tyres, vehicle geometry · Wheels, tyres
Removing tyre from wheel
6R 2009–2014
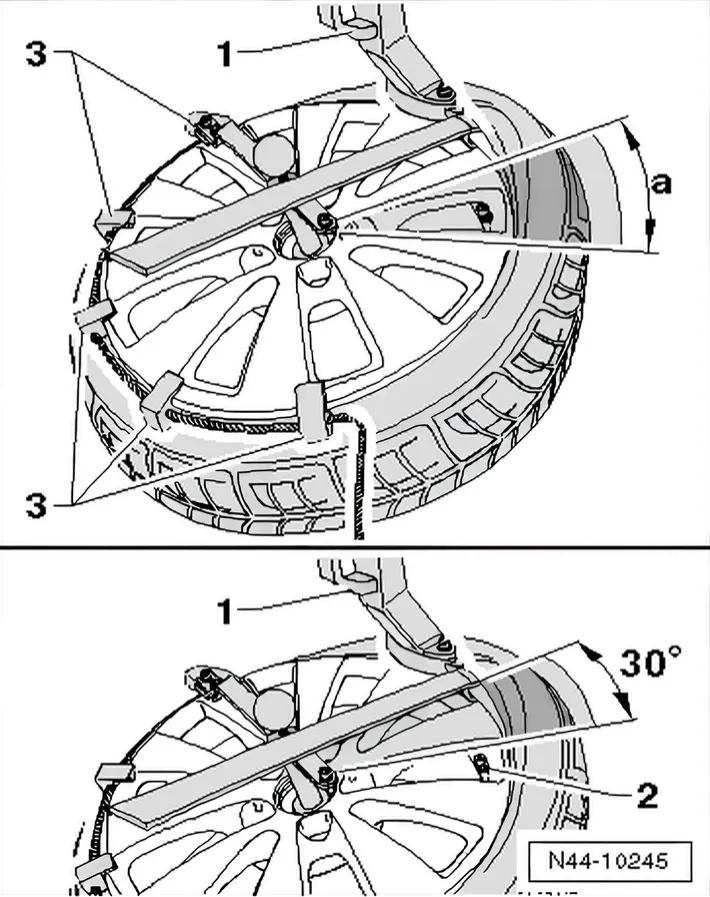
- Turn wheel on tyre fitting unit so that the tyre valve -2- is directly in front of the assembly head -1-.
- Position the assembly head -1- in the vicinity of the tyre valve so that an assembly lever can be inserted approx. 30° next to the tyre valve -2-.
- Seat depressor -3- on wheel rim opposite assembly head -1-.
- Now lever tyre bead over assembly finger on assembly head using assembly lever then remove assembly lever.
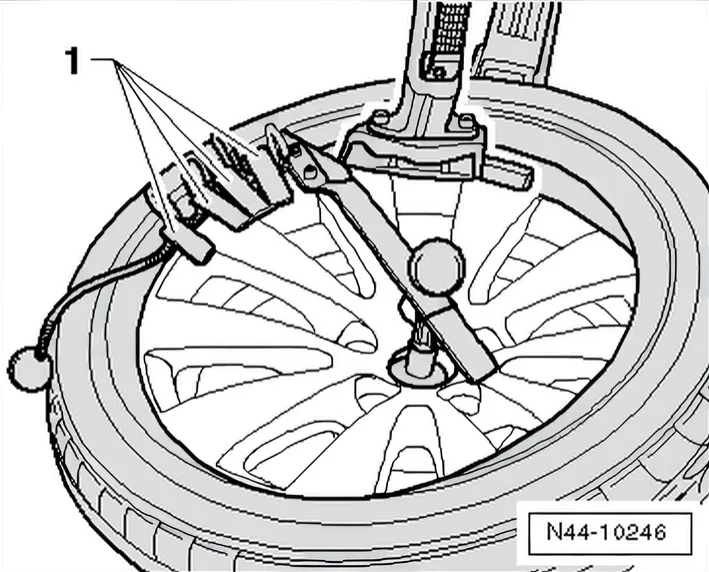
- Run tyre fitting unit clockwise until upper bead lies completely above wheel rim flange.
This action will push the depressor -1- up against the assembly head. This allows it to be removed easily.
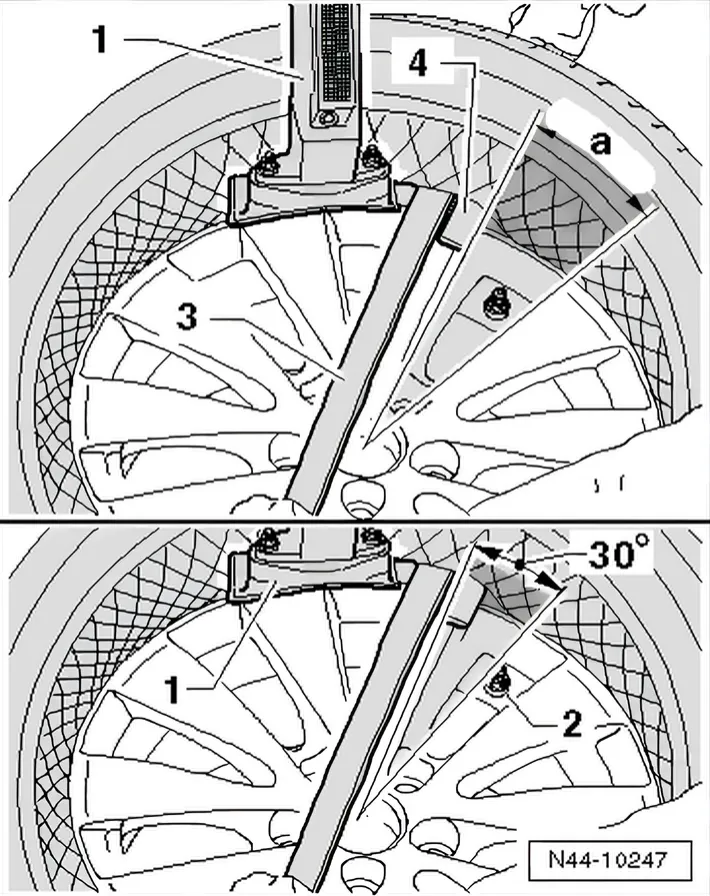
- Turn wheel on tyre fitting unit so that the tyre valve -2- is directly in front of the assembly head -1-.
- Position the assembly head -1- in the vicinity of the tyre valve so that an assembly lever can be inserted approx. 30° next to the tyre valve -2-.
- Now lever tyre bead over assembly finger on assembly head using assembly lever -3-.
- Additionally insert a plastic assembly lever -4-.
- Remove assembly lever -3-.
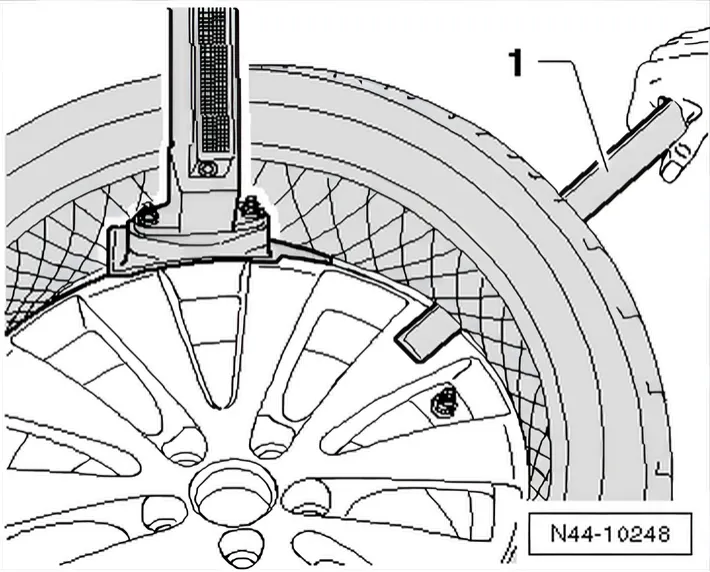
- From outside, hold bead over wheel rim flange using plastic assembly lever -1-. Run tyre fitting unit clockwise until tyre is completely removed from wheel rim flange.
Tyres which have been filled or sealed using tyre sealant must be drained before removal.
- Place the wheel on an even surface.
- Unscrew and remove the valve insert of tyre valve.
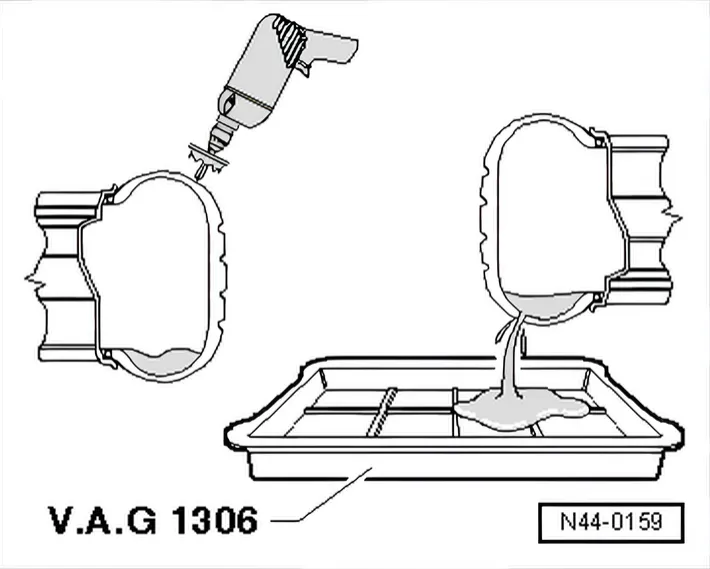
- Use a suitable drill or mill to carefully drill a hole in shoulder area of tyre.
- Hold wheel over a suitable container and drain sealant.
- Pull tyre from rim.
- Clean wheel rim with, for example, a moist cloth.