
1.4 TSI engine (EA111) · Mixture preparation – injection · Senders and sensors
Checking fuel pressure sender
Special tools and workshop equipment required
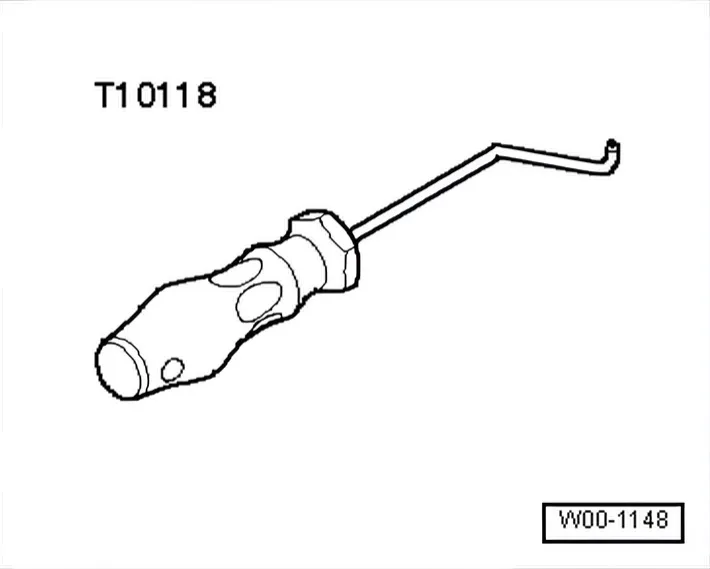
- Assembly tool - T10118-
- Double hex socket 1/2”, 27 mm - VAS 5301/7-
- Digital pressure gauge - VAS 6394/1-
- Test adapter - VAS 5570-
Prior to opening the high-pressure area, e.g. when removing the high-pressure pump, fuel rail, injectors, a fuel line, or the fuel pressure sender - G247-, the fuel pressure in the highpressure area must be reduced to a residual pressure of approx. 6 bar. The appropriate procedure is described in the chapter on releasing pressure in the high-pressure section ⇒ 2.3 Releasing pressure in high-pressure area.
Procedure
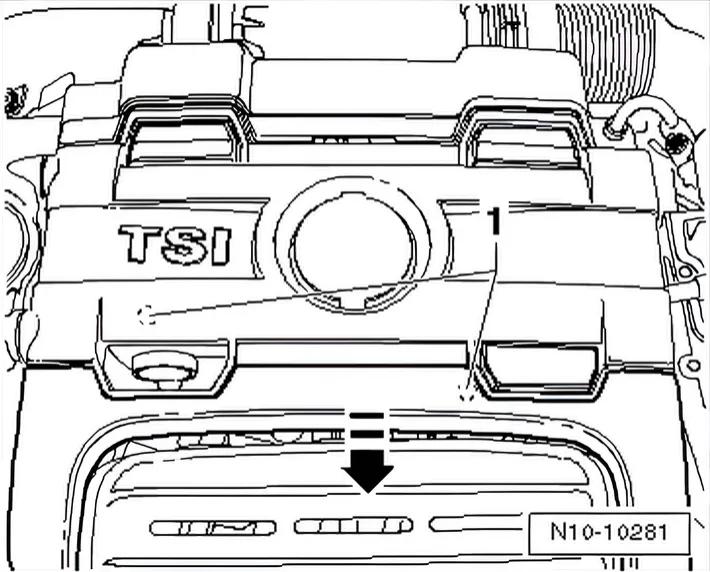
- Lift engine cover panel at points -1- and pull it forwards in direction of -arrow-.
- Remove air filter ⇒ 1.3 Removing and installing air filter housing.
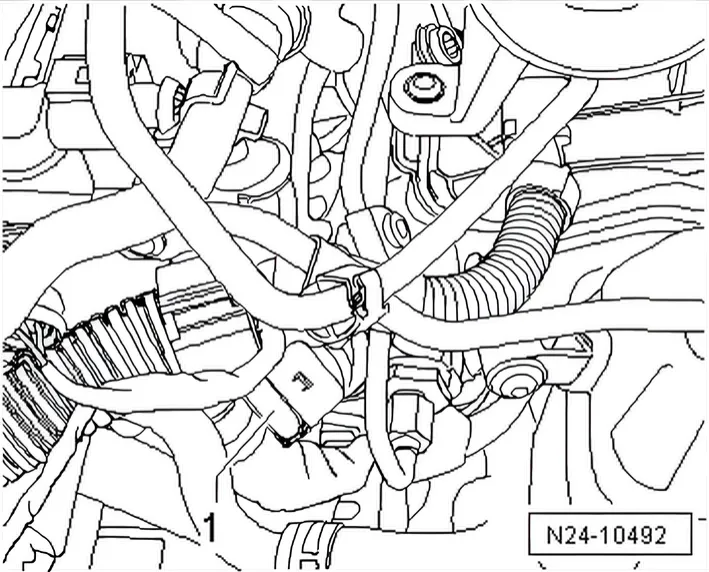
- Remove fuel pressure sender - G247- -1-.
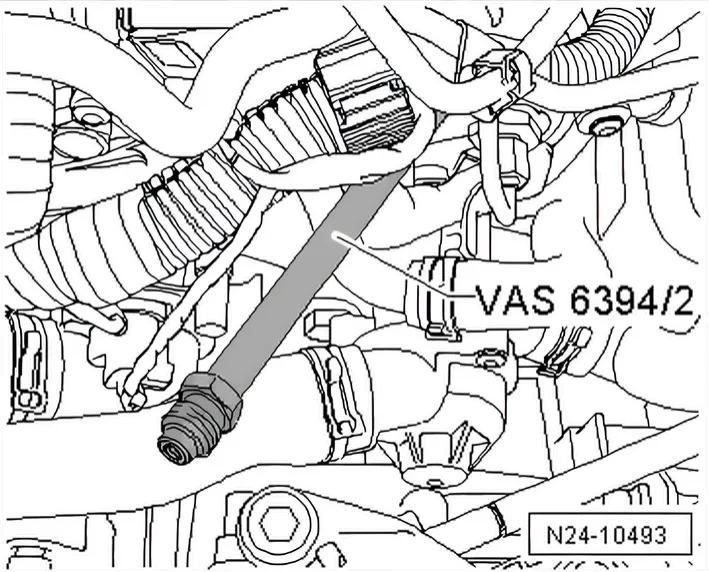
- Instead of fuel pressure sender - G247-, screw in adapter - VAS 6394/2- and tighten to 22 Nm.
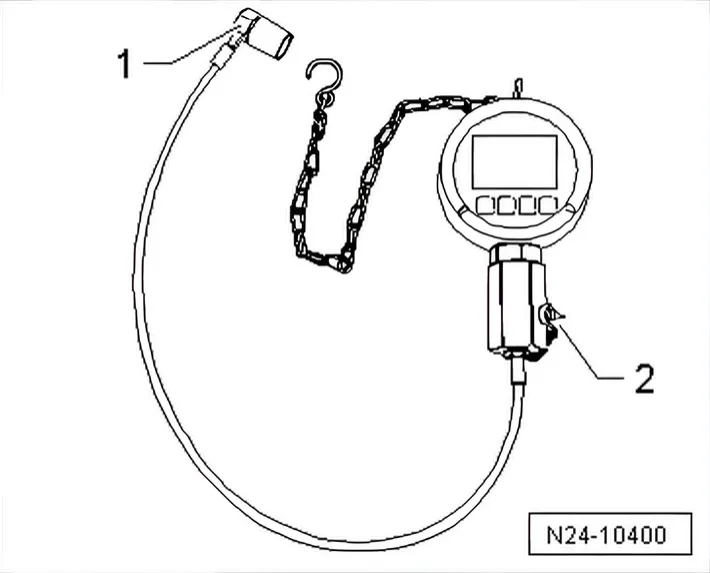
- Open cover -2- of digital pressure gauge - VAS 6394/1- and tighten fuel pressure sender - G247- to digital pressure gauge to 22 Nm.
- Screw pressure line -1- of digital pressure gauge - VAS 6394/1- hand-tight to adapter - VAS 6394/2-.
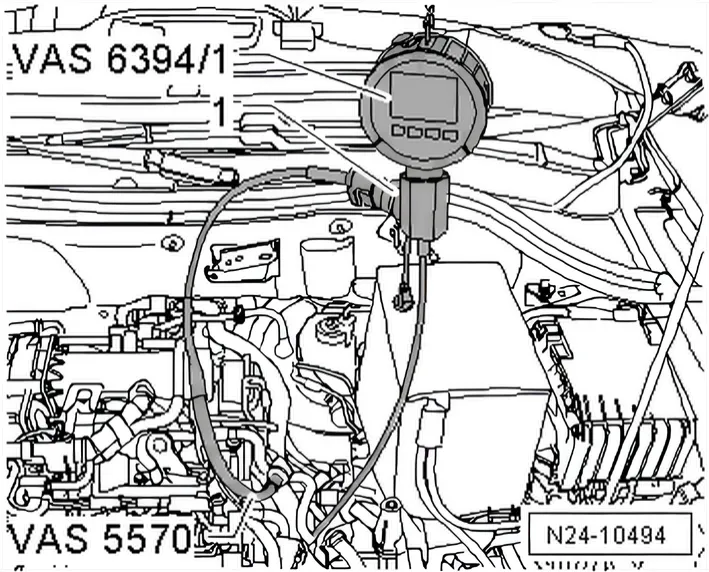
- Connect test adapter - VAS 5570- between fuel pressure sender - G247- -1- and connector.
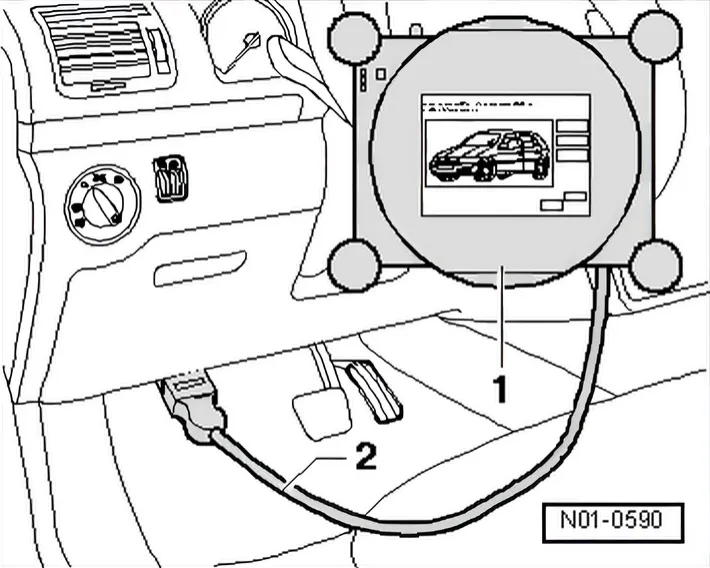
- Connect vehicle diagnosis, testing and information system - VAS 5051B- -1- as follows:
- Push diagnostic cable connector -2- onto diagnostic connection in driver footwell.
- Switch on ignition.
Engine control units KWP (Keyword Protocol)
- Press following keys on display in succession:
Vehicle self-diagnosis
Vehicle self-diagnosis
01 - Engine electronics
011 - Measured values
- Enter '248' (or '140' for engine code CKMA) and confirm with Q.
Display field 3 shows the actual value reported to the vehicle by the fuel pressure sender - G247-.
Engine control units UDS (Unified Diagnostic Service)
- Press following keys on display in succession:
Guided function
- Confirm the test version and the brand.
- Specify vehicle model.
- Select model year.
- Determine engine version.
- Specify “engine” as vehicle system to be used.
Read measured values
- Follow the programmed steps of the tester until step »Select displayable measured values«.
- Search for “IDE00589 Fuel Pressure” in plain text.
Done
Read
Continuation for all engine control unit versions:
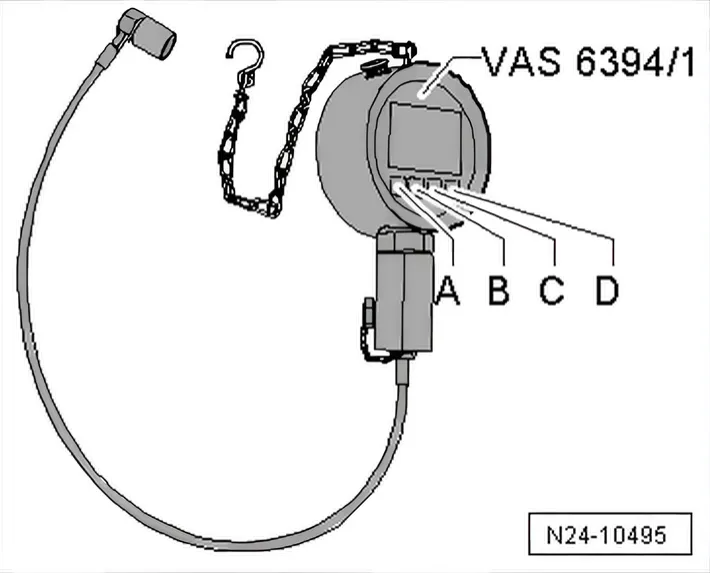
- Switch on digital pressure gauge - VAS 6394/1- by pressing key -A- briefly once.
Digital pressure gauge - VAS 6394/1- should display 0 bar; if this is not the case, press key -C- briefly once for zero point compensation.
- Start engine.
- Compare pressure displayed by digital pressure gauge - VAS 6394/1- with actual value of vehicle diagnosis, testing and information system - VAS 5051B-.
The pressures may deviate by up to 5 bar.
If pressures do not correspond, fuel pressure sender - G247- must be renewed.
Prior to opening the high-pressure area, e.g. when removing the high-pressure pump, fuel rail, injectors, a fuel line, or the fuel pressure sender - G247-, the fuel pressure in the highpressure area must be reduced to a residual pressure of approx. 6 bar. The appropriate procedure is described in the chapter on releasing pressure in the high-pressure section ⇒ 2.3 Releasing pressure in high-pressure area.
- Renew fuel pressure sender - G247- and again compare both measured values.
If measured values again fail to correspond:
- Check wiring ⇒ Vehicle diagnostic tester.
If measured values correspond:
- Further testing is carried out with “Guided Fault Finding” in ⇒ Vehicle diagnostic tester.