
1.2 TDI CR engine (EA189) · Glow plug system · Glow plug system
Removing and installing ceramic glow pin plugs; carrying out resistor test
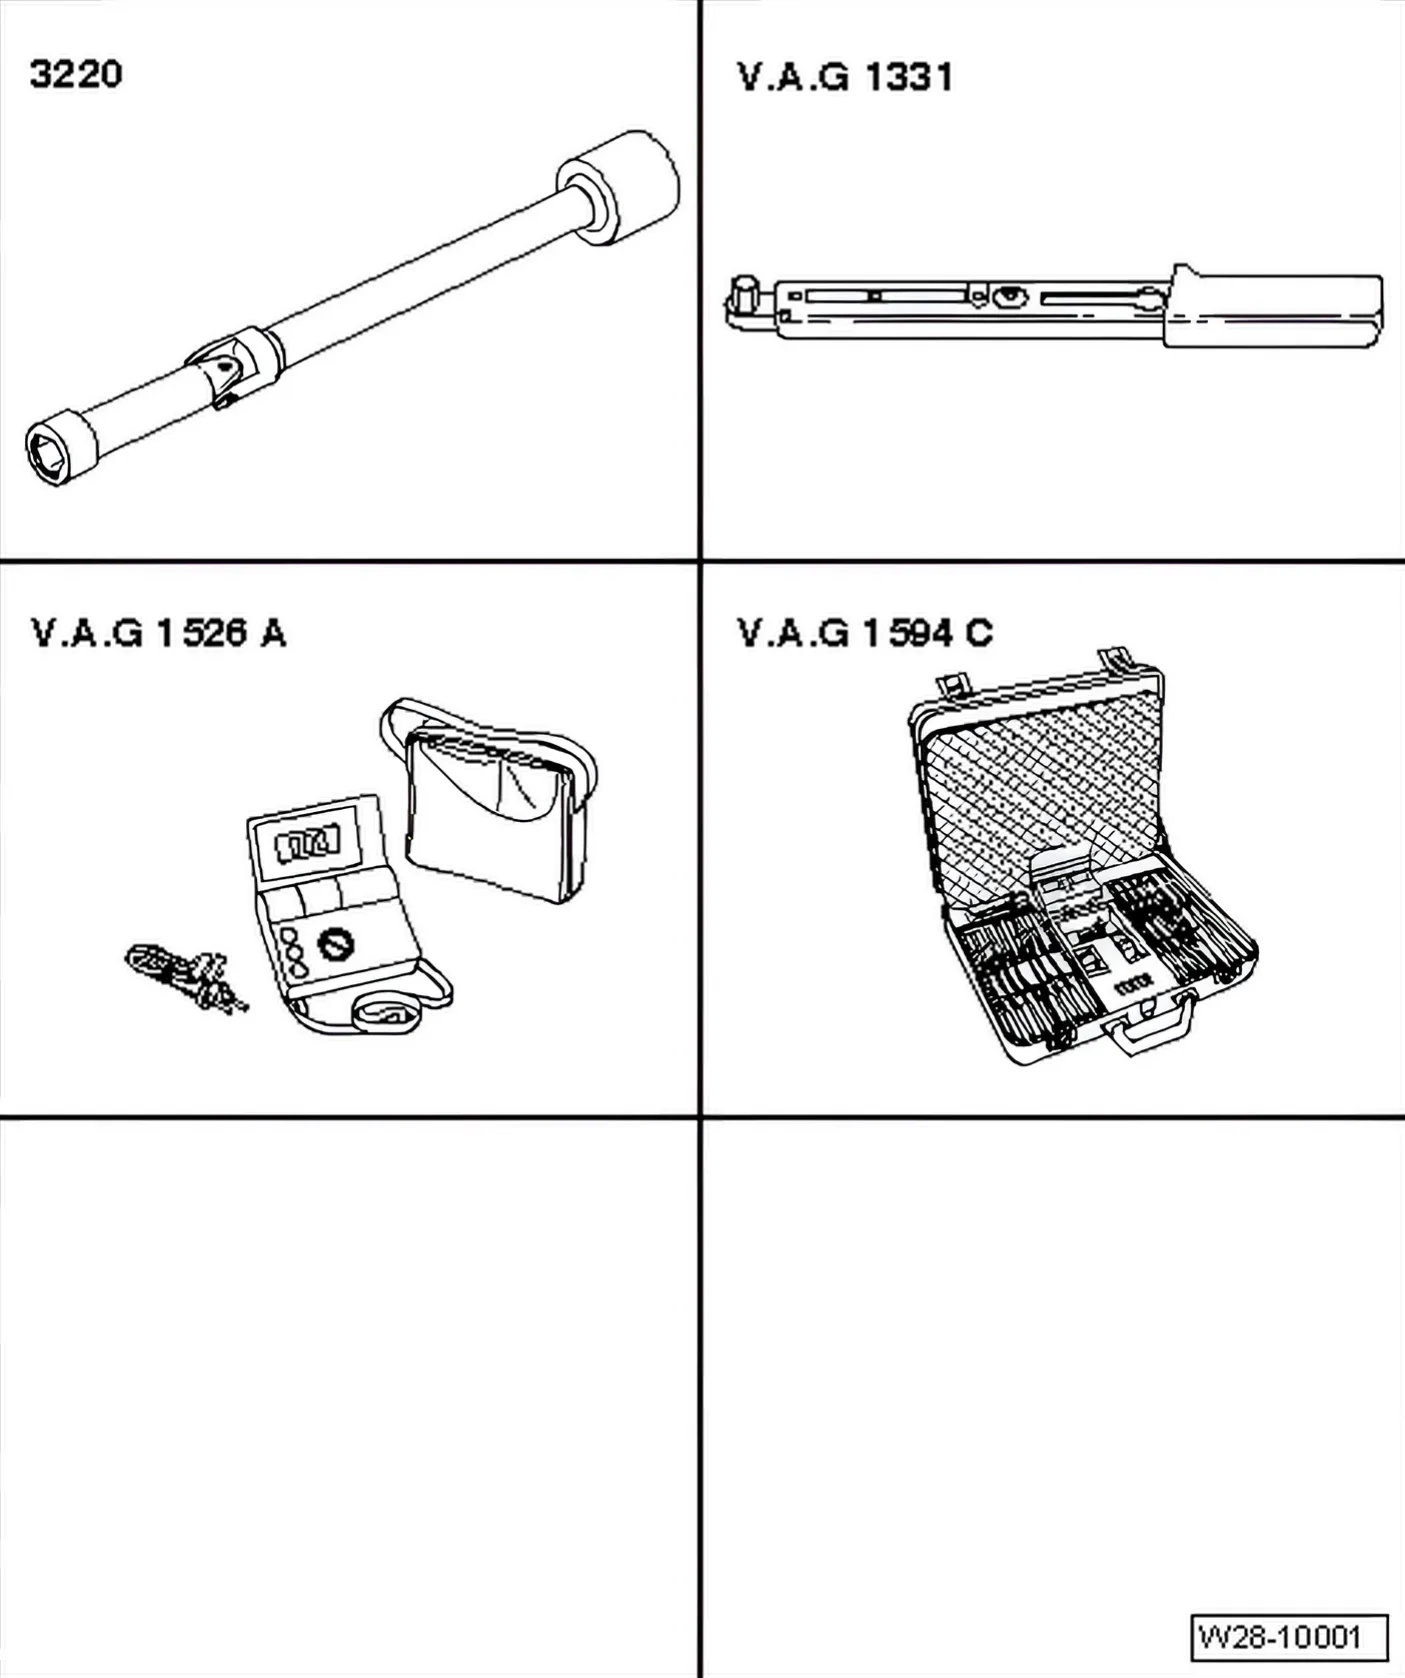
Special tools and workshop equipment required
- Jointed spanner - 3220-
- Torque wrench (5 … 50 Nm) - V.A.G 1331-
- Hand multimeter - V.A.G 1526 A-
- Adapter set - V.A.G 1594 C-
Test conditions
- Engine is cold
- Ignition switched off
Procedure
- Remove engine cover panel ⇒ 3 Engine cover panel
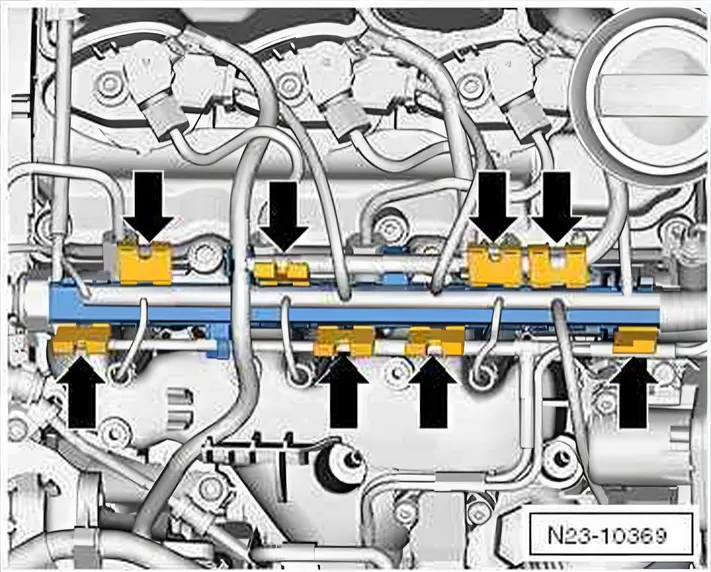
- Open catches -arrows- of cable routing and free wiring harness.
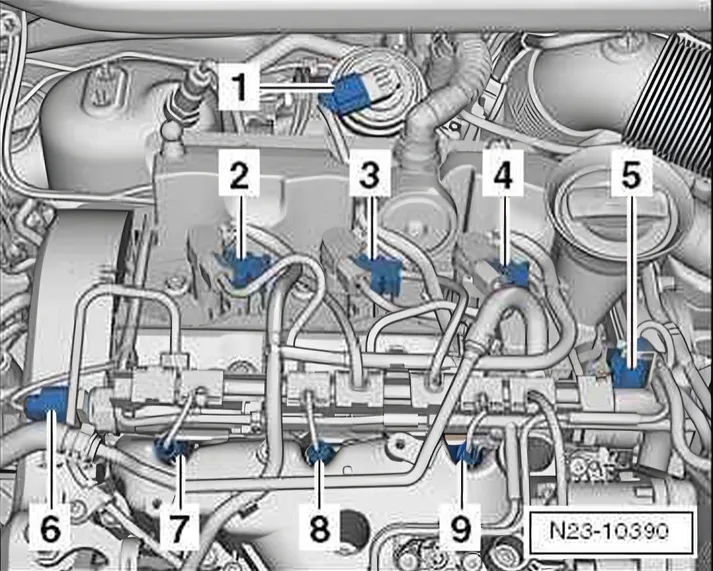
- Pull connector -6- off fuel pressure sender - G247-.
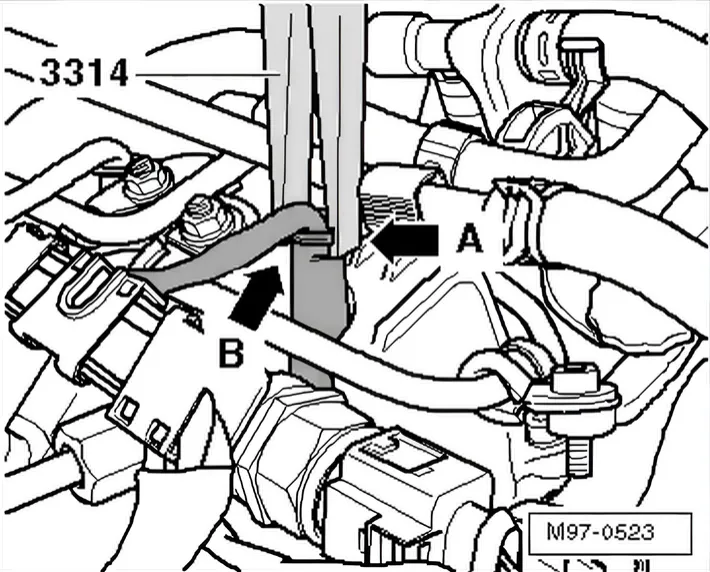
- Position pliers - 3314- with groove -arrow A- on support sleeve shoulder -arrow B-.
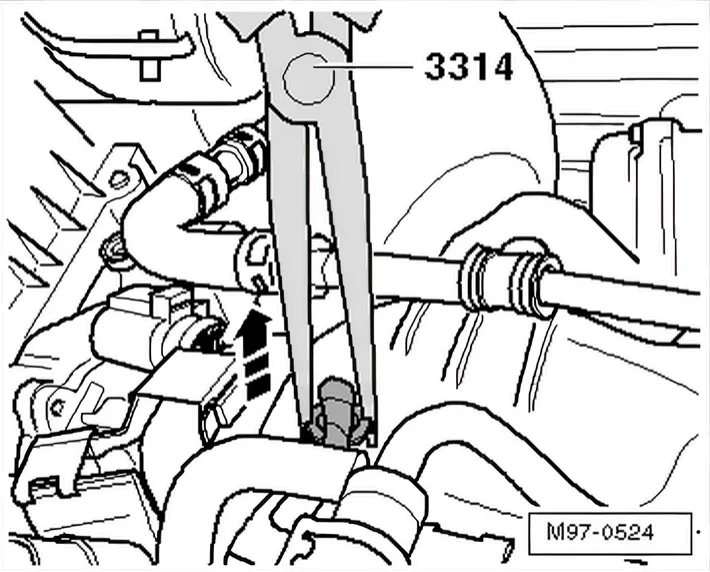
- Carefully pull connectors off glow pin plugs -in direction of arrow-.
- Clean glow pin plug openings in cylinder head. It must be ensured that no dirt falls into the cylinder.
Cleaning procedure:
- Use a vacuum cleaner to remove coarse dirt.
- Spray brake cleaner or suitable cleaning agent into glow pin plug opening, let it work in briefly, and blow out with compressed air.
- Then use an oil-soaked cloth to clean the glow pin plug opening.
- To loosen glow pin plugs, use 10 mm socket spanner - 3220-
Installation is carried out in the reverse order. When installing, note the following:
- Before installing, bore in cylinder head and threads must be completely cleaned of all deposits.
- Screw ceramic glow plugs into cylinder head by hand using U/J extension and socket, 10 mm - 3220-.
- Then tighten ceramic glow pin plugs. Specified torque: 18 Nm
- If specification is exceeded, renew defective ceramic glow pin plug.