
1.2 TDI CR engine (EA189) · Exhaust system · Emission control
Removing and installing particulate filter
⇒ 2.2.1 Removing and installing particulate filter (LHD)
⇒ 2.2.2 Removing and installing particulate filter (RHD)
2.2.1 Removing and installing particulate filter (LHD)
Special tools and workshop equipment required
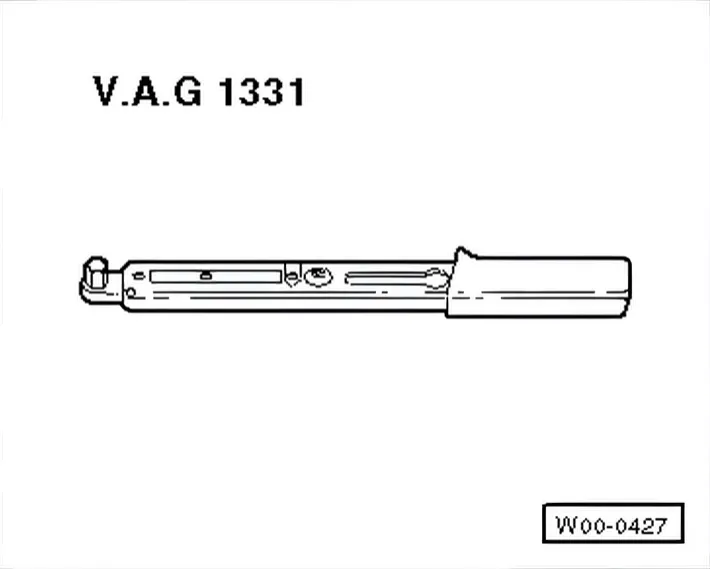
- Torque wrench - V.A.G 1331-
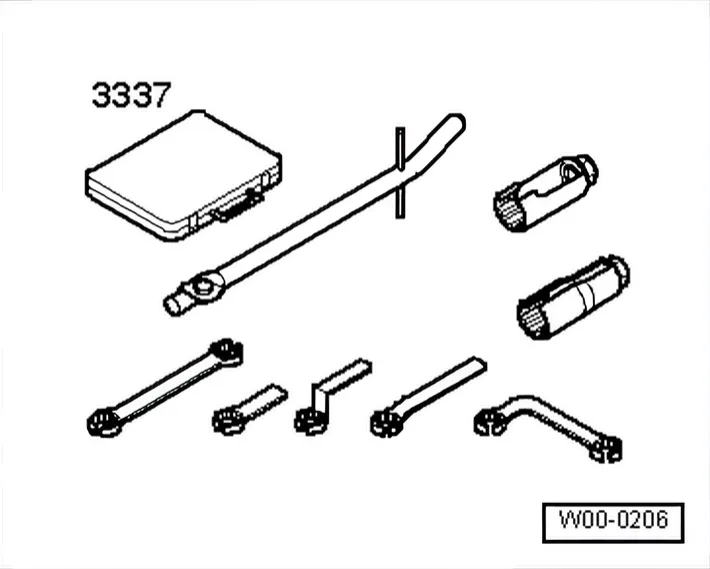
- Lambda probe open ring spanner set - 3337-
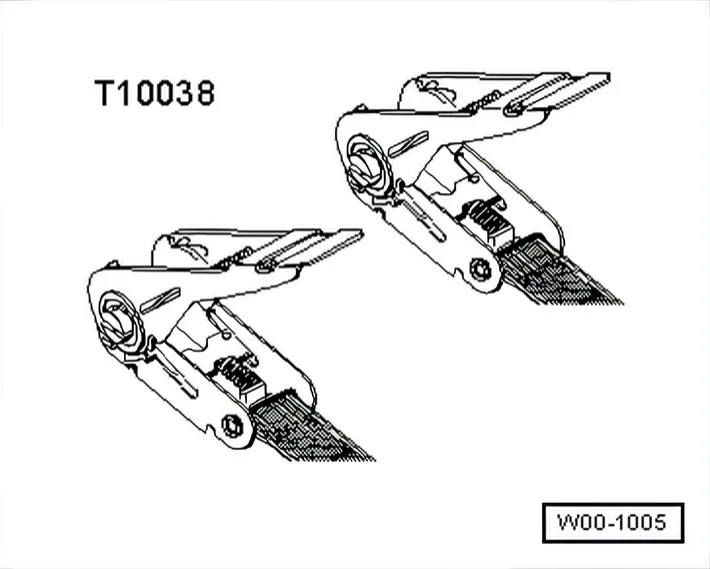
- Tensioning strap - T00038-

- Engine and gearbox jack - VAG 1383A-
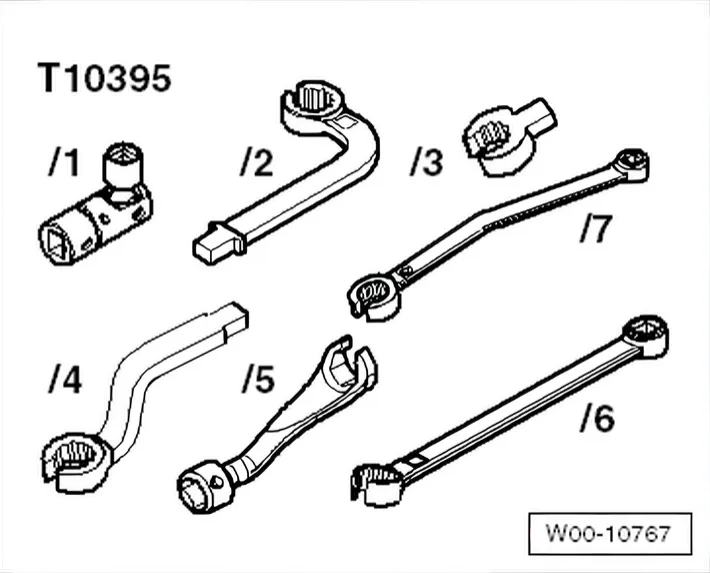
- Tool set - T10395-
Removing
- Turn wheels to straight-ahead position.
- Loosen universal joint ⇒ Running gear, axles, steering; Rep. gr. 48; Removing and installing steering column.
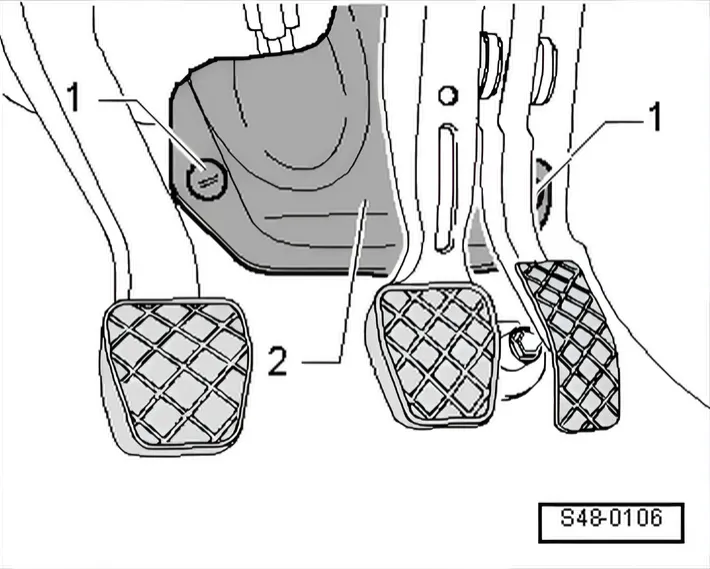
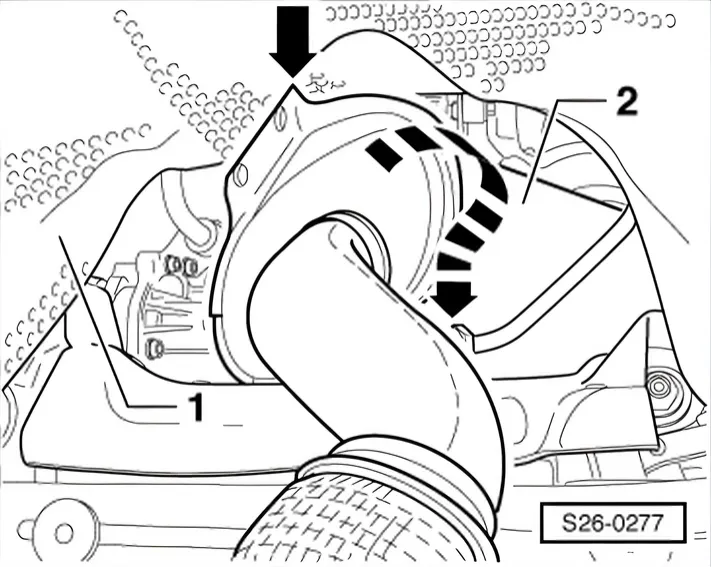
- To do this, remove cover -2- and unscrew plastic nuts -1-.
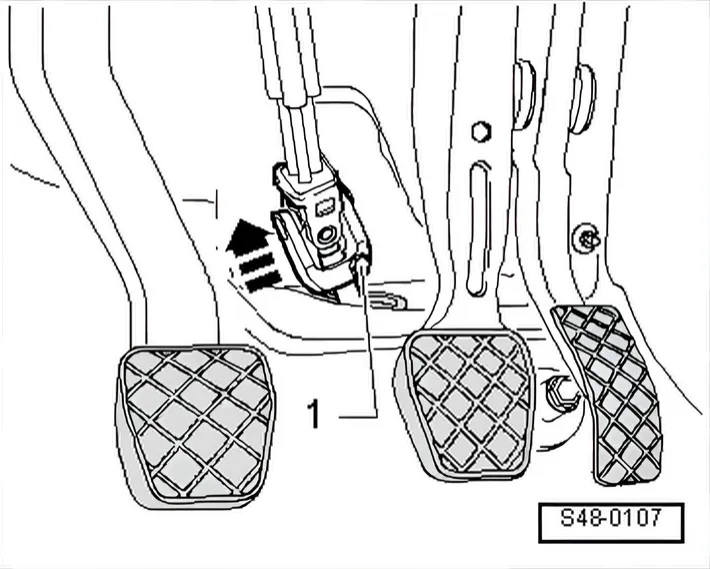
- Unscrew bolt -1- from universal joint and pull universal joint off in direction of arrow.
- Remove engine cover panel ⇒ 3 Engine cover panel.
- Detach following connectors and make lines accessible.
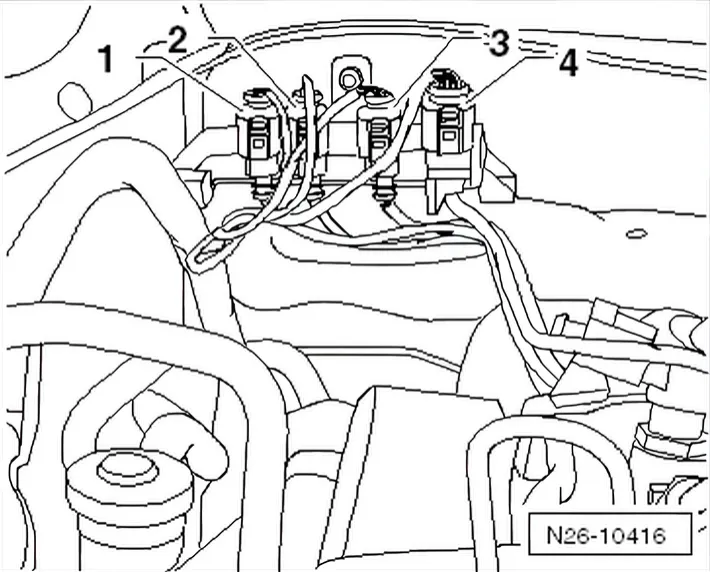
- -1- exhaust temperature sender 1 - G235- connector
- -2- exhaust temperature sender 3 - G495- connector
- -3- exhaust temperature sender 4 - G648- connector
- -4- connector for Lambda probe - G39-
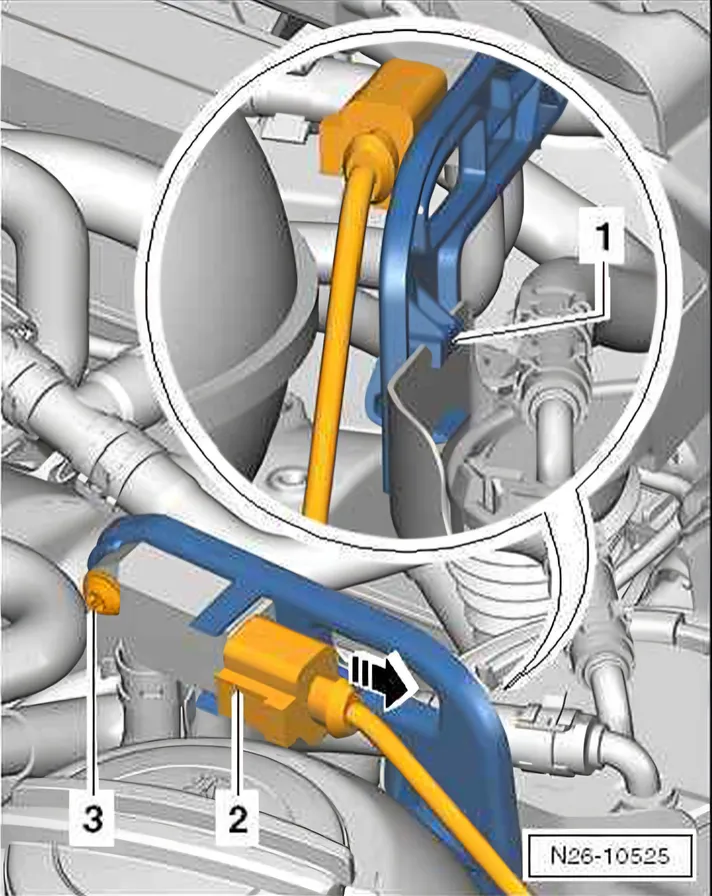
- Separate connector to pressure differential sender - G505- -2-.
- Unscrew bolt -3-.
- Pull lines out of retainers on engine and remove heat shield from particulate filter; if necessary remove cable ties.
- Unscrew Lambda probe - G39- using Lambda probe open ring spanner set - 3337- ⇒ Item 6 (page 249).
- Unscrew exhaust temperature sender 3 -G495- using wrench - T10395/6- ⇒ Item 15 (page 250).
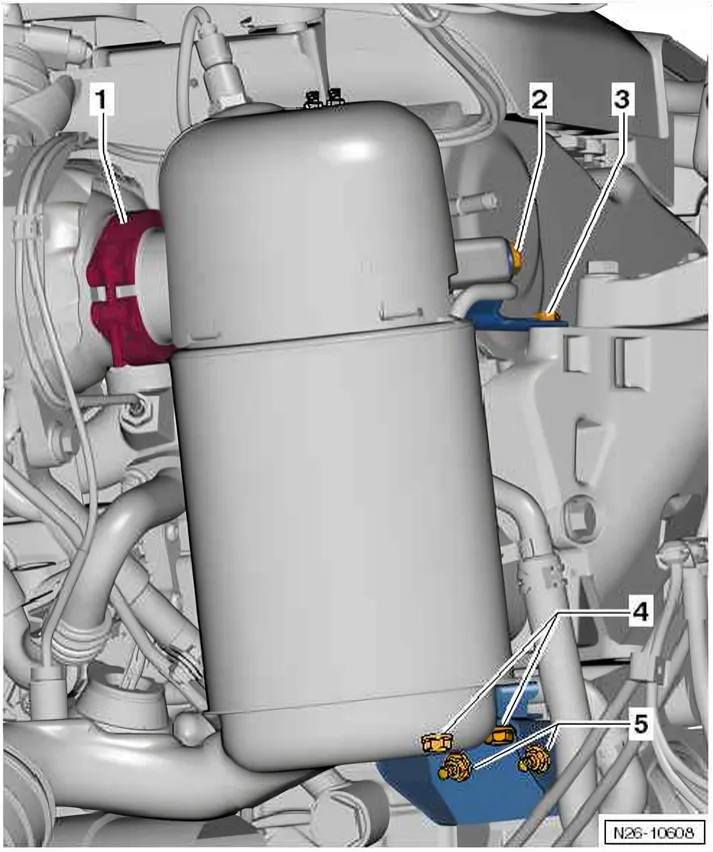
- Remove securing clamp -1- between particulate filter and turbocharger.
- Unscrew bolts -2-.
- Undo bolt -3- and swivel bracket towards the front.
- Remove noise insulation ⇒ General body repairs, exterior; Rep. gr. 50.
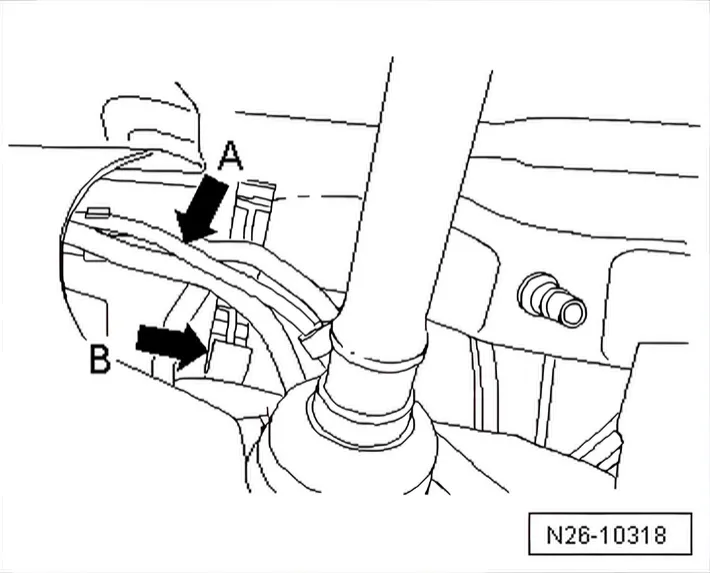
- Open bracket -B- of hydraulic lines -A-.
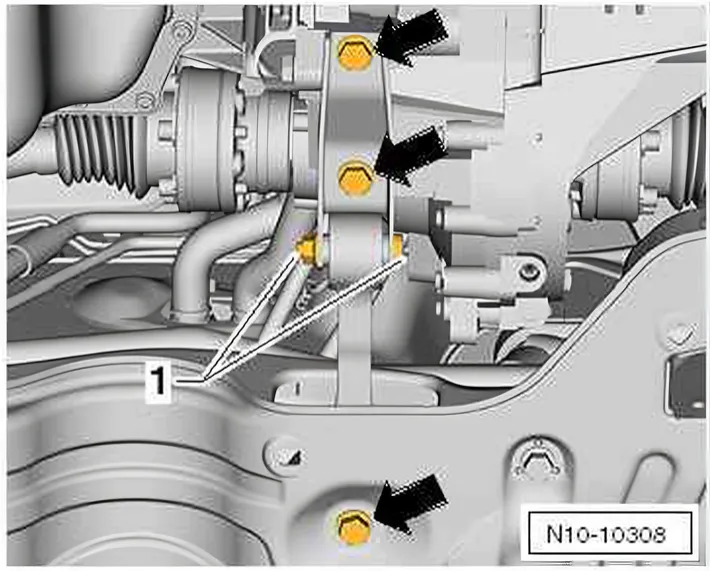
- Remove pendulum support -arrows-.
Do not loosen item -1-.
- Place engine and gearbox jack engine and gearbox jack - VAG 1383A- below subframe.
- Unscrew subframe bolts individually and replace with locking pins. ⇒ Running gear, axles, steering; Rep. gr. 40
- Loosen anti-roll bar at top of coupling rod ⇒ Running gear, axles, steering; Rep. gr. 40.
- Carefully lower subframe with engine and gearbox jack - VAG 1383A-; steering remains on subframe.
The hydraulic steering circuit does not need to be opened for this ⇒ Running gear, axles, steering; Rep. gr. 40.
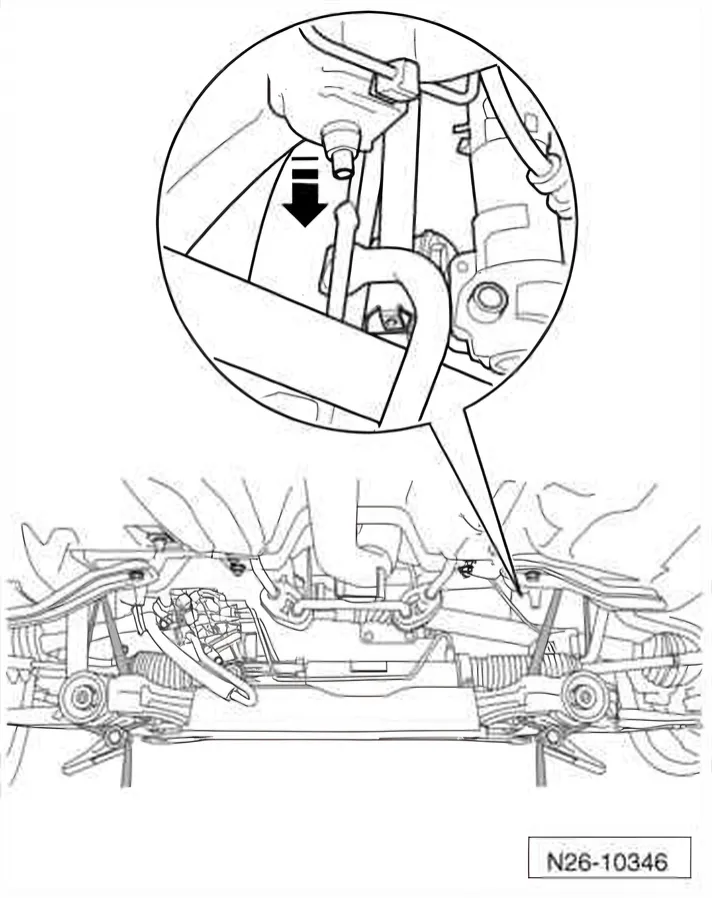
- Lower on the right side max. 10 cm -movement arrow-.
- To prevent the hydraulic lines being overstretched, lower on the left side max. 7 cm.
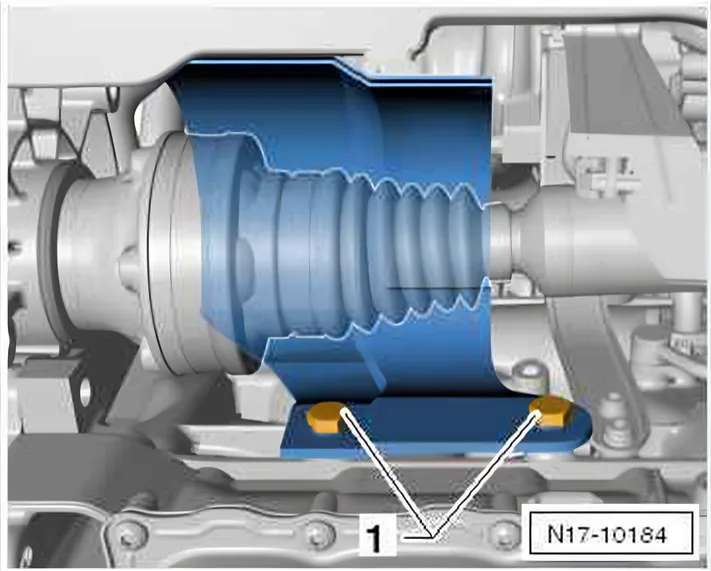
- Unscrew bolts -1- and remove heat shield for right drive shaft.
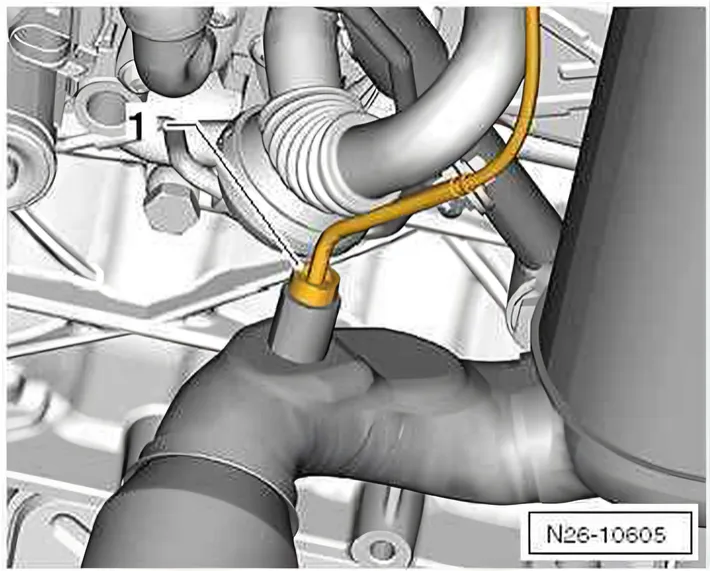
- Unscrew exhaust gas temperature sender 4 - G648- -item 1- from exhaust pipe downstream of particulate filter.
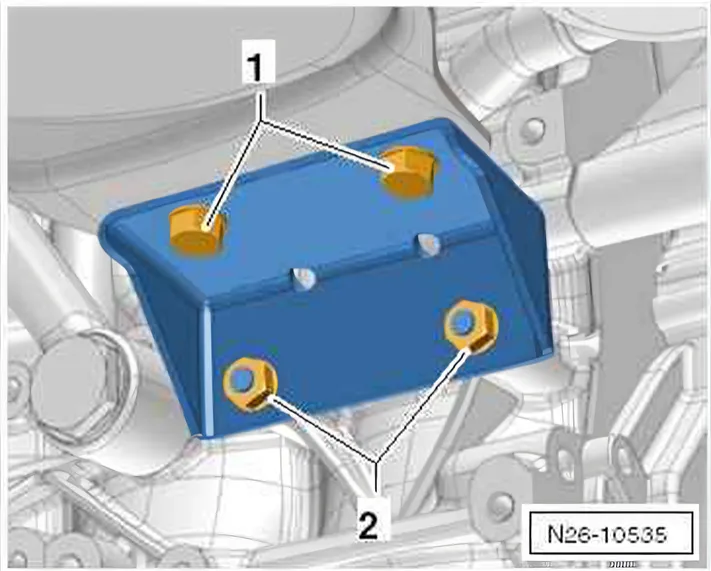
- Unscrew bolts -1- and then nuts -2-.
- Remove particulate filter bracket.
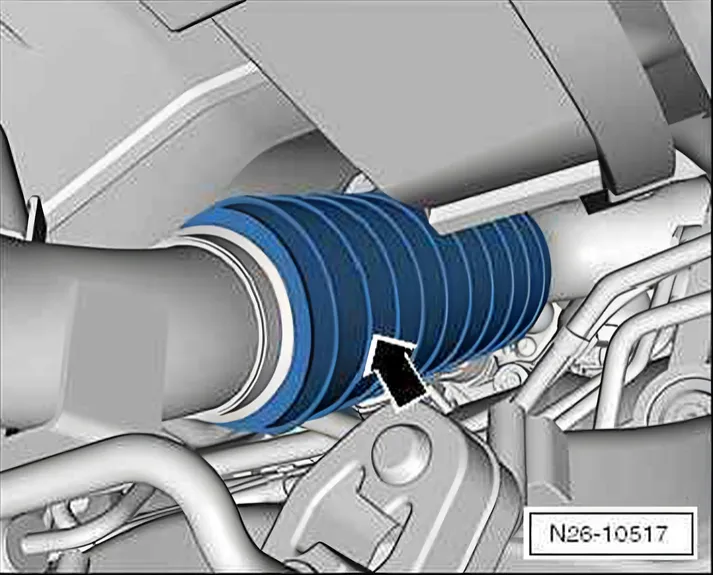
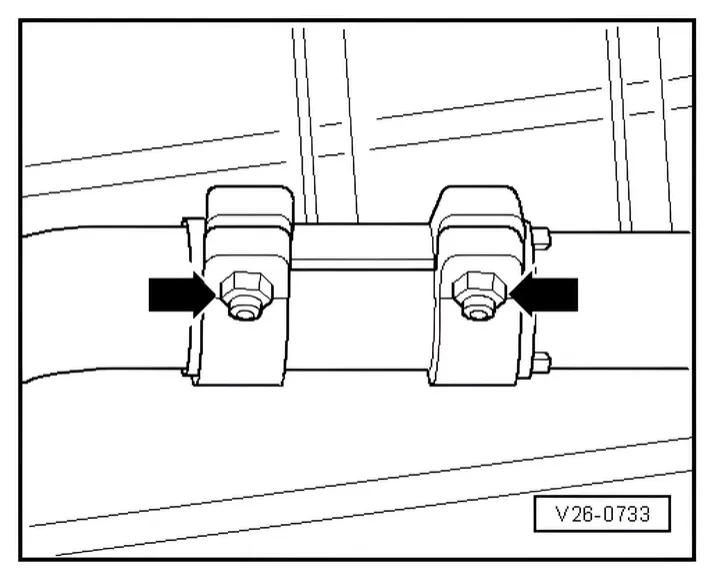
- Loosen securing bolts -arrows- of clamping sleeve, then push down backwards from front exhaust pipe.
- Detach front exhaust pipe from mounting brackets.
Carefully remove front exhaust pipe with particulate filter together with pressure differential sender - G505- above lowered subframe.
- Remove particulate filter by turning 180° around its own axis.
Installing
Installation is carried out in the reverse order. When installing, note the following:
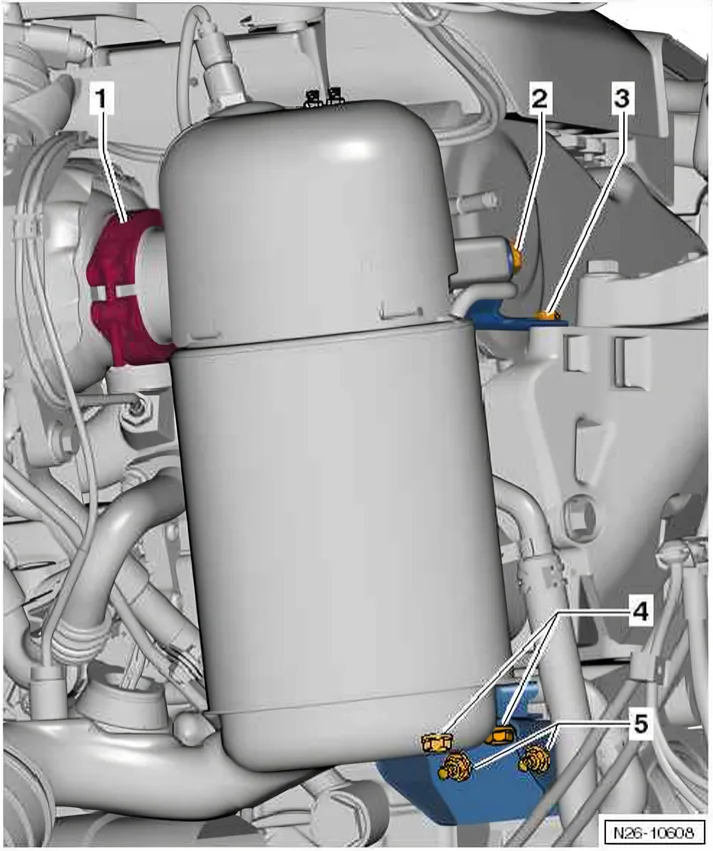
Tightening sequence
| 1) | Position particulate filter on turbo charger and loosely attach clip -1- |
|---|---|
| 2) | Screw bolts and nuts -2…5- in by hand • It must still be possible to move particulate filter and bracket |
| 3) | Tighten clamp -1- ⇒ 2 Emission control. |
| 4) | Tighten bolts and nuts -2, 3, 5- ⇒ 2 Emission control. |
| 5) | Bolts -4- ⇒ 2 Emission control. |
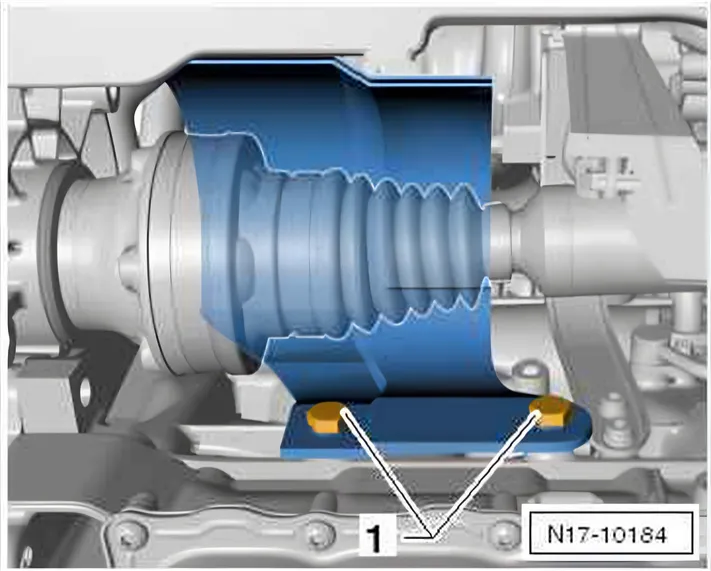
Specified torque for bolts for drive shaft heat shield -1- ⇒ Running gear, axles, steering; Rep. gr. 40; Suspension,
- Install subframe ⇒ Running gear, axles, steering; Rep. gr. 40; Removing and installing subframe with steering rack.
- Align exhaust system free of stress ⇒ 1.2 Separating exhaust pipes from silencers.
2.2.2 Removing and installing particulate filter (RHD)
Special tools and workshop equipment required
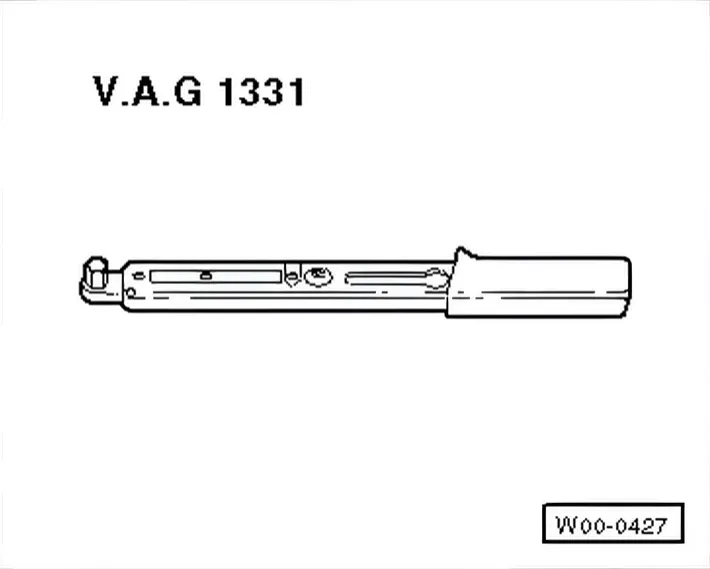
- Torque wrench - V.A.G 1331-
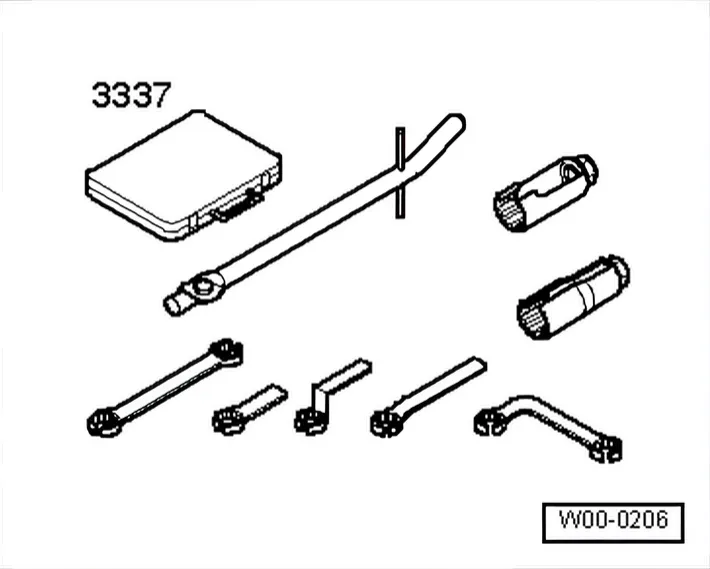
- Lambda probe open ring spanner set - 3337-
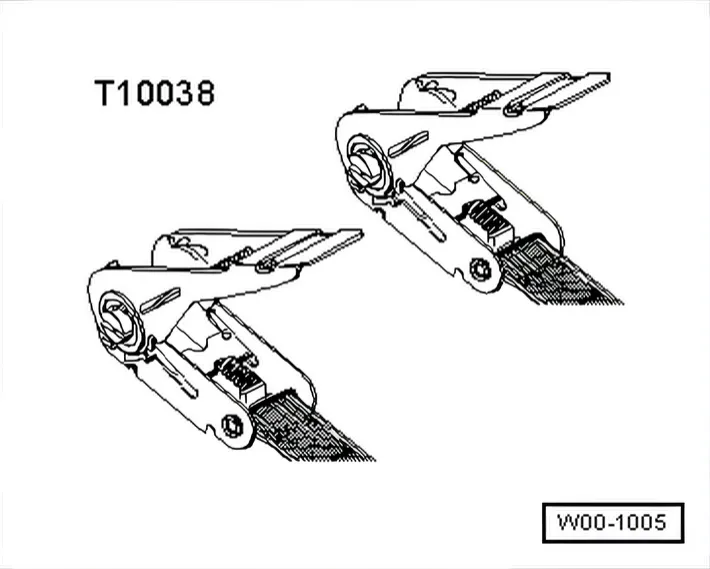
- Tensioning strap - T00038-
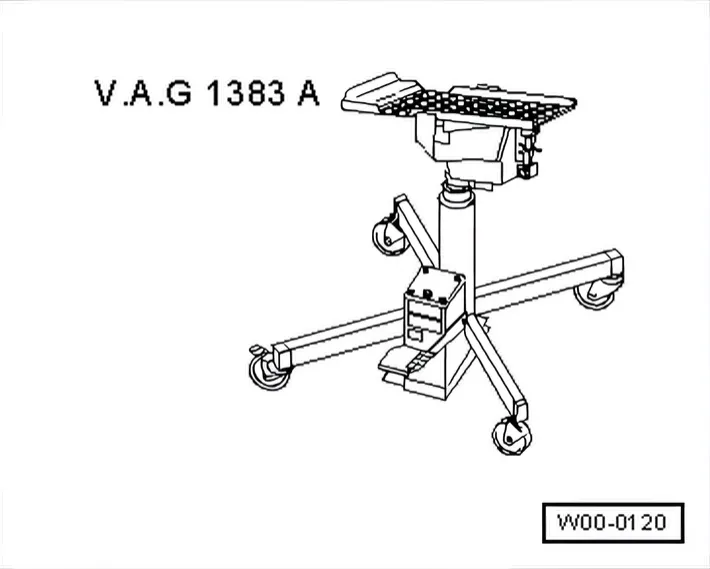
- Engine and gearbox jack - VAG 1383A-
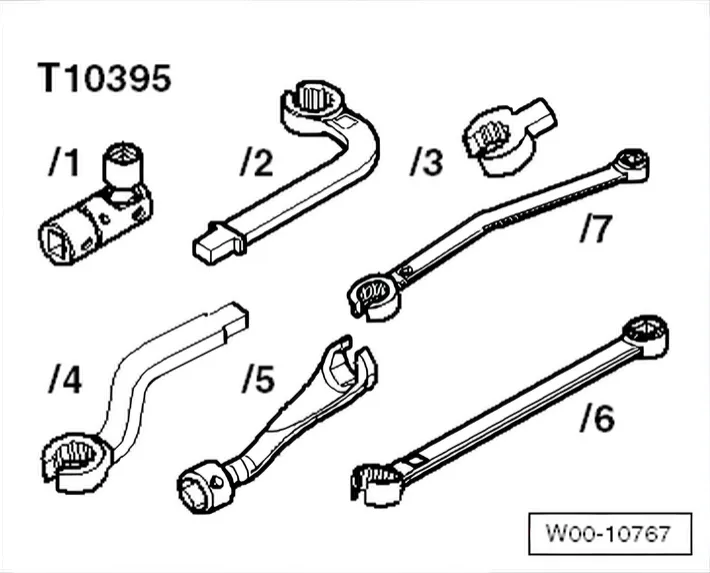
- Tool set - T10395-
Removing
- Turn wheels to straight-ahead position.
- Loosen universal joint ⇒ Running gear, axles, steering; Rep. gr. 48; Removing and installing steering column.
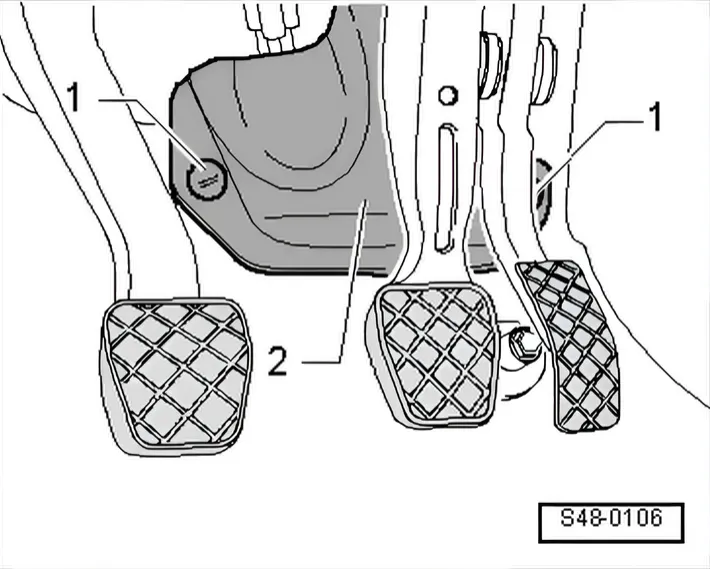
- To do this, remove cover -2- and unscrew plastic nuts -1-.
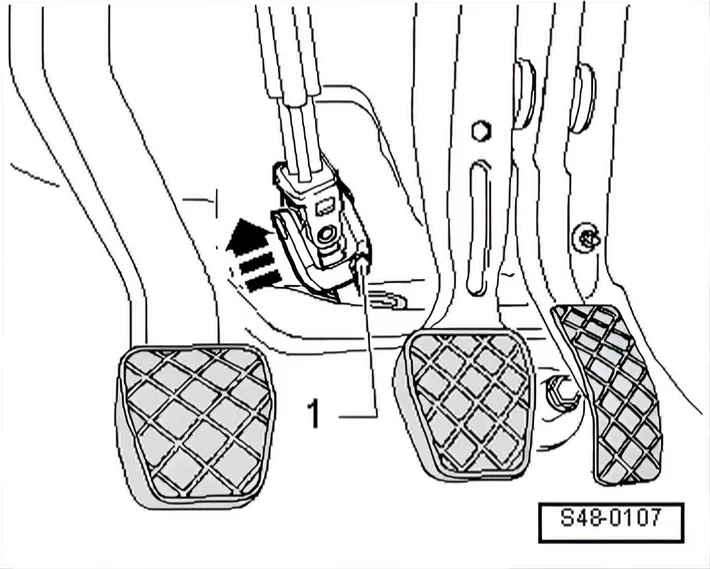
- Unscrew bolt -1- from universal joint and pull universal joint off in direction of arrow.
- Remove engine cover panel ⇒ 3 Engine cover panel.
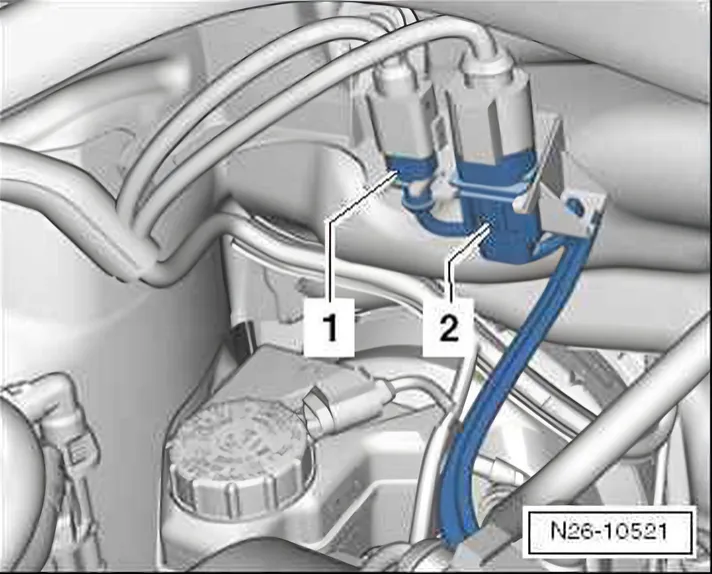
- Disconnect connectors -1- for exhaust temperature sender 1 - G235-.
- Disconnect connectors -2- for Lambda probe - G39-.
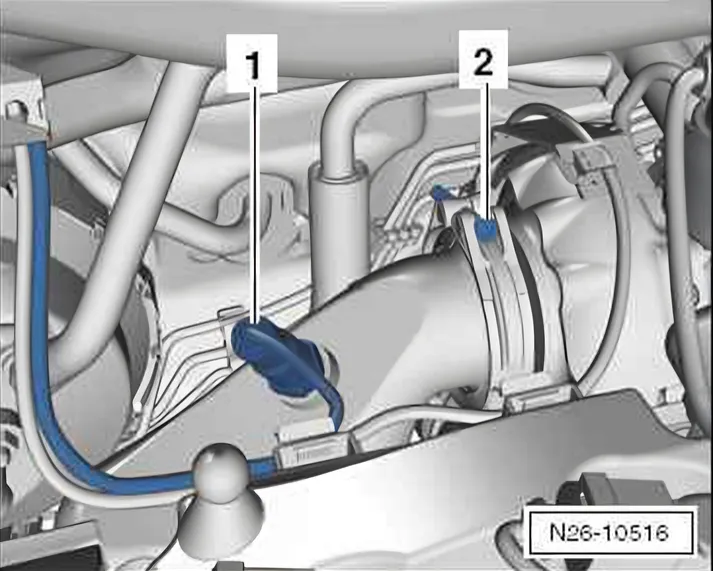
- Unscrew Lambda probe - G39- -1- using Lambda probe open ring spanner set - 3337-.
- Remove securing clamp -2- between catalytic converter with non-engine-mounted particulate filter and turbocharger.
- Remove noise insulation ⇒ General body repairs, exterior; Rep. gr. 50; Body - front; Assembly overview - sound insulation.
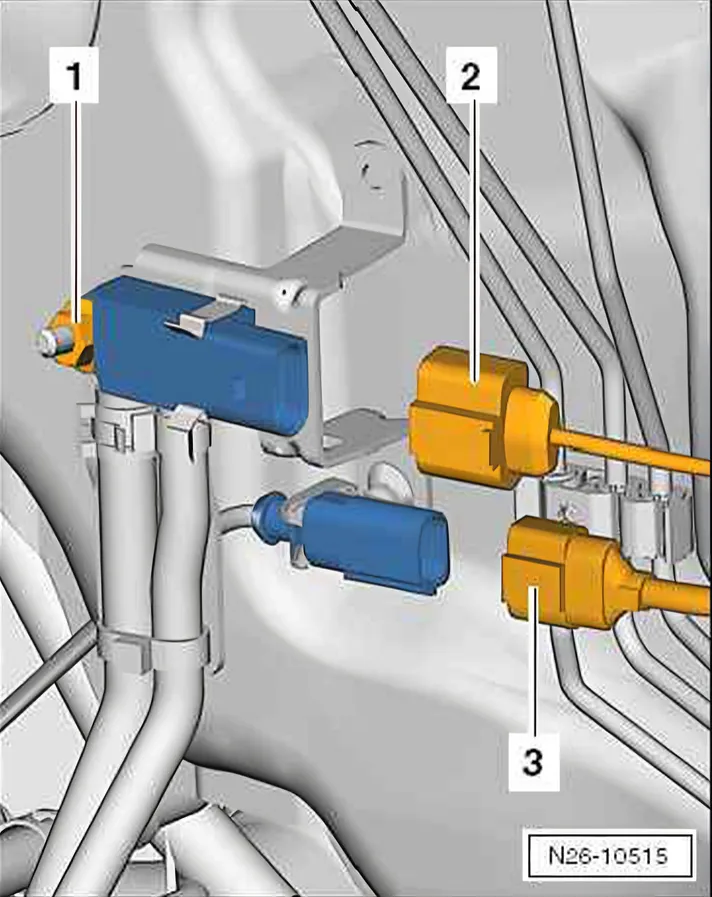
- Separate connector -2- to pressure differential sender - G505-.
- Unscrew pressure differential sender - G505- -1-.
- Separate connector -3- to pressure differential sender - G505-.
- Pull lines from retainers, remove cable ties if necessary.
Do not bend the flexible joint in the front exhaust pipe by more than 10° because it might otherwise be damaged.
If the catalytic converter with non-engine-mounted particulate filter is to be re-installed, a transportation sleeve -arrow- must always be secured to the flexible joint in front exhaust pipe.
- Open bracket -B- of hydraulic lines -A-.
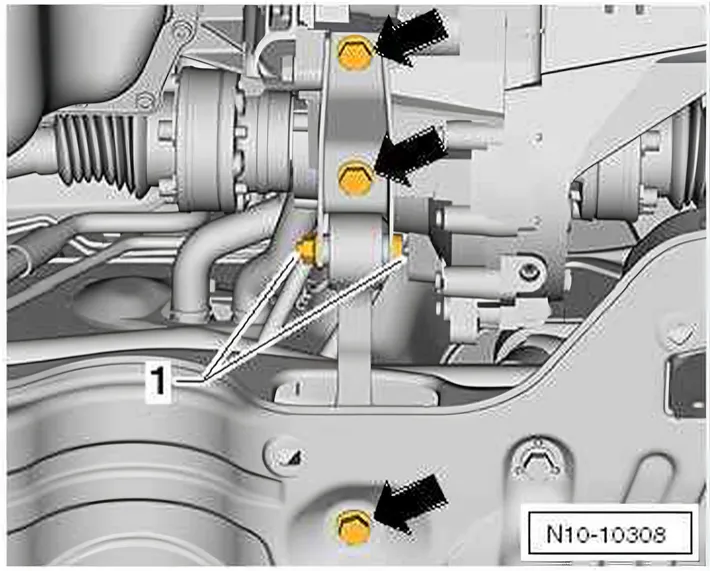
- Remove pendulum support -arrows-.
Do not loosen item -1-.
- Place engine and gearbox jack engine and gearbox jack - VAG 1383A- below subframe.
- Unscrew bolts from subframe and renew them by locating pins ⇒ Running gear, axles, steering; Rep. gr. 40.
- Loosen anti-roll bar at top of coupling rod ⇒ Running gear, axles, steering; Rep. gr. 40.
- Lower subframe with engine and gearbox jack - VAG 1383A-; steering remains on subframe.
The hydraulic steering circuit does not need to be opened for this ⇒ Running gear, axles, steering; Rep. gr. 40.
- Lower on the right side max. 10 cm -movement arrow-.
- To prevent the hydraulic lines being overstretched, lower on the left side max. 7 cm.
- Remove securing bolts -1- and remove cover from cylinder block for right drive shaft.
- Unscrew exhaust gas temperature sender 3 - G495- using - T10395/6- ⇒ Item 5 (page 252) from front exhaust pipe.
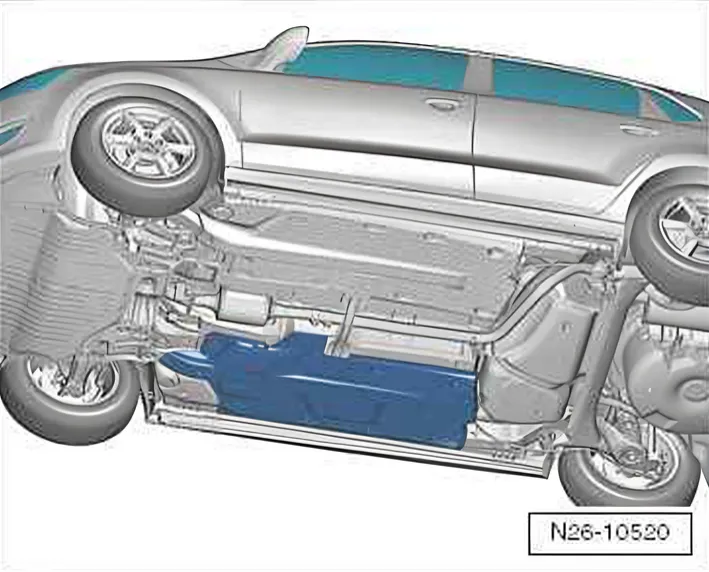
- Remove right underbody panelling ⇒ General body repairs, exterior; Rep. gr. 66.
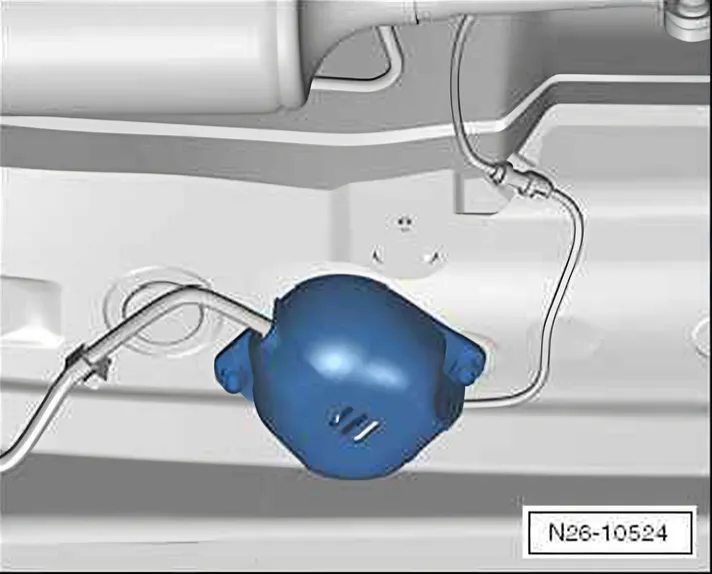
- Remove cover from connector for exhaust temperature sender
- 4 G648-.
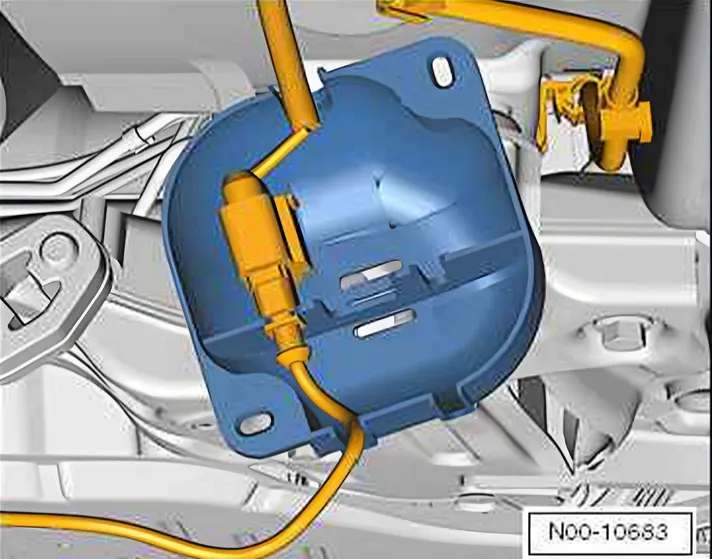
- Disconnect connector for exhaust temperature sender 4 - G648-.
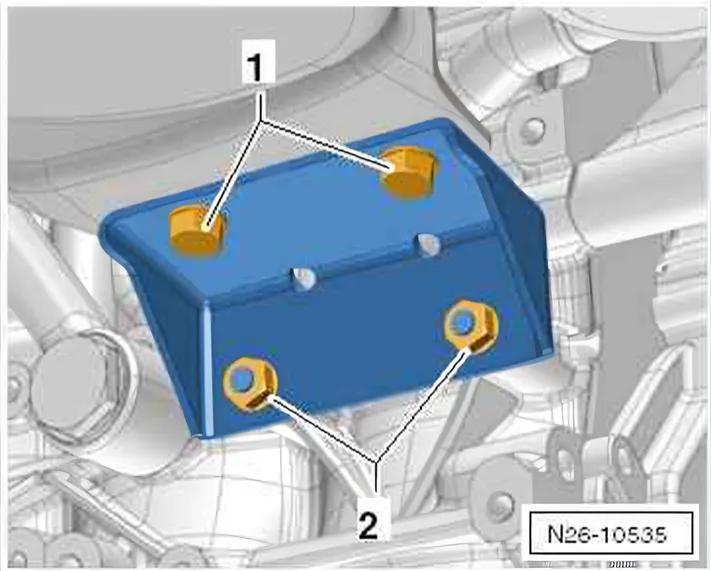
- Unscrew bolts -1- and then nuts -2-.
- Remove particulate filter bracket.
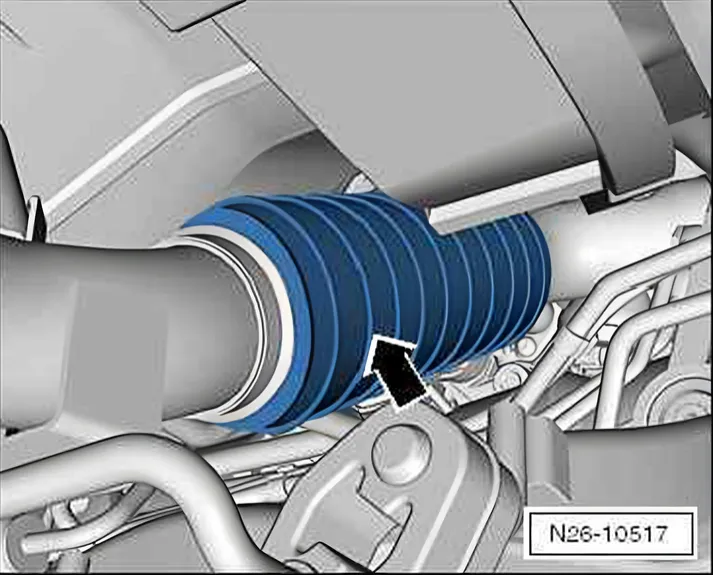
If the particulate filter is to be re-installed, a transportation sleeve -arrow- must always be secured to the flexible joint in front exhaust pipe.
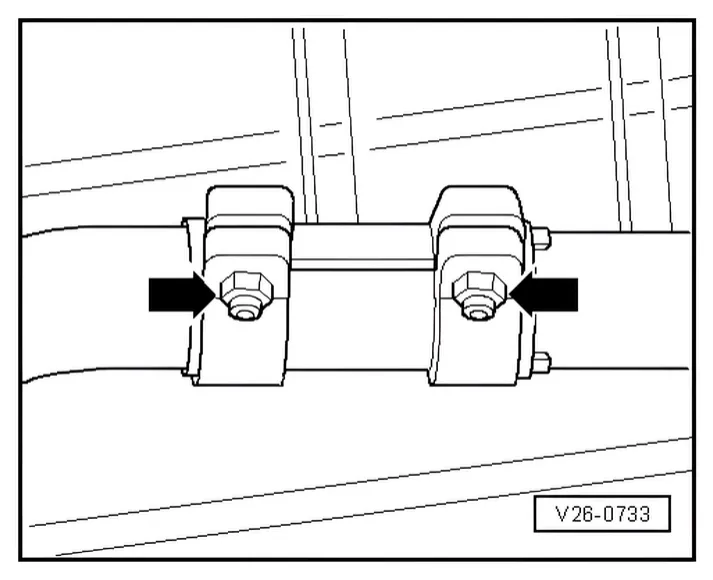
- Loosen securing bolts -arrows- of clamping sleeve, then push down backwards from front exhaust pipe.
- Detach front exhaust pipe from mounting brackets.
Carefully remove front exhaust pipe with particulate filter together with pressure differential sender - G505- above lowered subframe.
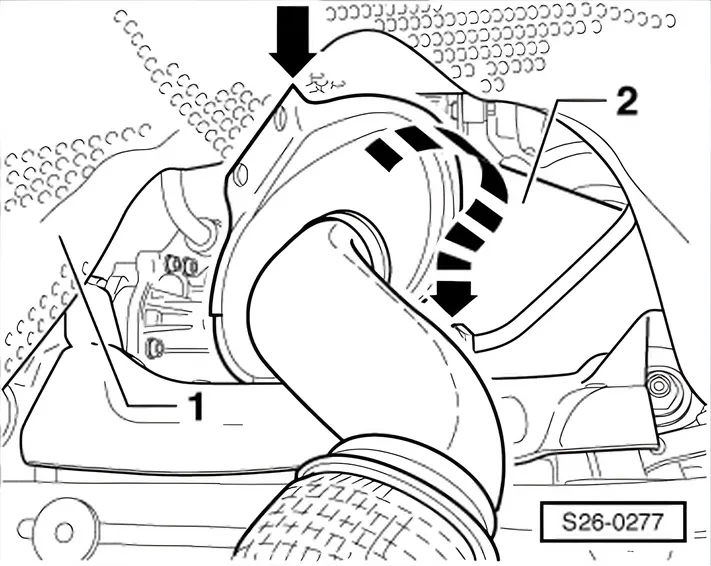
- Remove catalytic converter with non-engine-mounted particulate filter by turning 180° around its own axis.
Installing
Installation is carried out in the reverse order. When installing, note the following:
- Seal ⇒ Item 2 (page 252). Renew.
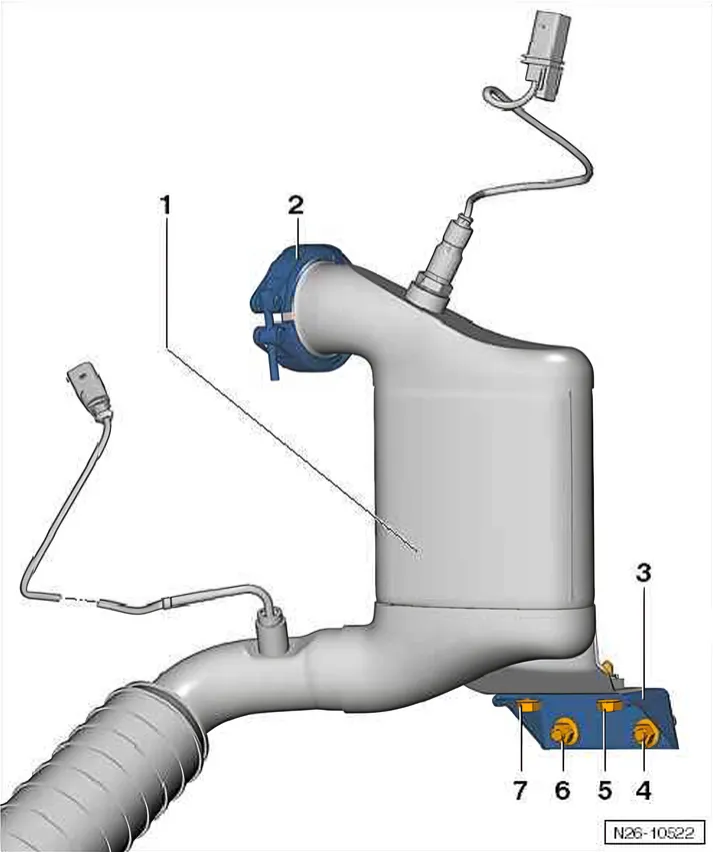
Tightening sequence
- 1) Mounting of catalytic converter with particulate filter installed away from engine (RHD vehicles) -1- on turbocharger, clamp -2- (positioning only)
- 2. Bracket on cylinder block with nuts -4- + -6- (for positioning only). Bolts -5- + -7- also (for positioning)
- 3. Tighten clamp -2- to turbocharger 7 Nm
- 4) Tighten left nut -6- to crankcase 25 Nm
- 5) Tighten right nut -4- to crankcase 25 Nm
- 6) Tighten left bolt -7- of bracket to diesel particulate filter 25 Nm
- 7) Tighten right bolt -5- of bracket to diesel particulate filter 25 Nm
Specified torque for bolts for drive shaft heat shield -1- ⇒ Running gear, axles, steering; Rep. gr. 40; Suspension,
Specified torque for exhaust temperature sender/catalytic converter with non-engine-mounted particulate filter (right-hand drive vehicles) ⇒ 2.1.2 Assembly overview - particulate filter (RHD)
- Align exhaust system free of stress ⇒ 1.2 Separating exhaust pipes from silencers.