
1.2 TDI CR engine (EA189) · Removing and installing engine · Removing and installing engine
Installing engine
⇒ 1.3.2 Additional information and assembly work for vehicles with air conditioner
1.3.1 Notes on installing
Install in reverse order of removal. During this procedure, observe the following:
Repairing the clutch:
- Vehicles with manual gearbox ⇒ Manual gearbox; Rep. gr. 34.
- Check clutch release bearing for wear and renew if necessary.
- Lightly grease clutch release bearing, release bearing guide and splines on input shaft with G 000 100.
- Check whether dowel sleeves for centring engine/gearbox have been fitted in cylinder block, insert if necessary.
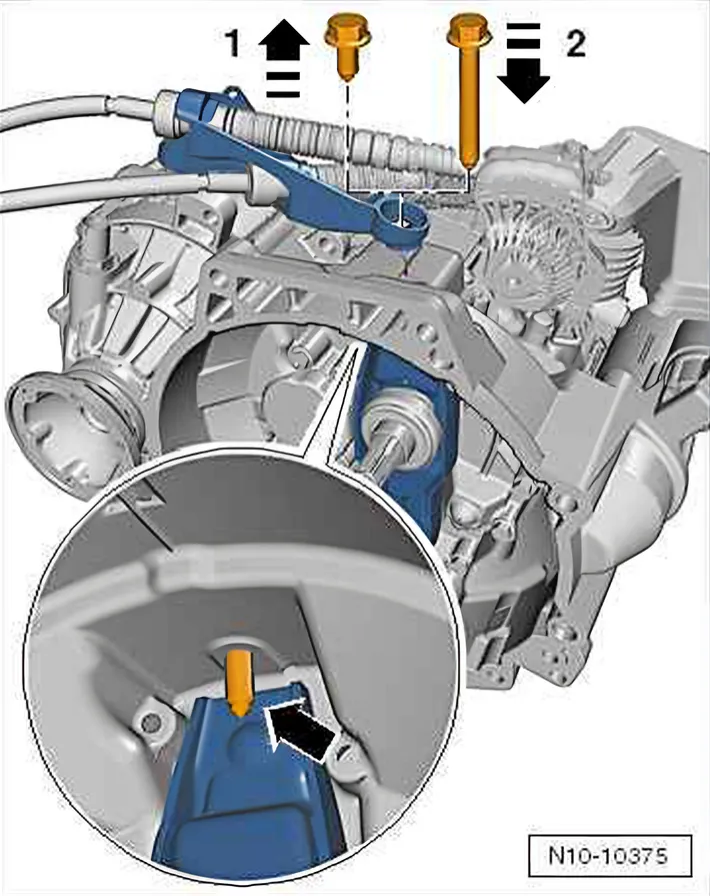
- Secure release lever using a suitable bolt -2- -arrow-.
- When swinging engine/gearbox assembly in, ensure that there is clearance between drive shafts.
- Bolt gearbox flange to cylinder block.
- Release again clutch release lever, remove previously fitted bolt.
- Fit genuine bolt again.
Gearbox specified torques: ⇒ Manual gearbox; Rep. gr. 34; Removing and installing gearbox.
Specified torque for starter: ⇒ Electrical system; Rep. gr. 27.
- Rock engine to align engine mountings stress-free.
- When installing »engine«, ensure that there is sufficient clearance to subframe.
- Adjusting assembly mountings ⇒ 2 Assembly mountings.
Vehicles with air conditioning system
- Install air conditioning system compressor ⇒ Heating, air conditioning system; Rep. gr. 87.
Continued for all vehicles
- Electrical connections and routing: ⇒ Electrical system; Rep. gr. 97.
- Install poly V-belt ⇒ 13 – Crankshaft group.
- Add coolant ⇒ 1.3.1 Draining.
- Connect vehicle diagnostic tester.
For example ⇒ Vehicle diagnostic tester
- Erase learnt values and adapt engine control unit - J623- to throttle valve module ⇒ Vehicle diagnostic tester “Guided functions”.
Observe sequence when installing particulate filter.
- Secure particulate filter ⇒ 2.1.2 Assembly overview - particulate filter (RHD).
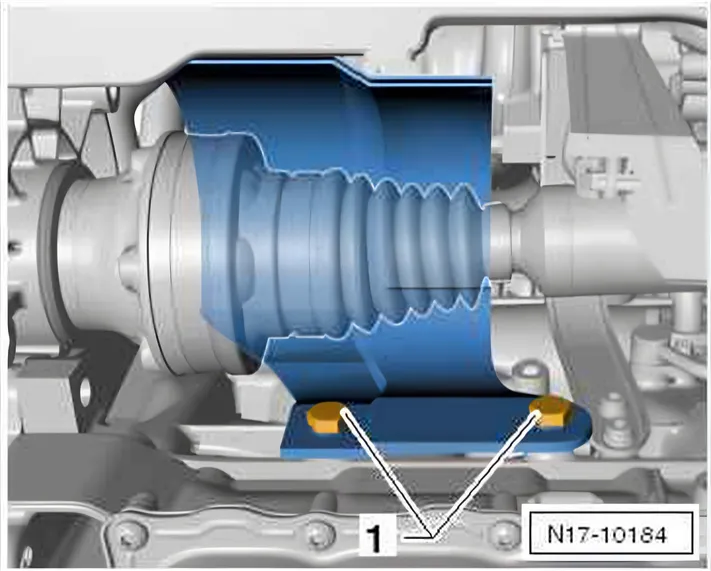
- Install heat shield for drive shaft (right side) -1-.
Specified torque ⇒ Manual gearbox; Rep. gr. 34
- Secure refrigerant lines free of stress to air conditioner compressor and to condenser ⇒ Heating, air conditioning; Rep. gr. 87.
- Charge air conditioner ⇒ Heating, air conditioning; Rep. gr. 87.
- Install battery and battery tray ⇒ Electrical system; Rep. gr. 27; Removing and installing battery.
- Observe notes after connecting battery ⇒ Electrical system; Rep. gr. 27; Disconnecting and reconnecting battery.
- Fill fuel system ⇒ 1.3 Filling/bleeding fuel system.
- Carry out a vehicle system test ⇒ Vehicle diagnostic tester “Guided Fault Finding”.
- Finish the vehicle system test so that any event entries stored during assembly can be erased automatically.
Note safety precautions applicable to a road test.
- Carry out road test.
- Then carry out vehicle system test again, rectify any faults which may have occurred.
Specified torques
| Bolted connection | Specified torque |
|---|---|
| Nuts and bolts M6 M7 M8 M10 M12 | 10 Nm |
| 15 Nm | |
| 20 Nm | |
| 40 Nm | |
| 65 Nm1) |
1) Specified torque for M12 flange bolts: 75 Nm
1.3.2 Additional information and assembly work for vehicles with air conditioner
- Extract refrigerant from air conditioner refrigerant circuit. Open air conditioner refrigerant circuit ⇒ Rep. gr. 87.