
1.4 MPI engine (EA111) · Cylinder head, valve gear · Valve gear
Assembly overview
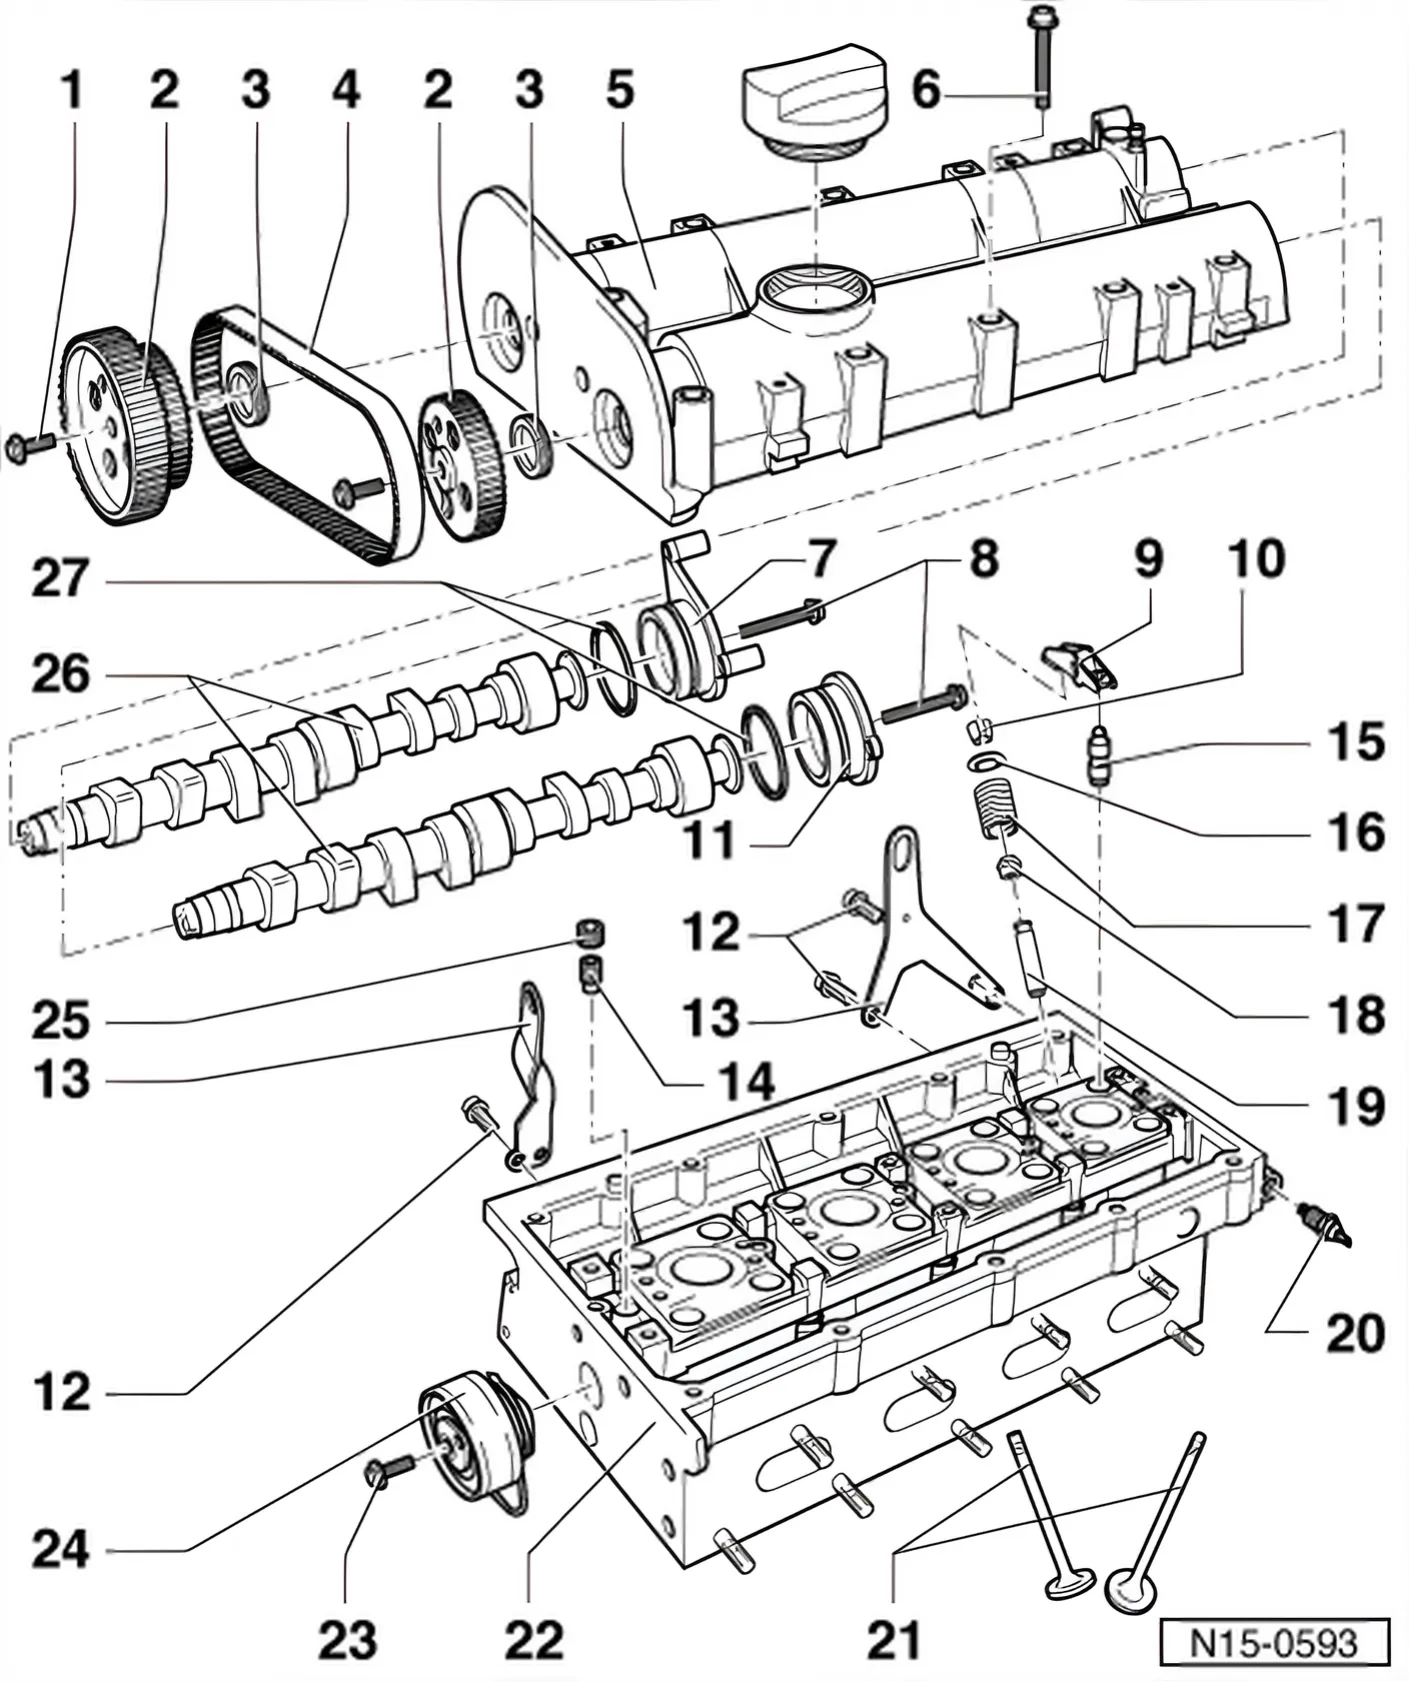
- 1 20 Nm + 1/4 turn further (90°)
- Renew
- Use camshaft lock - T10016- to loosen and tighten ⇒ 2.1 Assembly overview.
- 2 Camshaft sprocket
- Note position when installing toothed belt ⇒ 1.3 Removing, installing and tensioning toothed belt.
- 3 Sealing ring
- Renew only with camshaft installed.
- Lightly oil sealing lip of oil seal
- Renewing ⇒ 2.3 Renewing camshaft oil seals
- 4 Coupling drive toothed belt
- Mark direction of rotation before removing
- Check for wear
- Do not kink
- Removing, installing and tensioning ⇒ 1.3 Removing, installing and tensioning toothed belt.
- 5 Camshaft case
- Removing and installing ⇒ 1.5 Removing and installing camshaft housing
- Remove sealant residue.
- Coat with D 154 103 A1 before fitting
- When installing, fit vertically from above onto studs and dowel pins.
- 6 10 Nm + 1/4 turn further (90°)
- Renew
- Tighten from inside outwards.
- 7 Cap/ignition ignition transformer
- 8 10 Nm
- 9 Roller rocker fingers
- Check roller bearing.
- Oil contact surface
- When installing, secure to supporting element using securing clip.
- 10 Cotters
- 11 Sealing cover
- 12 20 Nm
- 13 Lifting eye
- 14 Non-return valve, 6 Nm
- Do not overtighten, otherwise the valve can stick.
- Clean thread. Insert with D 154 102 A1.
- 15 Support element
- Check oil spray holes.
- With hydraulic valve clearance compensation.
- Do not interchange
- Before installing, check camshaft axial clearance ⇒ 2.1 Assembly overview.
- Oil contact surface
- 16 Valve spring plate
- 17 Valve springs
- Cylinder head removed: use valve spring tool - 3362-.
- Cylinder head installed: ⇒ 2.5 Renewing valve stem seals
- 18 Valve stem seal
- Renewing ⇒ 2.5 Renewing valve stem seals
- 19 Valve guide
- Checking ⇒ 2.4 Checking valve guides
- 20 0.3 … 0.7 bar oil pressure switch - F1-, 25 Nm
- Checking ⇒ 1.5 Checking oil pressure and oil pressure switch
- If seal is leaking, nip open and renew.
- 21 Valves
- Do not rework; only lapping-in is permitted.
- Valve dimensions ⇒ 2.1 Assembly overview
- 22 Cylinder head
- Reworking valve seats ⇒ 2.2 Reworking valve seats.
- Reworking sealing surface ⇒ 2.1 Assembly overview.
- 23 20 Nm
- 24 Tensioning pulley
- Checking ⇒ 1.4 Checking semi-automatic toothed belt tensioner
- Tensioning toothed belts ⇒ 1.3 Removing, installing and tensioning toothed belt.
- 25 Plug, 45 Nm
- Insert with D 154 102 A1.
- Must not be screwed in too far.
- Maximum permitted insertion depth from top of plug to camshaft housing surface = 2 mm.
- 26 Camshafts
- Checking axial clearance ⇒ 2.1 Assembly overview.
- Coat with oil before inserting (also axial bearing shoulder).
- After installing, renew oil seal.
- Renewing seals ⇒ 2.3 Renewing camshaft oil seals.
- 27 O-ring
- Renew
- Moisten with oil before inserting.
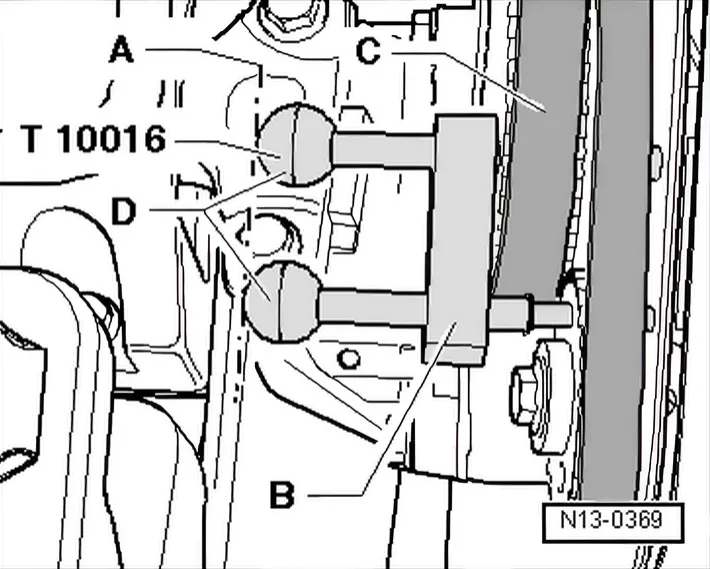
Locking both camshaft pulleys with camshaft locking tool - T10016-.
- Guide both locking pins through camshaft pulley locking pin holes to stop in camshaft housing fitting holes.
- Slide retainer -B- to stop against inlet camshaft pulley -C-.
- When both camshaft pulleys are locked in the fitting holes, the camshaft pulleys can be loosened or tightened.
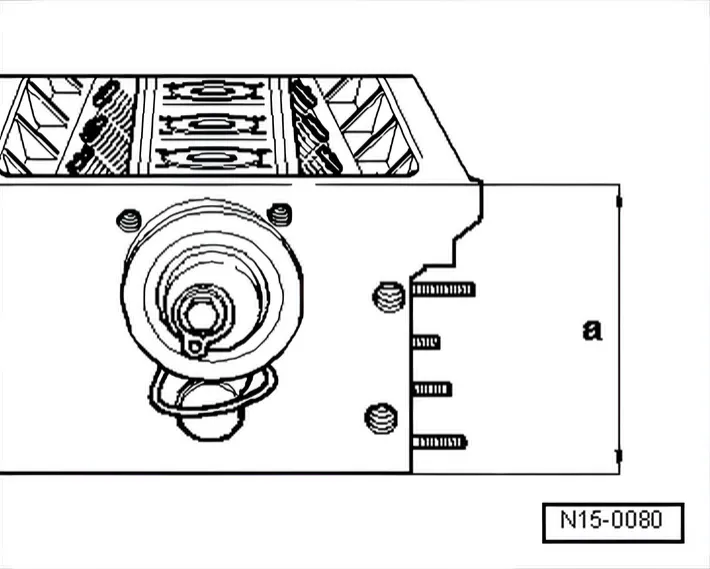
Reworking cylinder head sealing surface
Cylinder head reworking dimension: a = at least 108.25 mm
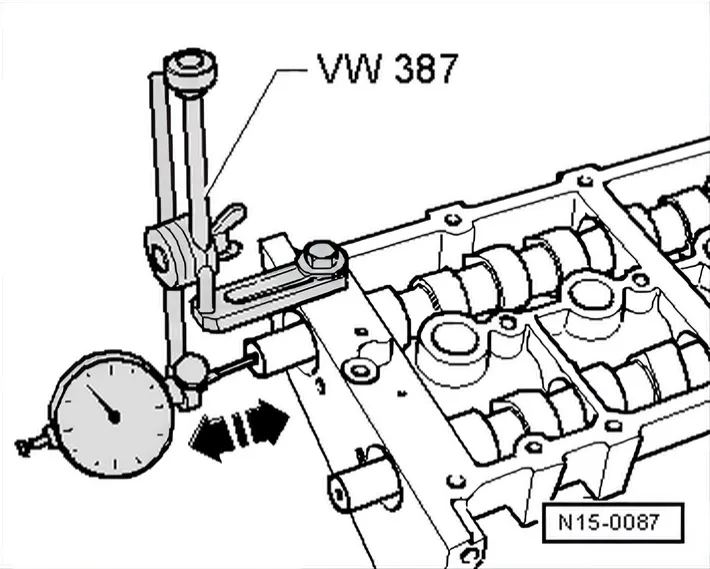
Checking camshaft axial clearance
Special tools and workshop equipment required
- Universal dial gauge holder - VW 387-
- Dial gauge
Perform measurements with camshaft housing removed and cap fitted.
Wear limit: max. 0.40 mm
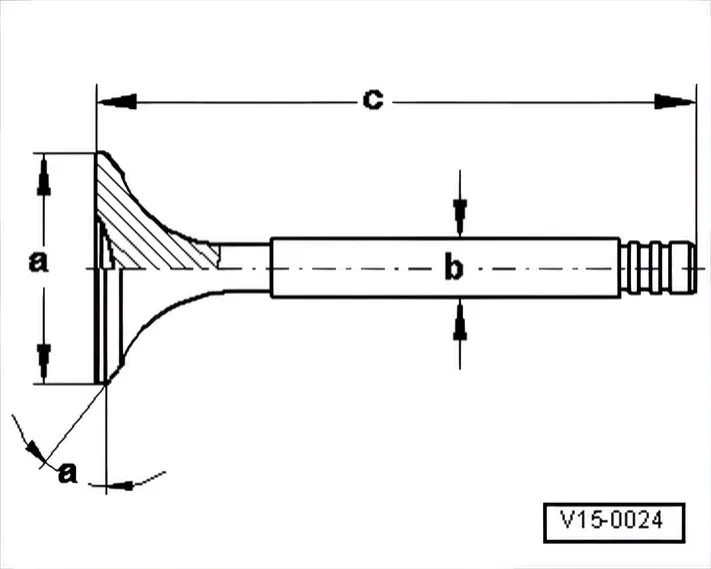
Valve dimensions
| Dimension | Inlet valve | Outlet valve |
|---|---|---|
| ∅ a mm | 29.5 | 26.0 |
| ∅ b mm | 5.973 | 5.953 |
| c mm | 100.9 | 100.5 |
| α ∠° | 45 | 45 |