
1.4 TSI engine (EA111) · Removing and installing engine · Removing and installing engine
Removing engine (Polo)
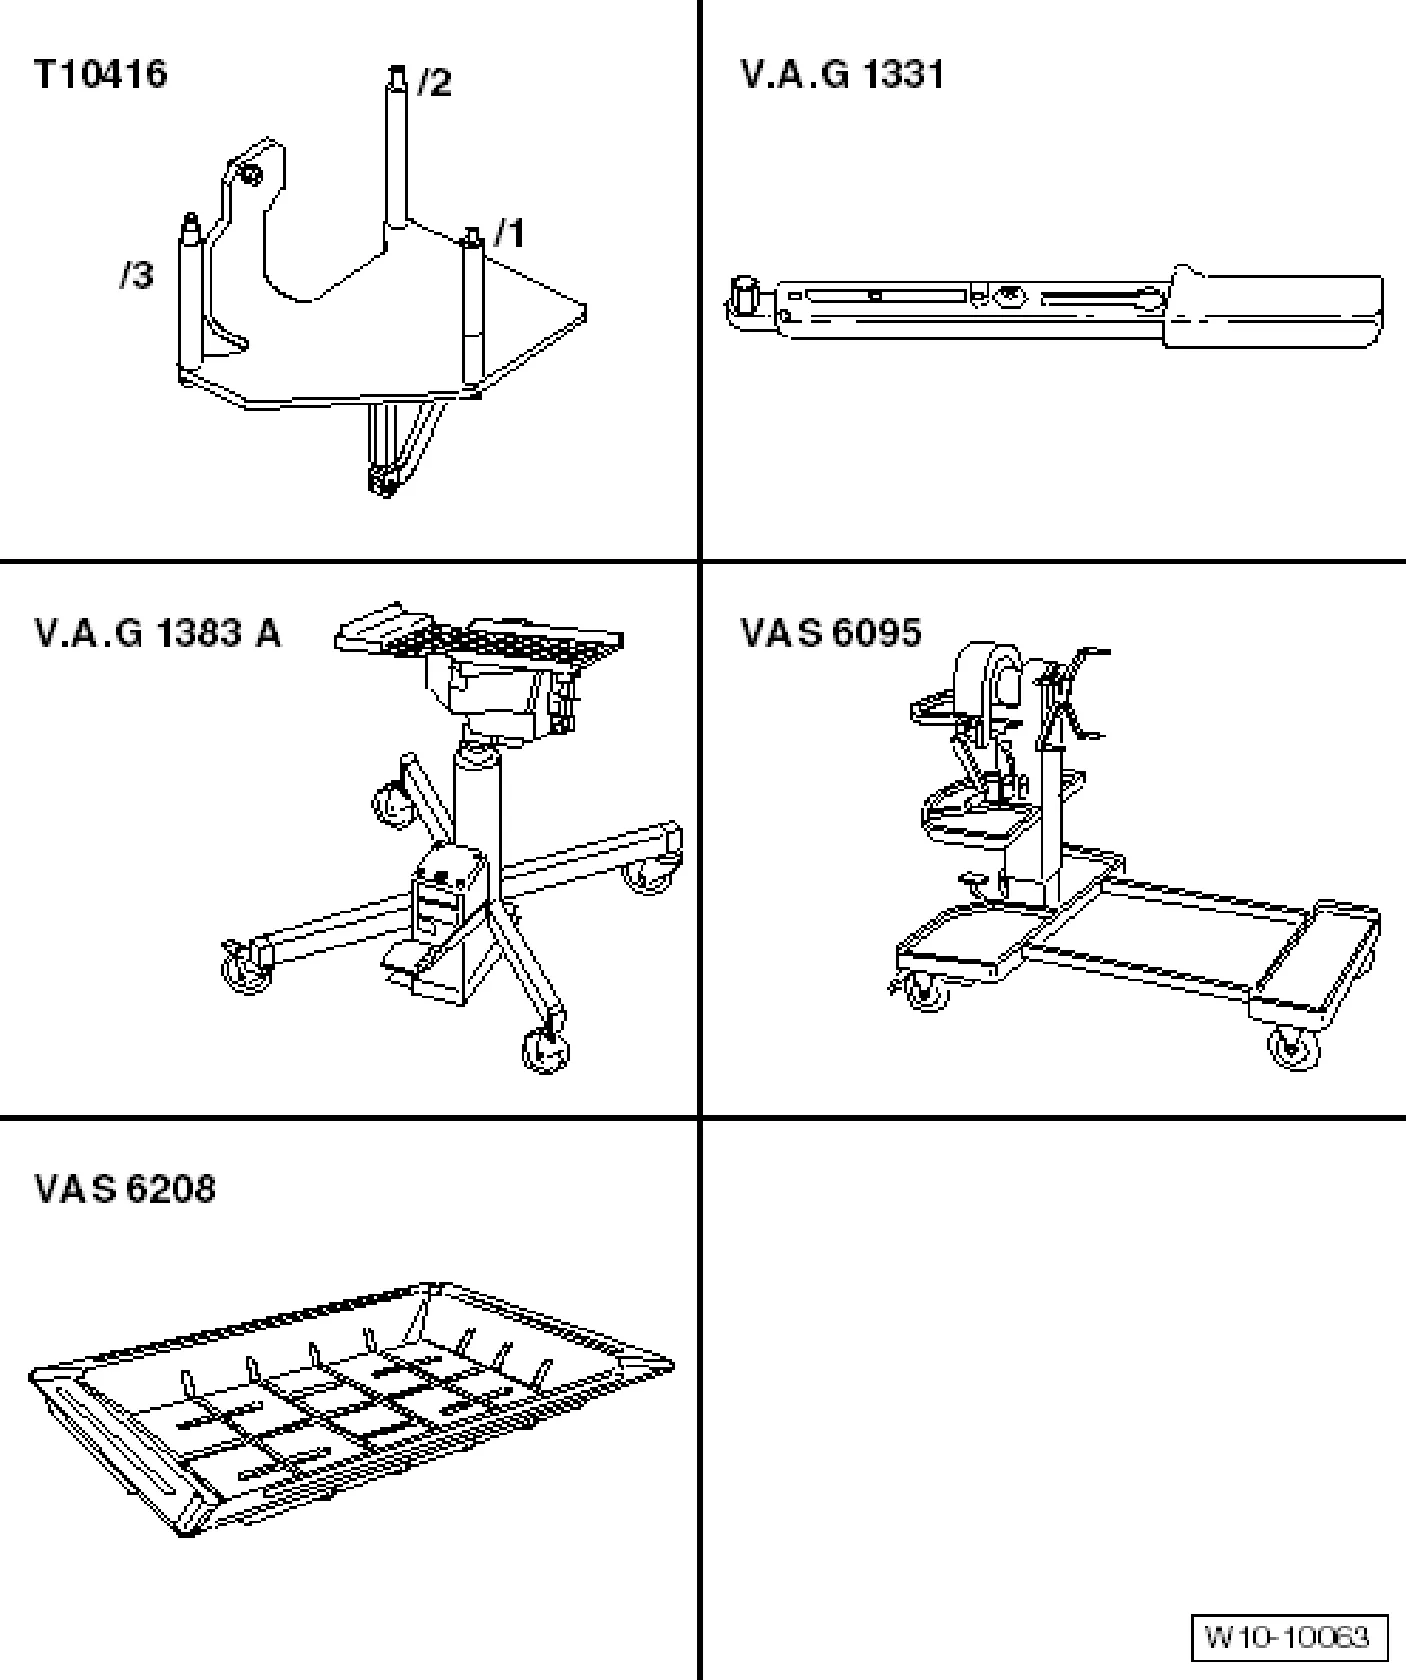
Special tools and workshop equipment required
- Engine support - T10416- with adapters /1, /2, /3
- Torque wrench - V.A.G 1331-
- Engine and gearbox jack - V.A.G 1383 A-
- Engine and gearbox support - VAS 6095-
- Drip tray for workshop hoist - VAS 6208-
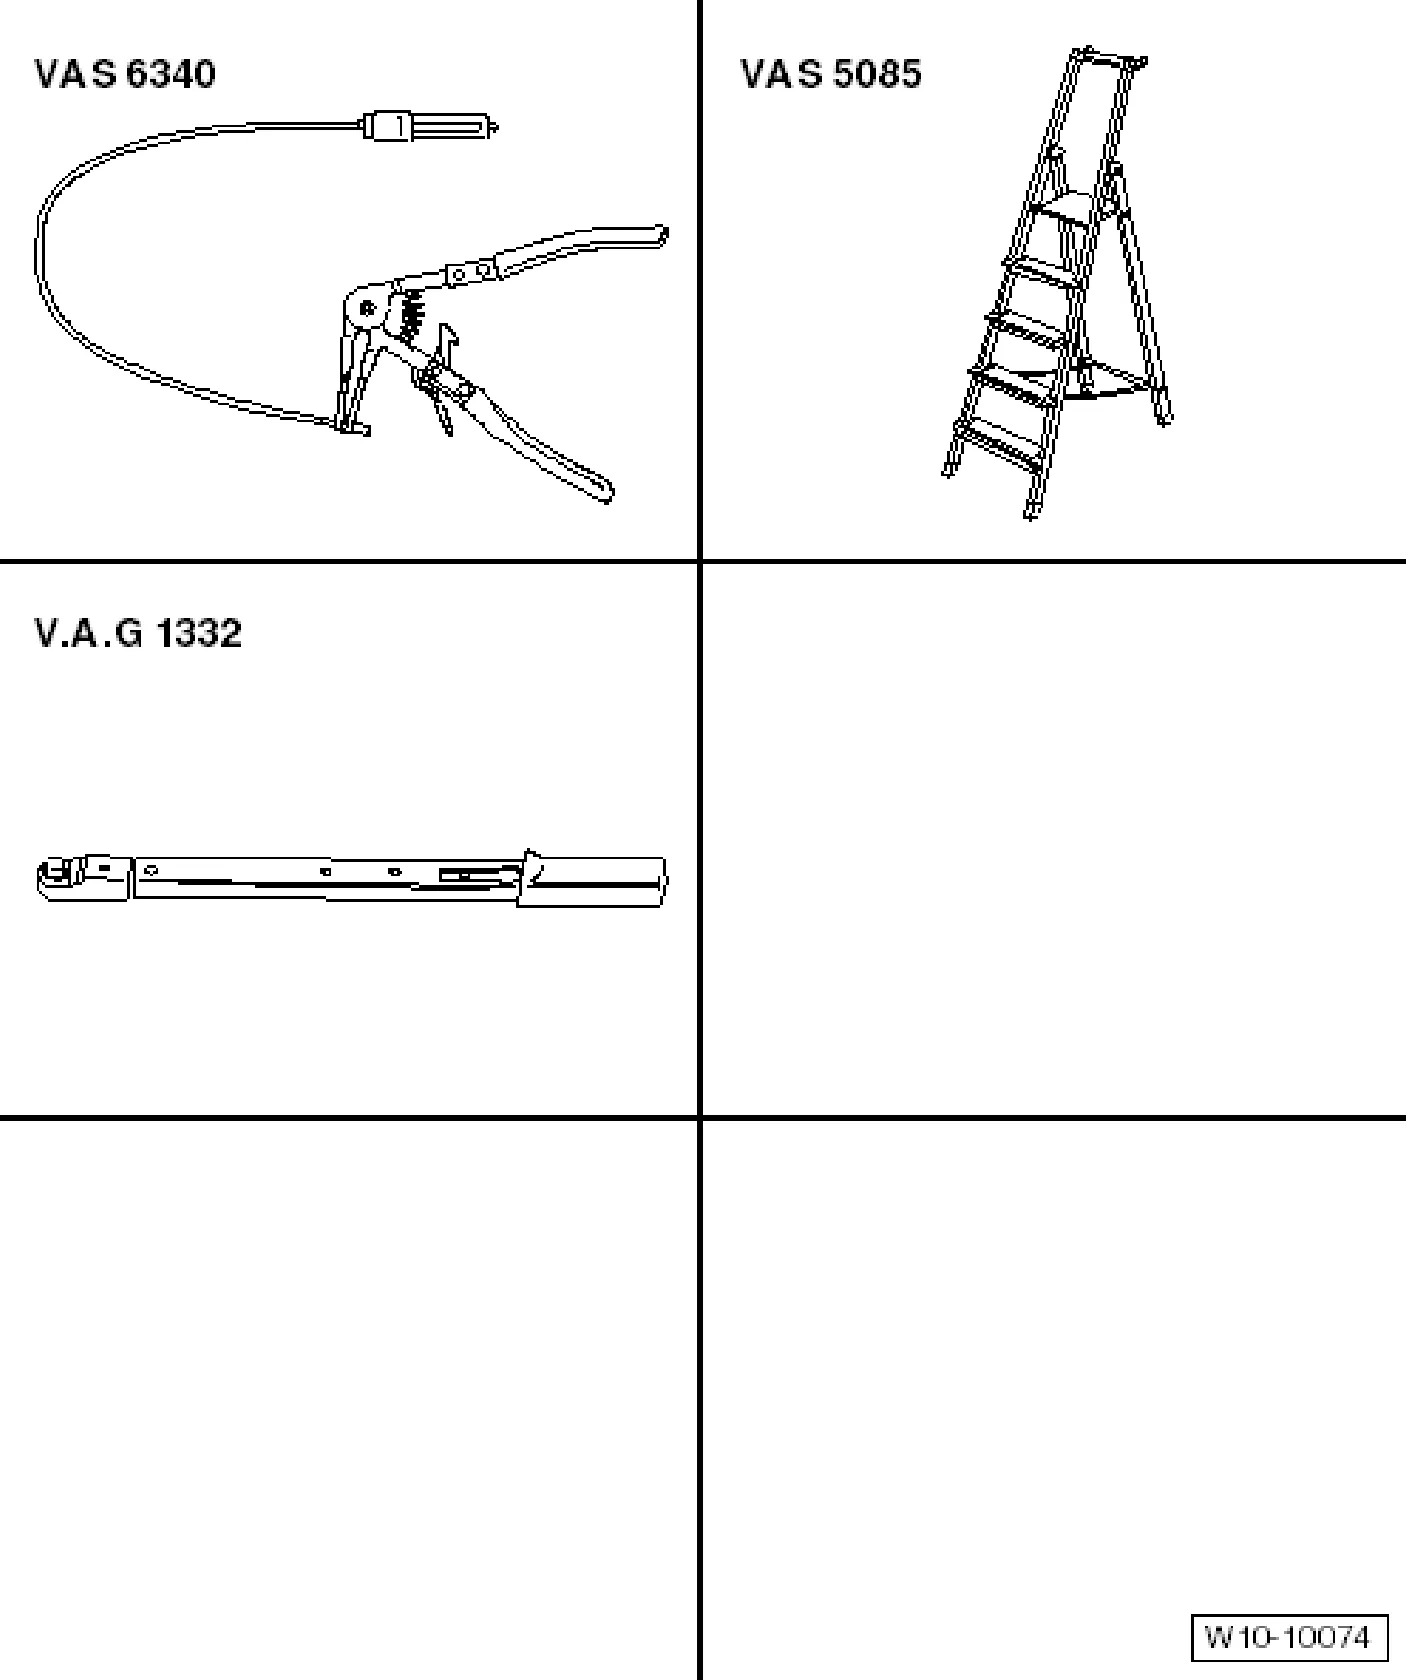
- Hose clamp pliers - VAS 6340-
- Stepladder - VAS 5085-
- Torque wrench (40 … 200 Nm) - V.A.G. 1332-
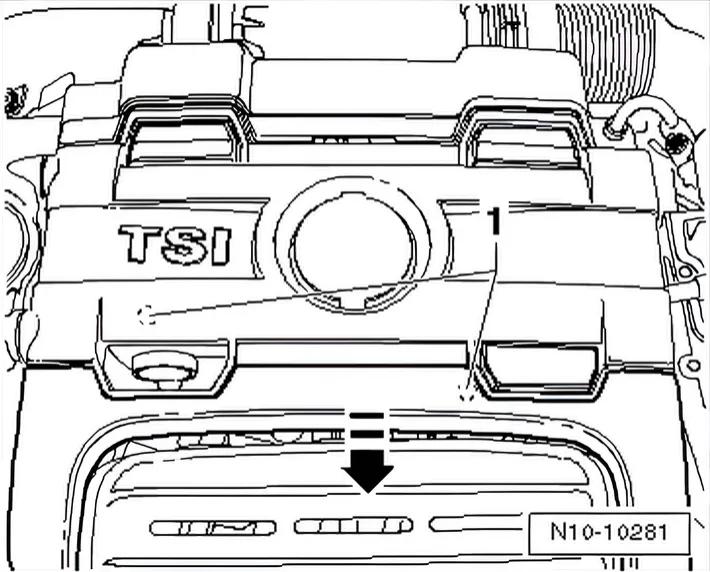
- Lift engine cover panel at points -1- and pull it forwards in direction of -arrow-.
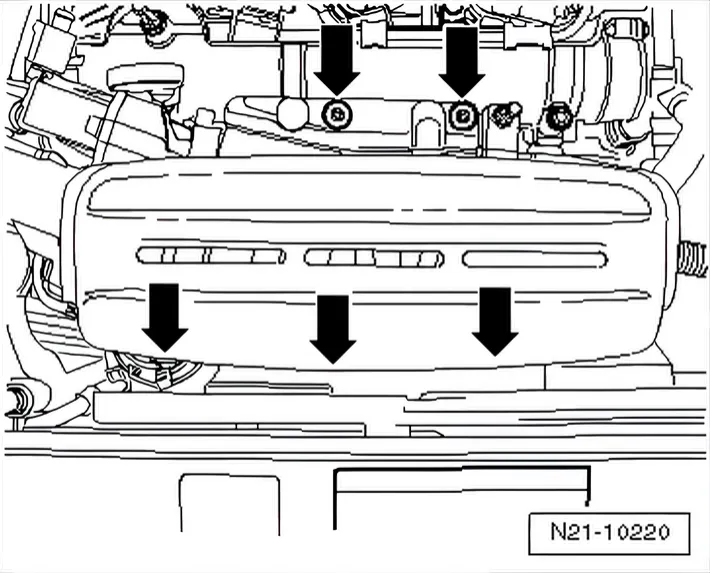
- Unbolt heat shield over turbocharger -arrows-.
- Pull hose -1- off at camshaft housing.
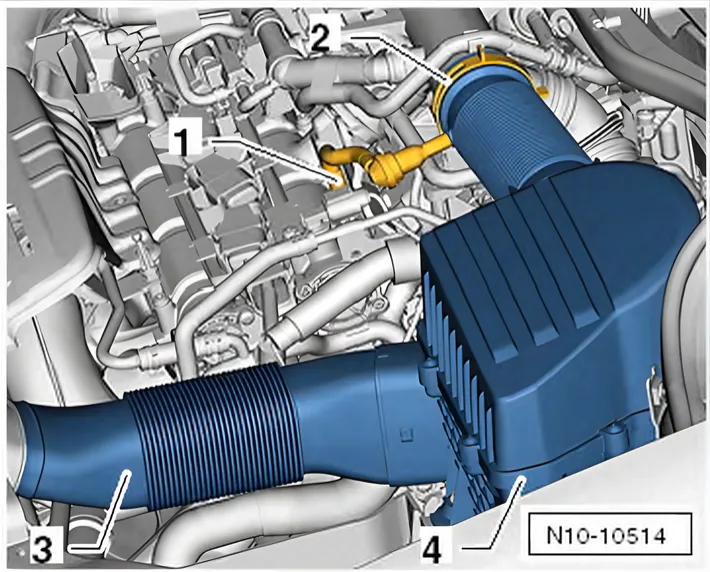
- Open spring-type clip -2- and pull intake hose off.
- Pull intake hose out of intake connection.
- Unscrew securing bolt and pull air filter housing -4- upwards.
- Disconnect battery ⇒ Electrical system; Rep. gr. 27; Disconnecting and reconnecting battery.
- Remove battery and battery tray ⇒ Electrical system; Rep. gr. 27; Battery; Removing and installing battery.
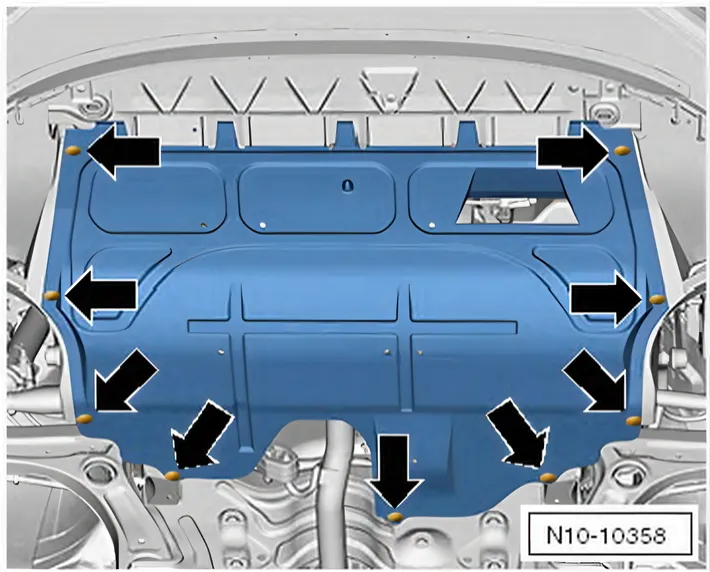
- Remove noise insulation securing bolts -arrows-.
- Remove front left and right wheel housing liners ⇒ General body repairs; Rep. gr. 66; Wheel housing liner; Removing and installing front wheel housing liner.
- Open and close expansion tank cap to release pressure in cooling system.
- Drain coolant ⇒ 1.6 Draining and filling coolant (Polo).
- Observe rules for cleanliness ⇒ 3.1 Rules for cleanliness.
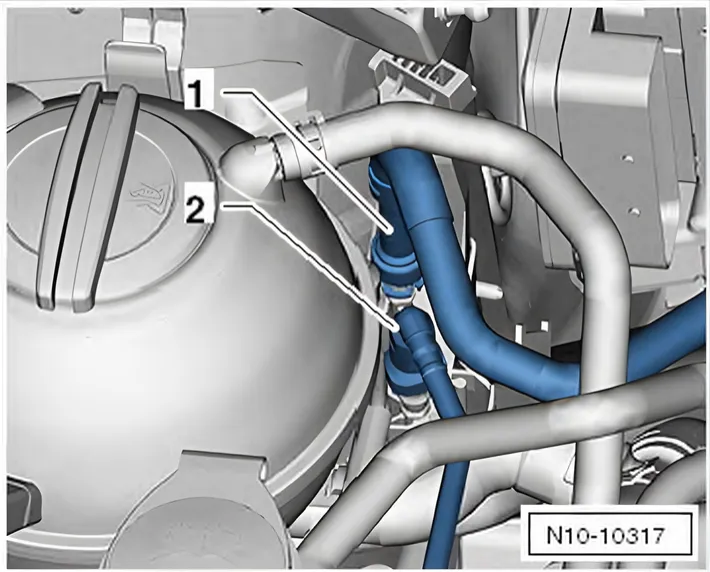
- Separate fuel supply line -1- and line to activated charcoal filter -2-. Press release tabs to do this.
- Pull coolant hoses off at heat exchanger behind intake manifold.
- Unplug connector -1-.
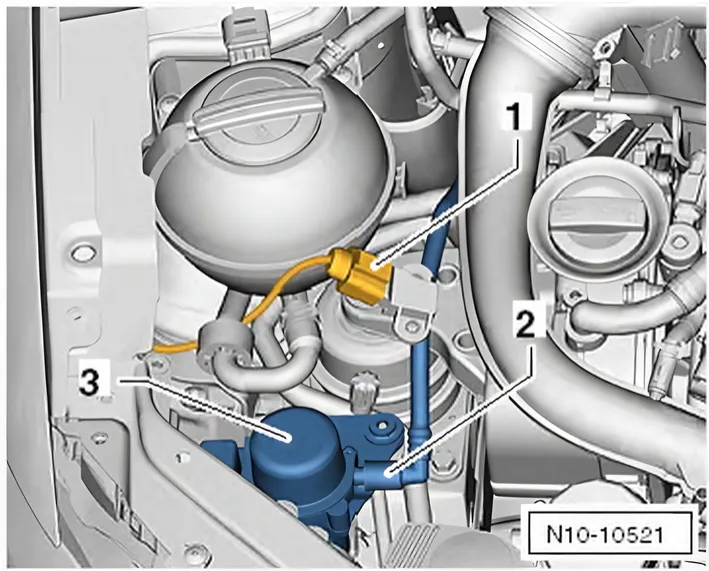
- Pull vacuum hose -2- off at vacuum pump for brakes - V192- -3-.
RHD only
- Additionally pull vacuum hose off at brake servo.
Continued for all vehicles
- Secure vacuum hose to engine with cable tie.
- Unplug connector -1-.
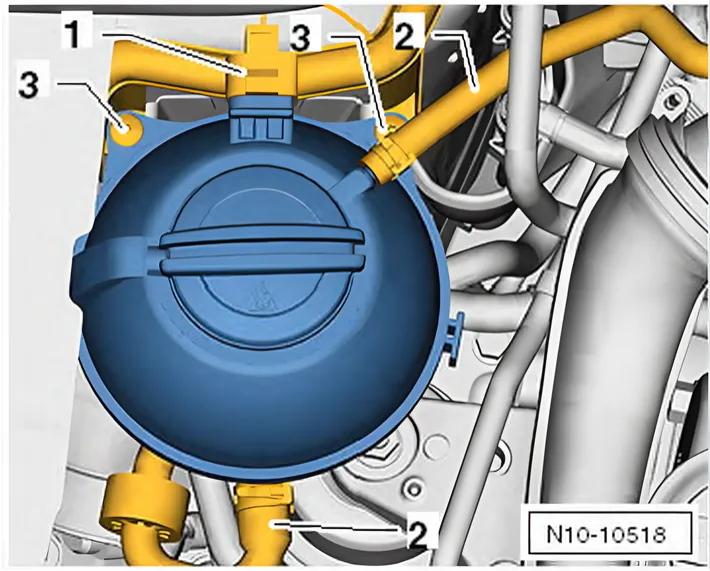
- Pull coolant hoses -2- off coolant expansion tank.
- Unscrew securing bolts -3- and pull coolant reservoir upwards.
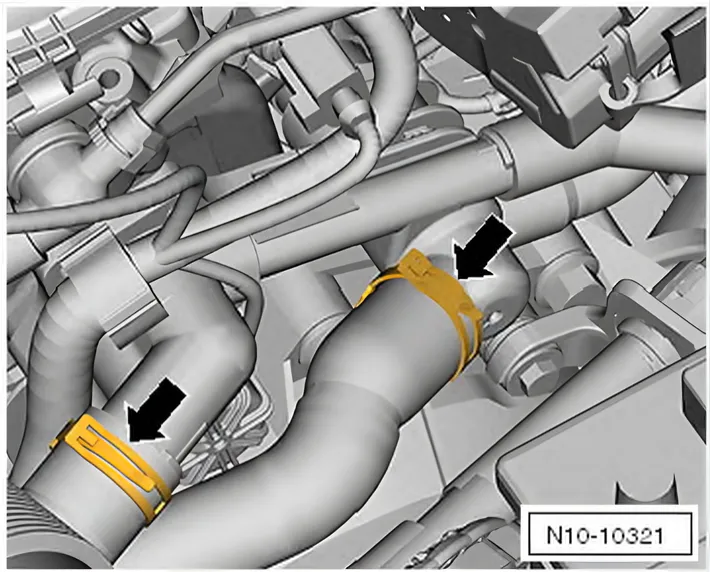
- Release coolant hoses -arrows- at gearbox side and pull them off.
- Pull coolant hoses off at radiator and remove completely.
- Remove engine control unit ⇒ 6 Engine control unit - J623-.
- Remove wiring harness from wiring guides and secure to engine with cable ties.
- Remove main fuse box in engine compartment ⇒ Electrical system; Rep. gr. 97; Removing and installing main fuse box in engine compartment.
- Secure main fuse box to side of body with cable ties.
- Remove selector lever cable ⇒ Rep. gr. 34; Removing and installing selector lever cable.
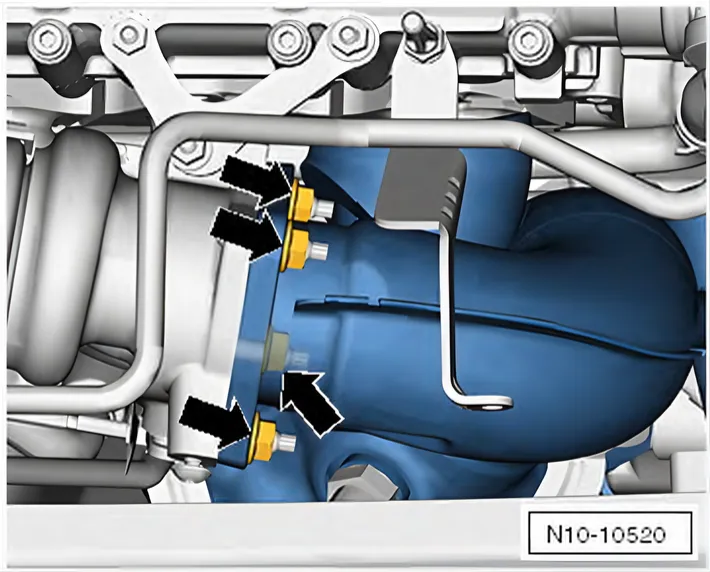
- Unscrew securing nuts on turbocharger -arrows-.
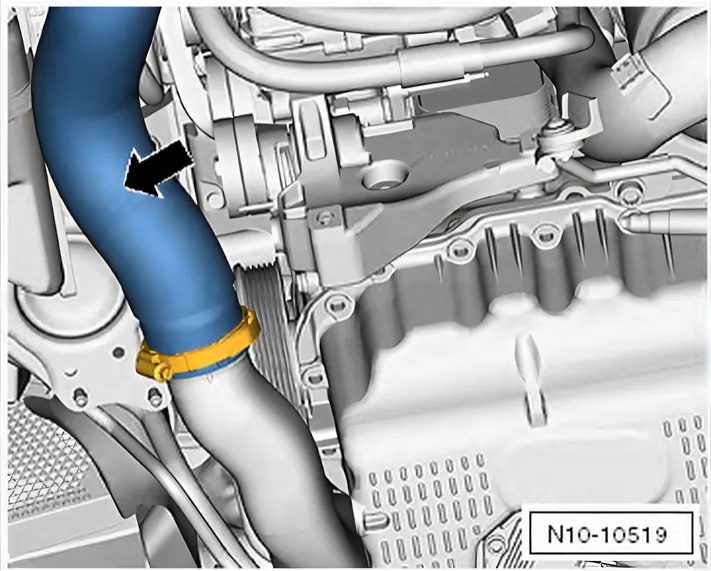
- Remove charge air hose -arrow-.
- Remove air conditioner compressor ⇒ Heating, air conditioning; Rep. gr. 87
- Secure air conditioner compressor to lock carrier.
- Ensure that lines are not kinked.
- Disconnect connector -3- for Lambda probe after catalytic converter - G130-.
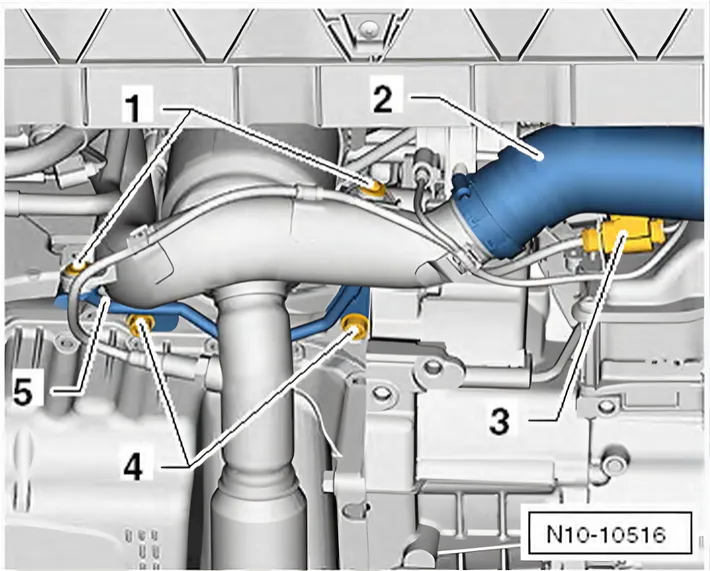
- Also disconnect all further connectors at gearbox support.
- Unscrew securing bolts -1- for charge air pipe.
- Unscrew securing bolts -4- and remove bracket -5-.
- Pull upper charge air hose off turbocharger.
- Remove charge air pipe downwards.
- Press front exhaust pipe support rings off pins.
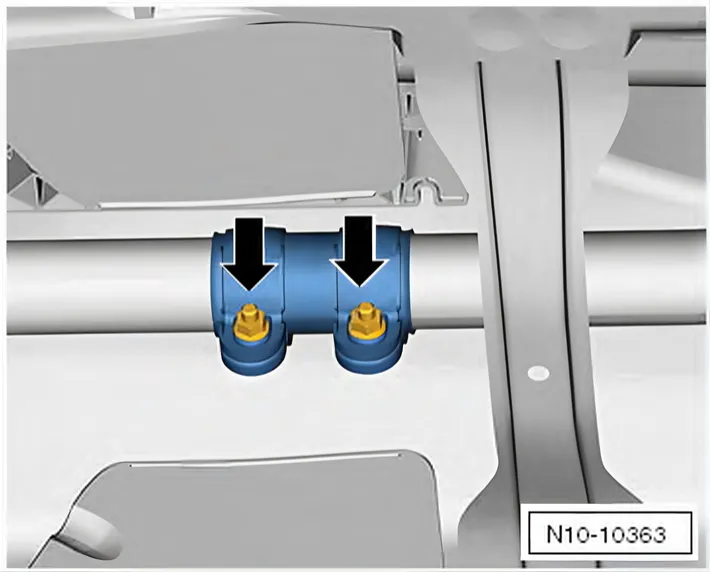
- Loosen securing bolts of clamp -arrows- and slide to rear.
- Remove catalytic converter with front exhaust pipe downwards.
- Remove poly V-belt ⇒ 1.3 Removing and installing poly V-belt (Golf Plus, Eos, Scirocco, Golf, Touran, Polo, Sharan, Passat, Passat CC, Golf Cabriolet).
- All cable ties that are opened or cut through when the engine is removed must be renewed/replaced in the same position when the engine is installed.
- Disconnect all electrical wiring from gearbox, alternator and starter and lay to side.
- Pull off or disconnect all other electrical connections as necessary from engine and lay to side.
- Pull vacuum and breather hoses off engine.
- Pull connectors off thermal switch and radiator fan.
- Remove right and left drive shafts ⇒ Running gear, axles, steering; Rep. gr. 40; Repairing drive shafts; Removing and installing drive shafts.
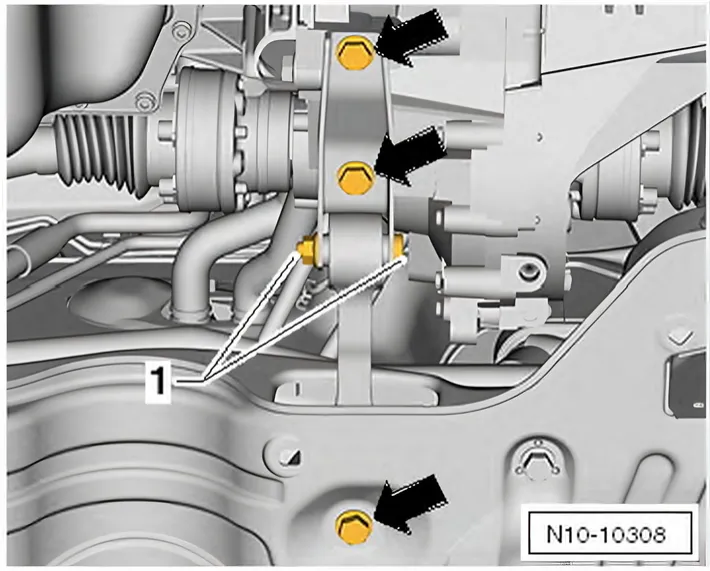
- Remove pendulum support securing bolts -arrows-.
- Remove subframe ⇒ Running gear, axles, steering; Rep. gr. 40; Removing and installing subframe.
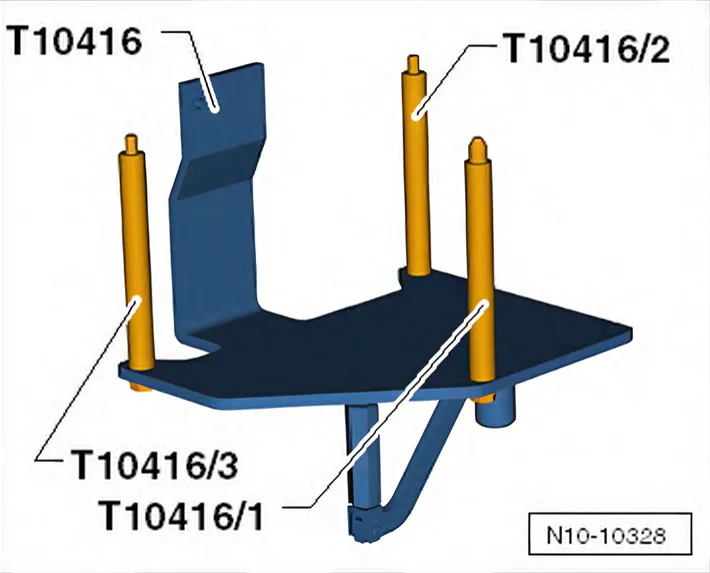
Engine support - T10416- with adapters -/1-, -/2- and -/3- is required to lower engine with gearbox.
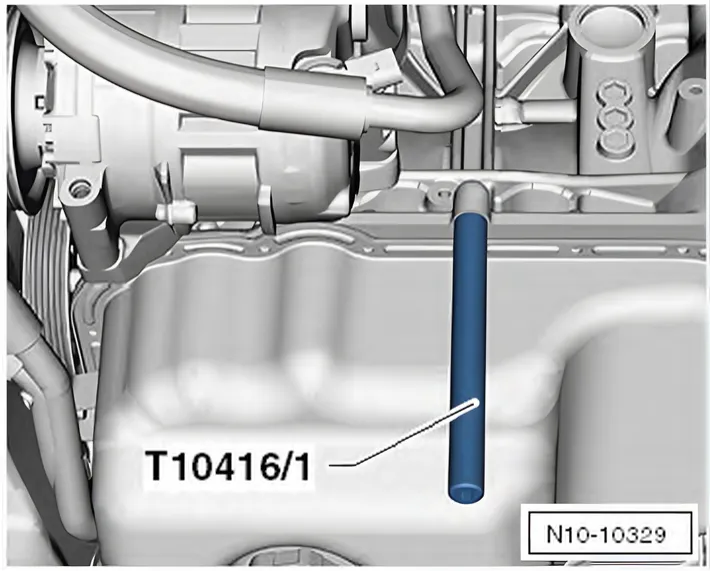
- Screw adapter - T10416/1- to stop into crankcase.
- Position the engine support - T10416- with adapters -/2- and -/3- on crankcase.
- Secure engine support - T10416- hand-tight to crankcase using a bolt -1-.
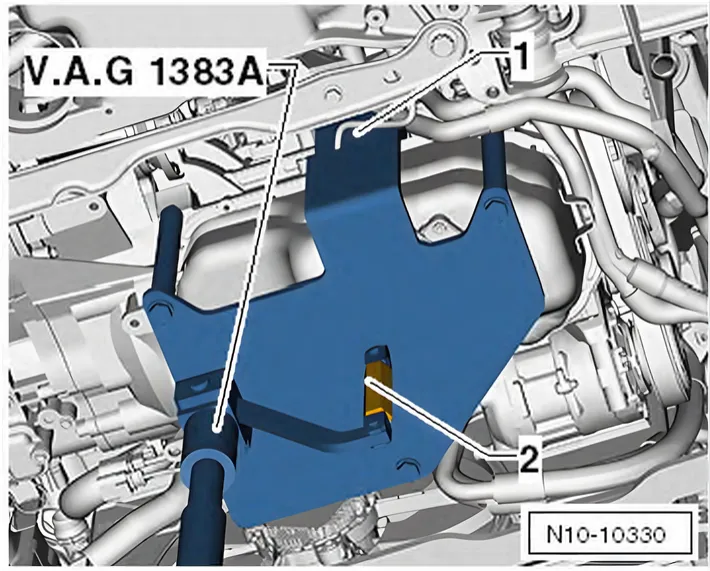
- Tighten all bolts on engine support - T10416- to 20 Nm.
- Position engine and gearbox jack - V.A.G 1383 A- on engine support - T10416-.
- Lift engine and gearbox slightly using engine and gearbox jack
- V.A.G 1383 A-.
- Unbolt earth wire -1-.
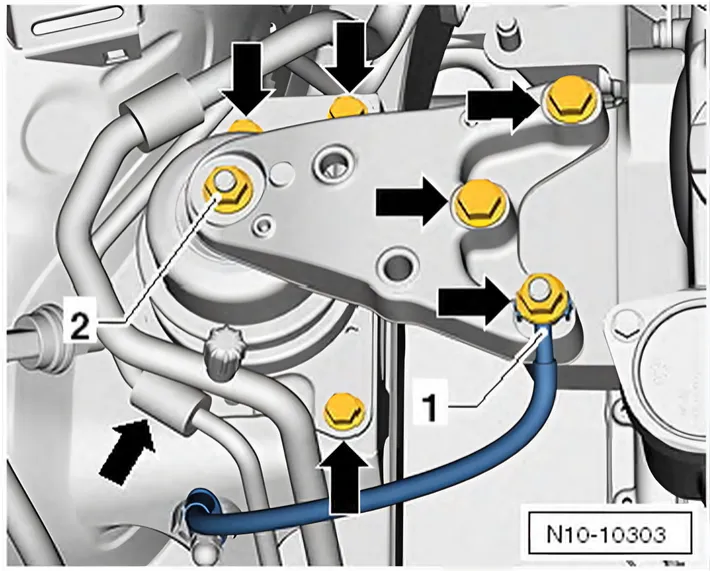
- Unscrew securing bolts -arrows- for engine mounting.
- Remove complete engine mounting.
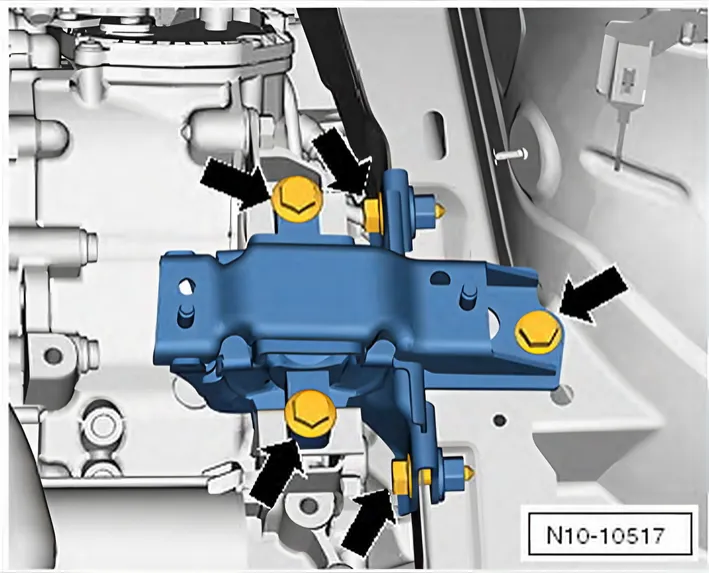
- Unscrew securing bolts -arrows- at gearbox mounting.
- Carefully lower engine and gearbox.
Secure engine to engine and gearbox support - VAS 6095- to carry out repairs.
- Unbolt gearbox.
- Secure engine on engine and gearbox support - VAS 6095-.