
1.2 TDI CR engine (EA189) · Cooling · Radiator, radiator fan
Removing and installing radiator
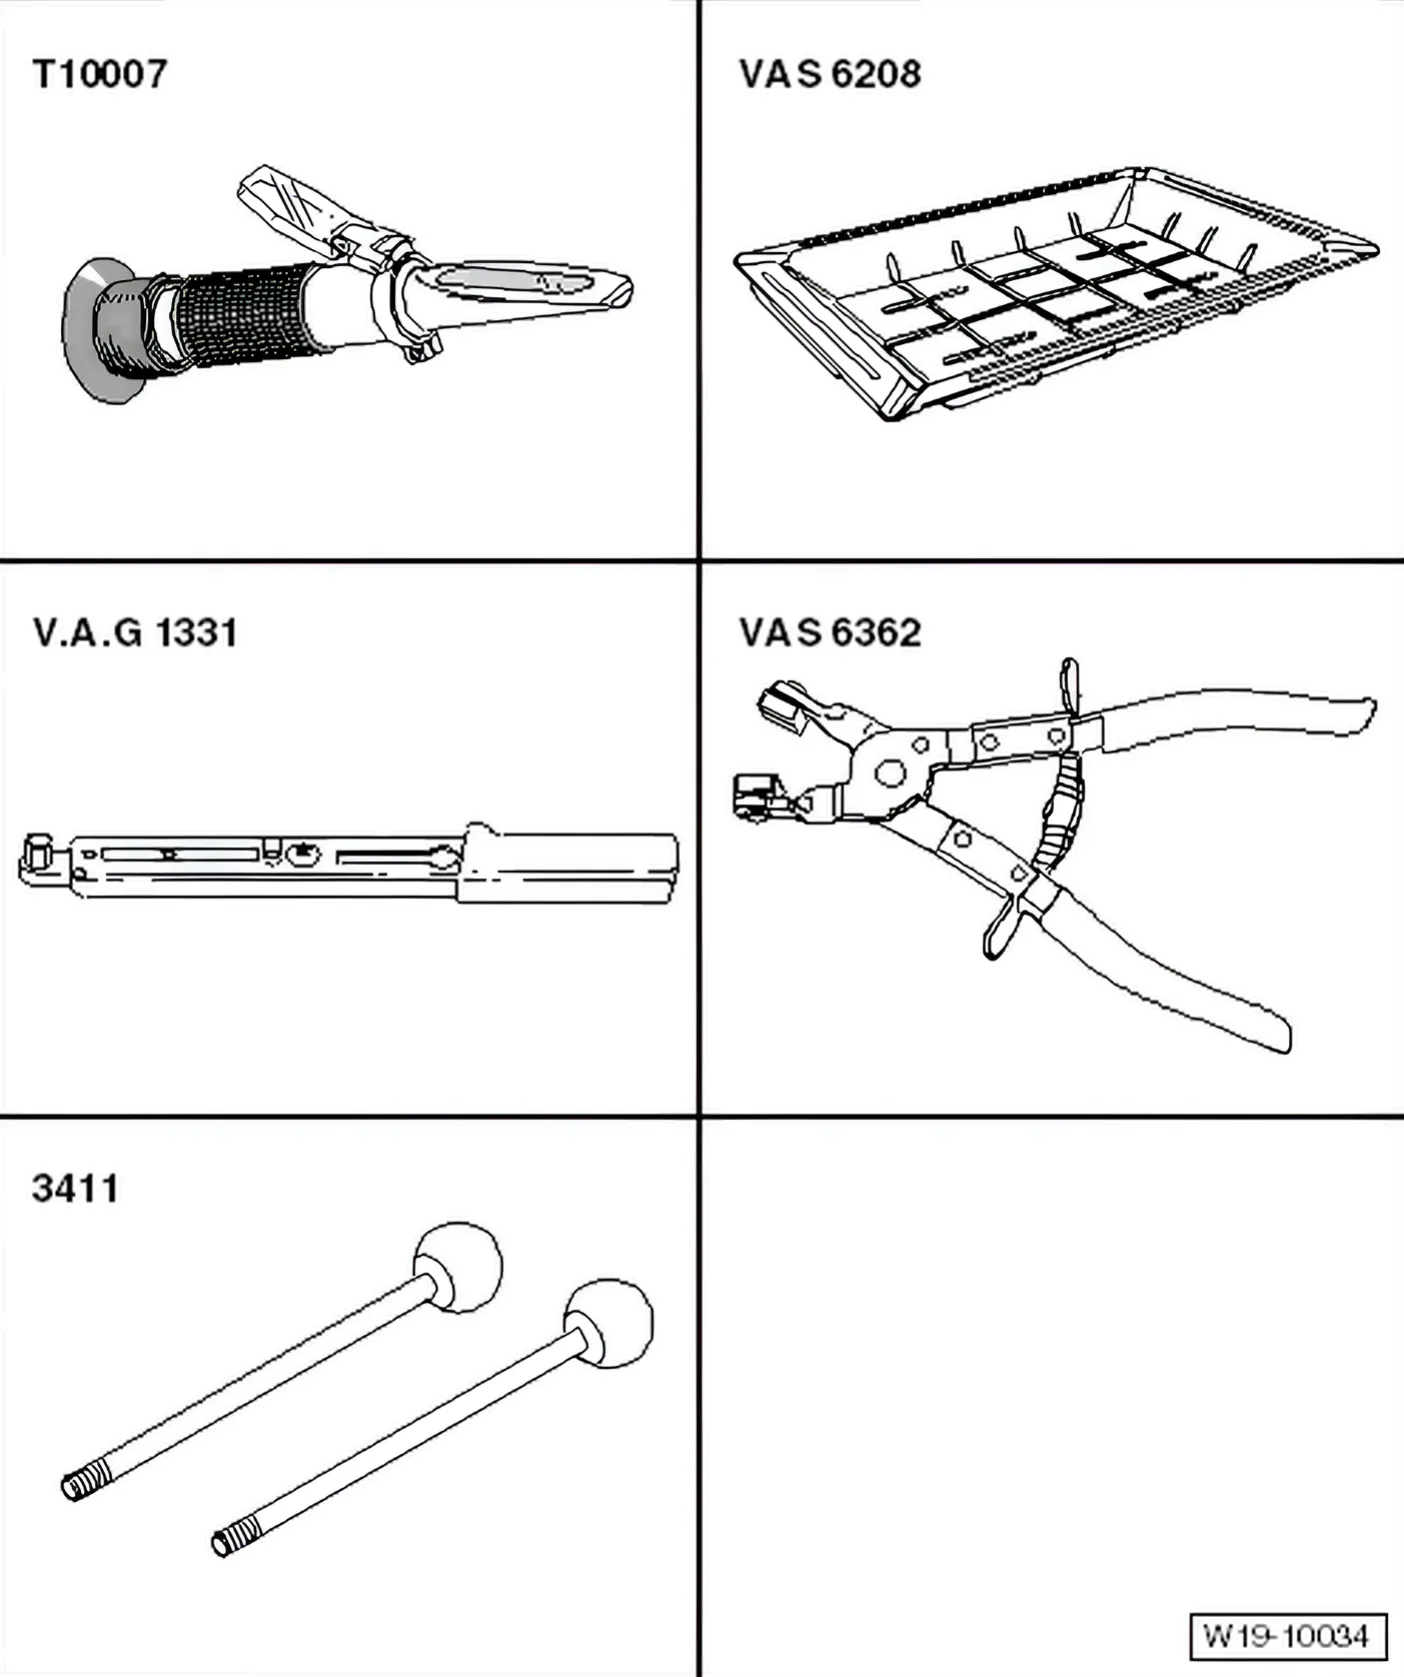
Special tools and workshop equipment required
- Refractometer - T10007-
- Drip tray for V.A.G 1202 - V.A.G 1306/-
- Torque wrench - V.A.G 1331/-
- Pliers for spring-type clips - VAS 6362-
- Guide pins - 3411-
»Carry out the following work sequence«
Removing
- Bring lock carrier into service position ⇒ General body repairs, exterior; Rep. gr. 50; Body - front; Lock carrier - service position.
Vehicles with air conditioning system
- Extract refrigerant from air conditioner ⇒ Heating, air conditioning; Rep. gr. 87.
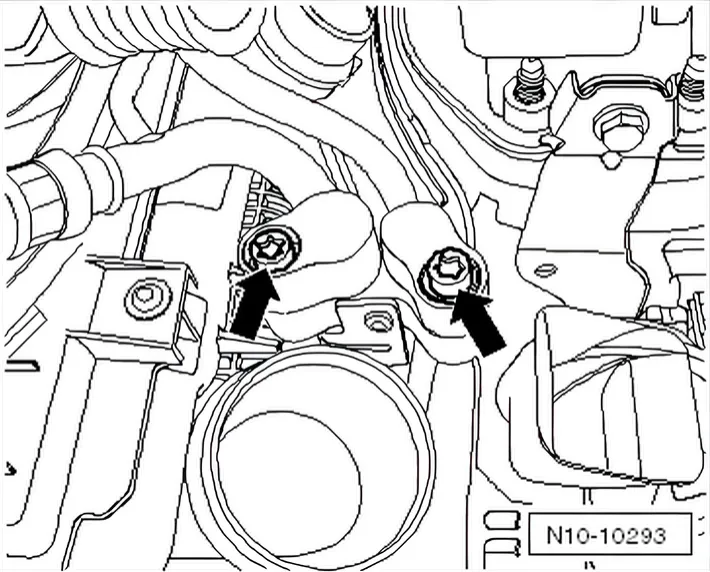
- Unscrew refrigerant lines -arrow- from lock carrier.
Continued for all vehicles:
- Remove connecting hoses to charge air cooler ⇒ 2 Charge air system.
- Drain coolant ⇒ 19 – Cooling.
- Pull coolant hoses off radiator.
- Pull off connector for radiator fan.
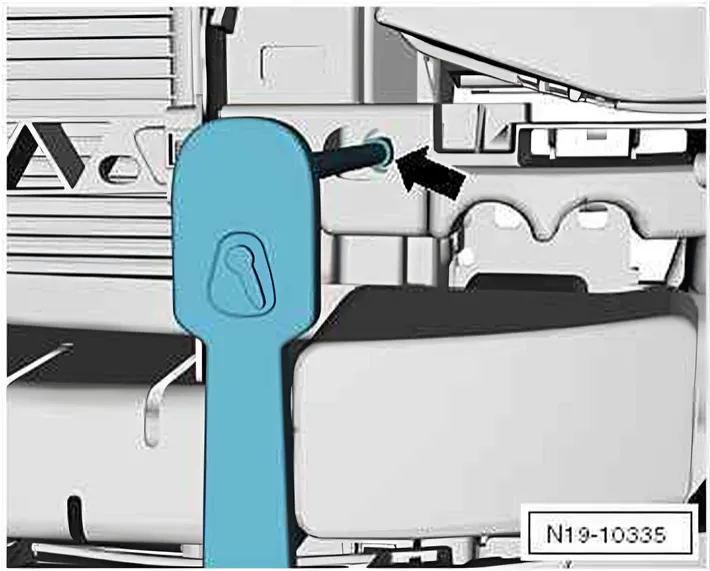
- Unscrew securing bolts for front radiator -arrow-. Remove radiator upwards together with charge air cooler.
Disconnecting charge air cooler from radiator
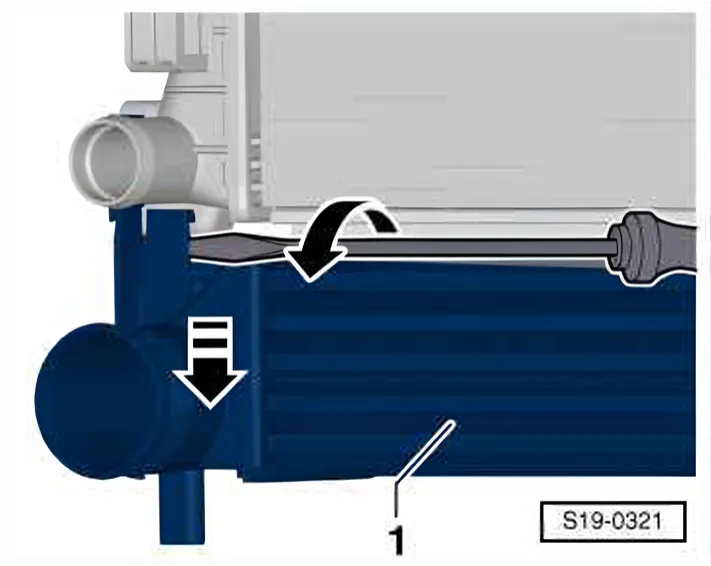
- Push a wide screwdriver into the latch on the left. Turn the screwdriver in order to carefully open the latch of the charge air cooler -1- at radiator.
- Then, pull the charge air cooler on left downwards a little bit.
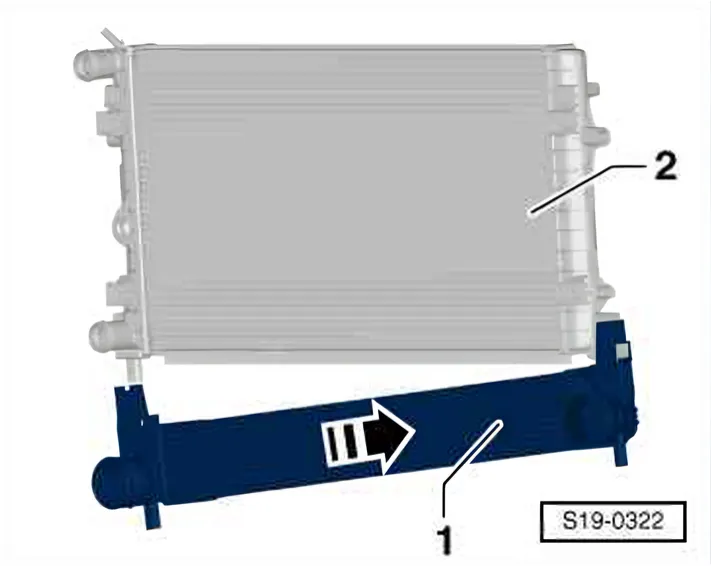
- Push charge air cooler -1- towards the right out of the locking latch of the radiator -2-.
Installing
Specified torques ⇒ 1.3.3 Filling: Using cooling system charge unit - VAS 6096- only
Installation is carried out in the reverse order. When installing, note the following:
- Add coolant ⇒ 1.3.1 Draining.
- Vehicles with air conditioner. Charge air conditioning system with refrigerant ⇒ Heating, air conditioning; Rep. gr. 87.