
Running gear, axles, steering · Rear suspension · Axle beam
Renewing bonded rubber bush for axle beam
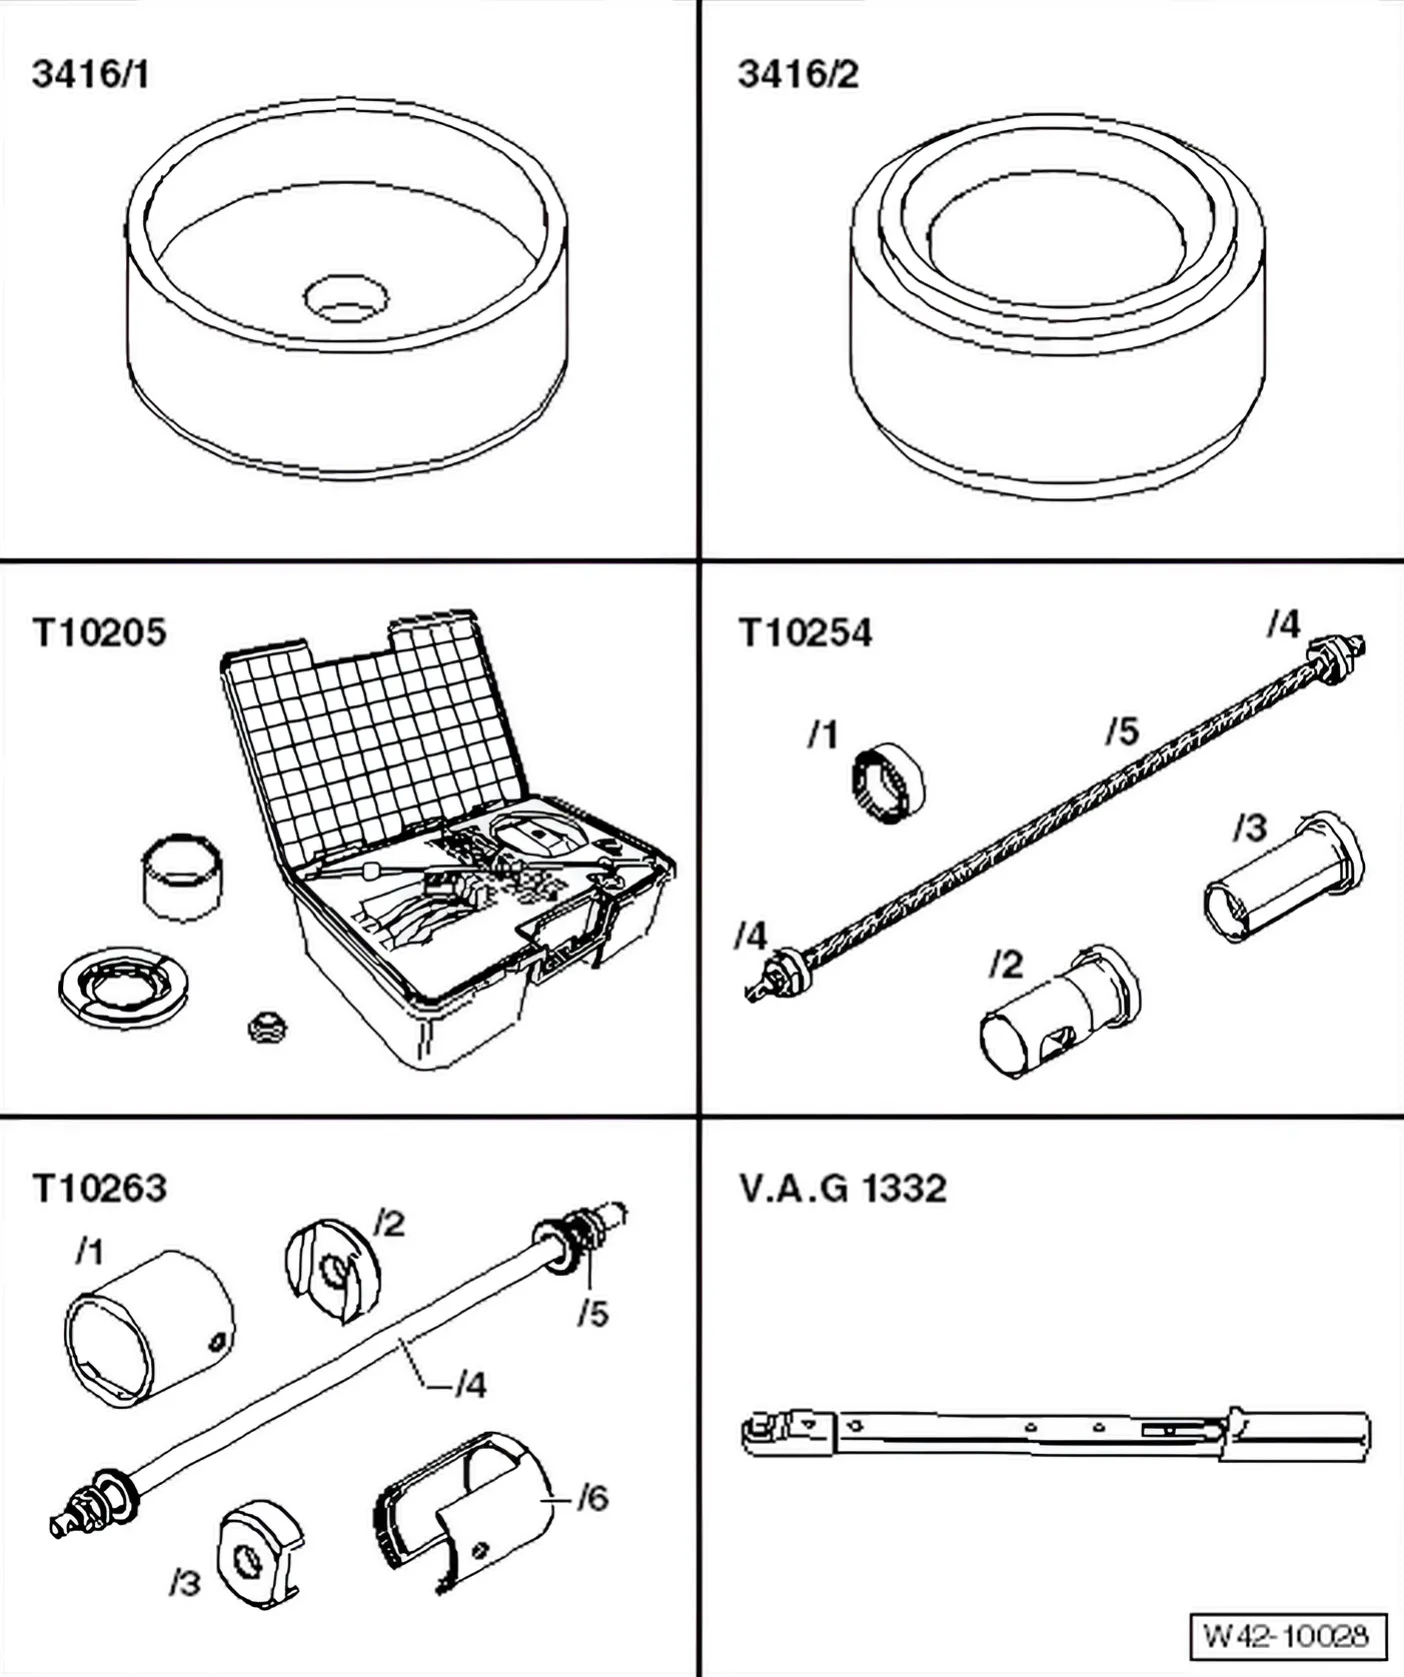
Special tools and workshop equipment required
- Thrust piece - 3416/1-
- Thrust piece - 3416/2-
- Assembly tool - T10205-
- Assembly tool - T10254-
- Assembly tool - T10263-
- Torque wrench - V.A.G 1332-
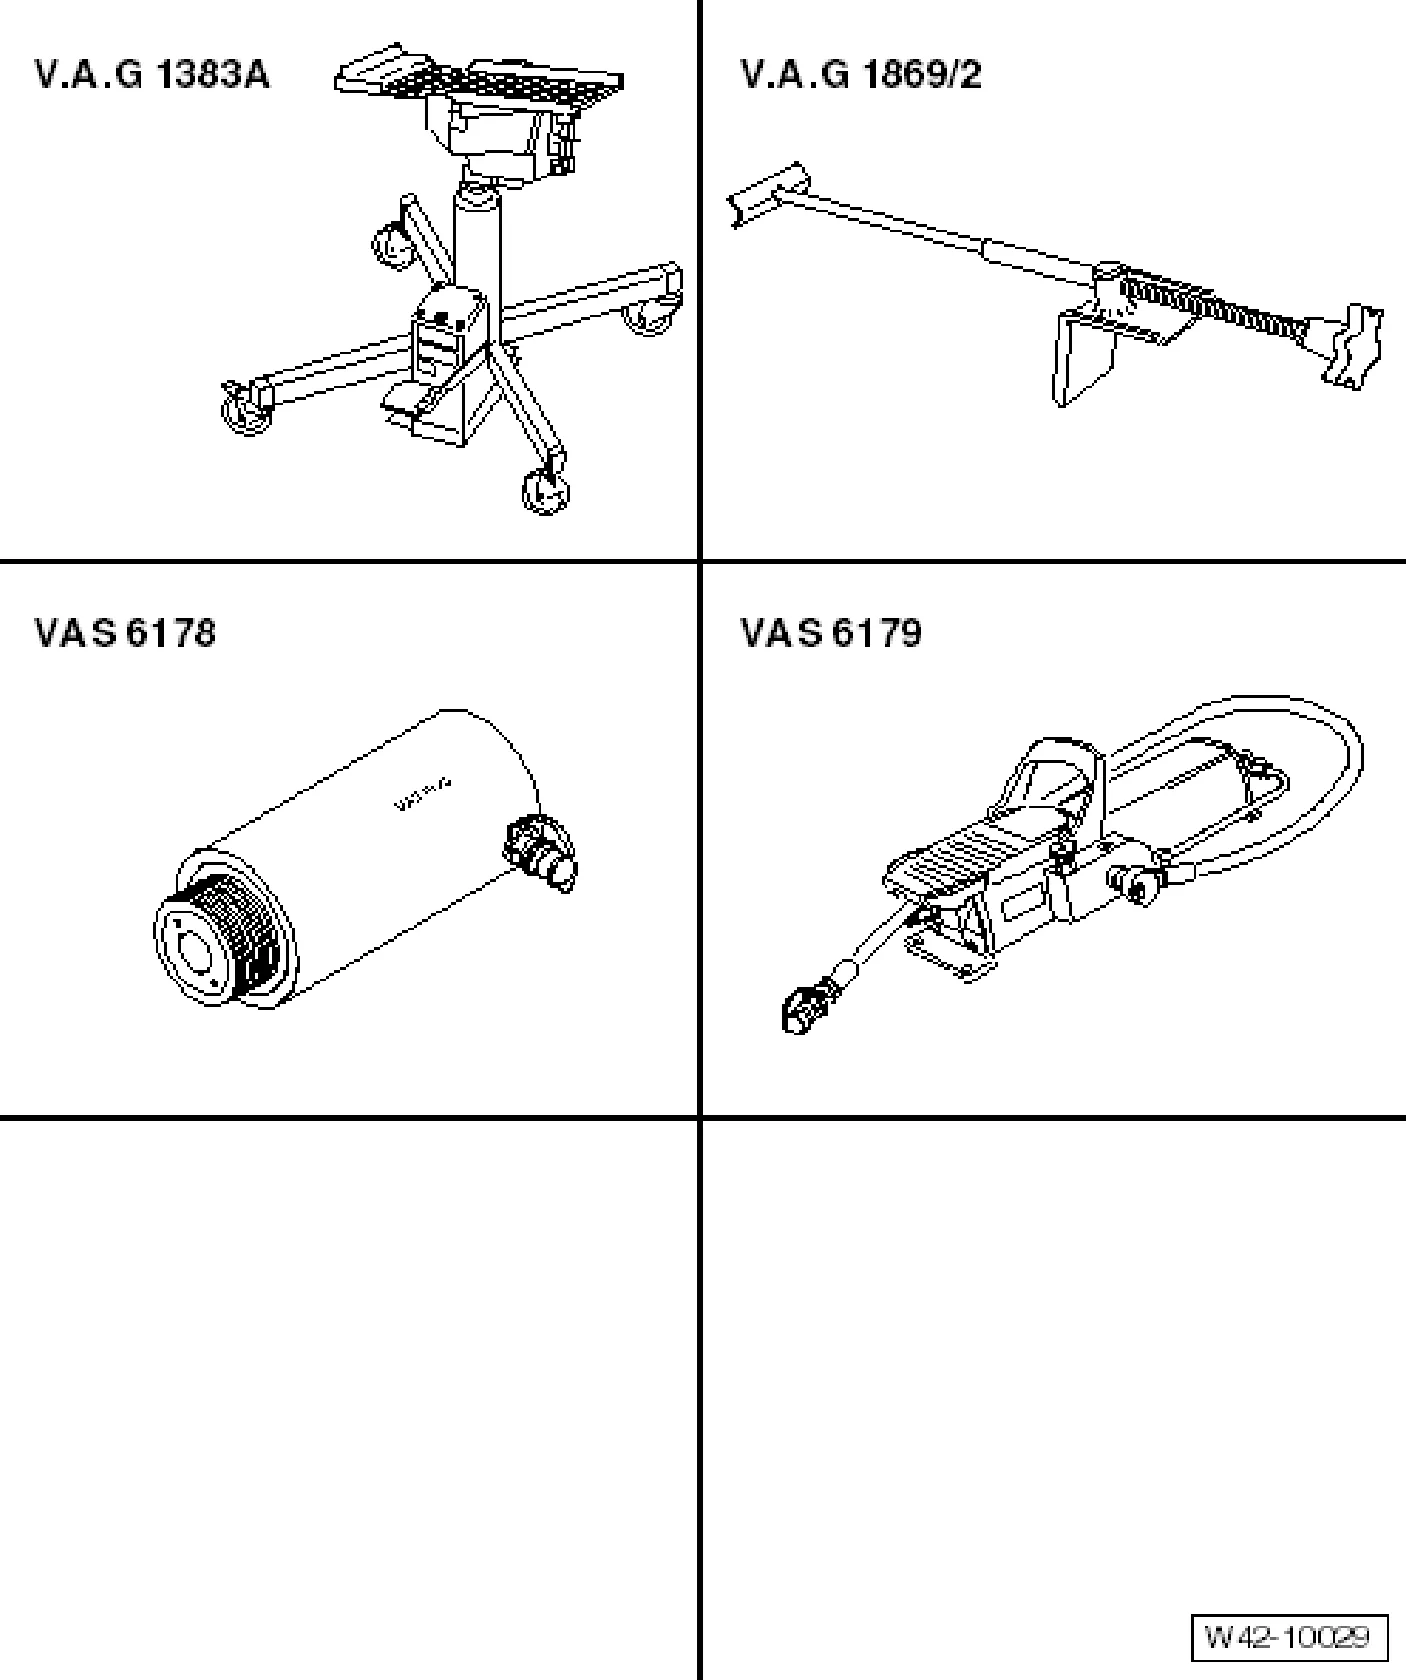
- Engine and gearbox jack - V.A.G 1383 A-
- Universal gearbox mounting - V.A.G 1359/2-
- Brake pedal depressor - V.A.G 1869/2-
- Hydraulic cylinder - VAS 6178-
- Foot pump - VAS 6179-
Removing
- Release handbrake.
- Apply brake pedal depressor - V.A.G 1869/2-.
- Raise vehicle to working height.
- Remove wheels.
- Pull connector off speed sensor.
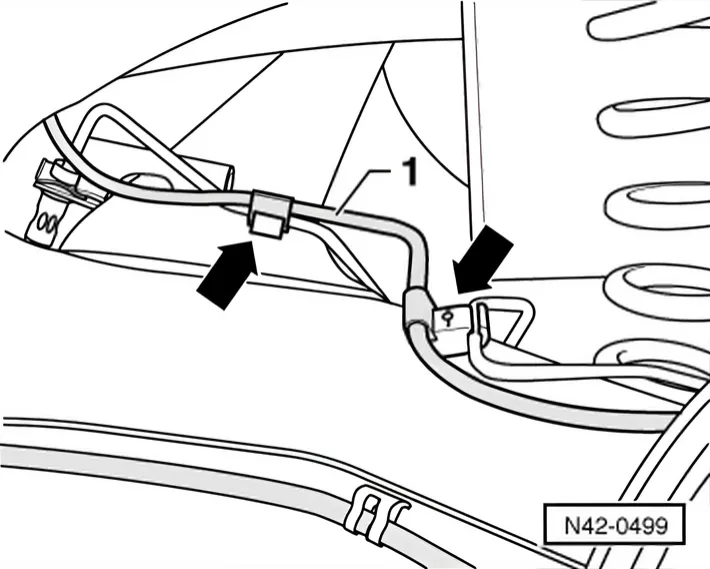
- Unclip wire -1- for speed sensor from brackets -arrows-.
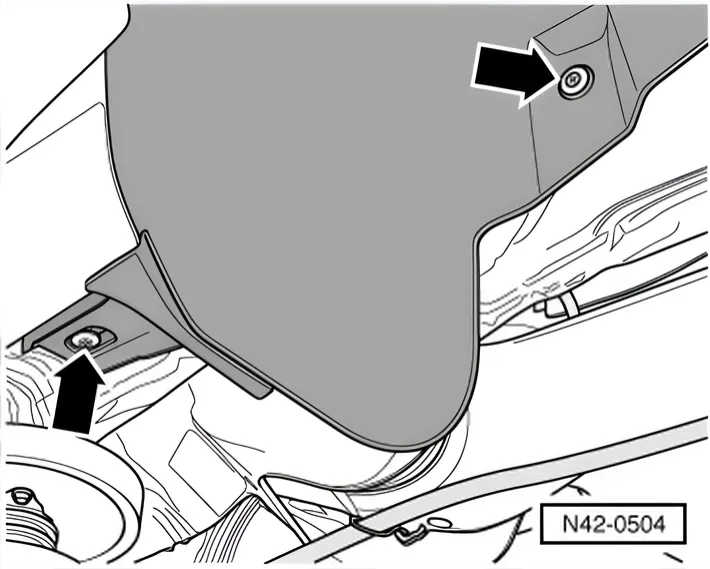
- Unscrew bolts for wheel housing liners -arrows- on both sides.
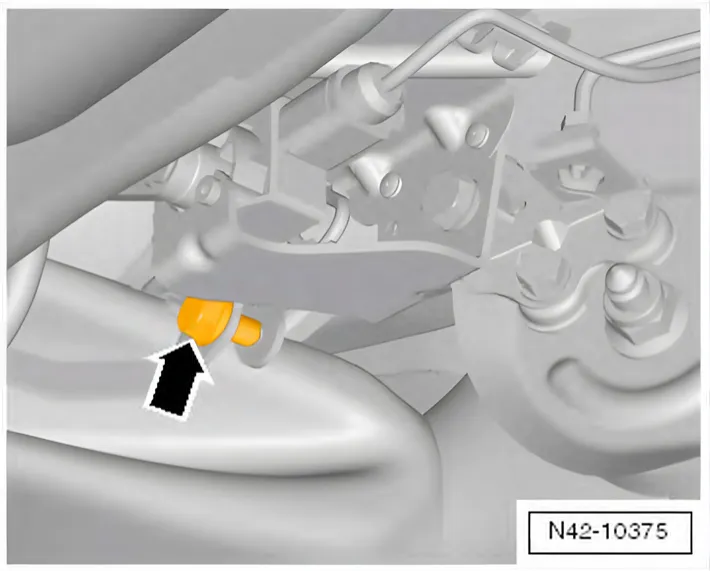
Vehicles with dynamic headlight range control
- Unbolt coupling rod of rear left vehicle level sender - G76- from rear axle -arrow-.
Continued for all vehicles
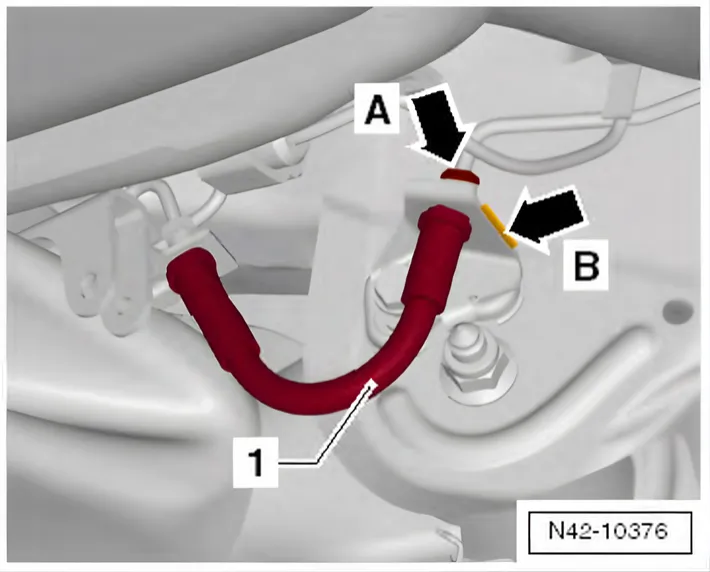
- Disconnect left brake line -arrow A- and remove clip -arrow B-.
- Pull left brake hose -1- out of retainer.
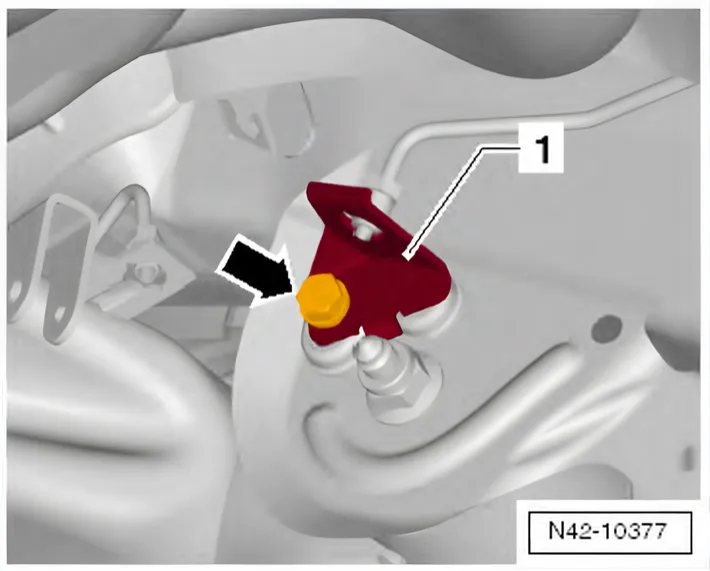
- Unscrew bolt -arrow- and remove retainer -1- from mounting bracket.
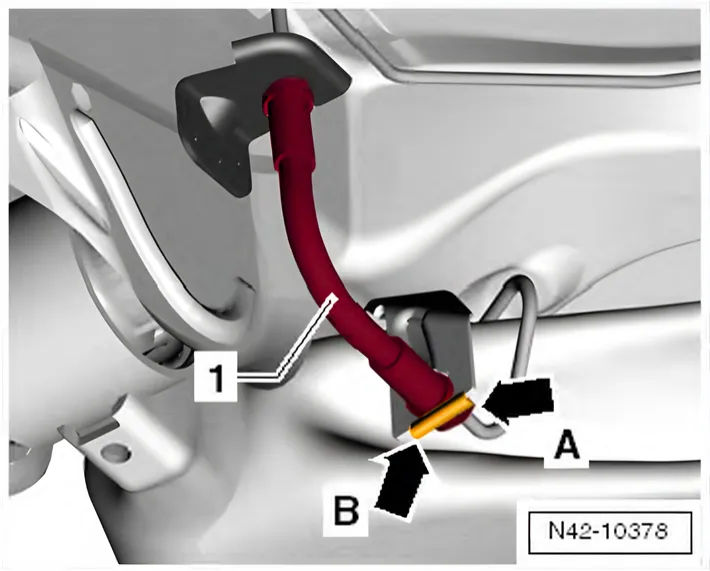
- Disconnect right brake line -arrow A- and remove clip -arrow B-.
- Pull right brake hose -1- out of axle beam.
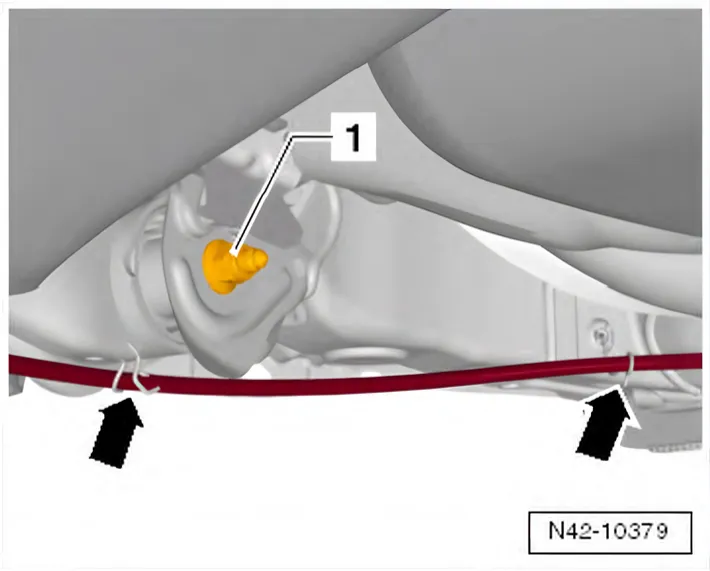
6R 2009–2014 All vehicles except for R WRC
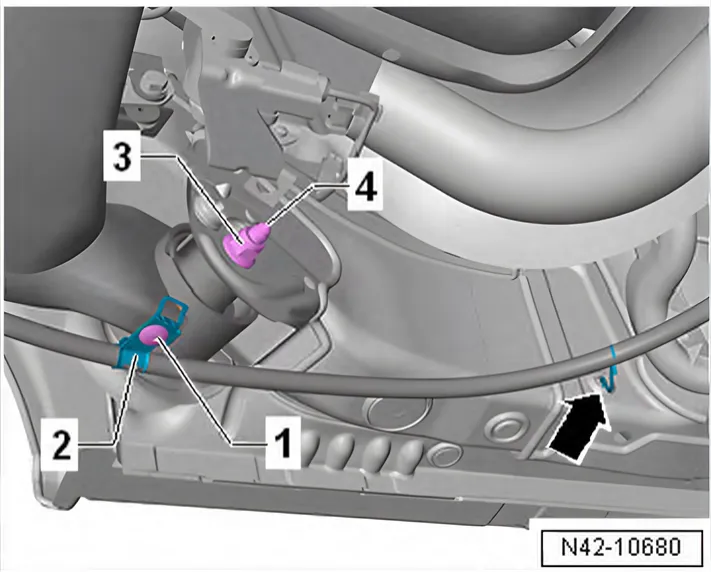
R WRC only
- Unscrew bolt -1-, and remove bracket -2- from axle beam.
- Unscrew nuts -3-.
- Unscrew bolts -4- for right and left axle beams.
Continued for all vehicles
- Remove handbrake cables from retainers -arrows-.
- Pull handbrake cables out of guide tubes.
- Secure rear axle with a strap or similar when lowering and removing.
- Unscrew bolts -1- for right and left axle beams.
- Lower rear axle with engine and gearbox jack - V.A.G 1383 A-.
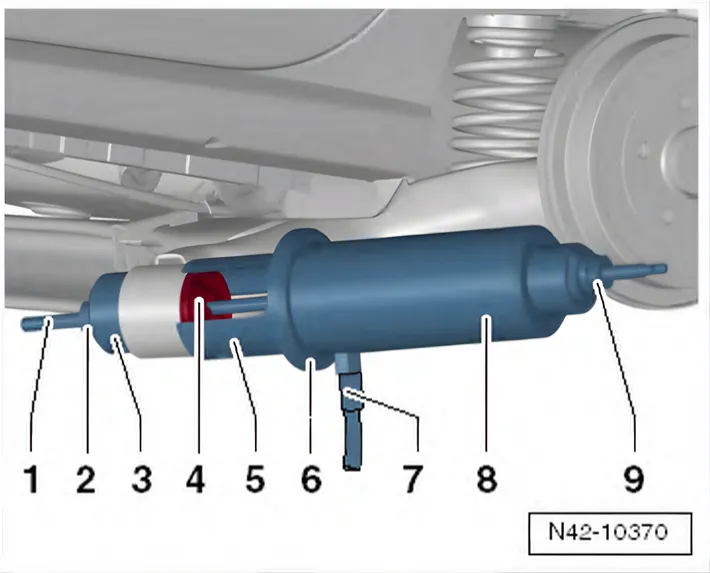
- Fit special tools as shown in illustration.
- 1 Spindle - T10254/5-
- 2 Nut - T10254/4-
- 3 Press tool - 3416/2-
- 4 Bonded rubber bush
- 5 Tube - T10263/6-
- 6 Pressure plate - T10205/1-
- 7 Foot pump - VAS 6179-
- 8 Hydraulic press - VAS 6178- and thrust piece - T10205/13-
- 9 Nut - T10254/4-
- Take up play in special tools.
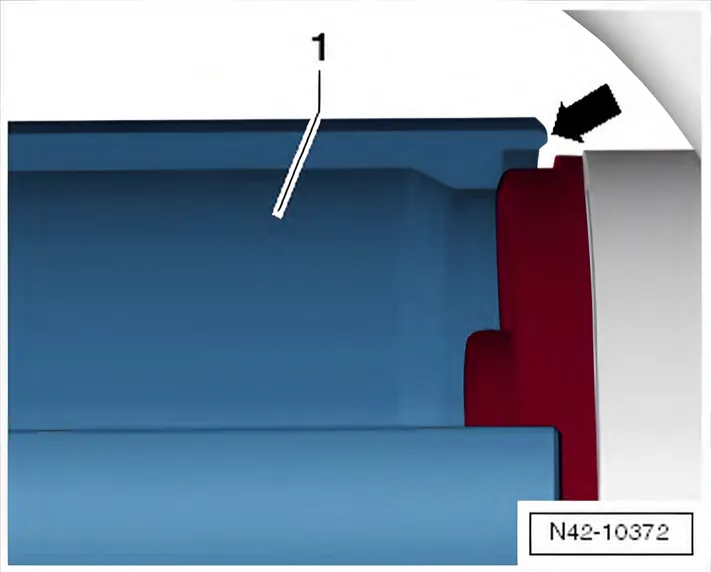
- Tube - T10263/6- -1- must be positioned on bonded rubber bush so that outer circumference is able to rest evenly on axle beam -arrow-.
- Pull out bonded rubber bush by operating the pump.
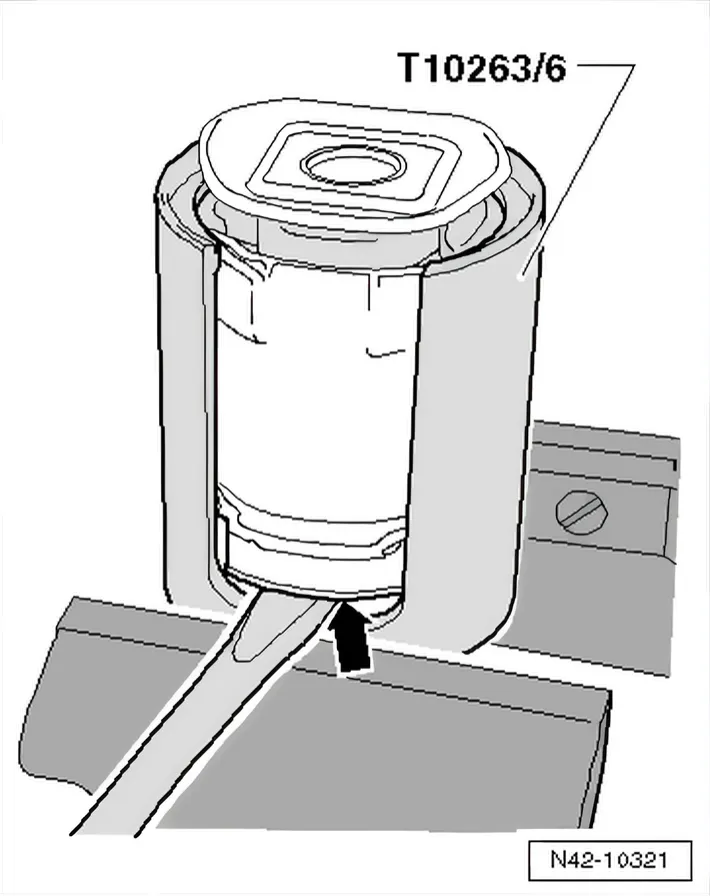
- The bonded rubber bush must be removed from the tube - T10356/6- once the bush has been pulled out.
- Clamp tube - T10356/6- on the intended surfaces in a vice.
- Insert a screwdriver between tube - T10356/6- and bonded rubber bush and lever bush out of tube -arrow-. If necessary, apply a drift to bush and drive out with light hammer blows.
Installing
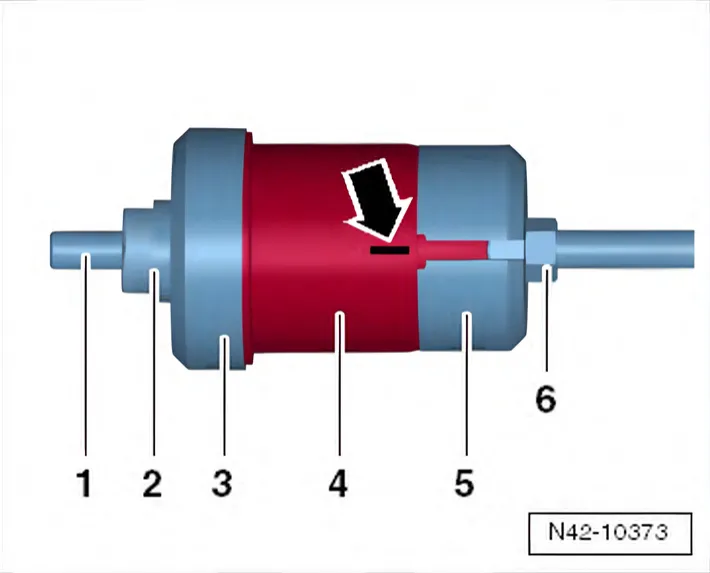
- Bolt new bonded rubber bush with specified special tools.
- 1 Spindle - T10254/5-
- 2 Nut - T10254/4-
- 3 Press tool - 3416/1-
- 4 Bonded rubber bush
- 5 Press tool - 3416/2-
- 6 Nut M12 x 1.5, commercially available
Face end of bonded rubber bush is equipped with a lug, which fits precisely into recess on thrust piece - 3416/2- -5-.
- Mark position of lug on long side of bonded rubber bush -arrow-.
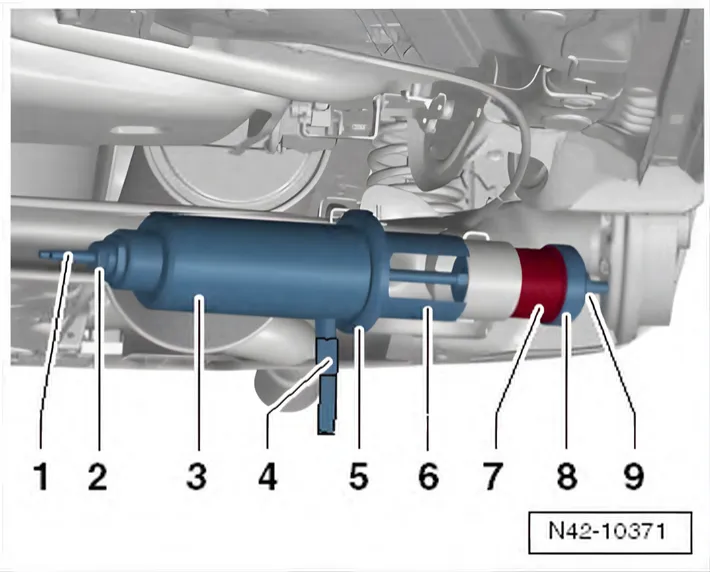
- Fit bonded rubber bush and special tools to the rear axle.
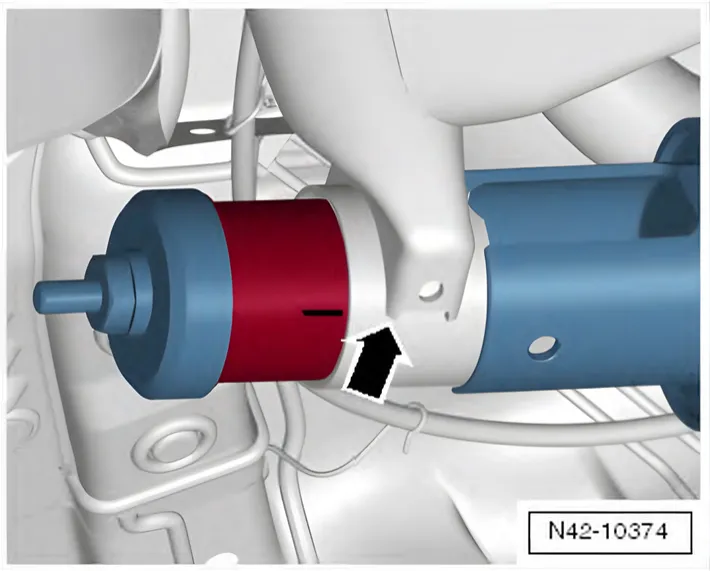
- 1 Spindle - T10254/5-
- 2 Nut - T10254/4-
- 3 Hydraulic press - VAS 6178- and thrust piece - T10205/13-
- 4 Foot pump - VAS 6179-
- 5 Pressure plate - T10205/1-
- 6 Tube - T10263/6-
- 7 Bonded rubber bush
- 8 Press tool - 3416/1-
- 9 Nut - T10254/4-
- Before pressing in bonded rubber bush, make sure that marking you previously made aligns with edge -arrow- of axle beam.
- Pressing in bonded rubber bush.
- After mounting, check installed position of bonded rubber bush.
- Grease the kidney-shaped cavities on the bonded rubber bush with assembly paste - G 052 150 A2- before installing rear axle.
Noises can occur when the vehicle is driven if the rear axle is installed “dry”.
- Tighten rear axle in unladen position ⇒ 3.6.2 Raising wheel bearing assembly to unladen position (vehicles with coil springs), rear axle.
Continue installation in reverse order of removal.
- Bleed brake system ⇒ Brake system; Rep. gr. 47; Hydraulic system; Bleeding hydraulic system following standard procedure.
- Install wheels and tighten bolts or nuts ⇒ 1.5 Specified torques for wheel bolts.
Specified torques
| Component | Specified torque |
|---|---|
| Rear axle to mounting bracket ♦ Use new bolts and nuts. ♦ Tighten bolts and nuts in unladen position. | 45 Nm +90° |
| Rear left vehicle level sender - G76- to axle body | 15 Nm |
| Retainer for left brake line | 20 Nm |
| 6R 2009–2014 Brake lines to brake hose | 14 Nm |
| 6R 2009–2014 Brake lines to axle beam (R WRC only) | 5 Nm |
6C 2014–2017
- ⇒ 2.1 Assembly overview - axle beam
- ⇒ 2.1 Assembly overview - rear vehicle level senders
- Brake lines to brake hose ⇒ Brake system; Rep. gr. 46; Rear brake